- Home
- Things to carve
- Carving a Buddha
Carving a Buddha tutorial
Have fun carving a little, peaceful Buddha.
LEVEL: SOME CHALLENGES
Welcome to this step-by-step guide to carving a Buddha tutorial. If you've ever wanted to create a unique wooden carving with a touch of whimsy, this tutorial is for you. I'll walk you through the process of crafting a peaceful Buddha caricature, complete with a gold-lined hat, a chubby belly, and a serene expression.
By the end of this tutorial, you'll have a charming Buddha figure sitting on stacked rocks (with his feet peeking out), ready to bring a sense of tranquility to any space. Let's get started and discover the joy of carving a truly unique piece!

What you will need to carve your Buddha
- For this carving a Buddha tutorial, you will need a bock of wood that is 1 x 1 x 3 inches (2.5 x 2.5 x 7.6 cm). I prefer basswood, which is easy to carve and holds details well.
- You will want to use a ruler to measure your guidelines and a pencil or pen to sketch them and other details.
- I always provide a free painting guide at the end of every tutorial to help you get a similar look. If you're new to woodcarving, check out this informative page about painting a woodcarving.
- You will carve off the corner, which will give you plenty of space for the design. If you want to carve a much larger Buddha (and prefer to use a bandsaw) there is a free pattern at the end of the tutorial. You will have to adapt the instructions below, which are geared to carving with a knife from the original wood block.
- Please always protect your hands with a good carving glove and cover your lap with something flat and hard if you plan to carve while sitting.
- For this tutorial, I used a U-gouge and micro-U-gouge and provide suggestions if you are only using a knife.
Carving a Buddha tutorial overview
It may be helpful to watch this short video to see all the steps at one time before you start to carve your Buddha.
Carving a Buddha tutorial: Set up your wood block
- Draw your first guideline 1/2-inch (0.6 cm) from the bottom of the block all around to mark the top of the first rock (photo 1).
- Draw a second guideline a 1/2-inch (0.6 cm) higher all around to mark the top of the second rock (photo 1).
- Your third guideline is 1-inch (2.5 cm) higher, which marks the bottom of the head of the Buddha all around (photo 1).
- Now, sketch 2 boxes that are 1/2-inch (0.6 cm) wide and 3/4-inch (1.9 cm) high to reserve space for the feet that will peek out from the the second rock (photo 2). This will give you more than enough wood to work with.
 1. Guidelines are sketched
 2. Toe boxes are sketched
Carving a Buddha tutorial: First cuts
Use stop cuts to separate the first rock all around (photo 3). You can also slightly round the corners on the rock all around (photo 4).
Sketch a new guideline across the mid-line of your foot box (photo 5). Note: You can carve off the previous guidelines as you won’t need to reserve that much wood (see photo 5).
Use a stop cut to separate the midline on both sides (photo 6), removing wood from above your cut. Now, use your knife to separate the vertical guideline (photo 7). This will give you access to carve the feet later in the tutorial.
 3. Making a stop cut
 4. Rounding the rock
 5. Foot area resketched
 6. Stop cut across the midline
 7. Separating the foot box
Carving a Buddha tutorial: More rounding
Round and shape the second rock on the front (photo 8). You will finalize the shape later.
Mark a triangle on each side (photo 9) where you will later remove wood to carve the protruding feet.
Separate the second rock on the back (photo 10).
 8. Rounding the second rock (front)
 9. Wood is marked
 10. Separating the rock (back)
Carving a Buddha tutorial: Add details
Slightly round all the sharp corners (visible in photos 11-14).
Sketch additional details including the ear boxes that are about 1/2-inch (0.6 cm) square (photos 11-14). Sketch the eye line at an angle (about 1/2-inch [0.6 cm] on each side. The nose guideline is also about 1/2-inch (0.6 cm) wide.
Loosely sketch the arms on each side (photos 11-14), which are about 1/2-inch (0.6 cm) wide. Reserve wood for each hand (photo 11).
 11. Details are added
 12. Right view of details
 13. Left view of details
 14. Back view
Carve the head of your Buddha
Make a stop cut under the nose guideline (photo 15).
Sketch the facial details (photo 16). Note: I later simplified the mouth design to make it easier to carve (see photo 28).
Shape the nose and eye socket. I run my knife along the nose and eye socket guidelines first (you can use a paring cut or hold your knife like a pencil), then slip my knife under the wood near the nose guideline (photo 17), and carve up to the eye socket. This will give you more access to further shape the nose. You could also use a V-tool here.
Now, use stop cuts to separate each ear (photo 18) and the head from the body all around (photo 19).
 15. Carving the nose
 16. Face details are sketched
 17. Carving up to the eye socket
 18. Separating the ear
 19. Separating the head
Carve more Buddha details
Separate the arms, which will give you greater access to shape the belly. I start with a pyramid cut (photo 20) in the crook of each arm. You could also use a V-tool for separating all the details on your Buddha.
Use stop cuts to separate the arm along the side (photo 21) and back.
Sketch the cheeks and mark where you will round the face (photo 22). Sketch the Buddha’s chest and his loincloth (photo 22).
Separate the details you just carved (photo 23). You can use whatever cuts you prefer here. I switched between paring cuts, and moving my knife along the guidelines, to make my first cut. Then I made a second slicing cut.
 20. Starting pyramid cut
 21. Separating the arm
 22. More sketched details
 23. Separating details
Carve the back of your Buddha
Use a pyramid cut to carve the back arms of your Buddha (photo 24). Use stop cuts to separate the waist band, removing wood from above (photo 25).
Sketch the smile lines and the eyelid lines (photo 26) and separate them (photo 27). You can hold your knife like a pencil or use a paring cut here.
Sketch the mouth (photo 28) and use your knife to separate it (completed in photo 29). You could use a paring cut or hold your knife like a pencil.
 24. Carving the back arms
 25. Separating the waist band
 26. Sketched smile lines and eyelids
 27. Separating smile line
 28. Mouth is resketched
Carving a Buddha tutorial: The ears
I used a U-gouge (#11) to remove wood from the inside of the ears (photo 29). I start from one side and switch to the other side to avoid grain issues. Don’t dig too deeply. Tip: If you don‘t have this gouge, you can make a pyramid cut. The top of your triangle should be in the middle of the ear.
Gently use your knife to round the outer ear.
To shape the back of the ear, make your first cut along the ear (photo 30) and gently slice wood off. Take your time. Tip: If you break the ear, use wood glue and wait 24 hours before continuing.
 29. Carving the inner ear
 30. Shaping back of ear
Sketch more details on your Buddha
Sketch where you will carve the Buddha’s cloak around the chest and his lower arms (photos 31-33).
Add the fingers and the toes (photos 31-34).
Sketch the bottom of the Buddha's hat on the sides (photos 32,33) and back (photo 34).
 31. Front details are sketched
 32. Right side details
 33. Left side details
 34. Back detail
Carve more Buddha details
Use stop cuts to carve the top and arms of the cloak (photo 35), removing wood from around your cuts. Use shallow V-cuts to add some wrinkles to the cloak (completed in photo 36).
Use shallow V-cuts to carve the fingers. Tip: Look at your own hand to see how the fingers differ in length (completed in photo 34). Before you separate the fingers, make a cut at an angle, starting midway on the hands, so the tops of the fingers will slightly slope down.
Use shallow V-cuts to carve the toes (completed in photos 36-39). Tip: Take your time here.
Shape the top rock and remove wood on each corner (photo 36) to create shadow (completed in photo 38). I switched to a smaller detail knife here.
Separate the hat all around (you can use stop cuts or paring cuts). Rotate a U-gouge (#11) to create the design on the front (photo 37). You could also use a detail knife here or skip this step.
 35. Carving the cloak
 36. Shaping the rocks
 37. Adding hat details
Refine your wood carved Buddha
Refine your Buddha as needed. Check for symmetry in the arms and hands. I removed a little more wood from the bottom of the head. I also removed wood from the tops of the eyelids (carving at a slightly downward angle) to create shadow (visible in photo 38).
Note: After painting I decided to add the belly button and nipples (visible in photo 42) with a micro-U gouge. You could also use a pin vise, or a metal screw, to create these shallow holes.
Clean up wood fuzzies with your knife, a dental brush, or sandpaper.
 38. Front of unpainted Buddha
 39. Right view of Buddha
 40. Left view of Buddha
 41. Back view of unpainted Buddha
Paint your wood carved Buddha
Unless noted, all acrylic paints are diluted with water (called a wash). A thin brush or a toothpick are useful for tight spaces.
- Hat, cloak, and loincloth: Ceramcoat metallic rose gold wash. Use 100% paint to accentuate the cut lines.
- Hat border: Ceramcoat metallic gold wash.
- Lips: Very diluted wash with Winsor & Newton red iron oxide. Later I used a toothpick to add some 100% Apple Barrel flamenco red for extra pop.
- Cheeks, top of eyelids, and top of ears: Very diluted wash with Winsor & Newton red iron oxide.
- Top rock: first coat with FolkArt steel gray wash, reserve wash, and let dry. Then, add one drop of Ceramcoat black to resErie and apply by pressing brush bristles against wood and quickly wipe off with paper towel. Save leftover paint. Lightly sandpaper. Let dry completely and dry brush with Craftsmart ivory.
- Bottom rock: Use leftover paint (steel gray plus black). Lightly sandpaper. Let dry completely and dry brush with Craftsmart ivory.
- Face, ears, body, hands, and feet: Walnut oil medium. You could also use boiled linseed oil.
- Eyelashes, bindi, earrings, and hat border: Thin black magic marker.
- Highlights: 100% Ceramcoat metallic gold applied with a toothpick to the eyelashes, belly button, earrings and bindi.
- Cut lines after drying: Americana oak gel stain. Apply with brush and wipe off with paper towel or cloth.
 42. Front of painted Buddha
 43. Right view of painted Buddha
 44. Left view of painted Buddha
 45. Back view of painted Buddha
Free Buddha wood carving pattern
Simply photocopy this pattern to size to fit your wood block.

Carving a Buddha tutorial summary
- This step-by-step tutorial will guide you to carve a whimsical Buddha with his feet poking out from a rock.
- The many intricate details help make this an interesting carve.
- Metallic paint works well for the hat, loincloth, and cloak, but feel free to vary up the colors if you want.
Get 50 Wood Carving & Painting Tips when you join our FREE Covered in Chips club.
You might like these
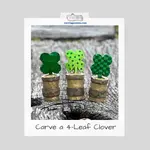
Four-Leaf Clover Wood Carving Tutorial
Easy four-leaf clover wood carving tutorial to make a fun decoration with a knife and a block of wood.
Share this page
carvingjunkies.com never sells your personal information.
This site uses cookies for its operation and to enhance your experience. As an Amazon Associate and Focuser Carving affiliate we earn from qualifying purchases.
Home | About Us | Privacy Policy | Terms of Use | Contact | Sitemap