- Home
- How to hand carve wood
- Beginners guide to wood carving
Beginners guide to wood carving with success
All you need to start this fun hobby.
This beginners guide to wood carving will provide essential tips to help you get started on your wood carving journey.
Wood carving can provide hours of enjoyment and spark your creativity.

Beginners guide to wood carving: What kind of carving?
The beauty of wood carving is that there are so many different carving techniques.
Some carvers like to use one knife to create a character or animal out of a block of wood, which is typically referred to as whittling.

If carvers use more than one knife and other tools—like gouges—it may be referred to as wood carving. Check out our page on the best wood carving knives and the best gouges here.

Our tutorials focus primarily on wood carving and whittling.
These projects can be realistic (like a carving of a bird or animal).
Or they can be more quirky and humorous, which is commonly known as caricature carving.
A hallmark of caricature carving is realistic but overblown proportions on a figure, such as large shoes, ears, lips, and teeth.
If a wood carving makes you smile, chances are it is probably a caricature carving.

Other types of wood carving
Beginners guide to wood carving: Relief carving
With relief carving:
- Figures, animals, or scenes are carved on a flat panel of wood.
- Some think of it as carving raised pictures into wood.
- To remove the wood, carvers tend to use chisels or gouges that they drive into the wood with a mallet.
- The flat piece of wood needs to be secured to a workbench or a wall with clips, screws, nails or a vise grip.
- Relief carving is often done by hand and can include the use of power tools.

Beginners guide to wood carving: Chip carving
With chip carving:
- Carvers typically use a knife, chisel, and hammer to remove small chips from a flat piece of wood, creating designs and patterns.
- These designs can range from simple triangles and circles to intricate, Escher-like creations that create a picture or artistic scene.

Beginners guide to wood carving: Spoon carving
With spoon carving:
- Carvers may start with a large piece of wood and use an axe to create the basic shape of the spoon (or spatula, mug, bowl, or kuksa).
- Special wood carving hook knives are used to scoop out the wood in a circular fashion.
- This may be combined with knives that are used to shape handles or create a design.
- Some carvers may purchase spoon blanks that are precut, eliminating the need to remove wood with an axe.


Beginners guide to wood carving: Flat plane carving
Flat plane carving is a specialized style of wood carving that uses minimal cuts.
Read our ultimate flat plane carving guide to learn more.

Beginners guide to wood carving: Realistic human carving
Realistic human carving is:
- Similar to sculpture.
- Carvers may use hand or power tools to create a bust (just the head and neck) or full body of a person.

Beginners guide to wood carving: Safety first
The quickest way to derail your enthusiasm for wood carving is a bad cut.
Here are some tips in our beginners guide to wood carving to help you protect yourself.
Beginners guide to wood carving: Glove up
Everyone slips at some point (it’s called being “kissed by a knife”).
While gloves aren’t completely foolproof, they are better than a naked hand.

Beginners guide to wood carving: Protect your lap
It is crucial to protect your lap—and the femoral arteries in your legs—while carving.
There is a good reason this area of the body is called the triangle of death (yikes).
We use a vegetable bin that has one side that is lower than the rest. It also catches a lot of wood chips.
Another simple idea is to place a large wooden cutting board over your lap and carve onto it. If the knife slips, it should cut the wood and not your body.
Visit our best wood carving tools page to see other handy products we use and love!
 Lapshop using a vegetable bin
Beginners guide to wood carving: Think every cut through
Before you make a wood carving cut, do a pre-safety analysis in your head.
If you realize the way you are making a cut—or holding your knife—can lead to a slip, you should be able to prevent an accident.
Need to scratch your face? Put the knife down first. Things could get ugly.
Take your time when you are carving, too.
It’s easy to make mistakes when you are tired or rushing to finish a project.
Your eyes can strain (or get blurry) if you don’t take breaks, which can also increase your risk of an accident.
Beginners guide to wood carving: Keep knives super sharp
Nothing is more dangerous than a dull knife.
If you have to force it into the wood to cut, it’s easy to slip.
We stop every 20-30 minutes of carving to strop our knives. Of course, it helps to have the best wood carving knives when you are first starting out. Learn about the knives we recommend for beginners.
Stropping (or honing as it’s sometimes called) is a great way to keep your knife sharp.
Click on the photo below to easily learn how to make your own strop!


Beginners guide to wood carving: Plan your carving
When you are first starting out, look for patterns that don’t require carving eyes, which can be challenging.
It is also helpful to choose a project that does not have a lot of movement (such as unseen hands in a pants pockets versus arms waving in the air).
Advanced carvers often study their subjects to add little details that can really make a carving come to life.
If you are carving figures or caricatures, consider buying a drawing figure for artists (sometimes called a model mannequin).
You can bend, shape, and position the model as a guide for more realistic carving.
 Bendable model mannequin
Beginners guide to wood carving: The right wood
Basswood is a great medium for wood carving. It is usually soft and easy to carve.
When you are first starting out, you can purchase your wood from a craft store.
Once you get hooked on carving, you will want to upgrade to a better source of basswood that is kiln dried.
Even with shipping costs, better basswood may end up being more cost-effective than craft-store wood.
Check out our page about the best wood for wood carving.

Beginners guide to wood carving: Use an old towel
Before you start to carve, lay an old towel over your lap (and under your cutting board or box) to catch wood chips.
When you are done, you can fold it up and shake the wood chips off outside.
Some people prefer wearing an apron. It’s really a matter of personal choice.
Beginners guide to wood carving: Carve with the grain
Why is it important to carve with the grain?
If you do not, the wood can split easily, which is a sure way to ruin your wood carving.
 Grain is running vertically
Beginners guide to wood carving: Understand wood grain
In order for trees to grow, they contain vessels that deliver water and nutrients from the roots to the crown.
You can think of these vessels as a large bundle of straws.
You want to cut either parallel to the vessels (called with the grain)—or across them (called across the grain)—to make clean cuts.
If you insert your knife between the vessels (called into the grain), you will tear the fibers that make up the wall of the vessels. The end result is a torn and messy cut.
This can be really frustrating.
 Carving against the grain
To determine which direction the grain is going, inspect your piece of wood.
If you aren’t sure, make a cut at each end to determine if you are carving with or against the grain.
Your want your cuts to be clean.
Beginners guide to wood carving: Cut across the grain
At times a pattern may require you to cut across the grain, such as carving eyes.
You may be able to get around this by making smaller cuts with a very sharp knife.
If your wood is too dry, it may split or crumble when you cut across the grain.
A possible work-around is to spray the wood with a solution that is 50% water and 50% alcohol. This may prevent the fibers from splitting.
Beginners guide to wood carving: Choosing tools
Knives are a matter of personal preference and you may try a few before you settle on ones you like best
We like to use a larger roughout knife for removing larger pieces of wood and a smaller detail knife for small cuts and fine lines.
Definitely stay away from knives that are sold in craft stores. They are miserable to carve with or may not cut at all.
Check out our best wood carving tools page and learn what knives we love and use and where to purchase them.

Avoid using your knife tip to dig wood out or risk breaking it.
Our (current) favorite knives are from Helvie, OCCT, Drake, abd Deepwoods Ventures.
We love trying different knives (see our honest reviews). We also don’t mind spending a little bit more for good knives. It is well worth it when you use them for hours at a time.
Specialty knives are also helpful to use, such as a mini axe, a butter knife, or a knife to help carve eyes.
Most of our tutorials have been created for use with one or two knives because not everyone may have multiple gouges.
If you do own a gouge or two, you can use them with any of our free wood carving patterns.

Beginners guide to wood carving: Go bigger than intended
When it comes to details like ears, lips, noses, and teeth, it is better to make them bigger than you want when you are first learning how to carve.
It’s easy to cut wood away, but you can never add it back!
When you are first starting out, it is easy to cut too much wood off.
Make noses and ears twice as big and refine later.
Beginners guide to wood carving: Take frequent breaks
Periodically take breaks to look at your carving to make sure your proportions and details are right.
No matter what details you are carving (shoes, gloves, glasses, etc.) get in the habit of looking at a picture—or using an actual object—as your visual guide.
For example, if you are adding clothing, look at pictures for guidance on how clothing drapes and wrinkles.
With a magnifying glass, it's
easy to remove too much wood!
Beginners guide to wood carving: Details make a difference
- Little details—like the fact that toes always point up in shoes—will make your carvings more realistic.
- If you want to add hair or fur to a carving, use a pencil first to map out the direction. If you do not like the results you can erase and start over.
- Strive to add movement to hair or fur, which are not uniform on people and animals.
Beginners guide to wood carving: Remain flexible
Sometimes when you are in the middle of a carving, you will get a design inspiration or idea that takes you in a different direction.
Let the carving “speak” to you, as opposed to sticking to a set design.
That’s half the fun of carving… taking a design and making it your own.
It will also help you develop your own style of carving over time.
Beginners guide to wood carving: Don’t stress over mistakes
Unlike painting, wood is really a canvas that can be shaved off at any time to create a new canvas.
As an example, eyes can be tricky to master at first.
If you don’t like what you’ve carved, simply remove the wood and start over. Or even paint the eyes on later.
If you cut a piece of your carving off unintentionally there is no shame in gluing it back on! We have had a nose or two end up on the floor.
Avoid the temptation to throw a carving away. There is always a way you can fix it.
Take your time and think the problem through. Try to see mistakes as learning opportunities.
It will make you a better carver.

Beginners guide to wood carving: Rest your hands frequently
It’s easy to get lost in a wood carving for hours at a time.
Giving your hands a rest (and stropping your knives) every 20 to 30 minutes is a great habit to practice.
Stand up and stretch, too. Your back will appreciate it.
Also avoid the dreaded “death grip” while holding your knife—or wood—too tightly when you are carving.
It will surely lead to hand pain!
Beginners guide to wood carving: Practice makes (almost) perfect
Any seasoned carver will tell you that the best way to improve your skill is to carve a little every day.
You may also want to join a carving group—or an online forum—to get feedback from other carvers.
Classes and workshops are another way to hone your skills (we plan to offer some soon).
Some carvers recommend taking a sculpture class to improve your design skills.
Before you show your carving, always ask yourself “how can I make this more interesting?”
Save all your carvings to track your progress over time. You will be amazed at how much you will learn from each carving.
Beginners guide to wood carving: Learn from others
The international Association of Wood Carvers features weekly zoom meetings with speakers that can help you learn about different techniques that carvers use. You can get to their Facebook page here. Also, sign up for their newsletter (we’ve written some articles for them).
There are many carving books that offer great tips and inspiration. Read our reviews of them here.
Some of the books we have drawn from include:
First Projects for Woodcarvers (Larry Green & Mike Altman)
Thinking Inside the Roughout (Caricature Carvers of America)
Caricature Carving (Editors of Woodcarving Illustrated)
Caricature Carving from Head to Toe (Dave Stetson)
Dynamic Wrinkles and Drapery (Burne Hogarth)
Beginners guide to wood carving: Step outside your comfort zone
Another way to elevate your carving is to carve something from a picture without a pattern.
It will force you to think the carving through from being one dimensional to three-dimensional.
You can also search stock photo houses online for images that might make fun carvings.

Summary of beginners guide to wood carving
- Carving is a wonderful craft that you can improve through practice.
- When you are first starting out, try to recreate patterns from other carvers.
- Over time, let your creativity shine and put your own spin on your carvings.
- You will build confidence in your carving skills and develop your own personal style.
- Let those chips fly!
Get 50 Wood Carving & Painting Tips when you join our FREE Covered in Chips club.
You might like these
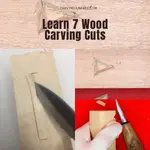
Basic Wood Carving Cuts You Can Master and Use All the Time
7 wood carving cuts you need to learn to get great results time after time.
How to Strop Your Knives Super Sharp, Easily and Efficiently
How to strop your knives so sharp they will cut wood like butter and improve your wood carvings.
Best Gloves for Wood Carving With One Simple Hack
Best gloves for wood carving? With our simple hack, you get the ultimate protection.


Share this page
carvingjunkies.com never sells your personal information.
This site uses cookies for its operation and to enhance your experience. As an Amazon Associate and Focuser Carving affiliate we earn from qualifying purchases.
Home | About Us | Privacy Policy | Terms of Use | Contact | Sitemap