- Home
- How to hand carve wood
- How to strop
How to strop your knives super sharp
A simple guide for improving the performance of your knives.
If you are wondering how to strop your knives, or are looking for tips to enhance what you may already be doing, we're here to help.
While there are many different kinds of strops, and varying opinions on the best method, the goal is always the same: to keep your knives super sharp.

How important is it to learn how to strop properly?
Dull knives are downright dangerous. They are also MISERABLE to carve with. Regular stropping is an important way to keep your knives scary sharp.
Some wood carvers never use anything other than a strop to keep their knives sharp.
Stropping is also sometimes referred to as honing your knife.
How to strop guide: What are strops made from?
Strops that are made from different materials, including:
- Leather (alone or on wood)
- Ceramic
- Cardboard (or index cards) on wood
- Multiple pieces of cardboard glued together (for gouges)
- Canvas (or denim)
- Felt
- Wood
Some carvers even use tennis balls to strop!
There are also all kinds of different sizes and handles for strops.
Some strops have multiple sides to apply different compounds. One side may be a little courser than the other.
 Leather strop with green compound
How to strop guide: Find what works for you
If you are first learning how to strop, you may want to experiment to determine what type of strop you prefer.
We will show you how to make a mini-strop with cardboard that you can easily throw into your carving kit. It is inexpensive and can be made in any size. You could also make your own strop with a piece of leather from an old belt.
Softer material (like leather) may strop your knife edge more quickly, but the softness may increase the risk of rolling and rounding the bevel of your knife (the surface that has been ground down to create the edge of the knife actually folds over on itself).
Using a strop with a harder surface (like cardboard on wood) may take you a little bit longer to sharpen your knife, but there may be less risk of rolling and rounding the edge of your knife.
How to strop guide: Choose your compound
Some say all compounds are alike, particularly the green or gold compounds. Abrasive compounds also come in other colors, including white, silver, red, black, and tan.
If you are carving figures or caricatures, you may want to try green, gold, or black compound to see if you have a preference.
Inside our own home one of us swears by green compound while the other is faithful to black compound, which tends to be more abrasive.
Compounds also come in different formats, including:
- A wax bar that you rub on like a crayon.
- Paste that you apply with knife (or flat, thin piece of wood).
- Powder that you sprinkle on.
- Sprays.
Whatever you use, you want to cover your whole strop with compound. You only have to do this once to enjoy many stropping sessions.
We personally do not like the smell of the wax bars on our fingers and prefer (black) paste in a tin. A little goes a long way. Seriously, you can probably go months without having to add more compound.
Some wood carvers like to warm up their leather strops with a hair dryer because they believe it helps them rub in the compound.
 Various compounds
How to strop guide: What exactly happens?
The process of stropping removes a tiny amount of metal from the knife and brings your knife edge back to life.
As you move your knife back and forth against a strop, you will notice black marks on the strop. That's a good thing! It means that microscopic pieces of steel are being removed from your knife.
Stropping can also help shine your knife. If you can see a reflection (like a mirror) it means you have done a good job.
How to strop guide: How we do it
Each wood carver may have their own "special sauce" when it comes to how to strop their knives. As always, take what ya like from us (below) and leave the rest:
- Place the strop on a flat surface (hold it with one hand).
- Place the knife flat against the strop (you can use your finger to keep it against the strop but wear a safety glove).
- Lift the spine of the knife at a very slight angle (not too much).
- Move the knife across the strop (you do not need to apply a lot of pressure).
- Fully lift the knife up and off when you reach the end of the strop (to avoid rolling your blade).
- Turn the knife over and repeat the process in the opposite direction.
- Finally wipe the blade with a piece of newspaper (sometimes we just use our leather-lined Kevlar glove).
How to strop: How many strokes are needed?
Some wood carvers like to do 10 strokes with their knife one way and 10 strokes the other way, then 9 strokes, then 8, etc. for over a hundred strokes in total.
Other carvers we know believe you only need 5 strokes on each side and work backward to 1 stroke each side.
You can also go back and forth with single strokes.
It is really a matter of personal preference and what works best for you.
When learning how to strop, keep these key tips in mind:
- Be careful not to roll the edge or change the angle of your knife when you finish a stroke (simply lift the blade straight up).
- Avoid putting too much pressure against your knife as you strop.
- Never move your blade toward the cutting edge (you will risk dulling the edge and damaging your strop.
- Consider wearing a safety glove (we got a small, but wicked, paper-like cut once!).
Want to make a mini-strop? It's easy!
 Make a mini-strop to carry with you
Here's how to make a mini-strop that we love:
- Cut a small strip of wood (we added a handle and hanging hole, but that is optional).
- Trace the wood onto a piece of thin uncoated cardboard from a cereal box (or the thin cardboard that comes from the dry cleaners).
Cut out the cardboard and glue or tape it onto a strip of wood. Use a vise or a couple of rubber bands to keep the cardboard in place as it dries
- Some carvers use index cards (thinner is better to help avoid rounding the bevel of a knife).
- Add compound of your choice and strop away.
Watch our "How to make a mini-strop in a minute" video below!
 Rubber bands are great to secure cardboard (and wood)
How to strop guide: What about gouges?
Some manufacturers (like Flex Cut) make special ridged strops that make it easy to strop gouges. You still need to apply your compound. Stropping without compound won't sharpen your knife very well.
Another alternative is to create ridges in a block of basswood to sharpen your gouges, or glue multiple pieces of cardboard together.
 Special strop made for gouges
How to strop guide: Should you clean a dirty strop?
Personally we don't see the need to clean a strop, especially with one made from cardboard, or an index card. You're just removing good compound from the surface.
Some carvers do like to clean their leather strops every now and then with a course pad, stiff brush, or a file.
Do not use sandpaper as it can leave residue that could damage your knives.
 Embrace the dirty strop!
How to strop guide: How often do you need to strop?
We strive to do a full stropping session before starting a carving session. Every half hour or so, we strop 10-15 strokes per side (more if we feel the knife is really dragging).
That's generally enough to keep our knives cutting well over time. When you start with a high quality, sharp knife, it doesn't take too much effort to keep it sharp.
Remember: it is better to strop your knife regularly than risk it becoming dull.
How to strop guide: Can you test your knife after stropping?
Yes! Some wood carvers rely on the paper cut test method to determine if their knives are scary sharp.
You can also try the knife on the end grain of basswood, which tends to be hard to cut. If your cut is quick and clean, your knife is probably sharp enough.
In our opinion, there is no need to overthink this. However, if you want to learn more about the science of sharpening and achieving perfect angles, check out the Science of Sharp blog.
Otherwise, if your knife cuts well and feels good, you're all set to go.
 Test your knife after stropping
How to strop guide: Will you need to sharpen your knives further?
Our philosophy is that if stropping alone no longer makes our knives super sharp... or we've nicked or damaged the knife... then we use other tools to sharpen our knives.
But that's a whole n'other ball of wax that requires a separate comprehensive article.
How to strop guide summary
- As you learn how to strop, try different types of strops to decide what works best for you.
- Compounds are also a matter of personal preference.
- We favor a harder strop that takes a little bit longer to sharpen, but reduces the risk of rolling our blades.
- Full stropping before you start carving (and shorter strokes every half hour or so while carving) are a good strategy to avoid the danger of carving with a dull knife.
You might like these
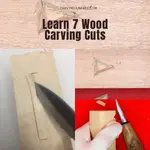
Basic Wood Carving Cuts You Can Master and Use All the Time
7 wood carving cuts you need to learn to get great results time after time.
Best Gloves for Wood Carving With One Simple Hack
Best gloves for wood carving? With our simple hack, you get the ultimate protection.
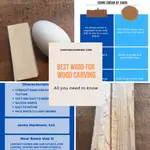
Best Wood For Wood Carving Tree And How Carvers Use Them
The best wood for wood carving and the best use for each type of wood.

Get 50 Wood Carving & Painting Tips when you join our FREE Covered in Chips club.
Share this page
carvingjunkies.com never sells your personal information.
This site uses cookies for its operation and to enhance your experience. As an Amazon Associate and Focuser Carving affiliate we earn from qualifying purchases.
Home | About Us | Privacy Policy | Terms of Use | Contact | Sitemap