- Home
- Easy wood carving ideas
- Thanksgiving pie wood carving
Treasurable Thanksgiving pie wood carving
The perfect carving to add to any table setting.
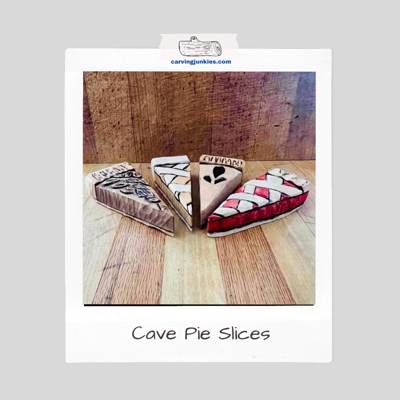
This Thanksgiving pie wood carving tutorial is just in time to add some holiday cheer to your dinner table. The best part of these easy pie pieces is that they have NO calories!
This tutorial provides the pattern for a cherry pie with a lattice design. You can use the same pattern to carve a pie without the lattice. Or, if you prefer a little challenge, you can carve pecans or include a design (like in the photo below).
What you need for your Thanksgiving pie wood carving
For this tutorial, I used a wood block that was 1 x 2 x 4 inches (2.5 x 5.1 x 10.2 cm). You can use a larger wood block and double or triple the dimensions. You want a piece of wood that is long and not super high. Otherwise you will spend a lot of energy hogging wood off.
I used a long-bladed knife for removing wood. I then switched to a smaller, chip carving knife to cut deep into the curved edges of the pie crust.
I always recommend wearing a good carving glove and protecting your lap with something hard (if you are a lap carver). Remember to stop and strop your knife every half hour or so.
A wood burner is optional but really enhances the painted pie. If you do not have a wood burner, you can use brown paint to highlight your cuts. But consider adding this amazing wood burner to your holiday or birthday wish list.
Thanksgiving pie wood carving tutorial at-a-glance
Here is a quick video to see the key steps for making your Thanksgiving pie carving.
Prepare your pie wood carving
Use your ruler and pencil to find and mark the middle of your block. Mine was 3/4 of an inch (1.9 cm). Hold one end of the ruler at the middle—and the other end at the corner—and draw the first side of a triangle (photos 1,2). Repeat on the other side (completed in photo 2).
Color in the wood that you will remove (photo 2). I used magic marker so you can see it well.
Draw another line that is about 1/2 inch (1.3 cm) down from top to mark the end of the curly-shaped pie crust (photo 2). Also, draw the curves on the crust. They are a little less than a 1/2 inch (1.3 cm) wide (photo 2).
 1. Drawing the triangle
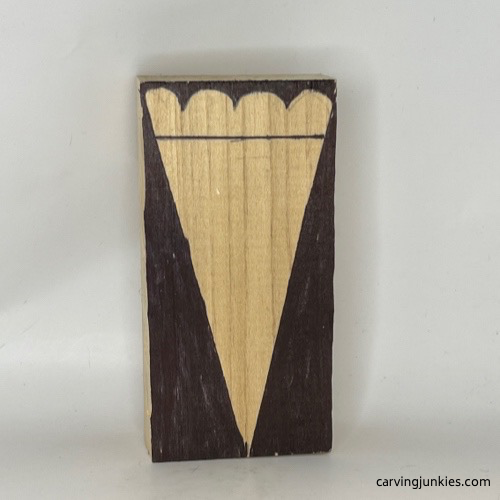 2. Wood to remove is marked
Start your pie wood carving
Use a sturdy rough out knife to remove the marked wood from each side (photo 3). You can use a push or pull cut. It will be a bit of a hand workout!
Just make sure that the knife you use has a very sturdy blade.
Keep checking your angle as you carve to ensure smoothness and symmetry.
I started from the bottom and worked my way up (photos 3, 4).
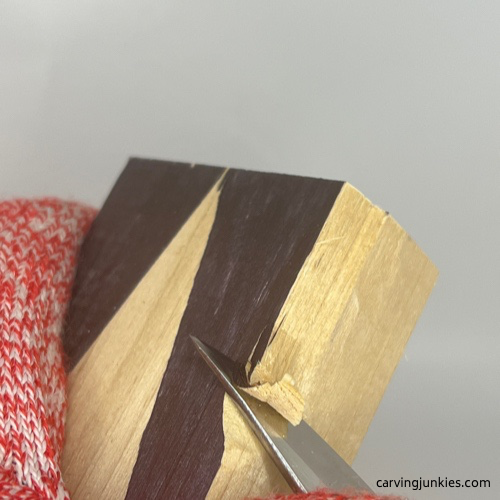 3. Starting to hog off wood
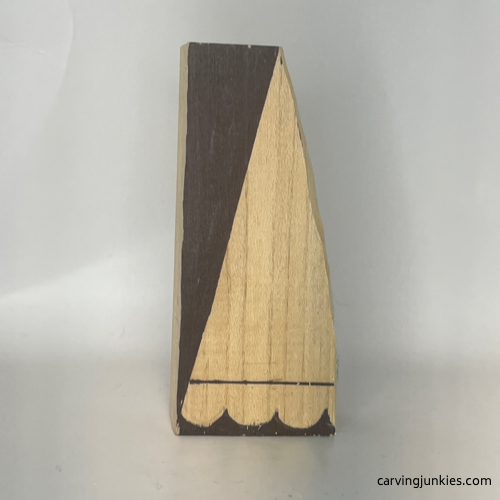 4. Halfway there!
Carve the crust on your Thanksgiving pie wood carving
Make stop cuts across the end of the pie crust and remove wood from underneath (photo 5). Continue to remove the top layer of wood (photo 6). Your top does not have to be completely flat. You want it to bulge a bit in the middle to appear as if the pie is overstuffed.
Draw the lattice on the top of the pie piece, which extends to the sides (photos 7-9). The lattice pieces are about 1/4 inch (0.6 cm) wide. My pie has 3 across and 3 down. Your lines do not have to be perfect—and you can add more or fewer lines—depending upon the width of your wood block.
Also, draw lines across the top and bottom of each side of your pie piece (photos 8,9). Each line is about 3/8 of an inch (0.96 cm) from the top and bottom.
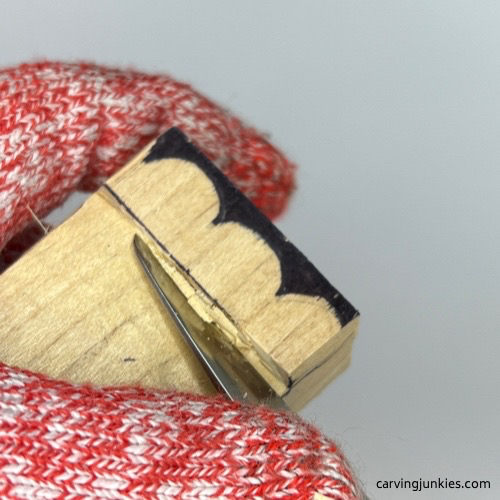 5. Removing wood under stop cut
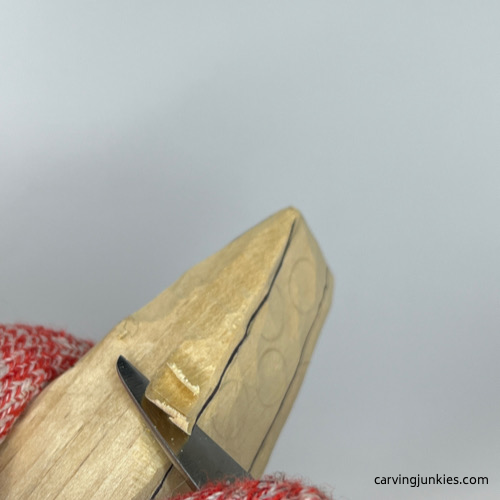 6. Removing wood from top
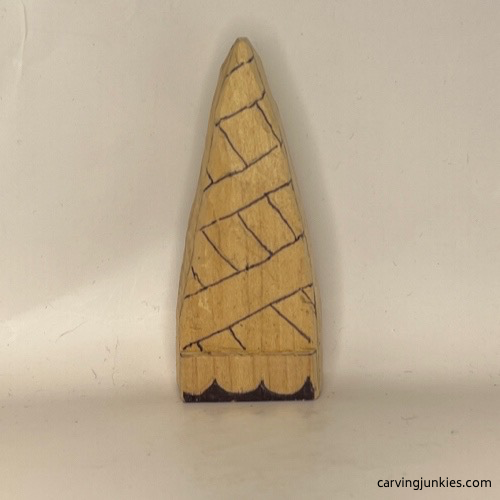 7. Lattice is drawn on the top
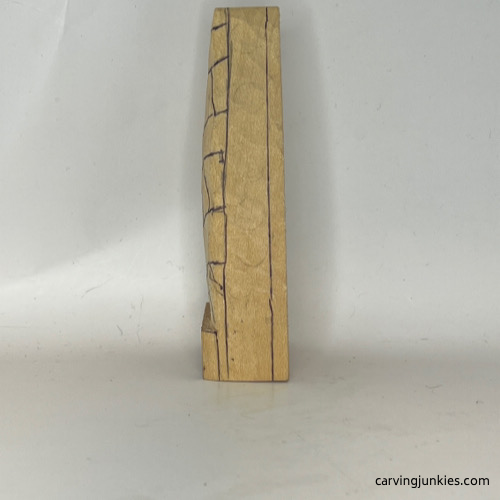 8. Side view of lattice and crust
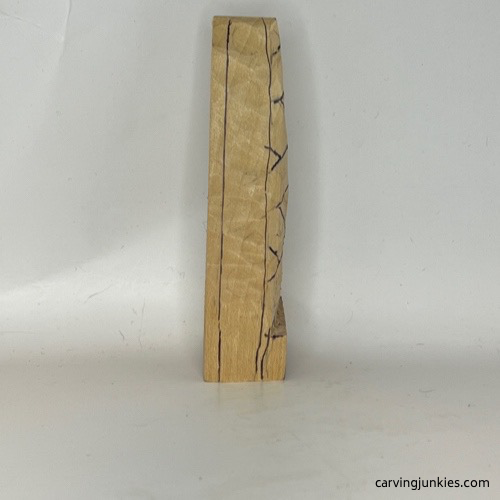 9. Opposite side view
Separate the lattice on your pie wood carving
Use stop cuts to separate the lattice (photos 10,11). You can use slicing cuts along your stop cuts to remove wood along the guidelines. Clean up your cuts as you go.
Draw your knife along each guideline on each side (photo 12) and use a second slicing cut (photo 13) to separate the pie crust along the sides.
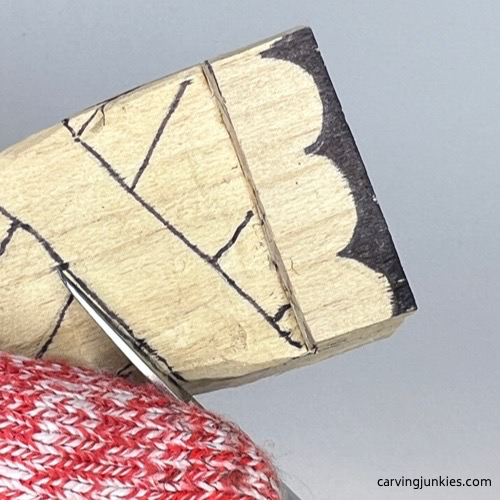 10. Making a stop cut
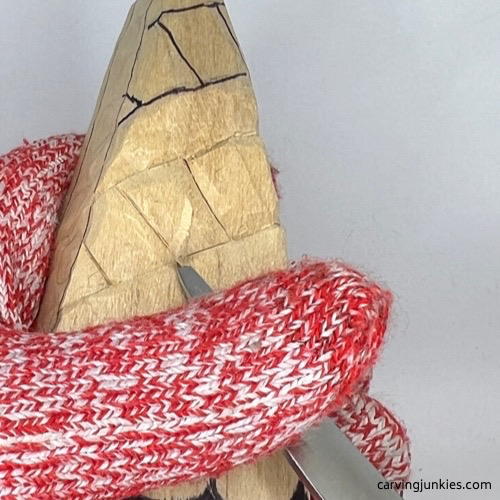 11. Carving the lattice
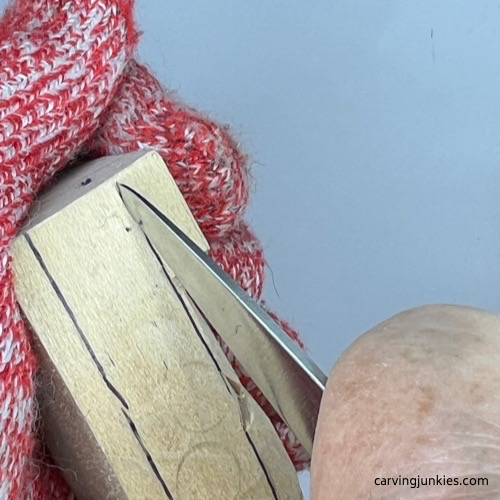 12 Separating the crust on the side
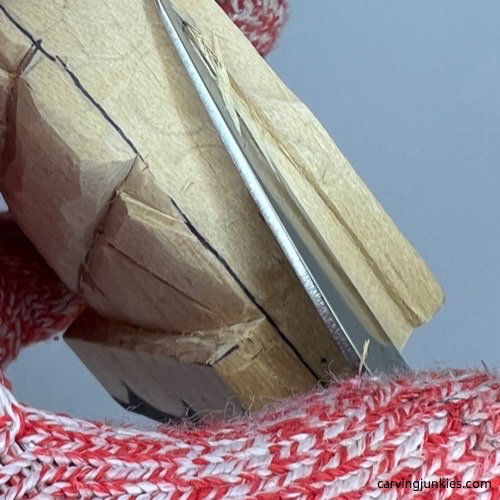 13. Making a slicing cut
Finish your Thanksgiving pie wood carving
Carve the end grain off the back of your wood block. Mark the wood on the sides that you will carve off to make the pie piece slightly curved (photos 14, 15). Carve off the wood you marked on both sides (photo 16).
Use pyramid cuts to carve the pie crust curves (photo 17). Be super careful here because the wood may be thick. Take your time (or remove wood in layers) to avoid breaking your knife. This is where I switched to my chip carving knife, which is perfect for this kind of cut.
Optional: Use a U-gouge to scoop wood out of the crust curves (photo 18). If you don’t have a U-gouge, you can make a scooping cut to remove wood (if you have a very sturdy knife). If not, you run the risk of breaking your knife.
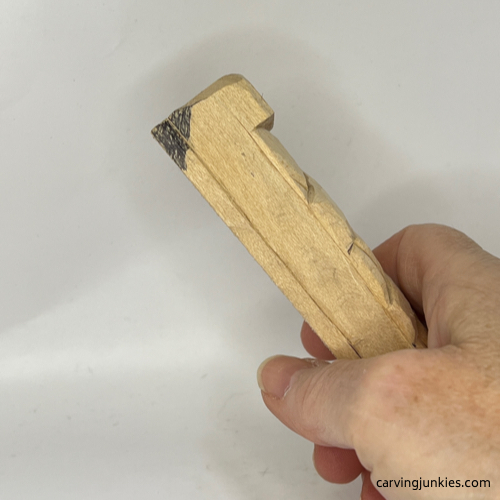 14. Wood marked for removal on right side
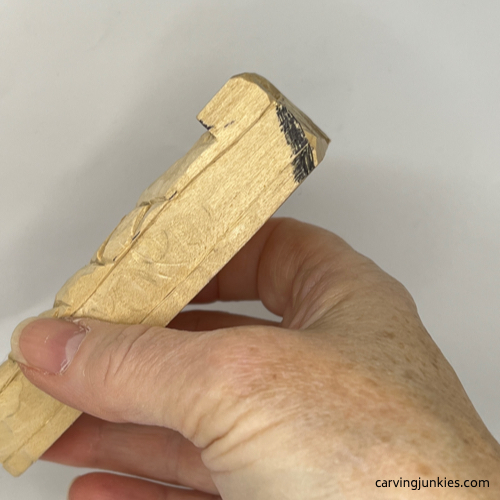 15. Wood marked for removal on right side
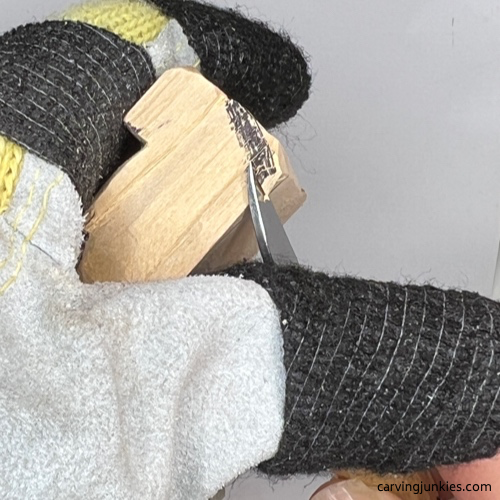 16. Shaping back of pie slice
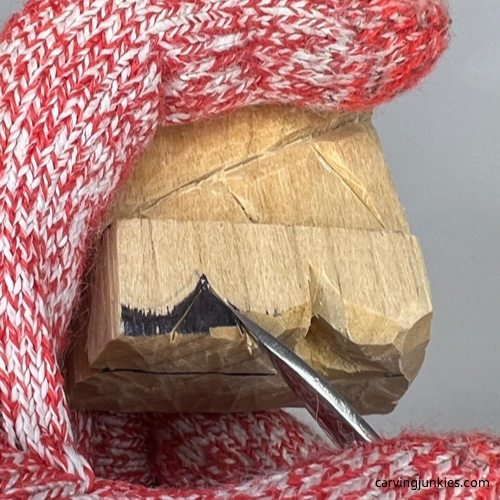 17. Carving the curved pie crust
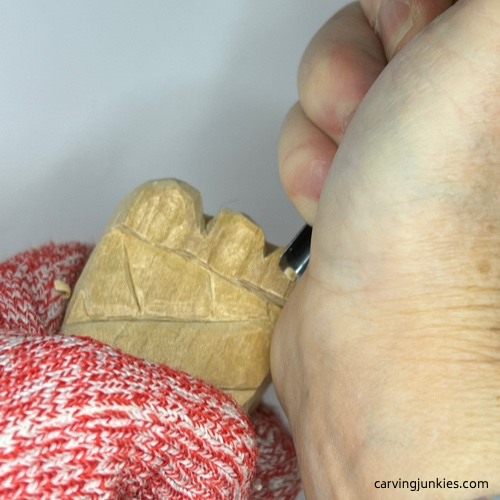 18. Using U gouge on pie crust
Time to paint your Thanksgiving pie wood carving
Prior to painting the pie piece, I used my awesome new Colwood burner with the H nib. As previously mentioned, if you don’t have a wood burner, try adding brown paint with a toothpick or a narrow brush to outline your cuts. This is important to make the paint pop.
You can use whatever acrylic paints you want (I’ve provided what was used to help you get the same look). Note: I always dilute my paint with 15-20 drops of water to create a milky wash.
- Lattice: DecoArt Buttermilk wash.
- Cherry filling: 3 drops of FolkArt Lipstick red mixed with 2 drops Ceramcoat Burnt umber (plus 20 drops of water). Add a second coat to highlight some areas where the cherries would be darker.
- Finish: Two days after painting, add 1 coat of Minwax penetrating stain (natural) with a brush. Tip: Keep a brush that you only use for adding stain, wax, or boiled linseed oil. Clean after using with soapy warm water.
 19. Top view of painted pie wood carving
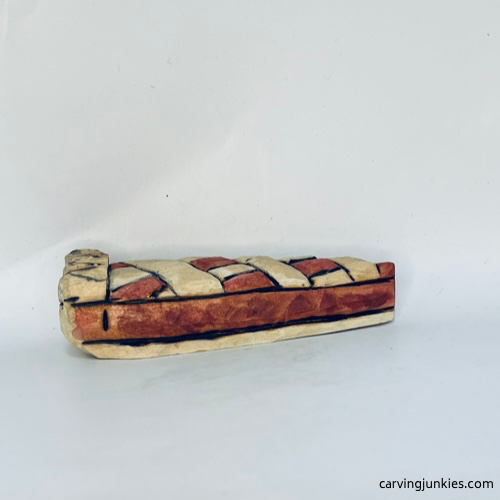 20. Right view of painted pie wood carving
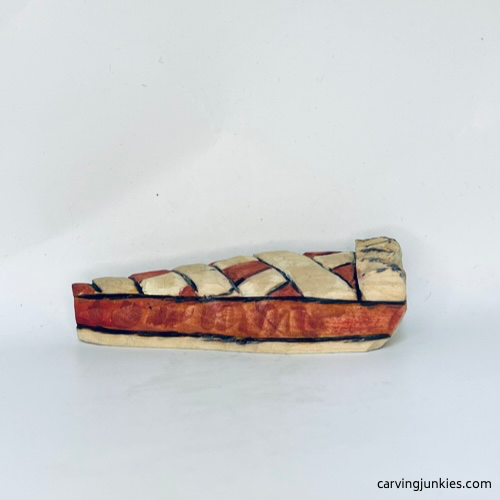 21. Left view of painted pie wood carving
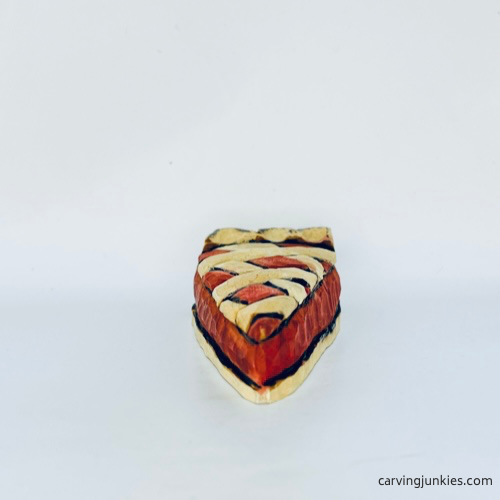 22. Front of painted pie wood carving
Thanksgiving pie wood carving tutorial summary
- This simple Thanksgiving pie wood carving is fast to carve and fun to paint.
- You are only limited by your imagination (use pictures of real pie pieces to help guide you).
- Wood burning really helps the pie pieces pop when you paint them (also prevents paint from bleeding).
- If you don’t have a wood burner, you can outline the pie pieces with brown paint (or use try a magic marker).
Get 50 Wood Carving & Painting Tips when you join our FREE Covered in Chips club.
Share this page
carvingjunkies.com never sells your personal information.
This site uses cookies for its operation and to enhance your experience. As an Amazon Associate and Focuser Carving affiliate we earn from qualifying purchases.
Home | About Us | Privacy Policy | Terms of Use | Contact | Sitemap
