- Home
- Things to carve
- Vampire wood carving
Villainous vampire wood carving tutorial
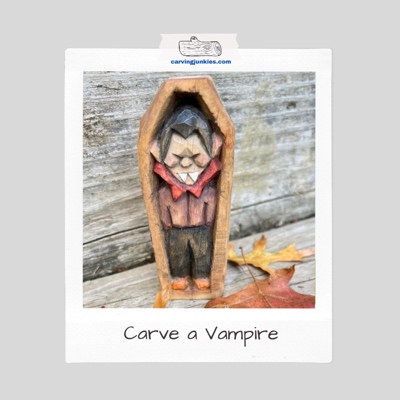
Mini Vlad makes a perfect Halloween decoration.
This vampire wood carving tutorial makes it fun to carve a villainous figure that is lying in this open coffin. He is spooky and cute at the same time. I don’t think you really have to worry about scaring anyone too much!
This carve also has some elements that are used in relief carving. However, you probably would not carve as deeply around the vampire as you would in a traditional relief carving.
The most challenging part of making this vampire is cleanly digging out wood around the vampire’s body. Simply clean up your cuts as you go and you should be able to carve this piece over a weekend.
Happy Halloween carving!
What you will need for your vampire wood carving
Use a wood block that is 1.5 x 7/8 x 4 inches (3.8 x 2 .2 x 10.1 cm). Note: I started with a block that was 1.5 x 1.5 x 4 inches (3.8 x 3.8 x 10.1 cm). David used a table saw to cut the block down. The remaining wood remnant can be attached with small hinges to open the top of the coffin (optional and not pictured).
Of course, if you want to make a bigger vampire wood carving you can double or triple the measurements.
You will want to use a pencil (or pen) to sketch your guidelines. A ruler (or measuring tape) will also be helpful.
I always recommend carving with a safety glove. It’s so easy to slip and cut yourself (and you never see it coming). Using a leather-lined Kevlar glove will also provide some added cushioning.
If you carve on your lap, also be sure to place a piece of wood (or something hard and flat) across your legs to protect the arteries in your upper thighs.
You can probably just use one knife for this vampire wood carving. I only used a straight knife with a nearly 2-inch (2.5 cm) blade. Note: If you have a V-tool and a gouge, I’ll point out places where you can substitute them in this tutorial.
A painting guide is included (at the end of this page) for getting the same look as my vampire wood carving.
Vampire wood carving tutorial at-a-glance
Watch this short video to see the key steps to creating your vampire wood carving.
Prepare your vampire wood carving
Draw a center line down your wood block. Mark the wood that you will remove to shape the top of the coffin on each side (photo 1). The widest line (that extends across the bottom of each triangle) is 1 inch wide (2.5 cm) and the remaining two sides are 0.5 inches (1.3 cm) long (photo 1).
Also, mark where you will narrow the sides of the bottom of the coffin so that they are 1/4-inch (0.6 cm) at the widest point. Draw the inner outline of the coffin, which should be about 1/4-inch (0.6 cm) wide (photo 1).
Roughly sketch the vampire. The head is about 1.5 inches (3.8 cm) long and 1-1/4-inch (3.2 cm) at its widest point. The lower body is 2.5 inches (6.4 cm) long. The legs are about 1.5 inches (3.8 cm) long and 0.5 inches (1.3 cm) wide (photo 1).
Note: I ended up changing the eyes to give the vampire a longer forehead (to accentuate his widow’s peak). This means you can ignore drawing the eyes (you will add the eyes later).
You can easily carve the nose using my triangle-by-triangle nose carving technique. For now, add a small nose box (about 0.5 inches square) that starts a little less than 0.5 inches (1.3 cm) from the bottom of the head. The mouth is also about 0.5 inches (1.3 cm) wide at the widest point.
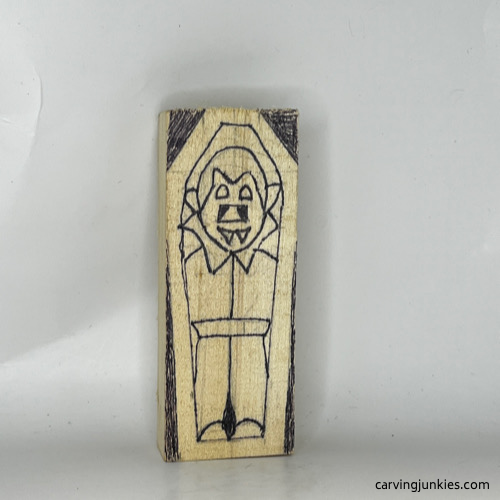 1. Guidelines are drawn
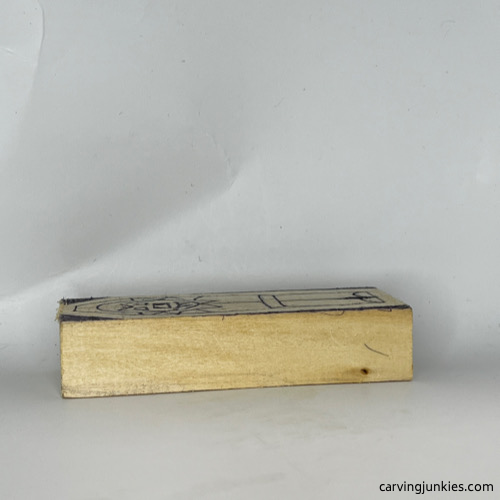 2. Side view of vampire coffin
Carve the coffin of your vampire wood carving
Use your knife to narrow the sides of the coffin at the top (photo 3) and the bottom on one side (completed in photo 4). Tip: Start in each corner and work your way toward the middle to avoid grain issues. You may have to turn your piece if the wood starts splintering. Be sure that your cuts are symmetrical on each side.
Repeat on the other side.
 3. Carving off the first corner
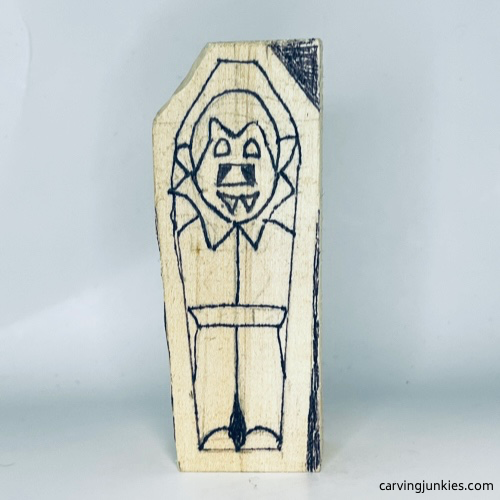 4. Top and bottom are narrowed.
Separate the body of your vampire wood carving
Run your knife along the guideline. I used a paring cut (photo 5), which allows better control of the knife. Tip: wear a thumb guard or tape on your carving thumb for added protection. You can also hold the knife like a pencil. Note: If you have a V-tool you can substitute it here.
After making your first cut, you can use a slicing cut underneath to cleanly remove wood in one piece (photo 6). Use a pyramid cut to cleanly remove deep chips of wood around the neckline (photos 7,8). Note: You will separate the head later.
To separate the lower body further, cut the wood at an angle (toward the coffin) to create a little space between the body and the coffin‘s inner wall all around (visible in photo 8).
Draw where you will separate the arms (photo 9). The hands will be hidden by the pants. You can also use a stop cut to separate the pants from the shirt. For simplicity, I decided not to carve a belt and just cut the waist across (visible in photo 9).
Use your knife to split the legs (completed in photos 9, 19-21. Use V-cuts (if you have a V-tool you can use it here instead).
Also shape the shoes (photo 10).
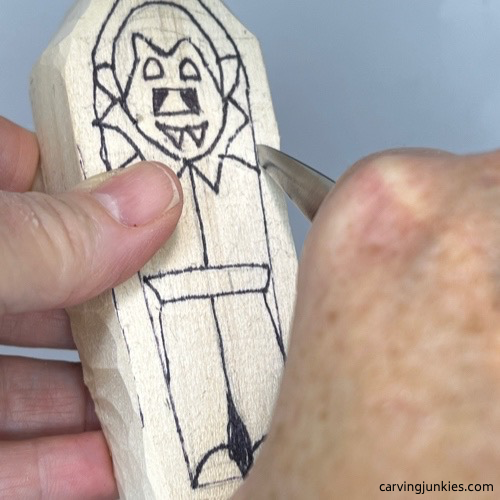 5. Making the first cut to separate the body
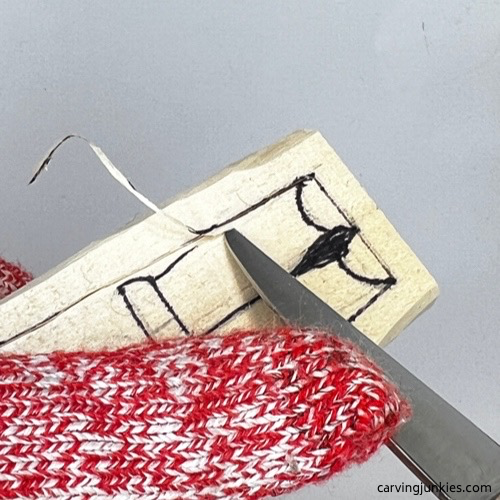 6. Making a second slicing cut
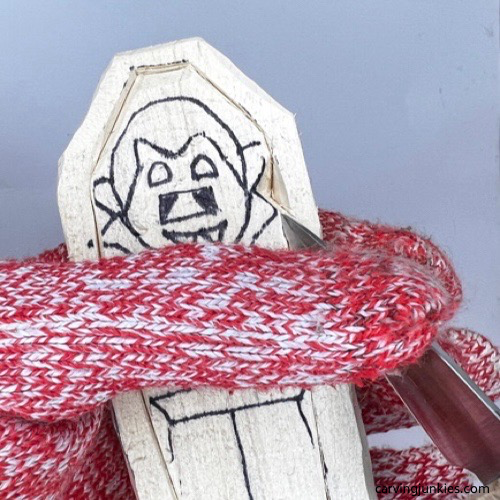 7. Starting a second pyramid cut
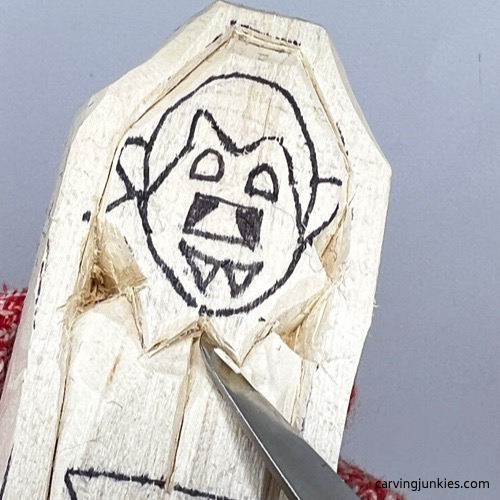 8. Making progress around the neckline
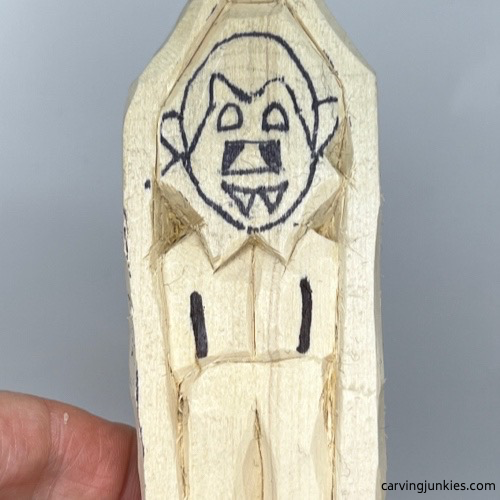 9. Arms are drawn
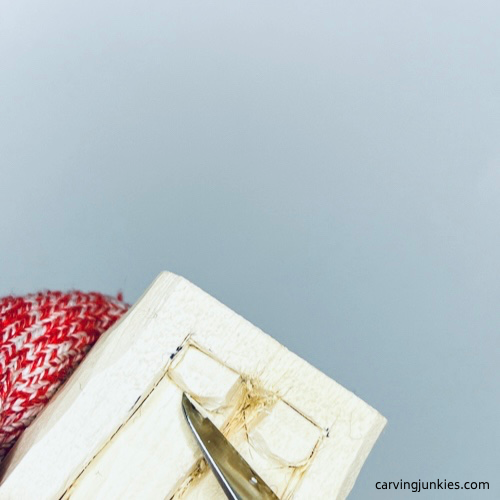 10. Shaping the shoes
Carve the head of your vampire wood carving
Switch to stop cuts—and remove wood in small sections—to separate the ears and the head of the vampire (photo 11). This will be the toughest wood to cleanly remove. You may need to remove wood in layers. Be super careful here not to dig too deeply and break the tip of your knife. Note: If you have a gouge, you can use it here.
Take your time and clean up any wood splinters or fuzzies as you go.
Make a stop cut under the nose—all along the bottom of the nose box. Make a pyramid cut on the right side of the nose (photo 13) to cleanly remove a chip of wood. Then, repeat on the other side (photo 14).
Draw the vampire’s cheeks (photo 15) and use stop cuts to remove wood around the cheeks. Also, shape the nose and carve the eyes (photo 16) by making an upward angled cut on each side of the nose. This will give you access to remove some wood from underneath your cuts.
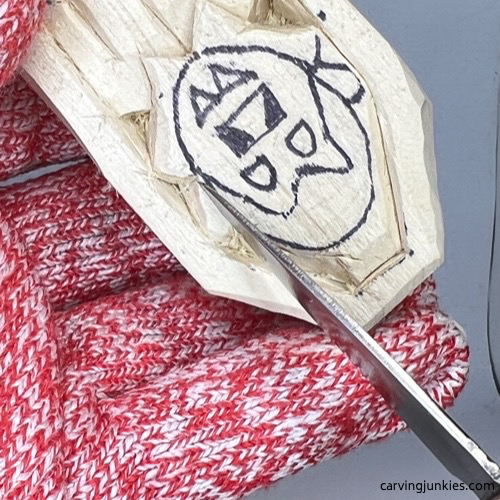 11. Digging wood out around the head
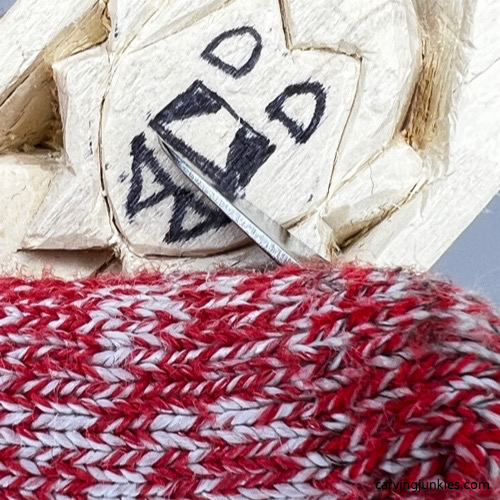 12. Making a stop cut
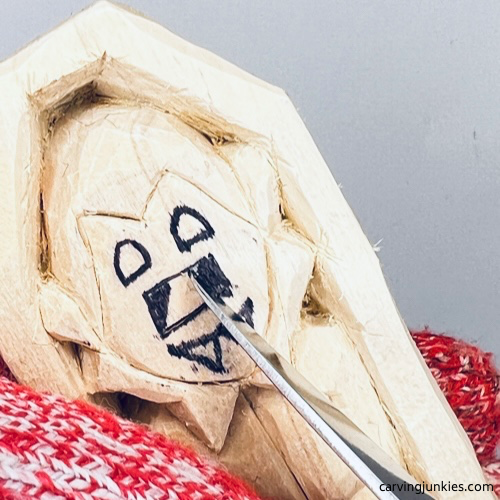 13. Starting a pyramid cut
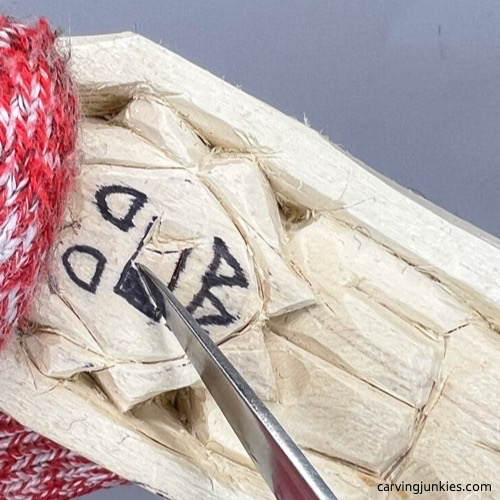 14. Starting second pyramid cut
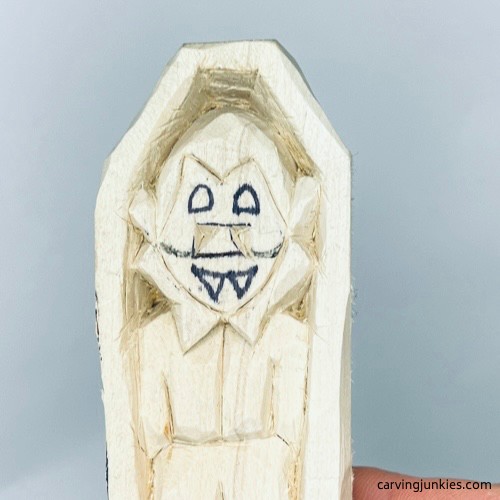 15. Cheeks are drawn
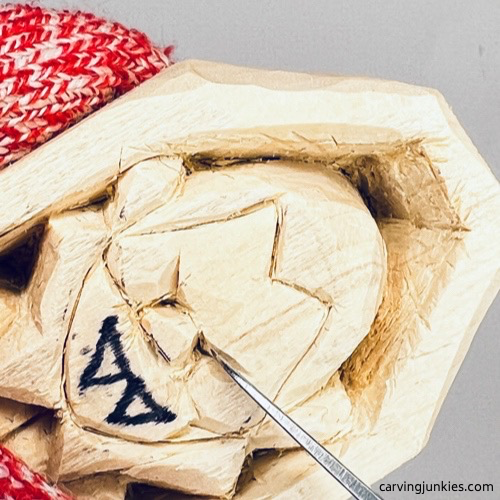 16. Carving the eyes
Carve the mouth on your vampire wood carving
Separate the top of the mouth and the outline of the fangs (photos 17,18). Carefully remove wood from above the mouth and around the fangs in layers to get the desired depth of the fangs (more visible in photos 19-21). Tip: Take your time here as the fangs are delicate.
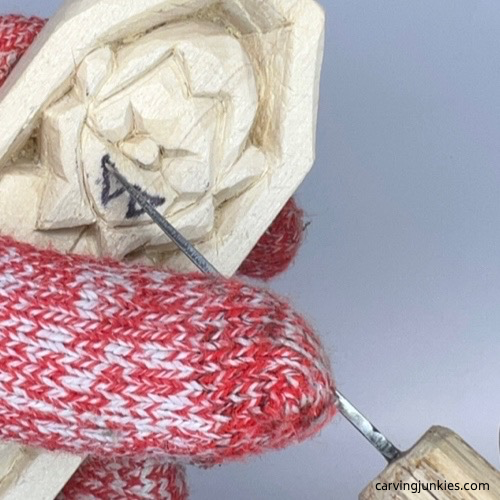 17. Separating the top of the mouth
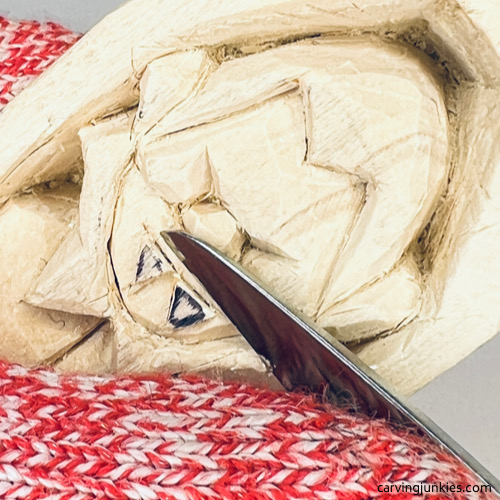 18. Removing wood above the mouth
Clean up the cuts on your vampire wood carving
Clean up your cuts all around and deepen cuts in places where you will use different colored paint (such as cuts between the hair and the face). This will help prevent paint from bleeding.
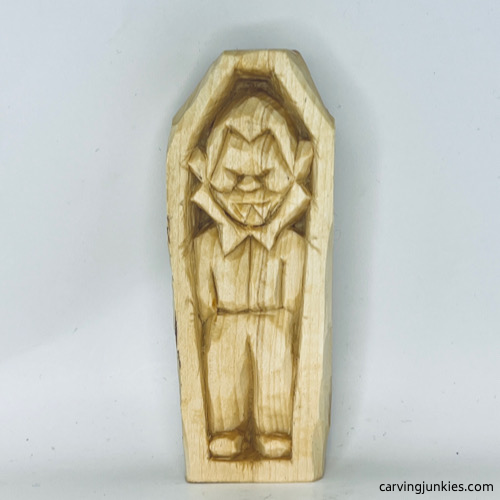 19. Front view of unpainted vampire wood carving
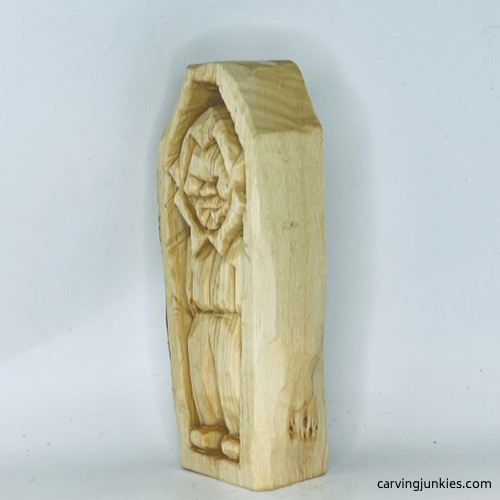
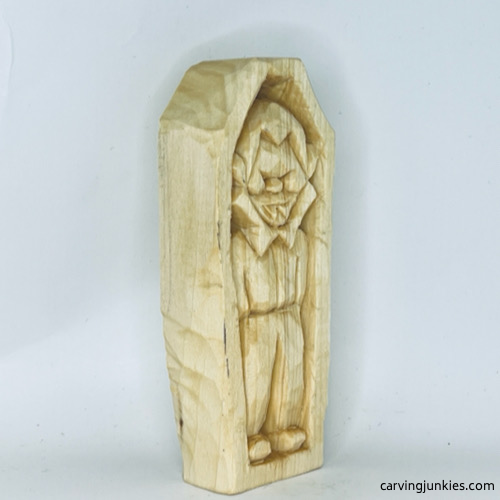 20. Right view of unpainted vampire wood carving
 21. Left view of unpainted vampire wood carving
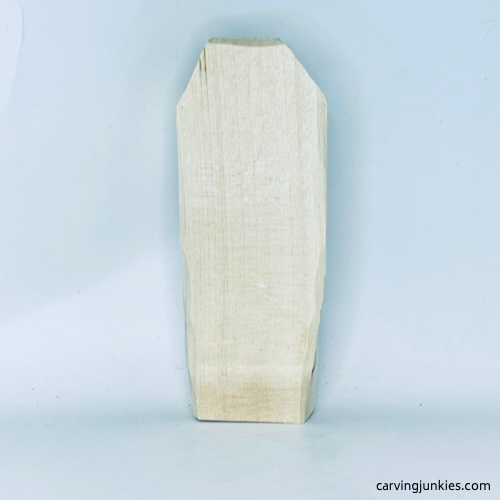 22. Back view of unpainted vampire wood carving
Finish your vampire wood carving
I generally use a wash that is achieved by adding 10-20 drops of water to each drop of acrylic paint. You can use any brand of paint that you want.
To get this same look, use the following paints:
- Very diluted base wash: Academy burnt sienna.
- Fangs: Ceramcoat white 100%.
- Face: FolkArt steel gray wash.
- Collar: Americana santa red wash. Mix with Ceramcoat burnt umber to highlight inside and outer collar crevices.
- Shirt: Ceramcoat purple wash.
- Pants and hair: Ceramcoat black wash.
- Shoes: Ceramcoat terra cotta wash.
- Dry brush hair and coffin with Ceramcoat white 100%.
- Coffin: Ceramcoat burnt umber wash.
- Highlights: Very diluted Ceramcoat black wash to add shadow below some cuts.
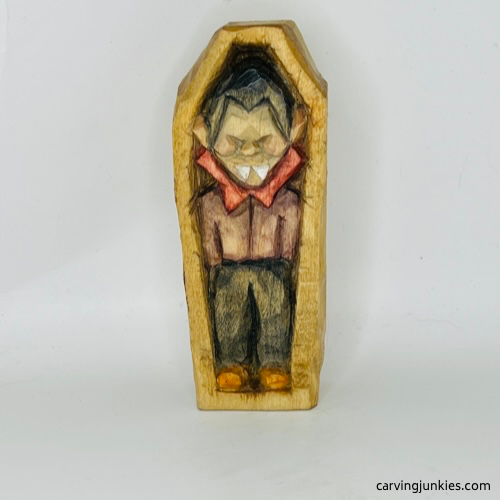 23. Front of painted vampire wood carving
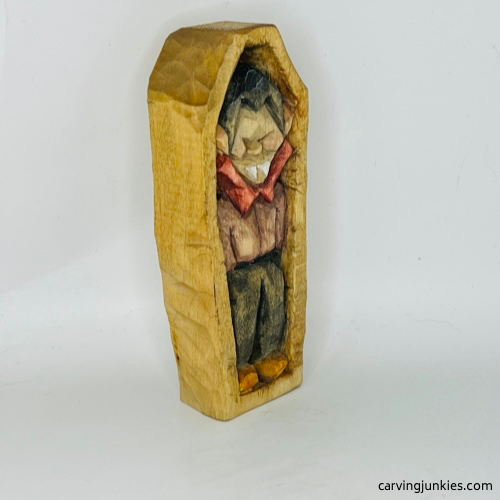 24. Right side of painted vampire wood carving
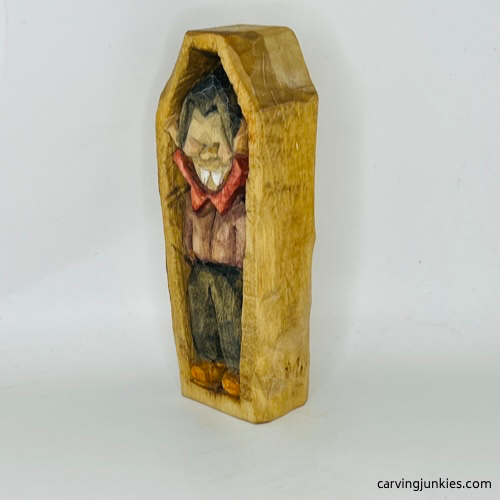 15. Left side of painted vampire wood carving
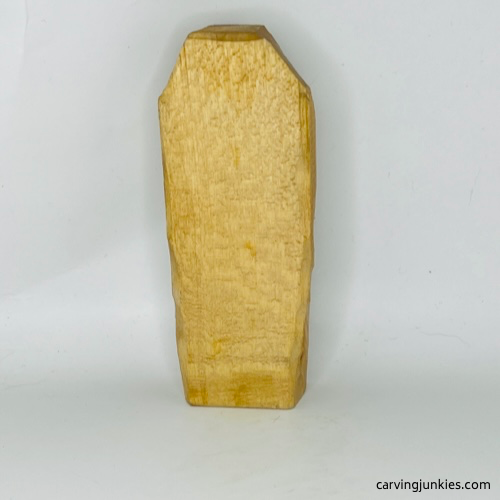 26. Back of painted vampire wood carving
Vampire wood carving pattern
Photocopy this pattern to size to fit any wood block.

Summary of vampire wood carving tutorial
- This little whittle vampire wood carving can be made super quickly and is a fun carve.
- This is also a great practice tutorial to see if you want to explore doing a more traditional relief carving.
- Make a couple of these villainous vampires to add to your spooky Halloween decor.
- You can vary the paint colors or use the painting guide that is provided.
Get 50 Wood Carving & Painting Tips when you join our FREE Covered in Chips club.
Share this page
carvingjunkies.com never sells your personal information.
This site uses cookies for its operation and to enhance your experience. As an Amazon Associate and Focuser Carving affiliate we earn from qualifying purchases.
Home | About Us | Privacy Policy | Terms of Use | Contact | Sitemap
