- Home
- Things to carve
- Wood carving project
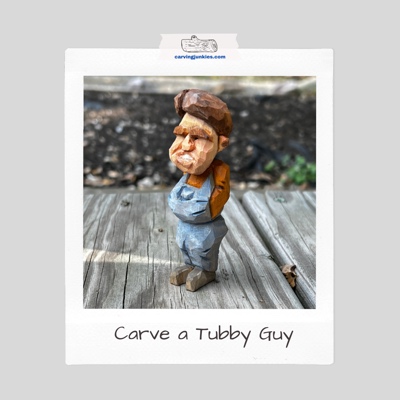
Tubby man wood carving project
Carve yourself a little man with a big belly.
Sometimes a wood carving project shows you how far you’ve come with your carving skills. I thought it would be fun to update an old carving—and add my own creative twist—to illustrate that if you stick with carving, you will improve with each carving (and improve your painting skills, too).
I carved my first caricature (see picture below), which was “Marvin” from Jack Price’s book on Carving Small Caricatures in Wood.
It totally ignited my obsession for wood carving and creating!
I gave my updated guy ears and a pompadour hairstyle, which makes it really fun to carve. I also (mostly) used the flat plane carving style.
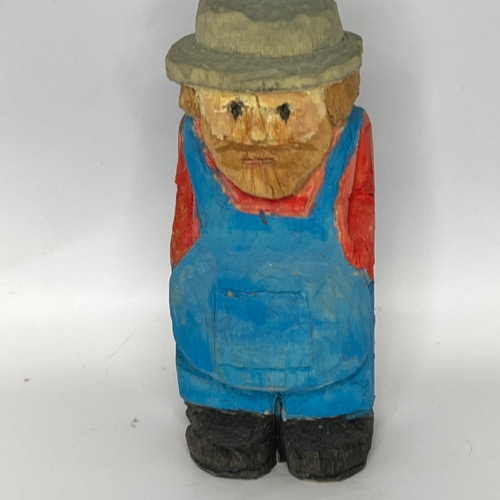 My very first caricature carving!
What you need for this wood carving project
You will need a wood block (basswood is recommended) that is 1 x 1 x 4 inches (2.5 x 2.5 x 10 cm), your knife of choice, a pen (or pencil) to mark the wood, and a ruler.
A template is provided below, if you are carving from a small wood block.
Please always carve safely by using a good carving glove and lay something hard and flat across your lap (to protect vital blood arteries).
In case you‘re wondering… I used my OCC Tools straight edged knife with a blade that is nearly 2 inches long.
A free painting guide is provided at the end of this page to help you get this same look for your tubby man wood carving project.
Let’s get to carving your tubby man wood carving project!
Tubby man wood carving project tutorial at-a-glance
See the key steps to carve your tubby man in the short video below.
Preparing your wood carving project
Photocopy the template below (photo 1) to size to fit your wood block. Cut out the template and trace it onto your wood block (photos 2-5).
Tip: If you scotch tape the template to a piece of cardboard—and cut it out—you can use the template again and again to create other tubby men (or women).
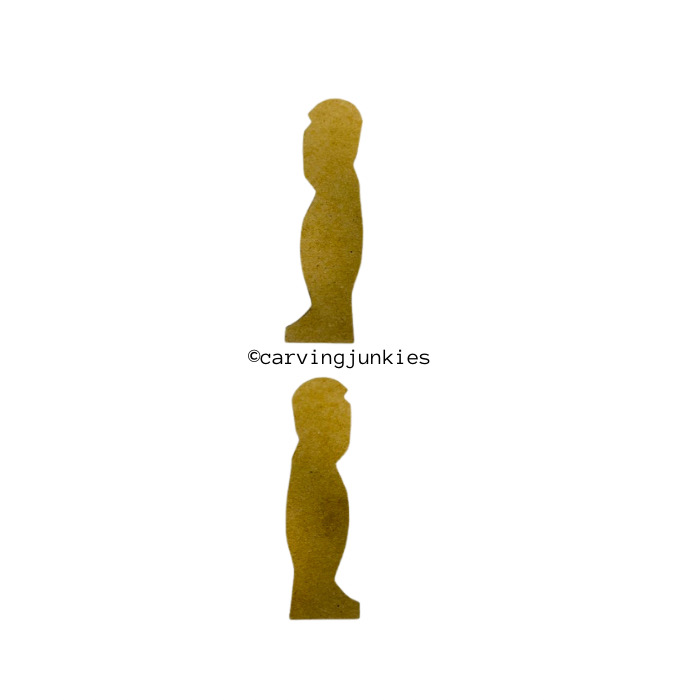 1. Wood carving project template
Just for reference, the middle of the neck on the front is about 1 3/4 inch (4.5 cm) from the top of the wood block. The tops of the feet are about 3 1/2 inches (8.9 cm) from the top.
On the back, only the middle of the neck is a little higher than the front—about 1 1/4 inches (3.2 cm) from the top.
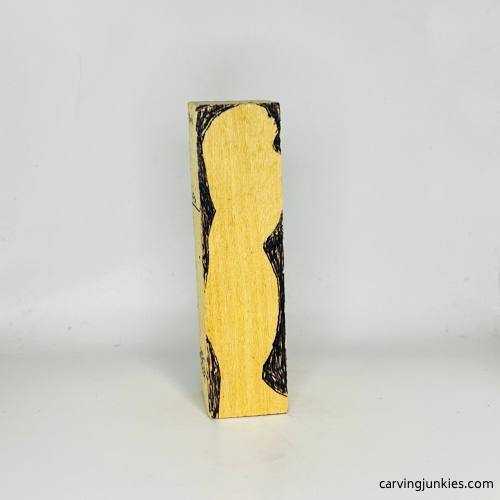 2. Wood carving project right guidelines
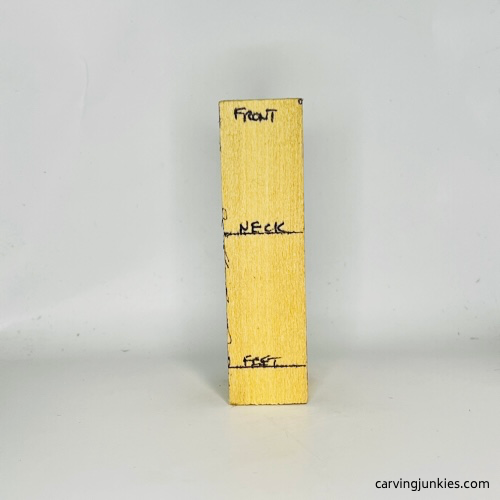 4. Wood carving project front guidelines
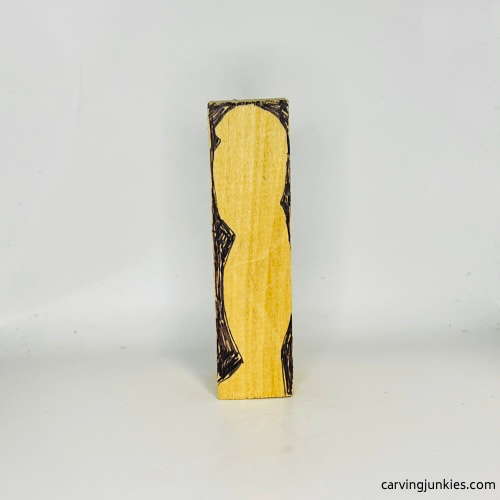 3. Wood carving project left guidelines
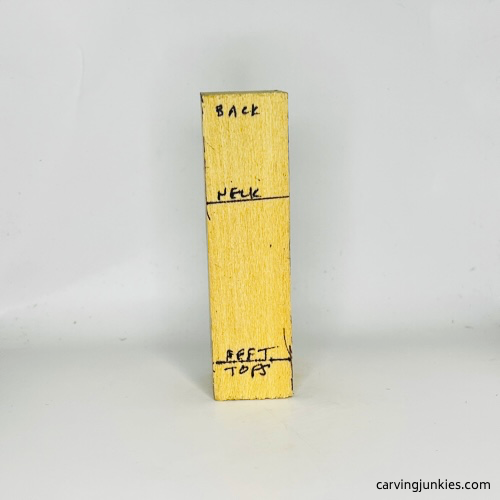 5. Wood carving project back guidelines
Making first cuts on your tubby guy
Your first step with this wood carving project is to roughout the tubby man.
One of the advantages of working with small wood blocks is that there isn’t that much wood you have to remove. The template takes up most of the wood block.
Use V-cuts to start sections on the tubby man where you want to remove wood. I like to start with the corners of the neck (photo 6), then move to the feet (photo 7). It’s okay if you need to make more than one V-cut to remove all of the wood.
Then, separate the head from the neck on the front (photo 8) and the back. You will separate the head on the sides later.
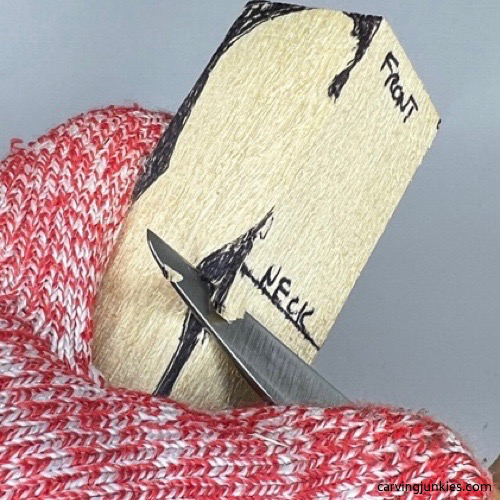 6. Making a V-cut at the corner
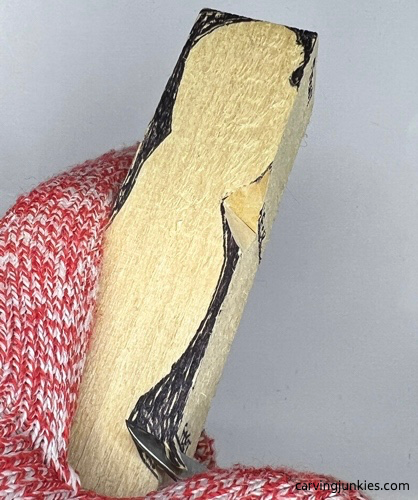 7. Making second V-cut
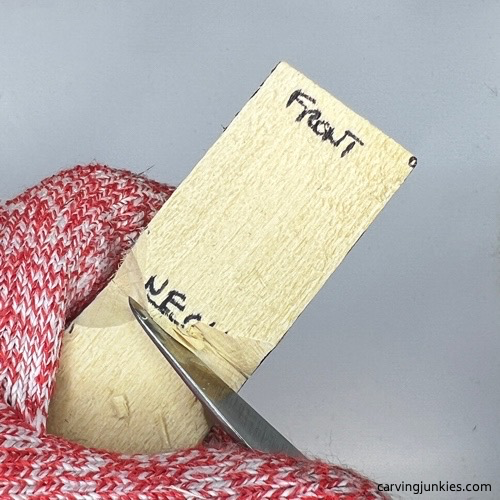 8. Separating the head in the middle
Add some details to your wood carving project
Draw a center line on the front. Sketch the pear shaped front of the face (photo 9).
Also, add the nose box, which is 1/2 an inch (1.3 cm) wide at the widest point, and a little more than a 1/4 inch (0.6 cm) across the bottom. The nose box starts about 3/4 of an inch (2 cm) from the top of the wood block. If you aren’t familiar with my triangle-by-triangle nose carving technique, click here.
Also, draw a guideline around the block that is about 2.5 inches (6.4 cm) from the top. Note: Ignore the lapels on the shirt as I made a design change for the shirt and overalls later (see photo 38 for reference).
Add the arms on each side, which are about 1/2 an inch (1.3 cm) in width. The hands will be hidden inside the pockets.
Also, draw a line all around that is 2.5 inches (6.4 cm) from the top of the wood block, which is where you will separate the waist (photos 9-12).
On each side, draw the hair line, and reserve a small triangle for each ear, which will peak out from the hair (photos 10,11).
On the back, add lines for the shoulders that are about a 1/4 of an inch (0.6 cm) wide. Also, add a small Y on the tush (photo 12).
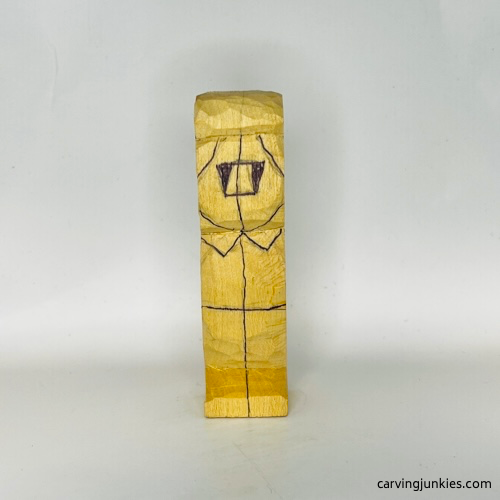 9. Front details are added
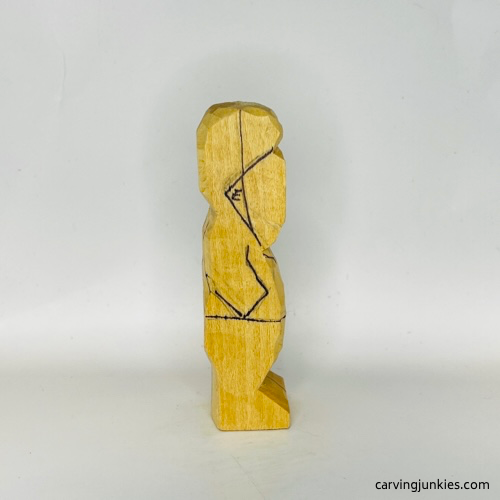 10. Right view of details
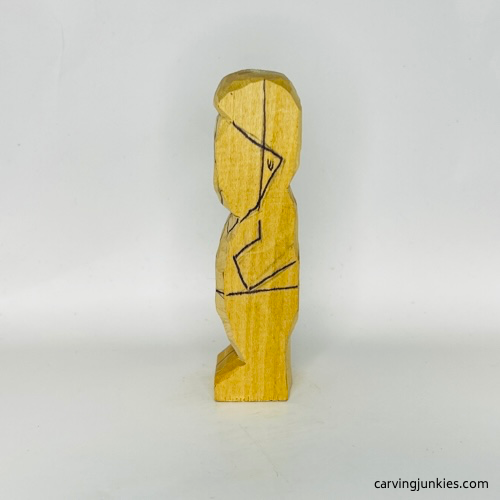 11. Left view of details
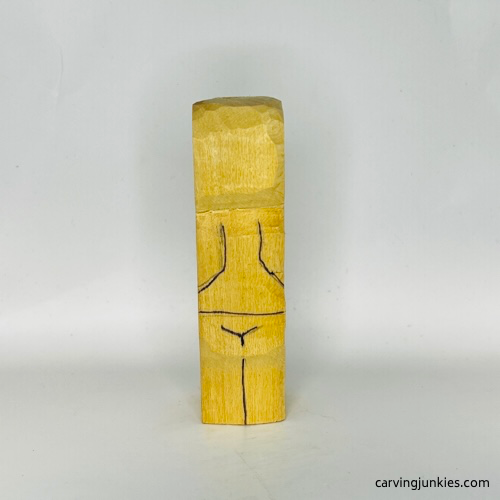 12. Back details
Start the lower body on your wood carving project
Use stop cuts to separate the waist all around, removing wood from underneath (photo 13). Tip: Start at the corners and work your way toward the middle.
Then, remove wood to narrow the sides of the legs below the hips (photo 14).
Use a wide V-cut to split the legs (photo 15). Work your knife up along the guideline (you can switch to a slicing cut here).
Narrow the height of the shoes. I like to shave wood off in layers, cutting in toward the body (photo 16) first. Then, carefully remove the wood with a controlled stop cut to avoid slicing off the foot! If you do lose a foot, just glue it back on, and let it dry overnight.
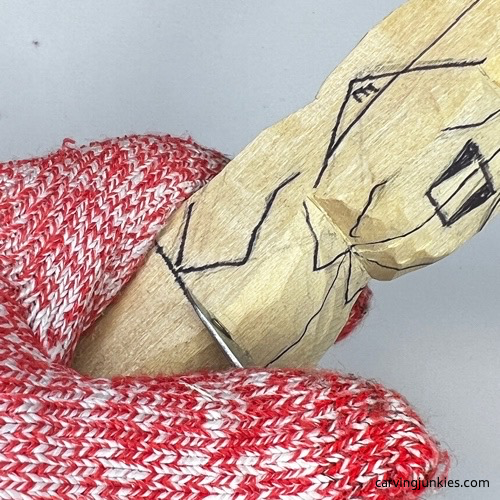 13. Separating the waist
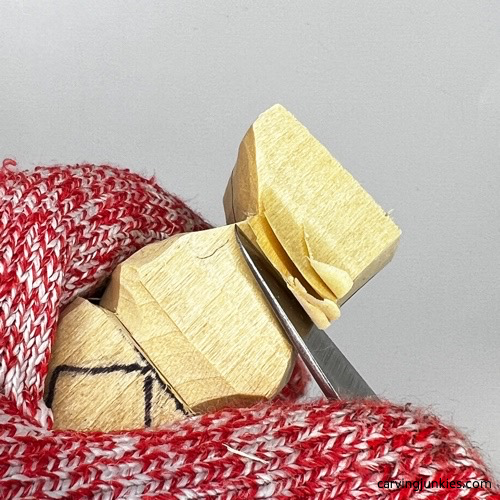 14. Narrowing the legs
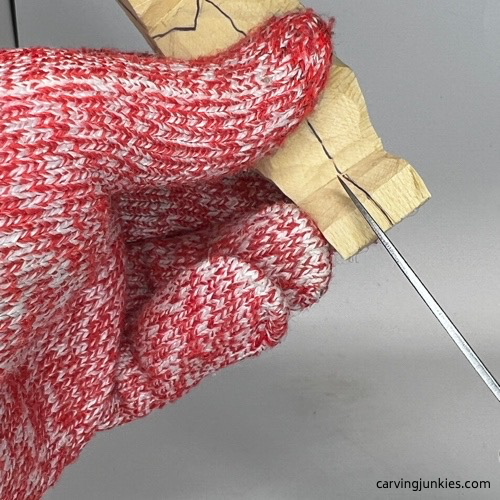 15. Making a V-cut
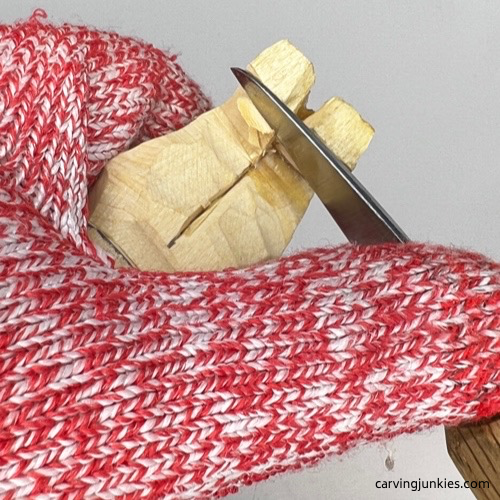 16. Reducing height
Carve the upper body of your wood carving project
Use stop cuts to separate the arms, removing wood from underneath (photo 17). Make a pyramid cut to start the crook of the arm (photo 18). Tip: Draw a triangle to guide you.
Make a stop cut to cut into the shoulder on the front and side (photo 19). Separate the back of the arm (photo 20).
You can shape the bottom of the chin and the top of the shirt a bit (photo 21) and refine it further later.
Now, repeat these steps on the other side of the tubby guy wood carving.
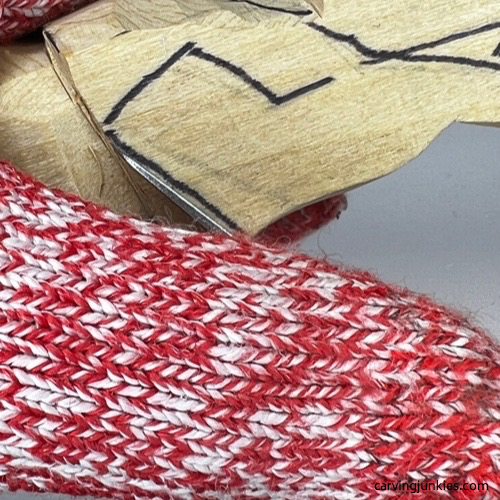 17. Making a stop cut
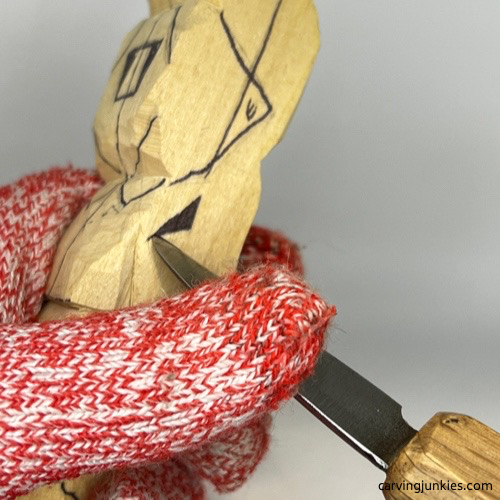 18. Making a pyramid cut
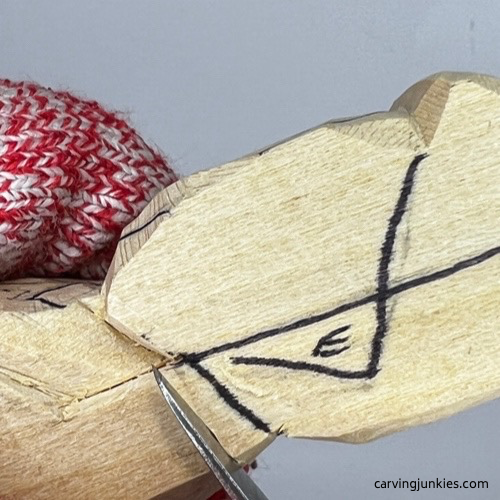 19. Cutting the shoulder
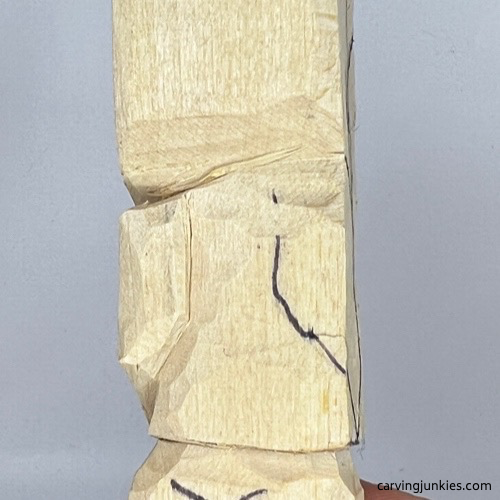 20. Back shoulder is cut
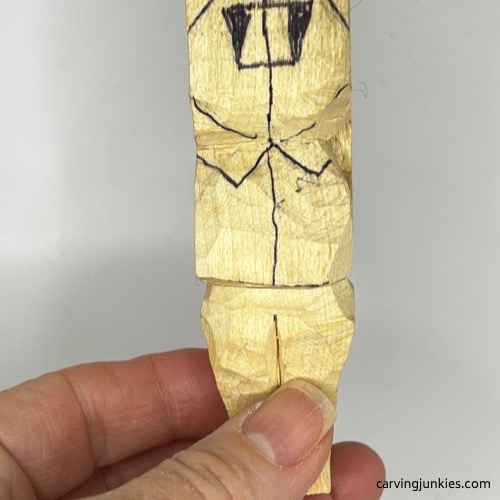 21. Progress from the front
Carve the ears on your wood carving project
Use your knife to separate the ear. You can make stop cuts (photos 22, 23) and remove wood from around the cut. Or, you can make your stop cut and use a slicing cut.
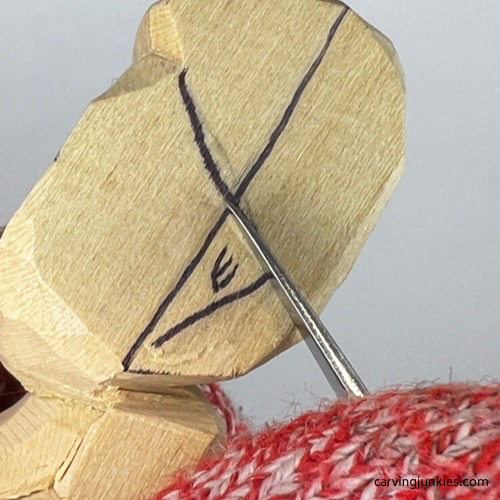 22. Making first stop cut
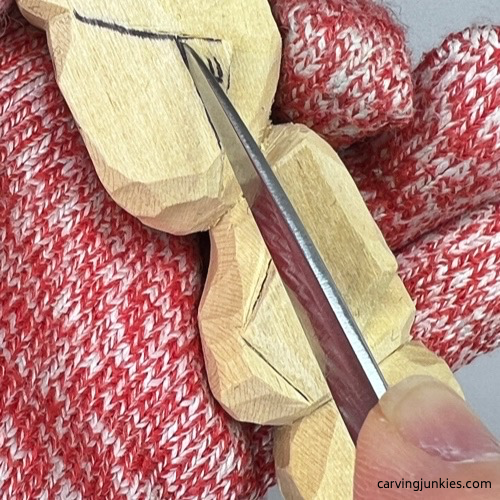 23. Making another stop cut
Carve the nose on your wood carving project
Carve the nose using my triangle-by-triangle nose carving technique (or use another technique if you prefer).
First, make a stop cut under the nose along the guideline (photo 24). Start the first pyramid cut on one side (photo 25). Repeat on the other side. Then, cut your knife at an angle to start the cheeks (photo 26). This will give you more access to clean up any wood strings left over from your pyramid cuts (visible in photo 26).
Then, draw on some facial details, including the wood on the nose that you will remove, the eyebrows, smile lines, mouth, teeth, double chin, bottom of the pants, and the front hairline (all visible in photo 27). Also, draw the hairline on the back (photo 28).
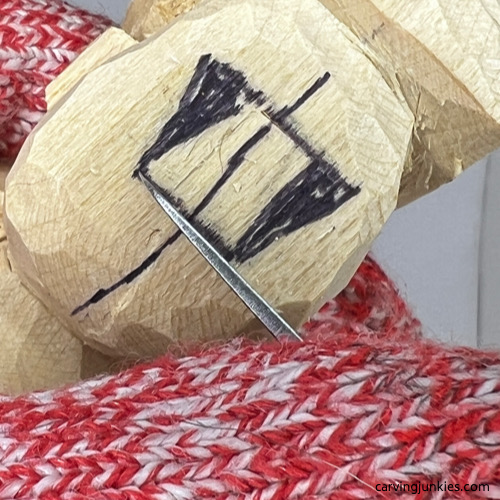 24. Making a stop cut
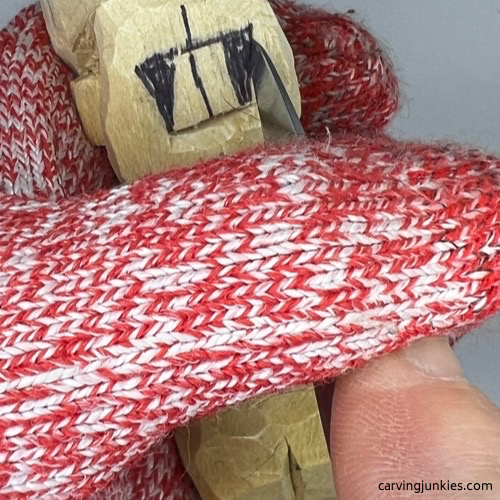 25. Making second cut
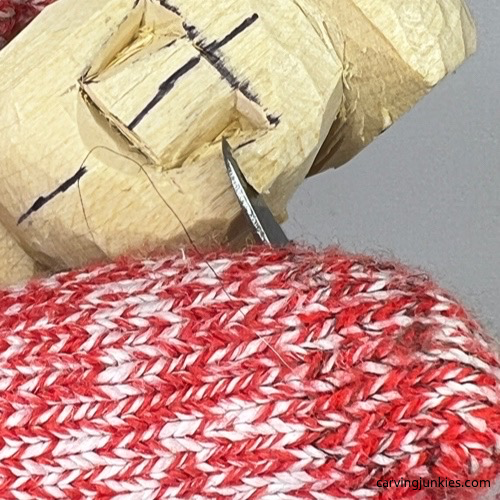 26. Angling cut for cheek
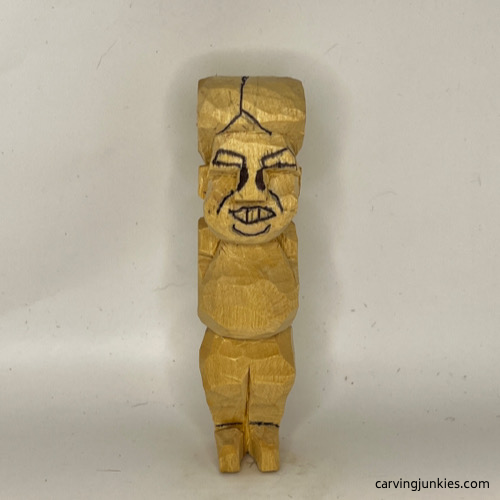 27. Facial details are drawn
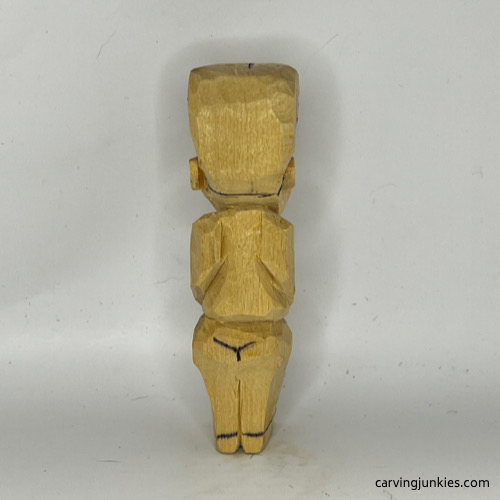 28. Back hairline
Carve the details on your wood carving project
Shape the nose by removing the excess wood (photo 29). Then, make a stop cut along each smile line (photo 29) and remove wood from inside the smile line. This will give you greater access to shape the nose.
Next, separate the teeth and the mouth line with small stop cuts or slicing cuts. Also, separate the double chin line and shape the chin area (completed in photo 31).
You will also need to carve the forehead back a bit (photo 32). Once that is done, make a stop cut to separate the top of the brow. You will make one long cut and mark where you will eventually make a V-cut to split the brows (photo 33) later on to avoid crumbling.
Now, start to reduce and shape the hair (photo 34).
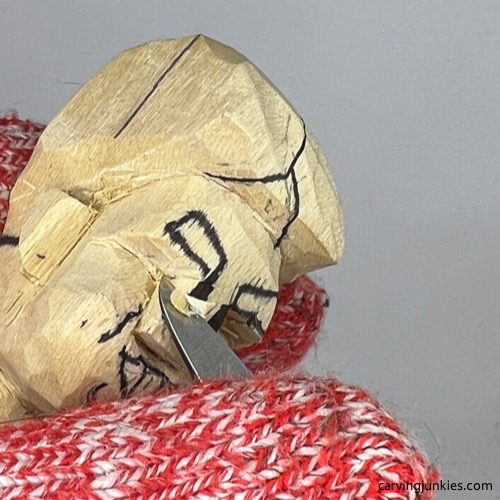 29. Narrowing the nose
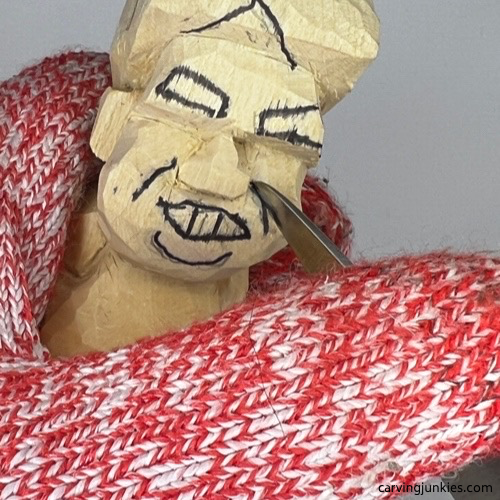 30. Carving the smile line
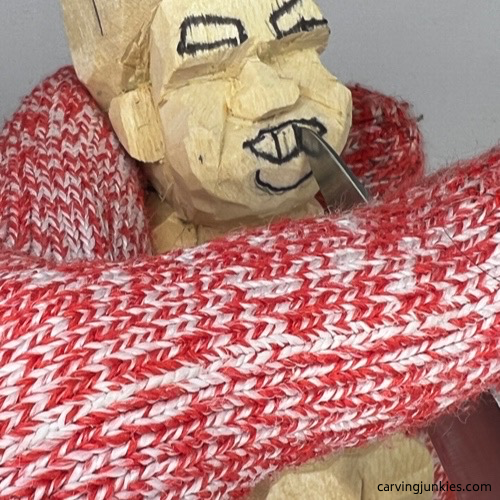 31. Separating the teeth
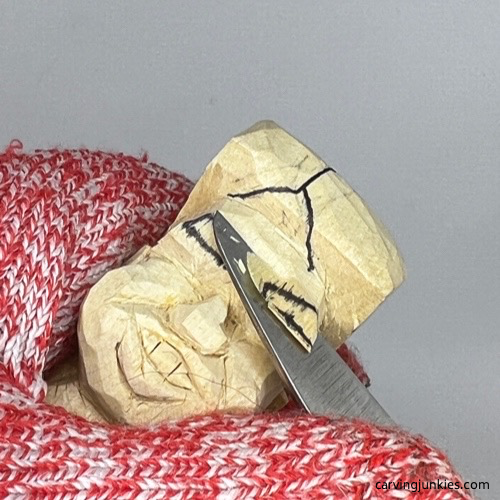 32. Carving back the forehead
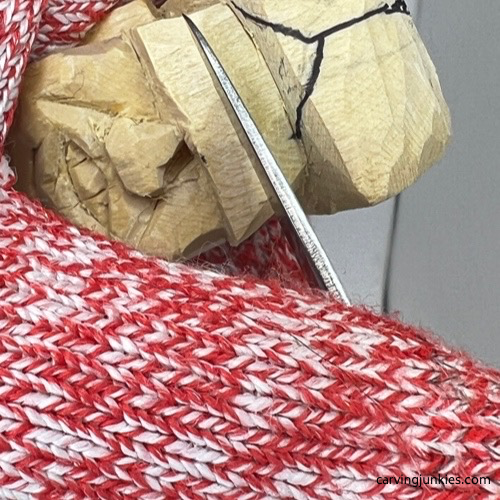 33. Making a stop cut
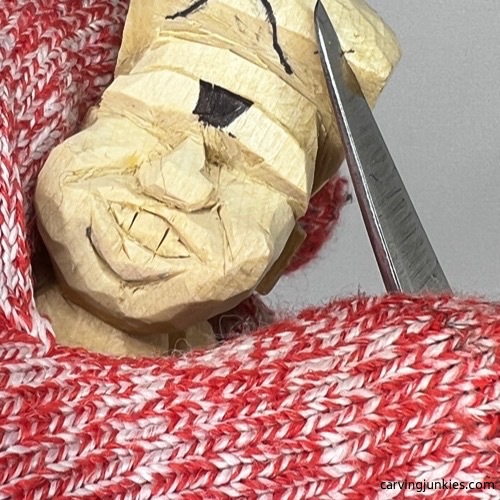 34. Reducing the hair
Carve more details on your wood carving project
Continue to shape the hair and make a V-cut to separate the part on the front and the top (photo 35). Tip: Go slowly and be careful not to crack the hair in the front.
Also, carve the hairline on the back. Use a stop cut and remove wood from underneath (completed in photo 36).
Draw the shirt and overall details on the front (photo 37) and carve them (completed in photo 38).
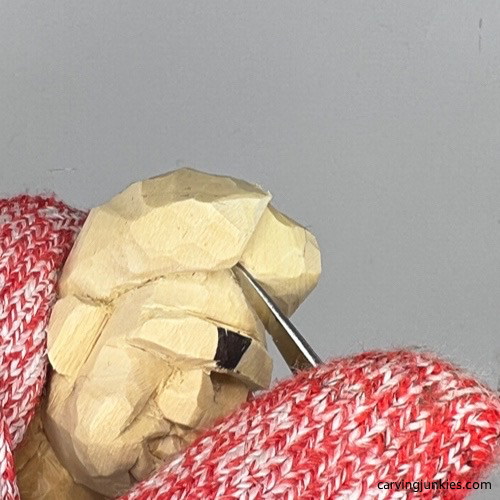 35. Carving the part
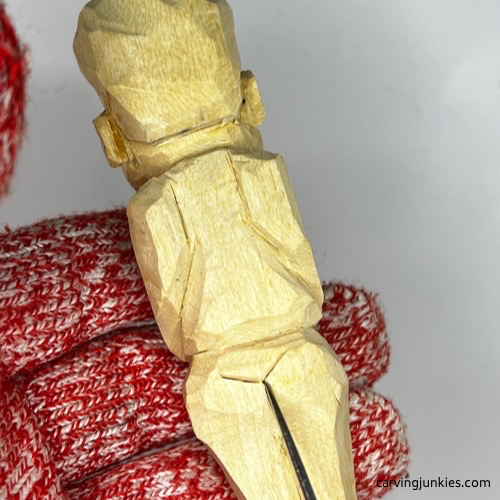 36. Carving back details
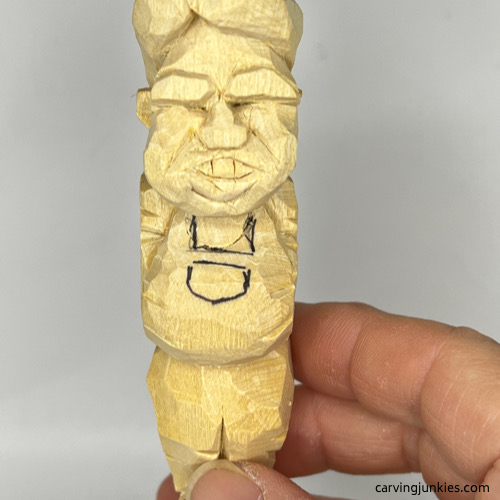 37. Details are drawn
Clean up your wood carving project
Use your knife to clean up any wood fuzzies, or to deepen cuts in places where you will change the paint color.
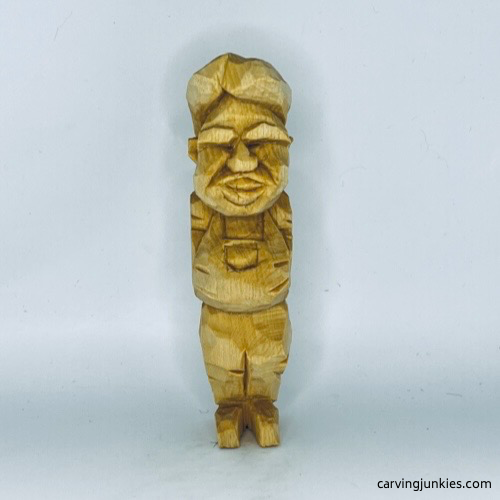 38. Front view of unpainted tubby guy
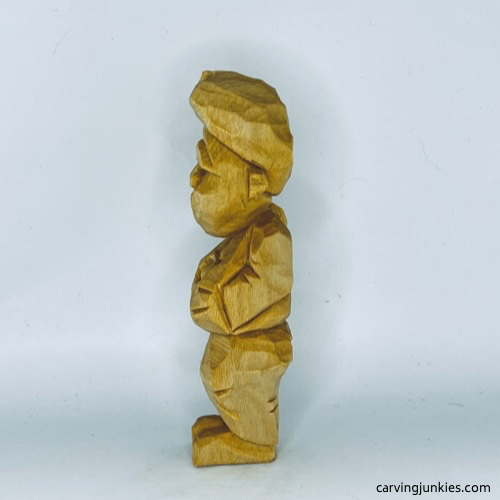 40. Left view of unpainted tubby guy
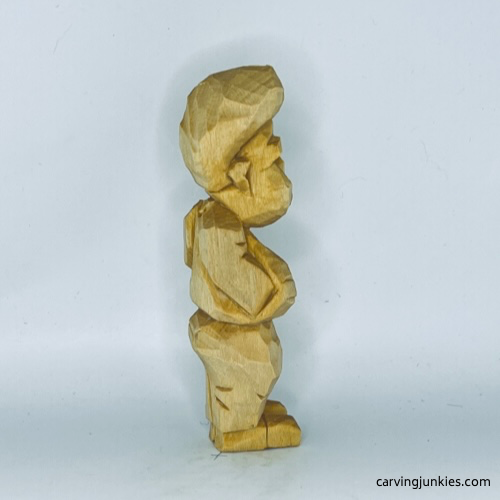 39. Right view of unpainted tubby guy
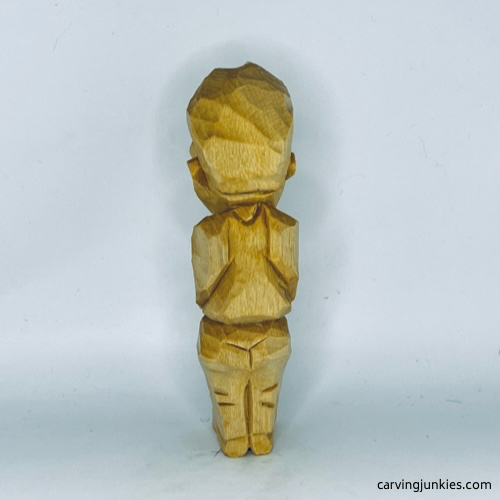 41. Back view of unpainted tubby guy
Paint your wood carving project
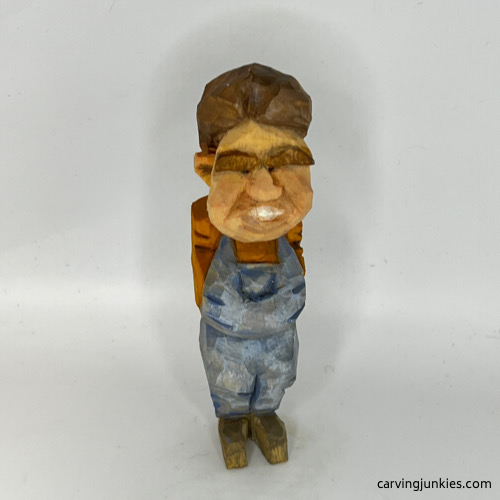 42. Painted front of tubby man
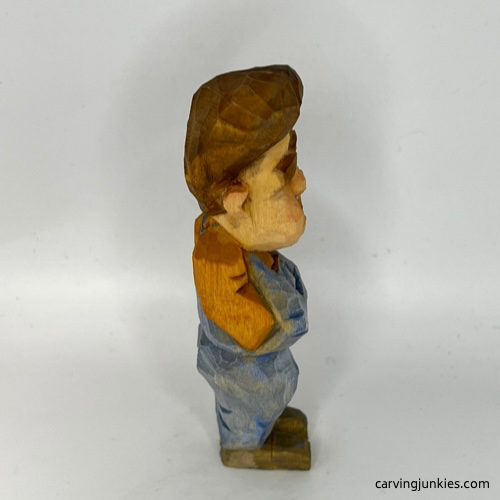 43. Painted right side of tubby man
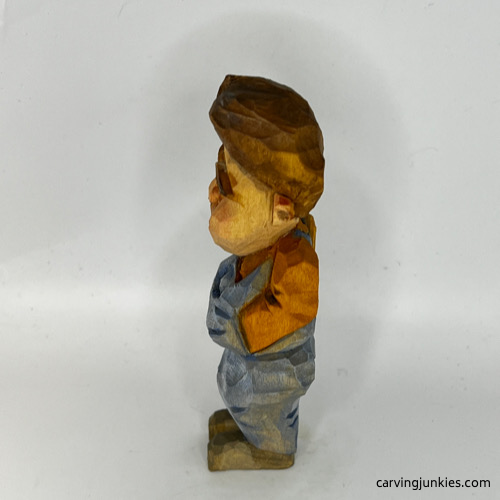 44. Painted left side of tubby man
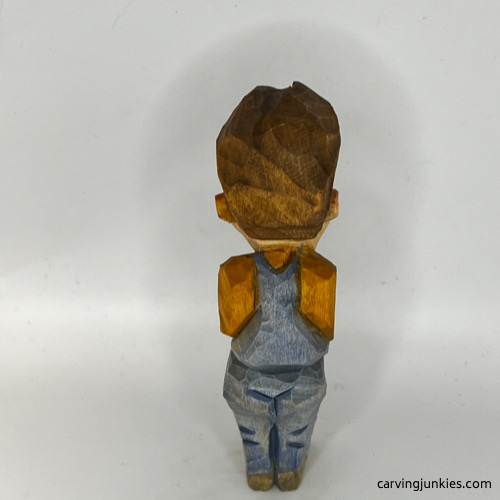 45. Painted back of tubby man
Use any type of paints and brushes that you want for your tubby man wood carving project. I use acrylic paints and water them down with about 25 drops of water to create a wash.
Here are the brands and colors to get this same look:
- Full body (base coat): Academy burnt sienna wash.
- Teeth: 100% Craftsmart vanilla.
- Ears and face: Ceramcoat tawny light wash.
- Hair and eyebrows: DecoArt burnt umber wash.
- Lips, inner ears, and smile lines: Dry brush DecoArt burnt umber.
- Shirt: Ceramcoat pumpkin mixed with burnt umber wash.
- Overalls: Apple Barrel blueberry frost wash and dry brush with Apple Barrel white. Mix with one drop burnt umber for highlighting the wrinkles.
- Shoes: FolkArt medium gray wash.
- Nose tip and cheeks: Windsor & Newton cadmium red light (very diluted with water) and Apple Barrel bright red (very diluted).
- Finish: I dipped the piece in boiled linseed oil, but feel free to use another type of finish.
Tubby man wood carving project summary
- This pattern is my own creative twist on Jack Price’s original “Marvin” pattern.
- The pompadour hair is fun to carve on this little man.
- You can use my triangle-by-triangle nose carving system to get a perfect nose.
- Save your tubby man and redo him a year or two later. You will be amazed at your progress!
Get 50 Wood Carving & Painting Tips when you join our FREE Covered in Chips club.
Share this page
carvingjunkies.com never sells your personal information.
This site uses cookies for its operation and to enhance your experience. As an Amazon Associate and Focuser Carving affiliate we earn from qualifying purchases.
Home | About Us | Privacy Policy | Terms of Use | Contact | Sitemap
