- Home
- Carving wood animals
- Carving a fish
Cool carving a fish tutorial
Carve yourself a fun and funky fish.
Carving a fish from wood isn’t smelly at all (unlike carving a fish to clean it).
We came up with this fun design that features bulging eyes, a wide tooth grin, and silly scales all over.
It is bigger than our usual whittles, but goes pretty quickly once you roughout the shape.
Let’s get going!

Supplies needed for our carving a fish tutorial
We use a basswood block that is 3 inches (7.6 cm) across and 2 inches (5.1 cm) high. For best results, remember to strop your knives before you start this carving a fish tutorial.
A good sturdy knife for removing wood and a detail knife are all you need. For roughing out, we use a Helvie boxcutter. For some of the detail work (like the fish scales) we use an OCC Tools straight knife (1 1/2 inch blade).
You will need a round object to draw the scales and a pencil to sketch your design.
We never carve without a good safety glove and always recommend one for you.
Carving a fish tutorial at-a-glance
Carving a fish: First steps
Using your roughout knife, round all the sides on the wood block (i.e., round the four sharp corners).
Draw your guidelines as follows:
- On the front of the block, loosely draw the eyes, mouth, and teeth (photo 1). Use a pencil with an eraser so you can get the shape that you want (we use magic marker to help you see the pattern). Don’t worry if your drawing is not perfect. It doesn’t have to be.
- Draw a line all around the block that is 1/4-inch (0.65 cm) back from the front of the head (photos 1-4) to mark where you will cut the block to carve the eyes and head. Make it about a 1/4-inch (0.65 cm) wide and color it in. Also add a colored triangle where you will split the eyes (photo 1).
- On the top of the block (photo 4), sketch an oval that is about 1 1/2 inches (3.8 cm) long. Draw on the tail and color the wood that you will remove (photo 4).
- Color the wood that you will remove on the sides around the tail (photos 2,3). It is about 3/4 of an inch (1.9 cm) wide.
 1. Front view of fish carving guidelines
 2. Right view of fish carving guidelines
 3. Left view of fish carving guidelines
 4. Top view of fish carving guidelines
 5. Back view of fish carving guidelines
Carving a fish: Separate the head
Using a sturdy roughout knife, make a V-cut on one corner (photo 6). Continue to make a series of V-cuts to separate the head all around (photo 7). Don’t cut too deeply. You will extend the head back later, but for now, you just need access to split the eyes.
Once the head is separated all around, use a deep pyramid cut to split the eyes (photo 8). Or, you can make several V-cuts (start with a small V-cut in the middle and work your way outward).
 6. Making a V-cut
 7. Continuing to separate the head
 8. Making a pyramid cut to split eyes
 9. Progress of eyes and face
Carving a fish: Separate the tail
We use a stop cut to start to remove the wood around the tail (photo 10). It is a bit of a workout. We find that removing wood is meditative and don’t mind using just a knife. But feel free to use a fishtail gouge.
Color more wood that you will remove on the back to shape the tail (photo 11). We use a pyramid cut to start to remove wood to split the tail (photo 12). Continue removing more wood a little at a time, using a series of V-cuts (or stop cuts). Tip: If you are using a knife, use one that is sturdy and be careful not to break the tip.
Keep removing wood until you have the rough shape of the split tail (photo 13).
 10. Using a stop cut to start wood removal
 11. Marking the tail for wood removal
 12. Starting to cut midtail
 13. Tail is roughed out
Carving a fish: Round the body
Now that you have created the rough shape of the tail, you can use your knife to remove wood to create a round, fat, fish body, starting on back of the fish (photo 14). Then, move to the front, behind the eyes (photo 15).
After rounding the body, create a curve on the tail (photo 16). We shave the wood off, but you need a knife that has some flex (to avoid breaking the tip). If you do not have this type of knife, make a wide V-cut instead.
Continue refining the tail until your fish carving looks similar to photo 17.
 14. Starting to round the back
 15. Rounding the body behind the eyes
 16. Curving the tail
 17. Refining the tail
How to carve a fish: Draw some details
Draw a fin on each side of the fish carving (photos 18,19). You can see how they look from the back in photo 19.
Also draw a line that arcs on both sides (photos 18,19). You will separate these lines later.
 18. Fin is added and arc is drawn
 19. Left view of fin and arc
 20. Back view of drawn fins
Carving a fish: Carve the details
Using your knife, make stop cuts to separate the fin on all three sides (photo 21).
Then, draw a line under the fin and across the body (photo 22) where you will remove wood (save this for last to avoid breaking the fins). This will make the fin stick out below the body of the fish (see photo 30 for reference).
Repeat on the other side.
 21. Separating the fin
 22. Marking wood to remove under fin
How to carve a fish: Carve the eyes
Make a stop cut at the midway point on the outer side of the eye (photo 23) and remove wood from above it. Shape the eyes, sketch the eyelids and the pupils, and mark more wood to remove from the sides of the fish head (photo 24).
Remove marked wood from the sides. We use a roughout knife and shave the wood off (photo 25). Cut along the eyelid guideline and remove wood from underneath (photos 25,26). This will separate the eyelid from the eye (photo 25).
Whenever we use a pull cut (sometimes called a paring cut), we always slip on a thumb guard for safety (photo 26).
 23. Separating the eyes
 24. Wood to remove is marked
 25. Shaving wood off
 26. Separating the eyelids
 27. Eyes are carved
Carving a fish: Refine some details
Cut along the guidelines for the mouth and teeth (photo 28). Once the mouth and teeth are separated, refine the teeth by removing wood at a downward angle on every side (photo 29).
Once the mouth is shaped, you can remove some wood under the eyes so they bulge out. Cut back into the head and remove wood from above your cut. This will create a flat surface above the mouth (see photo 31 for reference).
 28. Cutting along the guidelines
 29. Remove wood with angled cuts
Carving a fish: Add the scales
Before starting the scales make a small V-cut to separate the lips (see photo 32 for reference). Remove wood underneath the fins (see photos 31,35,36 for reference). Use stop cuts to separate the top section of the fish, removing wood from underneath (see photos 35,36 for reference).
To draw the scales, use something with a small round shape (we use the end cap of a magic marker, as seen in photo 30). Create your first row of scales. On the second row, center your round item in the middle of the first scale to create the pattern (illustrated in photos 30,31).
Repeat until all the scales are drawn on both sides of the fish and on the top and the bottom.
Using your knife, cut along the top guideline of each scale (photo 32). We use a pull cut, but use whatever cut is most comfortable for you. Then, slide your knife under your cut to carve a little bit of wood off beneath the first cut (photo 33). Tip: Make sure your first cuts are deep enough to cleanly remove wood from the second cuts.
Work your way around the sides of the scale in the same manner. Tip: practice a row or two on a piece of scrap wood until you get the hang of it.
 30. Drawing the scales
 31. Scale pattern on one side
 32. Cutting the outline of the scale
 33. Removing wood underneath the cut
Carving a fish: Adding lines
Carve a series of lines on the tail and fins (photos 34-37). You can use your knife to make narrow V-cuts. But if you have a V-tool, it will be much faster to use it here.
Make some lines short (and others long) on the back of the tail (photo 37).
Carving a fish: Prepare for painting
Clean up your cuts and remove any wood fuzzies. Also deepen any cuts that you think will enhance your carving.
Prior to painting, wash the carving in warm water and a little dishwashing detergent. You can use a light brush to help remove dirt and pencil marks.
 34. Finished front of the fish carving
 36. Left view of finished fish carving
 35. Right view of finished fish carving
 37. Back view of finished fish carving
Painting your fish carving
All paints are Delta Ceramcoat acrylic (except where noted) and are diluted with water. We repeatedly dip the brush into a mason jar filled with water and use the brush to swirl the water into a few drops of paint, until the wash is cloudy. You can use a small plastic cup, ice cube tray, or a plastic painting palette to water down your paints.
We favor flat and round brushes, but use whatever you like best.
- Eye whites and teeth: Artist’s Loft titanium white.
- Scales: Yellow amarillo.
- Shading on scales: Artist’s Acrylic burnt umber (1 toothpick drop) mixed with yellow amarillo.
- Eyelids, fins, tails, and dots: Tahiti blue. Tip: dots were applied with the tips of different sized paint brushes. When completely dry, we dry brushed the tail, fins, and eyelids with titanium white.
- Nostrils: Black magic marker (or paint, if you prefer)
- Outline of mouth: Bright red (very diluted).
- Eye pupils: black magic marker outline and black paint center. After completely dry, add a speck of 100% titanium white with the round end of a toothpick.
For great painting tips, click here.


Free pattern for carving a fish
If you prefer to carve your fish with a pattern, photocopy this to size to fit your wood block.

Carving a fish tutorial summary
- Carving a fish is simple with our step-by-step tutorial.
- This is a fun and colorful fish to add to your wood carving collection.
- The scales are easy to carve once you get the hang of it.
- This fish carving makes a great gift for a child or an adult.
You might like these
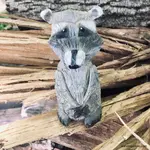
Raccoon Wood Carving With a Knife Tutorial From A Block of Wood
Raccoon wood carving tutorial carved from a block of wood with just a knife and no bandsaw.
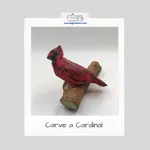
Free Cardinal Wood Carving Pattern
Free cardinal wood carving pattern, step-by-step tutorial, and painting guide are all right here to carve this beauty.
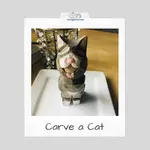
Carving a Cat Using Just a Knife Tutorial
Carving a cat is easy with our step by step tutorial with tons of photos from every angle
Get 50 Wood Carving & Painting Tips when you join our FREE Covered in Chips club.
Share this page
carvingjunkies.com never sells your personal information.
This site uses cookies for its operation and to enhance your experience. As an Amazon Associate and Focuser Carving affiliate we earn from qualifying purchases.
Home | About Us | Privacy Policy | Terms of Use | Contact | Sitemap