- Home
- Carving wood animals
- Racoon wood carving
Cute raccoon wood carving tutorial
You can easily make this adorable critter with our simple steps.
Our raccoon wood carving tutorial combines a little bit of realism with a dash of cuteness to make a beautiful carving that will bring a smile to anyone's face. Just grab a sharp knife and get started.


What you will need for this raccoon wood carving tutorial
- Basswood block (ours is 1.5 x 1.5 x 3 inches/3.81 x 3.81 x 7.62 cm).
- Carving knife of choice (we use a large roughout knife and a smaller detail knife).
- 60-degree angle V-tool (if you don't have one a knife will also work).
- Paints and paint brushes of choice (we use acrylic paints and provide water ratios).
- Pencil (magic marker is optional).
- Carving gloves (be safe!).
Raccoon wood carving tutorial at a glance
1. Draw your guidelines
- Draw a line 1.5 inches (3.81 cm) from the top all around the wood block to indicate where you will separate the head from the body (photo 1).
- Since you will carve the front of the head off the corner, draw two small marks on top where you will make cuts to start the ears (photo 2).
 1. Draw a line 1.5 inches from the top
 2. Two marks on top where you will cut the ears
2. Round off the corners
- Use a sweep cut (or push cut) to round each of the four corners (photo 3).
 3. Round the corners all around
3. Separate the head from the body
- Make a stop cut in each corner and remove wood from underneath to create a notch (photos 4-7).
- Make larger stop cuts between the notches to separate the head (photo 5).
- Make angular cuts on each side of the face so the top and bottom meet at a point on each side (photo 5).
- Draw marks on the front to indicate how far down the ears will go (photo 6).
- Cut into the ear guideline on the top of the head. Make a perpendicular cut from the front to remove wood for each ear (photo 7).
- Round the head (photo 7).
 4. Use a stop cut to notch all four corners
 5. Use stop cuts in between to separate the head
 6. Lines mark how far down the ears will go
 7. Ears are started and the head is rounded
4. Draw guidelines for the face
- Draw an oval line to mark the snout (photo 8).
- Make a stop cut at the top of the snout and remove some wood underneath it (photo 8).
- Define the top of each eye socket (photo 9).
 8. Stop cuts mark the top and bottom of the snout
 9. Define the eye sockets
5. Carve the snout
- To create the snout, use a push cut to shave wood off evenly all around. It is a bit like you would sharpen the point of a pencil (photo 10).
- Remove wood from underneath at an angle so the nose tilts up a bit (photos 11,12).
- Reduce a little wood from the eye sockets (photo 8).
- Start to round the back of the head (photo 13).
 10. Snout is shaped and the eye socket is defined
 11. Right side view
 12. Left side view
 13. Back of the head is rounded
6. Draw guidelines for the body
- Draw the pear-shaped underbelly on the raccoon wood carving (photo 14).
- Roughly mark where the arms, legs, and feet will go (photos 14-16).
- Draw a bushy tail on the back (photo 17).
- Use push cuts to deepen the eye sockets and smooth the area between the eyes (photos 14, 15).
 14. The arms, belly, and legs are drawn
 16. Left side view
 15. Right side view
 17. Tail is drawn
7. Round the body
- Start to round the shoulders and the corners on the body.
 18. Shoulders are rounded
 20. Left side view
 19. Round the corners all around
 21. Back view
8. Define the arms
- Remove wood under the neck to create a pot belly. We redrew the arms to criss-cross on the lower body. Raccoons have ugly fingers and claws so ours are less realistic (photo 22).
- Remove wood between the legs (start with a V-cut) and round the bottom of the belly (photo 22).
- Define the shoulders, which are wide at the top. The arms are narrower closer to the fingers (photos 22, 23).
- Use sweep cuts to further shape the face so it angles out around the snout (photo 22).
 22. Arms redrawn and top of belly takes shape
 23. Define the arms
9. Define the feet and toes
- Define the arms (photo 24) using line cuts (or stop cuts).
- Carefully use triangle cuts to define the claws (go slow as they are fragile).
- Draw lines for the claws on the feet (photo 25).
- Use V-cuts to separate the claws (photo 26).
- Carefully cut downward at a slight angle to remove wood from the top of the feet (photo 27).
 24. Arms and claws are defined
 25. Lines added for claws on feet
 26. V-cuts are used to define the claws
 27. Cut at an angle to further shape the feet
10. Shape the ears
- Reduce wood above the eye socket and draw guidelines for the ears (photo 28).
- Shape the ears and reduce more wood in between the ears (photo 29).
- Use a U gouge to carefully scoop wood out of the ears (photo 29). If you don't have one, carefully make a small triangle cut.
- Round the sides of the body (if needed) so the raccoon wood carving will not look boxy (photos 28,29).
 28. The ears are drawn
 29. The ears are cut
11. Draw lines for the eyes and fur
- Use a pencil to draw the direction of the fur lines (photos 30-33).
- Start from the middle and work your way out. Vary your lines (short and long).
- Draw a triangle eye socket on each side. Raccoons have beady little eyes that will be painted on (photo 30).
- Use a stop to create the line for the mouth and remove a little wood beneath it (photos 31, 32).
 30. Fur guidelines and eye sockets are added
 31. Right side view
 32. Left side view
 33. Back view
12. Cut the fur lines
- Cut the outline of the triangular eye socket (photo 34).
- Use a V-tool to cut the fur lines. You can substitute a knife but it may take longer (photos 34-37).
 34. Eye socket is defined and fur is cut
 35. Right side view
 36. Left side view
 37. Back view.
13. Prepare the raccoon wood carving for painting
- Wash the raccoon with soap and water (using dish soap) to remove pencil marks and soil.
- We paint our carvings while they are wet to prevent color bleeding.
 38. Ready for paint
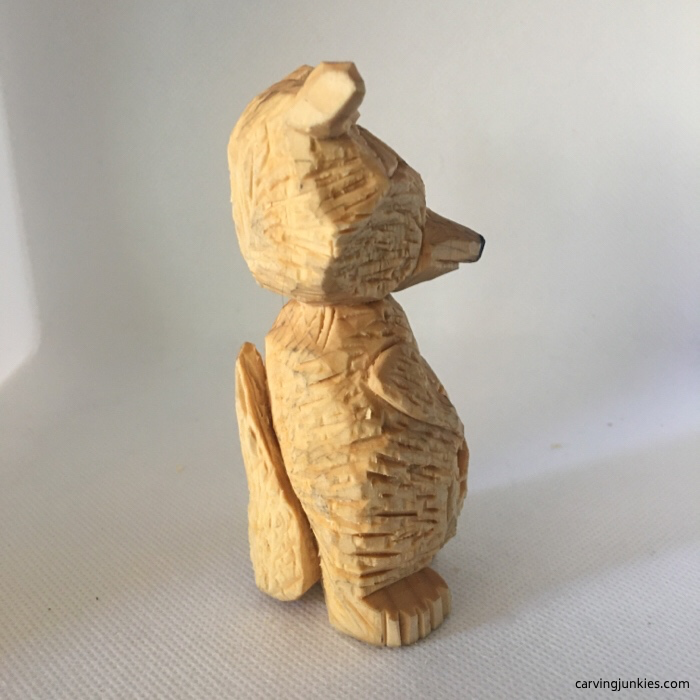 39. Right view
 40. Left view
 41. Back view
14. Painting the raccoon wood carving
 42. Finished raccoon wood carving
 44. Final left view
 43. Final right view
 45. Back view of multi-colored tail
To get this look
The raccoon wood carving is painted in several layers. Be sure to allow the paint to dry between layers. Note: He looks more gray in natural light as above.
Here is the order we use the paints (all are from CraftSmart except the titanium white, which is from Artist's Loft):
- Round nose and bridge of nose: black magic marker.
- Entire body: 2 drops dark gray paint mixed with 1 capful of water (we painted while camping and forgot our eyedropper!).
- Snout, above the eyes, edge of ears, front legs and chest: dry brush with 100% titanium white.
- Eye sockets, back legs, area around the snout, inner ear, and front claws: 1 drop black paint mixed with 1 capful of water.
- Eye sockets, inner ears, and fur around snout: dry bush sparingly with 100% black paint.
- Beady eyes and mouth line: black magic marker.
- White specs in eyes: 100% titanium white using a toothpick.
- Entire body (pick areas you want to highlight to give the fur a mottled color effect):
- Layer one: dry brush with 100% dark gray.
- Layer two: dry brush with 100% titanium white.
- Layer three: dry brush with 100% black (sparingly).
Finishing
After painting, we brush the raccoon wood carving with mineral oil and wipe it down after 10 minutes. Then we apply Howard's Feed and Wax for 20 minutes and polish with a soft cloth.*
*Immediately dispose of paper towels or cloths in the garbage outside as they can spontaneously combust.
Summary
- Carving this raccoon can bring you hours of enjoyment.
- Dry brushing adds texture and interest while painting the raccoon wood carving.
- To learn more about raccoons and see real photos visit this website.
Get 50 Wood Carving & Painting Tips when you join our FREE Covered in Chips club.
You might like these tutorials
Carve a Hillbilly From Wood
Carve a hillbilly full of personality from a block of wood—fun, easy, and step by step!
Fun Things to Carve With A Knife From a Block of Wood
Fun things to carve from wood with free tutorials and pictures from all angles so you can get great results.
Charming Scarecrow Wood Carving Tutorial
Easily create a scarecrow wood carving with this step-by-step tutorial that features lots of progress photos.


Share this page
carvingjunkies.com never sells your personal information.
This site uses cookies for its operation and to enhance your experience. As an Amazon Associate and Focuser Carving affiliate we earn from qualifying purchases.
Home | About Us | Privacy Policy | Terms of Use | Contact | Sitemap