- Home
- Things to carve
- Carving a mushroom
Carving a mushroom monster
Super fun step-by-step tutorial!
LEVEL: EASY
Get ready to carve a creature that’s part fungus, and total fun! This step-by-step carving a mushroom monster tutorial will walk you through the entire process of carving an adorable mushroom monster, complete with a chubby blue body and a charming little mushroom cap hat.
This little whittle is equal parts cute and quirky, and this project is a blast from start to finish. Whether you’re new to carving, or looking for something playful to tackle, this lovable little monster is perfect for you—and may even take up permanent residence on your shelf.

Guess what? You paint the eyes, nose, and mouth on this little guy, which makes it a super easy carve.
So grab your tools and let’s bring this shroomy little sidekick to life!
What you need for carving a mushroom monster
- I used a basswood block that is 1 x 1 x 3 (2.5 x 2.5 x 7.6 cm). You can easily go bigger and double or triple your dimensions. Or, use the free pattern at the end if you prefer to use a bandsaw.
- Keep a pencil handy for sketching and a ruler for measuring.
- You'll need a carving knife (make sure to strop it first).
- I always recommend using a good carving glove to protect your hands from accidental slips.
- Like to carve over your lap? Please put something flat and hard over it to protect yourself.
- You can find my painting guide for this carving a mushroom monster at the end of this tutorial. Use whatever paint brushes you prefer. Or, see my recommendations here (scroll to the bottom).
Quick video overview
You may want to view this quick video, which highlights the key steps to this tutorial.
Set up your wood block
Draw a circle on the top of the wood block (photo 1). Round all the corners (photo 2) to create a cylinder shape (completed in photo 3).
 1. Circle is sketched
 2. Rounding the corners
 3. Cylinder shape
Sketch your guidelines
Sketch a centerline on your wood block (photo 4). Also, sketch guidelines all around that are 1/2 inch (1.3 cm) and 1.5 inches (3.8 cm) from the bottom (photos 4-7) to mark the top of the feet and the bottom of the head.
Sketch one guideline that arches from the front to the sides (photos 4-7). Note: I started with two guidelines, but ending up only using the outer one to create more area for the face.
 4. Front guidelines
 5. Right guidelines
 6. Left guidelines
 7. Back guidelines
Make your first cuts
Use stop cuts to separate the head guideline all around, removing wood from underneath (photo 8). In the same fashion, separate the feet (photo 9) and the face (photo 10). Reminder: I ended up removing wood up to the first curved line to make more space for the face (visible in photo 11).
Sketch the face (photo 11). While you won’t carve the eyes, nose, or lips, it helps with placement as you shape the outer face.
 8. Separating the head
 9. Separating the feet
 10. Separating the face
 11. Face is sketched
Keep carving your mushroom monster
Round the top (photo 12). Make sure you remove all of the end grain off the top of the wood block, or your paint won’t adhere evenly.
Use stop cuts to further separate the face on each side (photo 13).
Mark wood all around that you will remove to shape the mushroom cap (photos 14,15).
 12. Rounding the head
 13. Separating the face
 14. Wood marked for removal
 15. Other side
Shape the mushroom cap
Remove the wood you marked (photo 16). I started with a pyramid cut in the corner. I also used stop cuts.
I sketched a line about 1/4 inch (0.6cm) wide around the cap to create a rim (partially visible in photo 17). I used stop cuts to separate the rim, removing wood from underneath (photo 17).
Use your knife (or you could use a V-tool) to create the ridges around the cap (photo 18). I used narrow V-cuts.
I carved the top of the face back a bit to flatten the area where the eyes will be painted (photo 19).
 16. Removing wood
 17.Separating the rim
 18. Carving the ridges
 19. Flattening eye area
Sketch more details
Sketch the arms on each side and the front of the feet (photos 20,21)
 20. Right view
 21. Left view
Carve the details
Use stop cuts to separate the outer arms (photo 22) and pyramid cuts to carve the crook of each arm (photo 23).
Use your knife to remove wood and shape the belly (photo 24) and the back (photo 25).
Split the feet (photo 26). I started with a pyramid cut here.
 22. Separating the arm
 23. Starting pyramid cut
 24. Shaping the belly
 25. Shaping the back
 26. Splitting the feet
Refine your mushroom monster
Finalize the shape of your mushroom monster all around (photos 27-30). Deepen any shallow cuts and use small V-cuts to add some wrinkles on each inside arm (completed in photos 27-29).
Shape the feet (photos 27-29). Tip: Draw the shape of the feet on the bottom before you carve. I kept the feet large to help keep the piece stable.
 27. Front view
 28. Right view
 29. Left view
 30. Back view
Finishing your mushroom monster
To get a similar look, here are the paints I used for this carving a mushroom tutorial:
- Body and feet: FolkArt calypso sky wash.
- Mushroom cap: 50% Americana buttermilk and 50% FolkArt yellow ochre wash. Then shade from the rim back with 100% Ceramcoat burnt umber.
- Mushroom ridges: DecoArt buttermilk wash.
- Nose: 100% buttermilk. I used 100% burnt umber for the dotted nostrils (applied with a toothpick).
- Eyes: Apple Barrel bright red 100%. The pupils are 100% Ceramcoat black paint with 100% buttermilk dots.
- Lips: 100% Ceramcoat black paint (applied with a toothpick).
- Mushroom dots: 100% Ceramcoat burnt umber with 100% buttermilk dots. I used a mandala tool to apply the paint.
- Finish (optional): I sprayed the piece twice with Mod Podge spray. After drying, I created a mix of 3 parts Minwax Aged Oak Gel Stain and 1 part mineral spirits to a small jar and applied with an old toothbrush. I immediately wiped the piece dry and disposed of all the paper towels outside (they are flammable). It's a bit messy so I wear plastic gloves. A little goes a long way and you can save the reserve for future carvings.
- Optional: I used a little sandpaper on the mushroom cap after sealing to create some highlights.
Looking for some general tips about painting a wood carving? Read this page.
 31. Front view
 32. Right view
 33. Left view
 34. Back view
Free mushroom monster pattern
Just increase the size of this pattern on a photocopier to fit your wood block.

Carving a mushroom monster summary
- This little carving a mushroom monster tutorial goes fast and is super easy to carve.
- You can vary the body colors to create additional mushroom monsters.
- It's a perfect carving for any wood carvers who don’t feel like fussing with eyes, nose, or lips.
You might like these
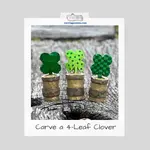
Four-Leaf Clover Wood Carving Tutorial
Easy four-leaf clover wood carving tutorial to make a fun decoration with a knife and a block of wood.
Get 50 Wood Carving & Painting Tips when you join our FREE Covered in Chips club.
Share this page
carvingjunkies.com never sells your personal information.
This site uses cookies for its operation and to enhance your experience. As an Amazon Associate and Focuser Carving affiliate we earn from qualifying purchases.
Home | About Us | Privacy Policy | Terms of Use | Contact | Sitemap