- Home
- Wood carving caricatures
- Carving caricature eyes
Carving caricature eyes easily
Tips to get the results you want.
If you find yourself screaming and cussing while carving caricature eyes you are not alone. This skill does not come easily for many carvers.
This article provides helpful information for carving eyes, simple steps you can follow, and visual examples.
Why are eyes difficult to carve?
One challenge when carving caricature eyes is that you are carving across the grain. As a result, wood can easily tear out and crumble.
Geahk Burchill suggests thinking of an eye as a mountain. Try to carve downhill when you can, and turn your work as needed, to avoid tear out. It can make a big difference in getting clean cuts (see photo 1).
 1. See the difference (grain runs vertically)
One method may not fit all
Here's a secret: a method for carving eyes that works well for one carver may not work well for every carver.
If you have been trying to mimic another carver's style, and are continually unhappy with your results, don't give up. You may need to experiment to come up with a method that suits your style of carving.
There are 3 P's to carving caricature eyes successfully:
- Practice
- Persistence
- Patience
Eyes should suit your caricature
Eyes that look good on one caricature may not be ideal for another.
If you take a look at the wonderful roughouts on caricature carver Chris Hammack's website you will see that he does not use the same eyes for every one of his carvings.
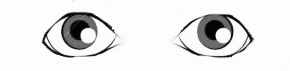
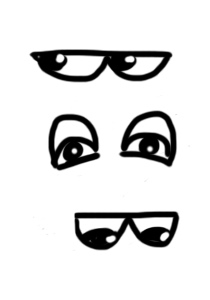
What kind of eye shape do you want?
If you want to inject a little realism into your caricature, you can carve a common human eye shape, like these illustrations below.
 Round eyes
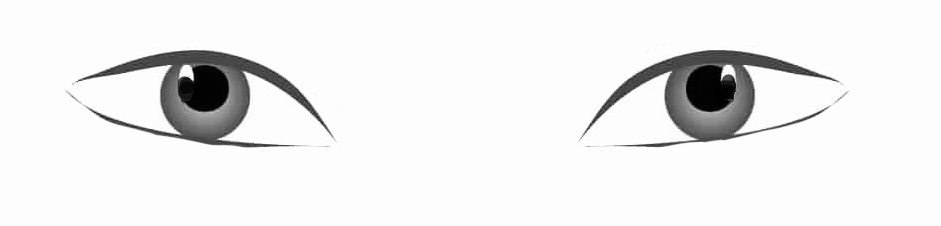 Monolid eyes
 Almond eyes
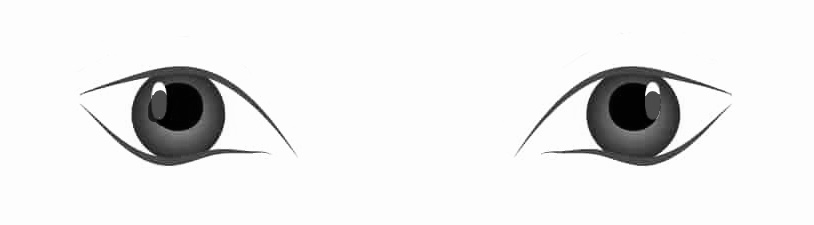 Upturned eyes
 Downturned eyes
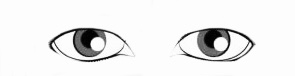 Droopy eyes
Cartoon eyes
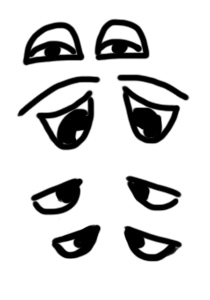
Some caricatures are enhanced by eyes that are more cartoonish than realistic. Cartoon eyes may also be a little easier to carve.
Another advantage of cartoon eyes is they can be exaggerated or humorous.
Below are some cartoon eye shapes that we like to use.

Study the human eye
Look at photos of different eye shapes (stock photo websites are a great resource) and refer to them as you practice carving caricature eyes.
Some carvers like to use a purchased study stick (photo 2) to help guide them while carving caricature eyes.
You can also create a study stick of your own on a block of wood as you practice the steps in creating an eye. Mary Finn offers nice instructions for creating a study stick for eyes in her book “Carving Egg Heads.”
 2. Purchased eye study stick
Getting facial proportions right
Once you've perfected an eye on a practice piece of wood, you need to advance to the next level, which is creating eyes in proportion to other facial features.
Don Mertz (the WoodBeeCarver) talks about the rule of thirds when creating the distance between facial features (originally from Rick Jensen) and suggests these proportions (photo 3):
- The hairline to the glabellar line (eyebrows) is 1/3
- The eyebrow to the bottom of the nose is 1/3
- The bottom of the nose to the bottom of the chin is 1/3
Caricaturist Dave Stetson offers a list of "rules" in his excellent book "Caricature Carving From Head to Toe." For example:
- The eye line should be approximately halfway between the top of the head and the bottom of the chin
- The bottom of the nose should be halfway between the eye line and the bottom of the chin
- From the side view, the top of the edge of the ear is in line with the brow of the eye
- The point where the ear is attached (on the top front edge) should be in line with the eye line
In his pamphlet "Head Proportions Made Simple," Ivan Whillock, draws a line across a drawing of a head and makes 4 tick marks (making 5 equal sections). With this method:
- The eyes fit into 2 spaces on either side of the center space
- The eyebrows should start in the corners of the eyes and are a bit farther than the outside corners of the eyes
 3. Rule of thirds
TIP: To set up a face, draw an upside down triangle (photo 4). The bottom of the triangle starts at the bottom of the nose and the other two corners of the triangle start at the center of each eye. (Whillock)
 4. An inverted triangle guides proper eye placement
General steps for carving caricature eyes
Different carvers may have different methods for carving eyes, but general steps can include:
- Creating an eye mound, typically by using a gouge or veiner to remove wood around the eye
- Marking the inner corners of the eyes with a pencil dot
- Drawing the eye and upper/lower eyelids
- Outlining the top and bottom of the eye using a knife and stop cuts
- Rounding (also known as lowering) the top and bottom of the eye into the upper and lower lids
- Extending the upper lid at the outside corner (and tucking the lower lid into the upper lid)
- Making a small triangle cut in one or both (inside and outside) corners of the eyes to create a shadow
- Drawing a bag under each eye (they do not have to be symmetrical)
- Carving the bags (using a gouge)
- Adding laugh lines around the eyes
A quick tutorial
The infographic below (photo 5) illustrates one of the ways we carve caricature eyes. The tools we use include a:
- Laminated U gouge to create the eye socket
- Helvie Hogger to outline the eyes (we prefer large blades and big-handled knives)
- Small butter knife from Deepwoods Ventures to round the eyes and shave/shape the upper and lower eyelids (photo 6)

Do you have the right tools?
If you want to carve a realistic eye with just a knife it can be done. But using a veiner or a V-tool may help you get better results (we like using a U gouge).
A specialty knife (like an axe or a knife specifically for eyes) may help, too (photo 7). There are also eye punches that allow you to make a perfect round or oval shape.
If you do not have any of these tools, carving cartoon eyes may be easier for you.
Always strop your knife and gouges (or sharpen them if needed) before carving caricature eyes. You want them to be super sharp.
TIP: A great exercise when carving caricature eyes is to take a block of wood and carve the same eye
using different knives and tools to determine which ones work best for you.
 6. For eyes, we love this butter knife
 7. Eye detail knife
Save the eyes for last
The personality of a caricature sometimes emerges or evolves while you are carving. That is why we like to wait to carve the eyes until we are close to the end of carving a caricature.
At that time, you can decide if you want realistic eyes, cartoon eyes, or want to paint the eyes on without carving them (such as for miniature carvings).
TIP: Once you master one eye shape/style, try to master another.
You will become a better carver if you keep challenging yourself.
Coping with mistakes
Mistakes are part of the learning process when carving caricature eyes. We often take one step forward and two steps back.
If you become frustrated, take a break and step away from your carving.
Fortunately, wood is a canvas that can be erased fairly easily if you make a mistake. You may be able to save your carving by shaving off the wood and starting over again.
If you make a mistake while painting eyes, you can also carve off the paint. We suggest letting the paint dry first to avoid getting it on other parts of your carving.
Painting caricature eyes
Whether you are carving caricature eyes that are realistic, or cartoonish, your steps for painting them are still consistent (always let paint dry completely after each step):
- Start by painting the whites of the eyes
- Add the colored iris (typically blue, green, or brown). We like to paint the eyes looking to the left or right for added interest (photo 8)
- Paint the pupil (typically black)
- Add a small speck of white (we use a toothpick and place it on the far corner of the pupil). For larger carvings you can increase it to a small circle
 8. Painting eyes in the corners adds movement
Your method for carving caricature eyes may evolve over time
The eyes you carve today may be very different from the eyes you carve six months or a year from now.
Try to relax and have fun when carving caricature eyes. Look at every carving session as a learning experience.
Summary
- Carving caricature eyes can be challenging for many carvers
- You may need to try several different methods and adapt them to fit your carving style
- Practice eyes over and over until you gain confidence
- Once you master one eye shape, challenge yourself by trying another
Books and online resources:
- Carving Caricature Heads & Faces (Pete LeClair)
- Caricature Carving From Head to Toe (Dave Stetson)
- Head Proportions Made Simple (Ivan Whillock)
- Carving Eyes (WoodBeeCarver)
Get 50 Wood Carving & Painting Tips when you join our FREE Covered in Chips club.
You might like these
Basic Wood Carving Cuts You Can Master and Use All the Time
7 wood carving cuts you need to learn to get great results time after time.
How to Strop Your Knives Super Sharp, Easily and Efficiently
How to strop your knives so sharp they will cut wood like butter and improve your wood carvings.
Best Gloves for Wood Carving With One Simple Hack
Best gloves for wood carving? With our simple hack, you get the ultimate protection.


Share this page
carvingjunkies.com never sells your personal information.
This site uses cookies for its operation and to enhance your experience. As an Amazon Associate and Focuser Carving affiliate we earn from qualifying purchases.
Home | About Us | Privacy Policy | Terms of Use | Contact | Sitemap