- Home
- Wood carving caricatures
- Caveman Caricature Carving
Cute caveman caricature carving tutorial
A super fun and quirky little whittle.
LEVEL: SOME CHALLENGES
Welcome to this caveman caricature carving tutorial to carve this little guy with a prehistoric twist. This step-by-step tutorial offers clear instructions and tips that will keep you carving with confidence.
The caveman is holding a club in his hand, which definitely raises the difficulty level a notch. However, you can always carve him without the club. His eyes and ears are also simple.
There are other details that are fun to carve, such as the jagged loincloth. The little bump on his Neanderthal head adds to his charm!

What you will need
Use a basswood block that is 1 x 1 x 3 inches (2.5 x 2.5 x 7.6 cm). Like many of my little whittles, you will carve off the corner to give you more carving space for the head and body. You will also carve this caveman from the top down to ensure the shape of his prominent head.
You will need a carving knife of choice, a ruler, and a pen or pencil for sketching. I also used a V-tool and U-gouge, but will include pointers for substituting a knife. A small pin vise (or a screw) will help you create a hole in his hand to hold the club, which is optional.
Always carve safely with a good glove and place a flat piece of wood (or a plastic cutting board) over your lap.
I provide a painting guide at the end of this page.
Caveman caricature carving tutorial at-a-glance
Watch this short video to get a quick overview of the full tutorial before you begin your caveman caricature carving.
Set up your wood block
Start by slightly rounding off all four corners with your knife. Mark the front (photo 1) and back (photo 2) of your wood block.
Add a guideline all around—about 1/2 inch (1.3 cm) from the bottom—to mark the bottom of the caveman’s loincloth (photos 1,2).
Add another line about 1/4 inch (0.6 cm) from the top to mark where you will carve the little head bump (photos 1,2).
Optional: Add a small box (marked H) that is about 1/2 inch (1.3 cm) square at an angle to reserve wood for the hand that holds the club (photos 1,2).
 1. Front guidelines
 2. Back guidelines
Start your caveman caricature carving
Starting at each corner, remove wood toward the center to form the small head bump (photo 3). Continue removing wood, turning your piece often to ensure the head bump is symmetrical all around (photo 4). You can round the top later.
 3. Starting small head bump
 4. Shaping bump inward
Sketch facial guidelines on your caveman caricature carving
Add a guideline to mark the bottom of the wide nose (photo 5), which extends about 1/2 inch (1.3 cm) on each side of your front corner.
Add another guideline a little more than a 1/4 inch (0.6 cm) above that guideline to mark the bottom of the eye socket (photo 5).
Make a deep stop cut across the top guideline (photo 6). Tip: Rock your knife back and forth. Meet the stop cut from above (photo 7) to remove wood and create a flat eye socket (visible in photo 8).
Start to round the head on each side (photo 8).
 5. Nose guidelines are drawn
 6. Making a stop cut
 7. Cutting from above
 8. Rounding the head
Start the nose of your caveman
Use a stop cut—and remove wood from below it—to carve the bottom of the wide nose (photo 9) on your caveman caricature carving. Now, sketch the sides of the nose and the mouth (photo 10).
I used a V-tool (Stubai #39) to carve the sides of the nose (photo 11). If you do not have one, you can hold your knife like a pencil and carve along the guideline, making a second slicing cut to remove the wood.
I used a U-gouge (Stubai #11) to carve each nostril (photo 12). Tip: Twirl the gouge from side to side, using your knife to slice off wood from underneath. If you do not have a U-gouge, you can use a knife. Turn your wrist as you carve to create the curved cuts. Then, remove the wood from under your curved cuts. Be very careful here—and use a knife that has some flex—to avoid breaking the knife tip.
 9. Making a stop cut under the nose
 10. Facial details are added
 11. Using V-tool to carve side
 12. Carving nostrils with U gouge
Carve the mouth on your caveman caricature carving
I used a V-tool to carve the mouth (photo 13). Tip: Hold your V-tool in an inverted position (photo 13), which prevents you from slipping and cutting yourself. If you don’t have a V-tool, hold your knife like a pencil and move it along the guideline. Then, make a second slicing cut.
Cut up to your previous cut so the top lip will be set back (photo 14). Add a guideline a little less than a 1/4 inch (0.6 cm) down from the top lip (photo 15) to mark the bottom lip.
Make a V-cut to start the bottom lip (photo 16), carving up to the bottom lip to shape it (completed in photo 17).
 13. Carving the mouth
 14. Cutting up to previous cut
 15. Bottom lip guideline is drawn
 16. Making V cut
Refine some details on your caveman caricature carving
Narrow the sides of the lips on your caveman caricature carving by making a stop cut at an angle (photo 17) and removing wood.
Add a neck guideline all around the front and back (photos 18,19). Note: You may have to shave off the hand box on the front and sketch it again later.
Use a V-tool (or a knife) to separate the neckline all around and cut into the neck on each side to create the shoulders (photo 20).
 17. Narrowing the lower lip
 18. Neckline on front is drawn
 19. Back view of neckline
 20. Separating neck
Add more details to your caveman
Sketch the arm on each side of your caveman caricature carving and add boxes for the hands (photos 21,22).
Use your V-tool to slightly separate the arms and hand boxes (photo 23), which you will deepen and refine later. Or, you can make stop cuts with your knife. Note: Do not separate the line between each hand box and arm—because the caveman isn’t wearing a shirt.
Add a guideline that is about 1/2 inch (1.3 cm) higher than your first guideline to mark the top of the loincloth (photo 24).
 21. Right arm is drawn
 22. Left arm is drawn
 23. Separating the arm
 24. Loincloth guideline is drawn
Carve more details on your caveman
Separate the top of the loincloth all around using stop cuts (photo 25).
Use your knife (or a V-tool) to cut the jagged bottom of the loincloth all around (photo 26). Tip: Use pyramid cuts and vary the length of your cuts to add interest.
Use a wide pyramid cut to carve the crook of each arm (photo 27). This will give you access to shape the arms, hands, and lower body (completed in photos 28-31).
 25. Separating the loincloth
 26. Carving the edges of the loincloth
 27. Making a pyramid cut
Add final details to your caveman
Once you have the basic shape of the arms, hands, and body of your caveman caricature carving (you will noodle it later), sketch on more details, including the eyes, cheek lines, smile lines, fingers, and belly button (photo 28). Note: Make sure you have enough wood depth to make a hole in the hand that holds the club (optional).
Also, sketch the ears on each side (photos 29,30).
Draw a center line where you will split the legs on the front and back (photos 28, 31). Mark where you will remove wood on each side to shape the feet (photos 29,30).
 28. Front view of sketched details
 29. RIght view of details
 30. Left view of details
 31. Back view of details
Carve the final details on your caveman
Use a small pin vise (or a Dremel tool or metal screw) to make a hole through the hand where the club will be inserted. It’s important to do this before you carve the fingers because the wood will be more stable. Angle the hole as close to the body as possible (photo 32).
After the hole is created, use shallow V-cuts to separate the fingers. Be careful here as the wood can crumble. If you run out of room for a thumb on the hand with the hole, you won’t notice it.
 32. Creating hole for club
 33. Checking angle of the hole
Finish your caveman caricature carving
Use stop cuts to separate the ears all around and use V-cuts for the inner ear (photo 34).
Separate the eyes by pushing your knife along the guideline (photo 35) with your thumb, and make a second slicing cut to cleanly remove wood. You could also hold your knife like a pencil. Or, you could make a stop cut and remove wood from the inside of the eye socket. You will add the pupils and eyebrows later with paint.
Make a stop cut on each side of the marked caveman (photo 36) to remove wood and roughly shape the feet.
Make a wide V-cut to split the legs about a quarter of the way through the wood (photo 37). Tip: For small caricature carvings, don’t split the legs completely for added stability and to avoid breaking them.
Sketch the toes on each side of your caveman (photo 37 ) and carefully separate them. Tip: Use V-cuts on the front of the toes before removing wood from the tops of the toes.
Use a small pyramid cut (or micro U-gouge) to carve the belly button (visible in photo 40).
Once the feet and toes are shaped, create an arch under each foot by turning your wrist as you remove wood (completed in photos 40,43). Be very careful here.
I carved the club from a stick found while camping (photo 39). You could also use a scrap piece of wood. The end of the club needs to be narrow enough to slip into the hole. You will use wood glue to secure it in place after painting.
 34. Carving the ear
 35. Carving the eyes
 36. Carving the feet
 37. Splitting the legs
 38. Toes are sketched
 39. Stick used to carve the club
Paint your caveman caricature carving
Before painting, clean up your cuts, especially on the loincloth. Add some V-cuts in the crook of the arms. I also made small pyramid cuts in corners of the arms, nose, and ears to create shadow. Use whatever acrylic paints and brushes that you want. Read this article for great tips on painting.
To get this look use:
- Skin: I brushed the flesh with boiled linseed oil and let it dry about 10 minutes before adding a Ceramcoat tawny wash.
- Eyes: 100% CraftSmart vanilla for the eye whites. 100% Ceramcoat black for the pupils and eyebrows. I used a black magic marker inside the pupils, which ended up looking a little blue.
- Loincloth: Ceramcoat pumpkin wash and 100% Ceramcoat black for the spots.
- Nose and cheeks and tops of ears: Winsor and Newton red oxide in a very diluted wash. Apply in layers.
- All cutlines and cracks: Black wash.
- Club: DecoArt burnt umber applied in lines with a toothpick. Glue in place with wood glue.
 40. Front of painted caveman
 41. Right view of painted caveman
 42. Left view of caveman
 43. Back of painted caveman
Caveman caricature carving pattern
If you prefer to carve your caveman caricature with a pattern, photocopy this to size to fit your wood block.

Get 50 Wood Carving & Painting Tips when you join our FREE Covered in Chips club.
You might like these
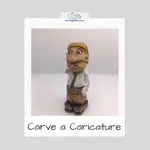
Caricature Carving Tutorial Using Just A Knife
Free caricature carving tutorial using just a knife with step-by-step instructions and photos.
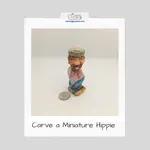
Wood Caricature Carving Tutorial With Just a Knife
Wood caricature carving tutorial of our adorable Hippie Yippie with easy instructions and guided photos.
Carving Caricature Eyes Easily
Carving caricature eyes is easy with these simple steps and tips to help you carve perfect eyes.
Share this page
carvingjunkies.com never sells your personal information.
This site uses cookies for its operation and to enhance your experience. As an Amazon Associate and Focuser Carving affiliate we earn from qualifying purchases.
Home | About Us | Privacy Policy | Terms of Use | Contact | Sitemap