- Home
- Things to carve
- Chip carving tutorial
Simple chip carving tutorial
Learn how to make a beautiful maritime coaster.
Looking for a chip carving tutorial that is simple in design yet elegant in presentation?
Whether you are new to chip carving--or are looking for an easy gift to make--you will have fun with this tutorial. It was created by our friend Olga Evistigneeva from Saint-Petersburg, Russia. You can see more of Olga's lovely chip carvings on Instagram.

What you will need for this chip carving tutorial
- Basswood carving disc that is 12 cm in diameter (4.7 inches).
- Pattern template (provided at end).
- Carving stab knife.
- Black carbon paper.
- Pencil.
- Double-sided tape.
- Acrylic paints.
- Acrylic lacquer (for your final coat).
- Safety gloves are also recommended for this chip carving tutorial.
 Use precut round basswood discs
1. Size and cut the chip carving tutorial template
- Cut the provided template to size (increase or decrease as needed) for this chip carving tutorial.
- Turn the template over and place a small piece of double-stick tape on the backside (photo 1).
 1. Place double-sided tape on the back of the template
2. Place the chip carving tutorial template on the basswood disc
- Carefully stick the template to the basswood disc, centering it as accurately as possible.
- Slide a piece of carbon paper under one side of the template and trace the pattern with a pencil (photo 2)
- Repeat on the other side (photos 2,3).
 2. Use carbon paper to trace the pattern on the basswood
Tip: A little double-sided tape keeps the template in place, especially with large patterns.
 3. The pattern is transferred to the basswood
3. Make your undercuts in this chip carving tutorial
- Make an undercut in each corner (top and bottom) of the rope pattern (photo 4).
- Your undercuts should not be very deep (about 1 to 2 mm or 5/6 of an inch).
 4. Make an undercut in each corner of the rope pattern
4. Carve the top and bottom of the rope pattern
- Cut along the top and bottom outline of the rope pattern (photo 5).
- Holding your knife at an angle between the inner circle and the bottom outline of the rope pattern (photo 6) to remove wood. Be careful as most mistakes happen during this step of the chip carving tutorial.
- Also cut between the outer circle and the top outline of the rope pattern to remove wood (photo 7)
- Clean up your cuts (photo 8).
 5. Cutting along the top outline of the rope pattern
 6. Cutting between the inner circle and the bottom outline of the rope pattern
 7. Cutting between the outer circle and the top outline of the rope pattern
 8. Clean up your cuts as you go
5. Carve the inner rope lines
- First make a shallow undercut along the inner rope line, from the top to the bottom (photo 9).
- Make a chip cut at the top and one at the bottom to remove wood (photo 10).
 9. Making a shallow undercut along the rope line
 10. Making a chip cut at the top and bottom
6. Paint the chip carving tutorial coaster
- Apply 2 to 3 coats of acrylic white paint for your base. Let each coat dry for an hour (photo 11).
- Using a narrow brush, paint the rope with aquamarine acrylic paint (photo 12) and let it dry for one hour.
- Optional: If you prefer something other than the maritime look, you can use Danish oil (natural wooden stain) or another acrylic paint, but still finish with an acrylic lacquer.
 11. Apply 2 to 3 coats of white acrylic paint
 12. Painting the rope with aquamarine paint
Chip carving tutorial tip: you can mix blue and green paint to get a similar color (photo 13)
 13. No aquamarine? Just mix blue and green paint together!
7. Finish your chip carving tutorial coaster
- Use an acrylic lacquer to finish the coaster and let it dry for 24 hours (photo 14).
- You need lacquer because it makes your coaster resistant to water and grease.
 14. Seal your coaster with acrylic lacquer
 Enjoy your finished maritime coaster!
Free chip carving tutorial pattern

Chip carving tutorial summary
- This chip carving tutorial can provide hours of enjoyment.
- It is great for beginners as well as those with more experience who want a simple design.
- The finished coaster makes an elegant gift or a fashionable addition to your home.
- For more maritime color schemes, visit this website.
 Simple yet elegant chip-carved coaster
Get 50 Wood Carving & Painting Tips when you join our FREE Covered in Chips club.
You might like these
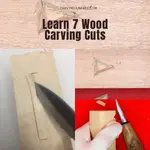
Basic Wood Carving Cuts You Can Master and Use All the Time
7 wood carving cuts you need to learn to get great results time after time.
How to Strop Your Knives Super Sharp, Easily and Efficiently
How to strop your knives so sharp they will cut wood like butter and improve your wood carvings.
Best Gloves for Wood Carving With One Simple Hack
Best gloves for wood carving? With our simple hack, you get the ultimate protection.


Share this page
carvingjunkies.com never sells your personal information.
This site uses cookies for its operation and to enhance your experience. As an Amazon Associate and Focuser Carving affiliate we earn from qualifying purchases.
Home | About Us | Privacy Policy | Terms of Use | Contact | Sitemap