- Home
- Things to carve
- Christmas gnome wood carving
Cute Christmas gnome wood carving
Easily carve a simple holiday gnome
LEVEL: EASY
Ready to bring a little holiday magic to life by creating a Christmas gnome wood carving with just a block of wood and a trusty knife?
In this step-by-step tutorial, I’ll guide you through the process of carving your very own charming Christmas gnome.

This easy-to-follow guide will have you carving this adorable gnome—with confidence—in no time. He’s makes a perfect little stocking stuffer!
So grab your knife, settle in, and let’s create something fun together. Because what’s better than a hand-carved gnome to spread some Christmas cheer?
Supplies needed
- I used a piece of basswood that is 1 x 1 x 4 inches (2.5 x 2.5 x 10 cm). You can always go bigger by doubling or tripling the dimensions. I’ve included a free pattern at the end of the tutorial if you want to use it.
- One knife should do the trick (of course, feel free to use a V-tool if you want).
- You will need a writing instrument and a ruler for your guidelines.
- Always carve safely with a good carving glove. And protect your lap with something hard if you are a lap carver.
- Use whatever acrylic paints and brushes you like. I’ve included a painting guide at the end of this tutorial if you want a similar look.
Preview the full tutorial
It may help to watch this short video of the key steps before you begin your Christmas gnome wood carving.
Set up your Christmas gnome wood carving
You will carve off the corner for this Christmas gnome wood carving.
Sketch your guidelines:
- The middle of the hat is about 2 inches (5 cm) from the top of the wood block. It angles down on each side (photos 1-4).
- On the back, the hat is about 2.5 inches (6.4 cm) from the top in the middle. Reserve some wood for the pom-pom (photos 1-3).
- Draw a line all around that is about 3.5 inches (8.8 cm) from the top of the wood block to mark the top of the boots (photos 1-4).
- Draw a circle for the nose that extends about 1/2 an inch (1.3 cm) on each side (photos 1-3).
 1. Front guidelines are drawn
 2. Right view of guidelines
 3. Left view of guidelines
 4. Back view of guidelines
Make your first cuts
Separate the hat and feet (photo 5). Use stop cuts and remove wood from below (for
the hat). Or, you can use a V-tool here. Repeat the same process to separate the top of the boots all around. Tip: Start at the corners and work your way toward the middle.
Mark wood around the hat for removal (visible in photos 6,7). Carve back the hat on the front and start to remove wood around the hat, saving space for the pom-pom (photo 6).
Remove wood from the sides. Extend the pom-pom lines across the back to ensure you reserve enough wood to work with (photo 7).
Once the hat takes shape, use a wide V-cut to create a notch on the left side (photo 8). Be careful here not to break your knife!
 5. Separating the hat
 6. Shaping the back
 7. Removing wood from the sides
 8. Notching the hat
Sketch some details
Add a line where you will carve the hanging part of the hat (photo 9). You can use a narrow V-cut or a stop cut to separate it.
Mark where you will split the wood on the front (photo 9) and the back (photo 12) to separate the boots.
Sketch the mustache under the nose (photos 9-11). Each side of the mustache is about 3/4 of an inch (1.9 cm) wide.
Add the belt buckle and belt (photos 9-11) all around. The belt is about a 1/4 inch (0.8 cm) wide. The buckle is about an inch (2.5 cm) square.
Add the arms (photos 9-12) and mittens (photos 9-11). The arm—and mittens—are about a 1/4 inch (0.8 cm) wide.
 9. Front details are sketched
 10. View from right
 11. View from left
 12. Back details are sketched
Separate the details
Use stop cuts to separate the nose, cheeks, and mustache (photo 13). Continue by separating the arms, mittens, and belt (photo 14).
Use a wide V-cut to separate the legs on the front and back (photo 15). Tip: Don’t separate the legs completely, which will give your Christmas gnome wood carving more stability.
Shape the boots (completed in photos 16-19). Be careful not to remove too much wood or your gnome may tip over.
 13. Separating face details
 14. Separating the arms
 15. Separating the legs
Refine your Christmas wood carving
Refine the overall shape of your Christmas gnome wood carving (completed in photos 16-19). I added some narrow V-cuts to define the mustache (you could also use a V-tool here).
You can add a brim to the hat (using stop cuts), making narrow V-cuts to notch the brim all around.
You can also notch the belt all around with narrow V-cuts (completed in photos 16-19).
 16. Front view of painted gnome
 17. Right view of painted gnome
 18. Left view of gnome
 19. Back view of gnome
Painting guide
If you’re new to wood carving, check out this great page on painting your wood carvings. To get a similar look, use these paints:
- Hat trim, beard, mittens, pom-pom, and hat decoration: AppleBarrel antique parchment wash.
- Nose and cheeks: Flesh color wash. I mixed some CraftSmart natural buff with Apple Barrel peach.
- Hat and suit: DecoArt Santa red wash.
- Boots and belt: Ceramcoat black wash.
- Tongue: Apple Barrel cameo pink 100%.
- Snow stripes on hat, arms, and pants: 100% AppleBarrel antique parchment applied with a toothpick. I made one dot in the middle and 2 dots on each side.
- Finish (optional): Seal with polyurethane spray twice to protect the carving. Then use turd polish or another antiquing stain.
- To make turd polish, I use 3 parts Minwax Aged Oak Gel Stain and 1 part mineral spirits. Apply with an old toothbrush (I wear rubber gloves). Blot with paper towels immediately to remove most of the polish. Always dispose of your paper towels outside in the trash. They could self combust!
Christmas gnome wood carving pattern
Photocopy this pattern to size to fit a larger block of wood.

Christmas gnome wood carving tutorial summary
- This little Christmas gnome wood carving is easy to make.
- It makes an adorable stocking stuffer for your friends and family.
- You could also use it to adorn a table top or a window sill.
- You can keep the painting simple or add more details.
- Adding turd polish really brings this little whittle to life.
You might like these
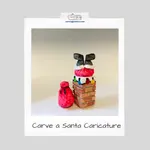
Santa Caricature Carving With a Knife From a Block of Wood
Santa caricature carving tutorial from a block of wood using primarily a knife to make a beautiful Christmas ornament.
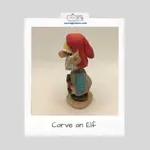
Christmas Elf Wood Carving Tutorial
This elf wood carving is easy to make and is the perfect ornament or decoration for Christmas.
Easy Christmas Tree Carving Tutorials With Just A Knife
This Christmas tree carving tutorial provides you with a trio of beautiful trees that are easy to carve.

Get 50 Wood Carving & Painting Tips when you join our FREE Covered in Chips club.
Share this page
carvingjunkies.com never sells your personal information.
This site uses cookies for its operation and to enhance your experience. As an Amazon Associate and Focuser Carving affiliate we earn from qualifying purchases.
Home | About Us | Privacy Policy | Terms of Use | Contact | Sitemap