- Home
- Christmas wood carving ideas
- Santa caricature carving
Santa caricature carving tutorial
Make this fun ornament for yourself or to give as a gift.
LEVEL: SOME CHALLENGES
Our Santa caricature carving is guaranteed to have people grinning from ear to ear. Display it on a table with your holiday decorations or add a hook to one of the boots to hang from a Christmas tree (hang optional bag separately).

What you will need for this Santa caricature carving tutorial
- Basswood block (ours is approximately 1-inch x 1-inch by 3-inches (2.54 x 2.54 x 7.62 cm), but you can easily make it bigger if you want).
- Wood carving knife.
- Paint and paint brushes (painting guide provided).
- Pencil to draw on details.
- Carving gloves (for safety).
Santa caricature carving tutorial at a glance
1. Draw your guidelines for carving the chimney bricks
- Draw a horizontal line about 1.5 inches (3.81 cm) from the top all around (top of chimney).
- TIP: if making a taller carving, draw this line a little less than halfway from the bottom.
- Draw a second line 1/2-inch (1.27 cm) lower (bottom lip of chimney for hanging lights).
- Draw multiple horizontal lines 1/4 inches (0.635 cm) apart, all around for the brick rows (you want a little lip at the bottom for grout).
- Add short vertical lines (alternate placement in each row so they are not uniform).
- See photos 1 and 2 to guide your Santa caricature carving lines.
 1. Front of pattern
 2. Back of pattern
2. Define the bricks
- Using your knife, cut the horizontal brick lines with stop cuts (photo 3) and remove a little wood from underneath.
- Make the vertical cuts with short V-cuts (photo 4).
- Shave a little wood off the edge of each row so they do not look boxy (photo 5).
 3. Cutting the brick lines horizontally
 4. Short vertical cuts are made
 5. Shaving off the edges
3. Add the Christmas lights
- Add a few circles randomly between the top of the chimney and the bottom lip. We insert a U gouge lightly into the wood and twirl it to create a uniform circle (see example in photo 6). If using a knife, draw the circles before cutting.
- TIP: Make the placement of the lights random.
- Using a knife, round each light (similar to how you round an eyeball into an eyelid; photo 7).
- Draw the top of each light and the light string around (photo 8).
- Using a knife, define the string line and the light tops (photo 9) on the Santa caricature carving.
 6. Making a circle with a U gouge
 7. Rounding the circular light
 8. Draw on the light string and tops
 9. Light string and tops are defined
4. Start the lower body of the Santa caricature carving
- Draw 2 oval shapes on top of the block to define the bottom of the shoes. Mark surrounding wood to remove (photo 10).
- Round all 4 corners from the top of the chimney up (photo 11). Santa's legs will be facing the corner on the front (be careful not to remove too much wood from the corners).
- After removing excess wood around the boot bottoms, draw on the boots, and mark wood to remove later when you split the legs in the front and back (photos 12,13).
 10. Bottom of boots are drawn and wood to remove is marked
 11. Sides are rounded
 12. Front view of drawn boots and where legs will be split
 13. Back view of Santa caricature carving
5. Continue working on the body
- Using V-cuts, carefully start to remove wood to create the heel of the boot on each side (photo 14). The end grain will be difficult to remove so take your time.
- Using a stop cut, separate and define the top of the boot in the front and back (it may help to turn it right side up to see how it looks). Then draw on the pant cuffs (photos 15,16).
 14. Cutting and shaping the heel of the boot
 15. Front with top of boot defined and pant cuff drawn
 16. Back view
 17. Left view of boot and cuff
 18. Right view of Santa caricature carving
6. Shape the boots and define the pant cuffs
- Separate the pant cuffs all around. Use a stop cut and remove wood from underneath (photos 19, 20).
- TIP: make deep stop cuts at the corners to avoid wood from crumbling.
- Round and shape the belly and the tush (photos 19, 20).
 19. Front view of defined pants cuff (back is similar)
 20. Left view (right is similiar)
7. Split the legs
- Slight design change: Slice off the heels of the boots (they were too fragile).
- Mark where you will (later) make little V-cuts for the new heels on the front and back (photos 21,22).
- Very gently make a small V-cut between the legs. Continue to use V-cuts to split them. Take your time and make clean cuts. Stop a little past each pant cuff (photos 21,22).
 21. Legs are split (front)
 22. Back of legs are split
8. Add details to the Santa caricature carving
- Using your knife, make a small V-cut on the back of each boot to create a new heel (photos 23, 26).
- Shape the boots to your liking (be careful not to break them).
- Optional: carve Santa's bag from a scrap piece of wood. Carve two lines on the front for the the drawstring and a line around the bag (not visible until painted). Make a couple of V-cuts on top of the bag and around the bag to create folds (photos 23, 26).
- Cut a few wrinkles near the crotch of the pants in the front and rear (photos 23,26).
- Cut a little Y lines for the tush (photo 26).
 23. Completed carving (front) with bag
 24. Left view
 25. Right view
 26. Back view with tush line
8. Paint the carving
 Front of painted Santa caricature carving
 Left view
 Right view
 Back view
To get this look (all paints are Craftsmart except where noted):
- Pant cuffs and snow on chimney: 100% white.
- Brick grout: Mix 1 drop dark gray, 1 drop white, and 3 drops water.
- Bricks: Mix 1 drop blueberry frost with 1 drop yellow, 1 drop bright red, 1 drop dark brown, and 10 drops of water. Let dry and randomly add 1-2 additional coats on a few bricks.
- Pants and bag: Mix 1 drop Badger crimson and 10 drops water.
- Yellow lights: 100% badger yellow.
- Blue lights: Mix 1 drop badger blue with 10 drops water.
- Green lights: Mix 1 drop badger green with 5 drops water.
- Red lights: 1 drop 100% Badger crimson.
- Boots and light sockets: Mix 1 drop black with 10 drops of water.
- String for lights: 100% black applied with a toothpick.
- Black lines on bag: 100% black applied with a toothpick.
Summary
- It is great when a Santa caricature carving can make people grin from ear to ear.
- This little ornament is perfect as a holiday decoration and also makes a lovely gift.
- To learn more about caricature carving visit the Caricature Carvers of America website.
Get 50 Wood Carving & Painting Tips when you join our FREE Covered in Chips club.
You might like these tutorials
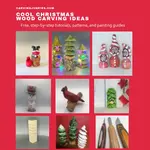
Cool Christmas Wood Carving Ideas
Fun Christmas wood carving ideas you can easily make for holiday ornaments or decorations.
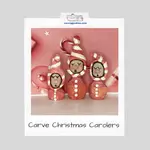
Wonderful Wooden Christmas Carolers
Carve these wooden Christmas carolers with our easy step by step tutorial with tons of progress photos.
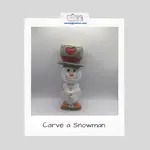
Carving a Snowman With A Knife Tutorial From A Block of Wood
Carving a snowman on ice skates from wood with a knife is easy with our free tutorial.
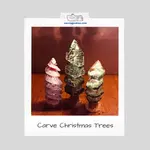
Easy Christmas Tree Carving Tutorials With Just A Knife
This Christmas tree carving tutorial provides you with a trio of beautiful trees that are easy to carve.
Share this page
carvingjunkies.com never sells your personal information.
This site uses cookies for its operation and to enhance your experience. As an Amazon Associate and Focuser Carving affiliate we earn from qualifying purchases.
Home | About Us | Privacy Policy | Terms of Use | Contact | Sitemap