- Home
- Flat plane carving
- Flat plane wood carving
Fun flat plane wood carving tutorial
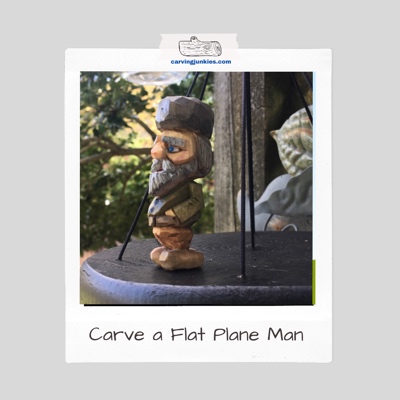
You will carve this little man using minimal cuts.
Flat plane wood carving is a wonderful style of carving that can also help you hone your carving skills. The goal is to carve your piece with large, clean cuts that are kept to a minimum.
While carving this little guy, the wood “spoke” to us to make the same type of hat that was worn by Omar Sharif in the epic movie Dr. Zhivago.
So we departed a little from the traditional Sandinavian characters that are the hallmark of this distinctive style of carving.
What you will need for this flat plane wood carving tutorial
- One basswood block. Ours is 1-inch x 1-inch by 3-inches (2.54 x 2.54 by 7.62 cm), and you can easily make it bigger if you want.
- Wood carving knife with a straight edge (we use an OCC Tools knife).
- Acrylic paints and paint brushes of choice (painting guide is provided at the end).
- Minwax natural gel stain (optional for a natural flesh color).
- Pencil to draw on the design (magic marker is optional).
- Good carving gloves (as always for safety).
Flat plane wood carving tutorial at a glance
1. Round 3 of the corners
- Keep the corner on the front of the block, but carve off the other 3 corners to create a cylinder shape (photos 1,2).
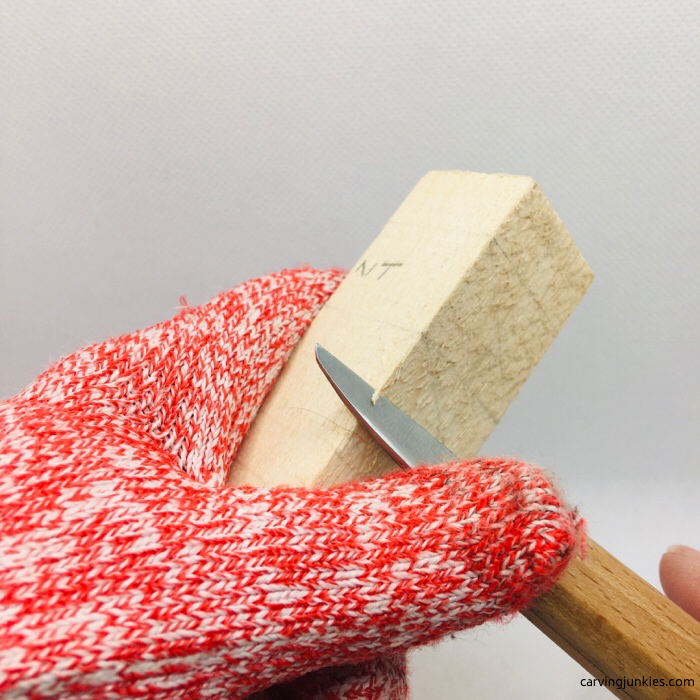 1. Carve off 3 of the corners
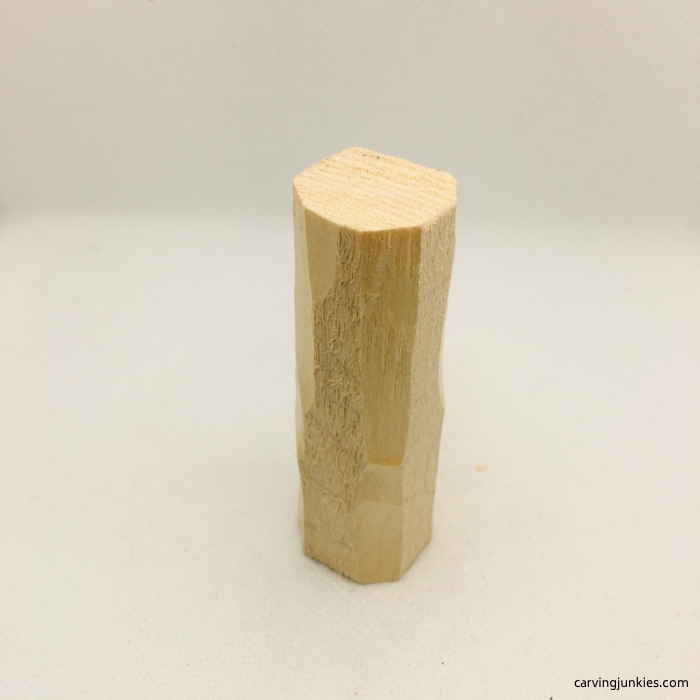 2. Cylinder shape around the back
2. Draw the flat plane wood carving guidelines
- Draw your first line 1/2-inch (1.27 cm) down from the top to mark the bottom of the hat (photo 3).
- Draw a second line 1 1/4-inches (3.175 cm) from the top to mark the neck. However, we're adding a beard in the front so draw a triangle to reserve wood where the beard will be (photo 3).
- Draw a third line 1/4-inch (0.0635 cm) from the bottom to mark the top of the feet (photos 3-5).
- Draw a fourth line 0.75 of an inch (1.905 cm) above the feet to mark where you will cut the knees (photo 3).
- Draw a fifth line 1 1/2-inches (3.81 cm) from the bottom on the back side to mark where you will cut the back of the knees (photos 5,6).
- Draw a line to mark the hairline on each side of the face of the flat plane wood carving (photos 4,5).
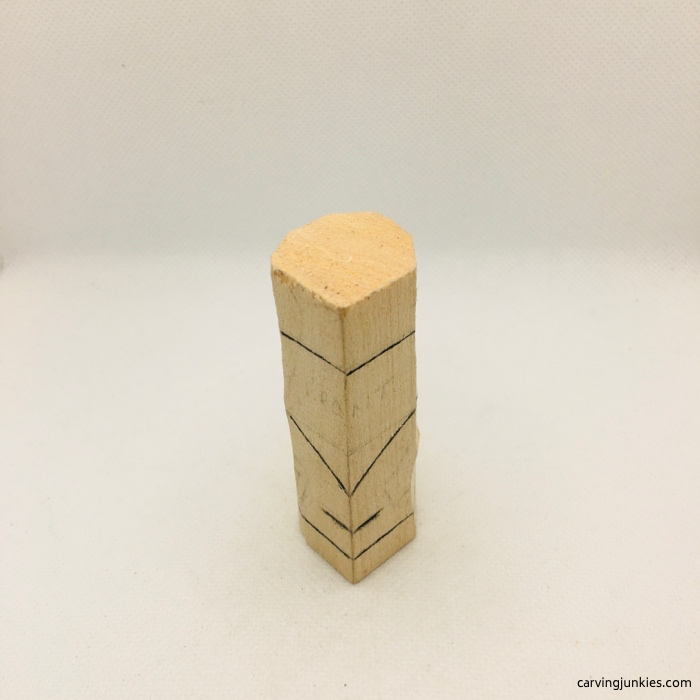 3. Front guidelines are drawn
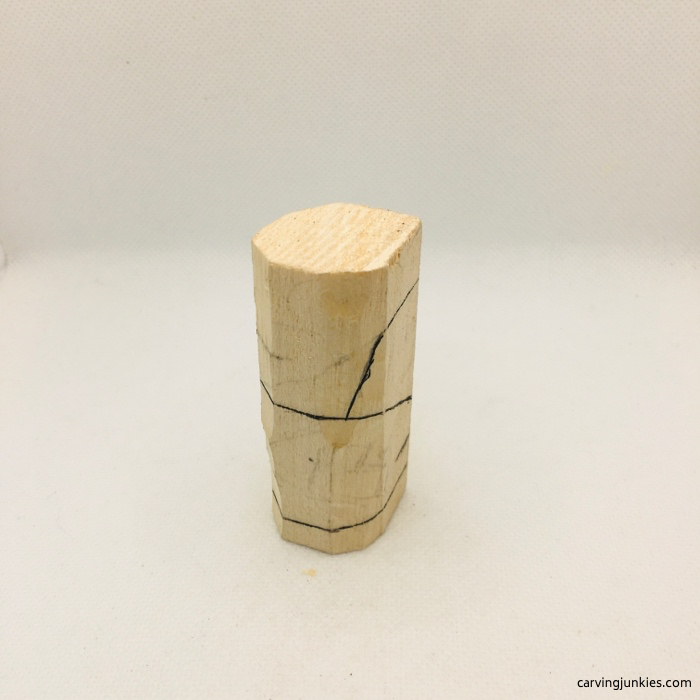 4. Right view
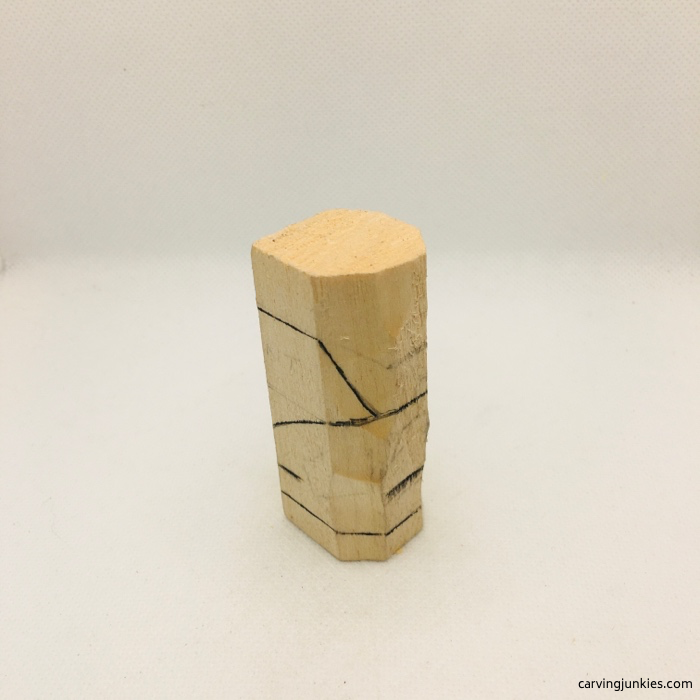 5. Left view
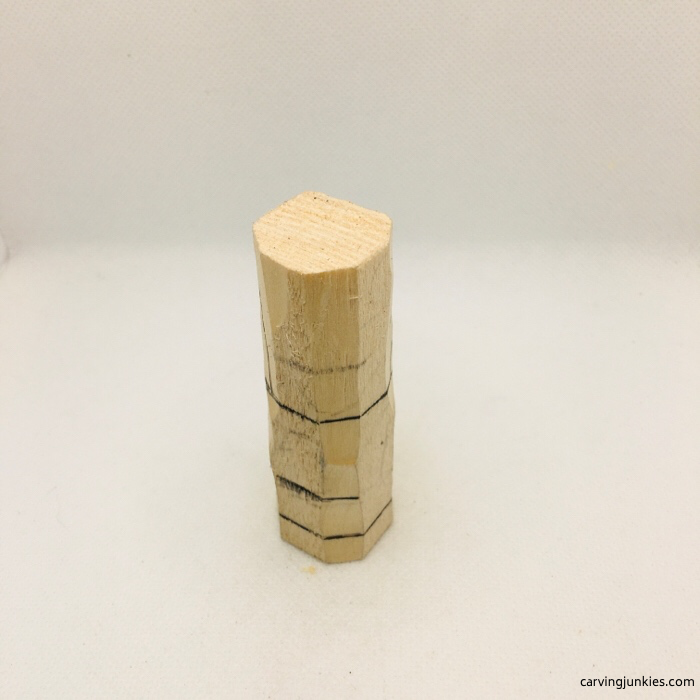 6. Back view
3. Separate the feet from the body of the flat plane wood carving
- Start with a stop cut (photo 7) along the guideline to separate the feet all around, removing wood from underneath (photo 8).
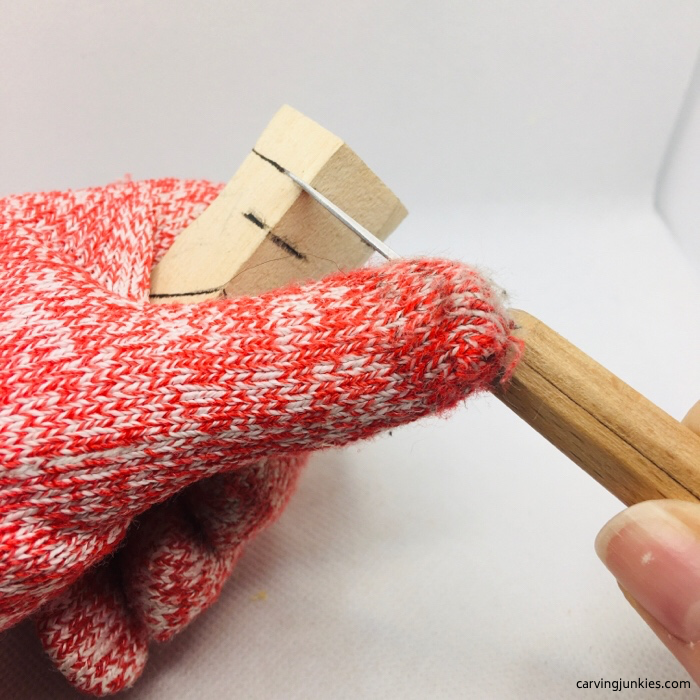 7. Separate the feet all around
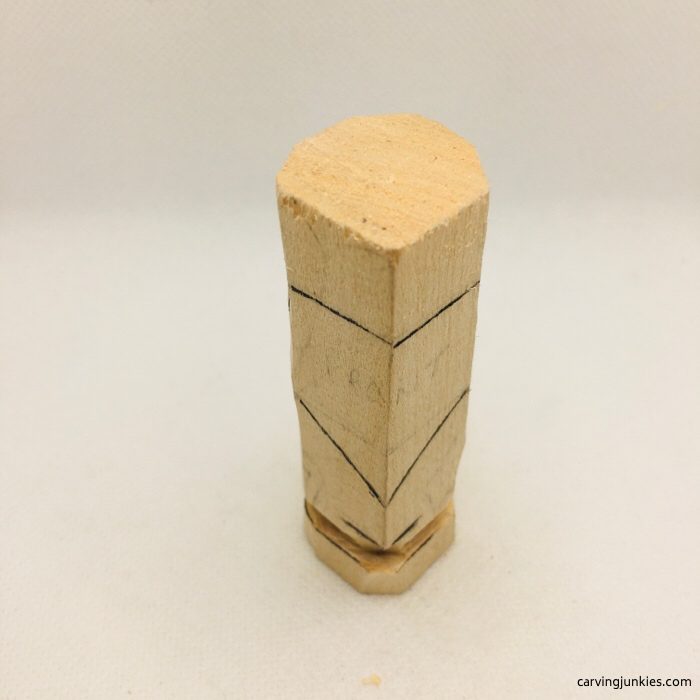 8. Front view of separated feet
4. Separate the head all around
- Use a stop cut along the guideline to separate the head and beard of the flat plane wood carving (photo 9).
- Separate the top of the head from the bottom of the hat (photos 9-12).
- Use a V-cut to remove wood from the back and front of the knees (photos 10-12).
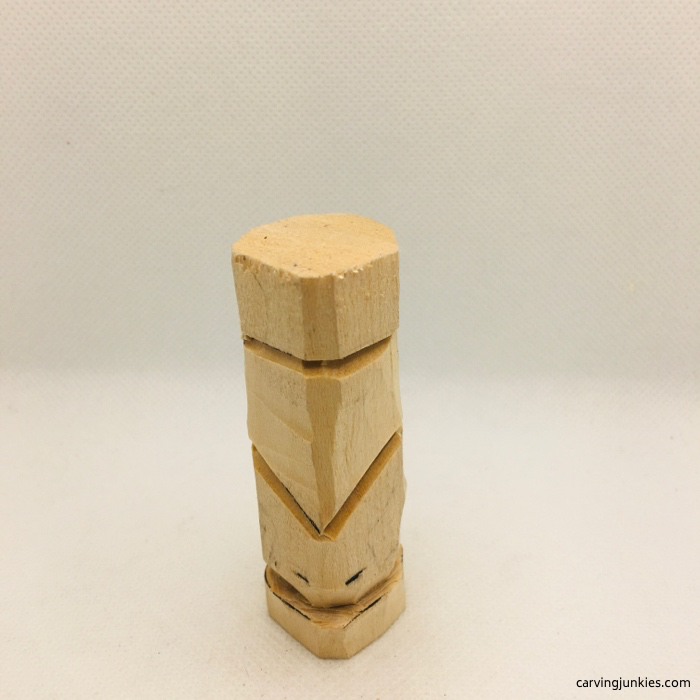 9. Top of the head and beard are separated
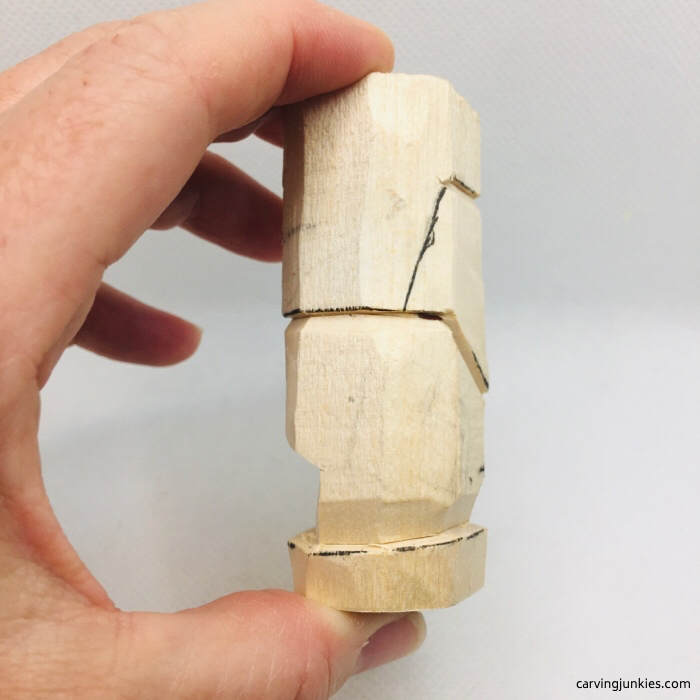 10. Right view
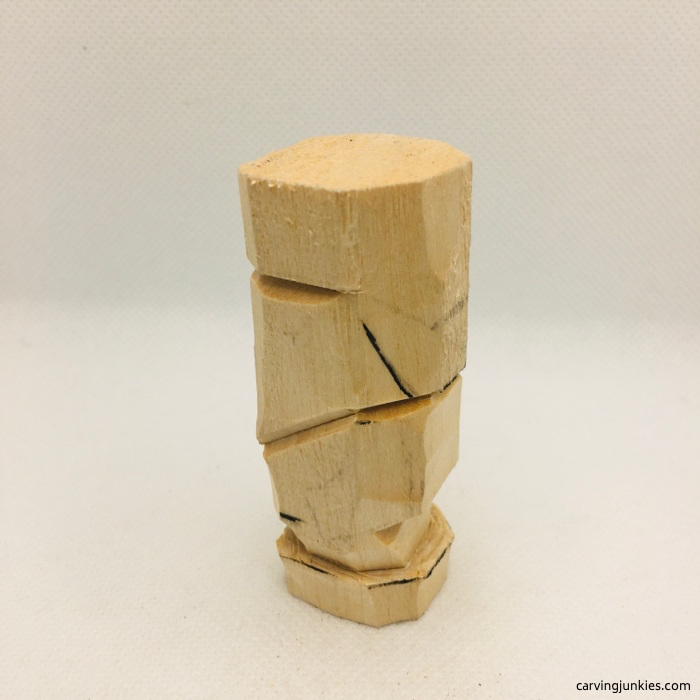 11. Left view
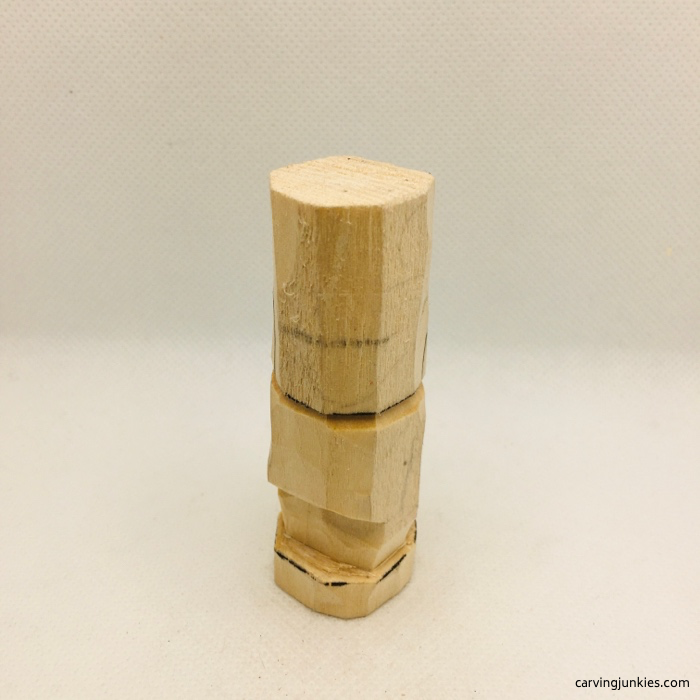 12. Knees are cut on the back
5. Draw the arms of the flat plane wood carving
- Draw the arms on each side, slightly extending them around to the front (photos 13-15).
- Mark where you will cut the arms on the back of the flat plane wood carving (photo 16).
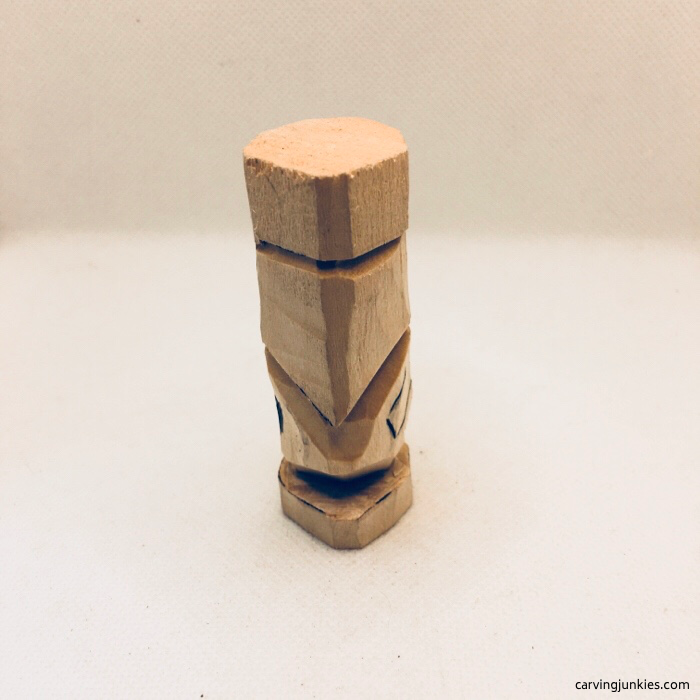 13. Arms are drawn on the front
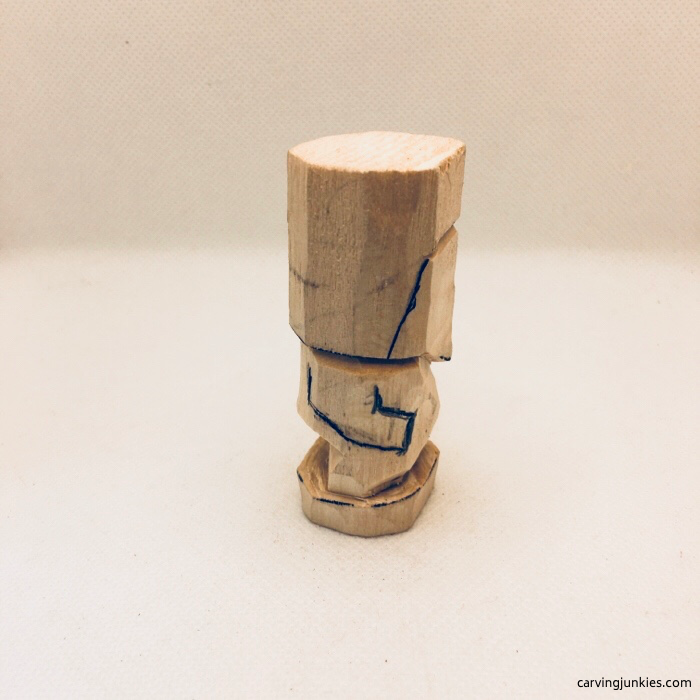 14. Right view
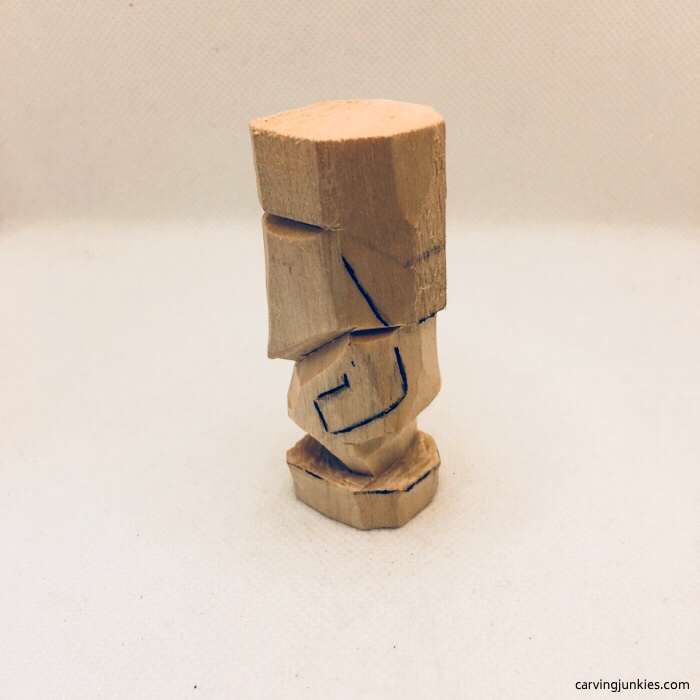 15. Left view
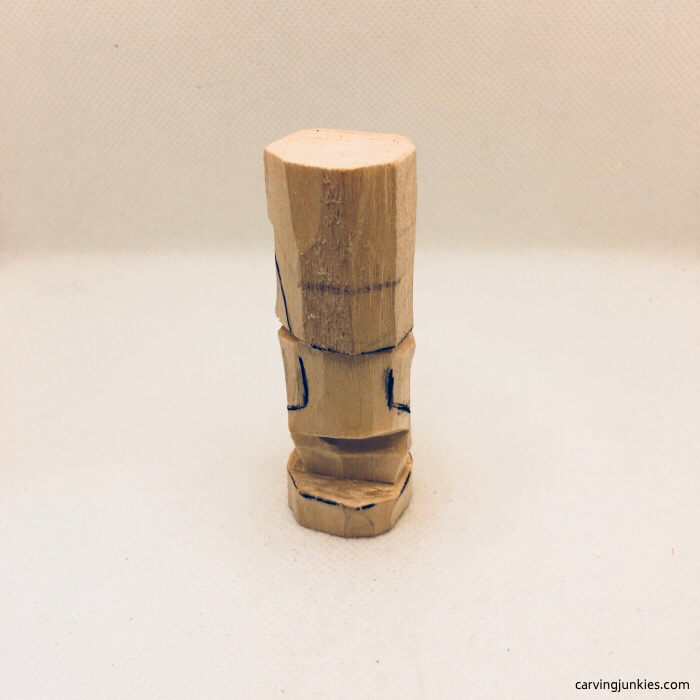 16. Back view
6. Cut the arms of the flat plane carving
- Use a pyramid cut to remove wood to create the crook of each arm (photos 17-19).
- Use a stop cut to define the outer part of each arm (photos 18,19).
- Make a deep cut across the top of each arm at a slight angle to create the shoulders (photos 18,19).
- Use a stop cut on each arm on the back, removing wood up toward the neck of the flat plane wood carving (photo 20).
Tip: check for symmetry when you are carving the arms,
especially from the crook of the elbow up to the shoulder.
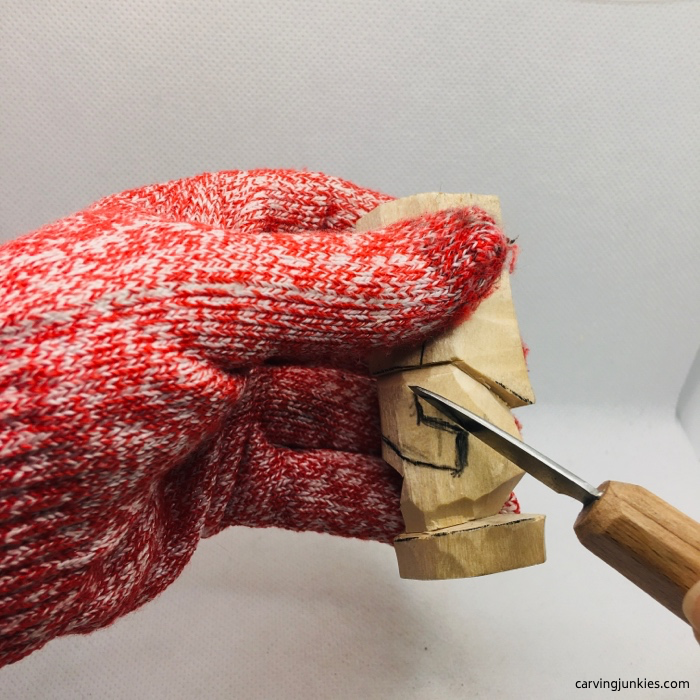 17. Starting to cut arms
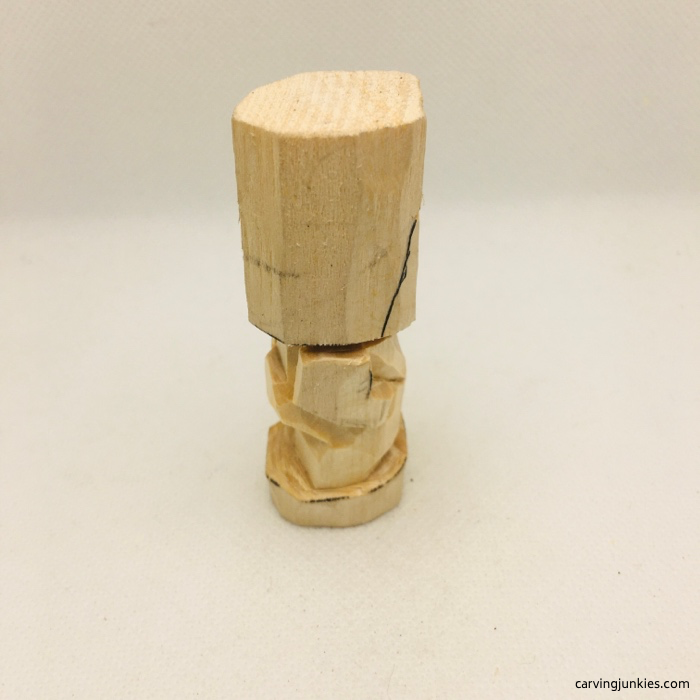 18. Right arm is cut
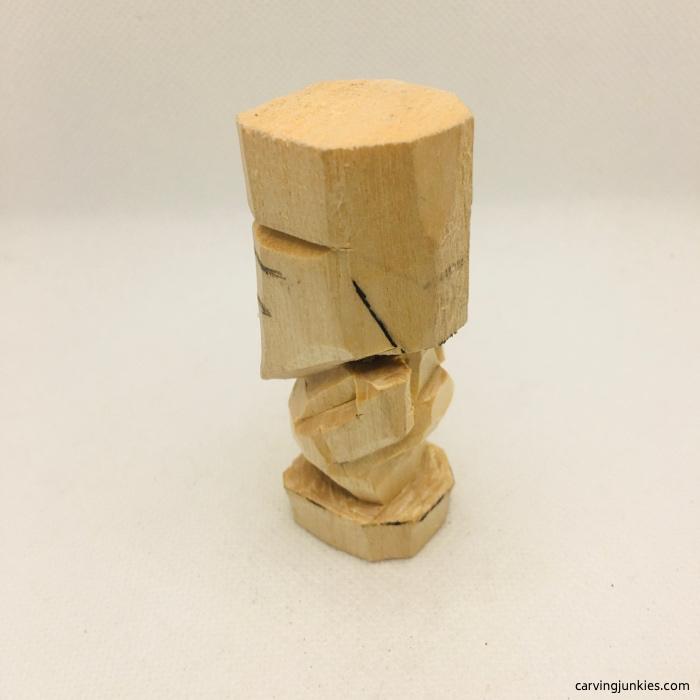 19. Left arm is cut
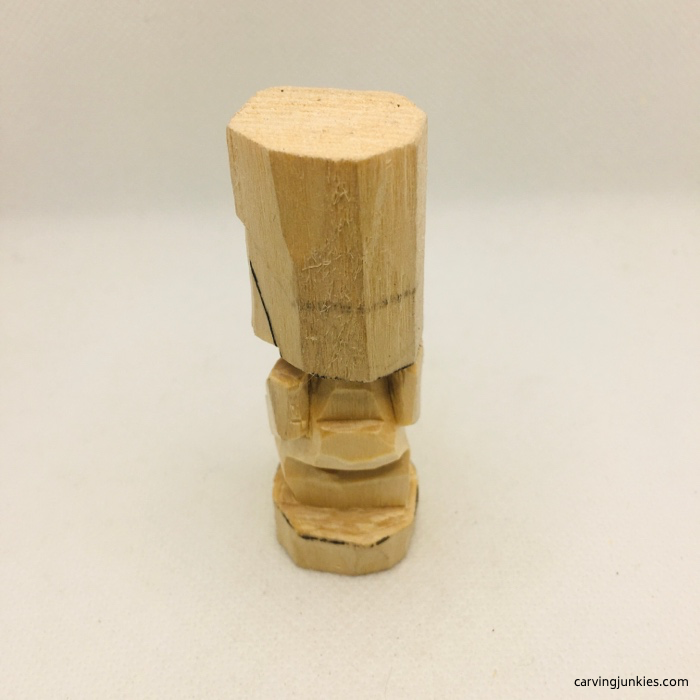 20. Back of the arms are cut
7. Carve the nose of the flat plane wood carving
- Draw guidelines for the nose (photo 21). Note: Ignore the wood colored in with magic marker as we made a later design change for the hat.
- Make a stop cut under the nose and remove wood from underneath (completed in photo 22).
- Make another deep cut on the side of the nose (photo 22).
- Make a stop cut at an angle from the top of the nose that will be the bottom of an eyebrow (photo 23). This allows easy removal of wood from the bottom of the nose upward (photo 24). Repeat on the other side of the nose.
- Carve the corners off the nose and create angular shape (photo 25).
- Use stop cuts to carve each eyebrow (photo 25).
- Using deep V-cuts, remove more wood from the front and back to shape the front and back of the knees of the flat plane wood carving (photos 25 and 26).
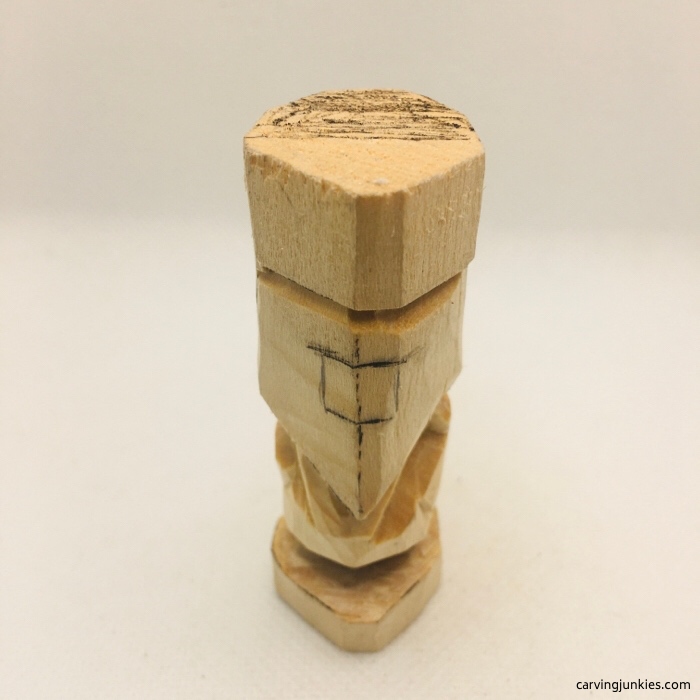 21. Nose is drawn
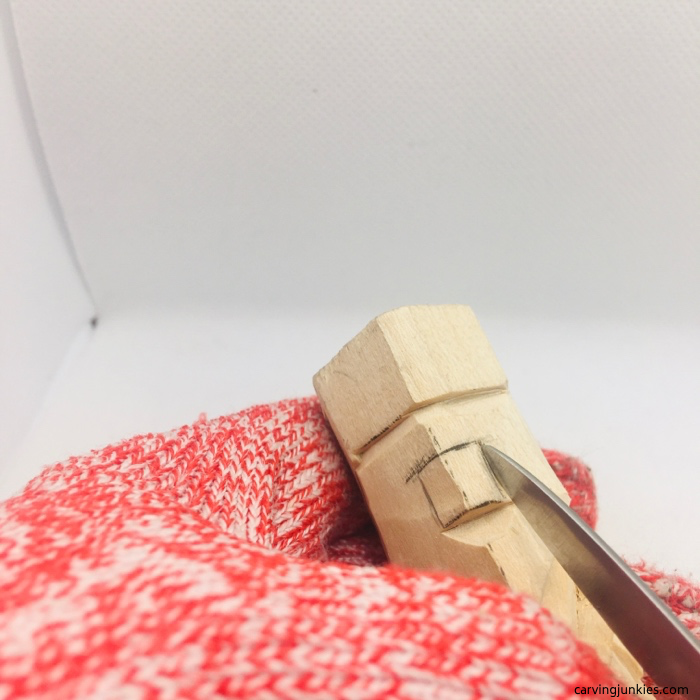 22. Starting next cut after stop cut under the nose
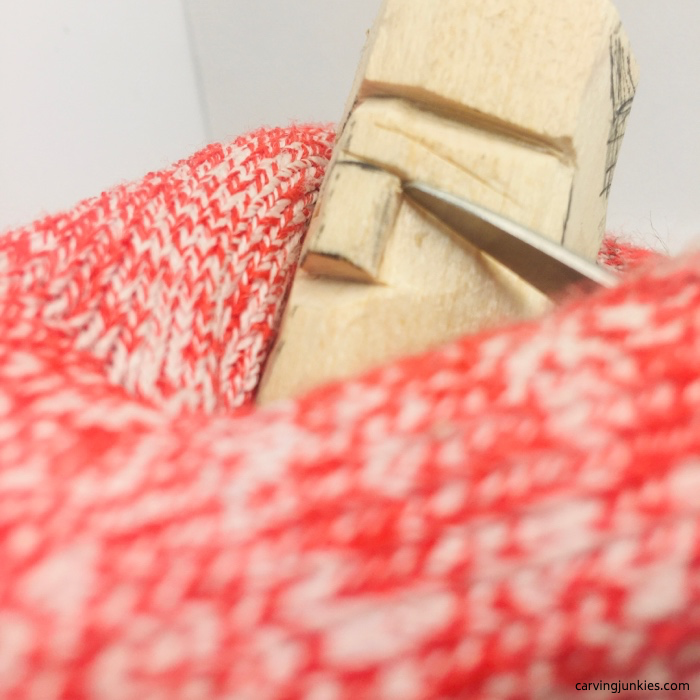 23. Top stop cut is made
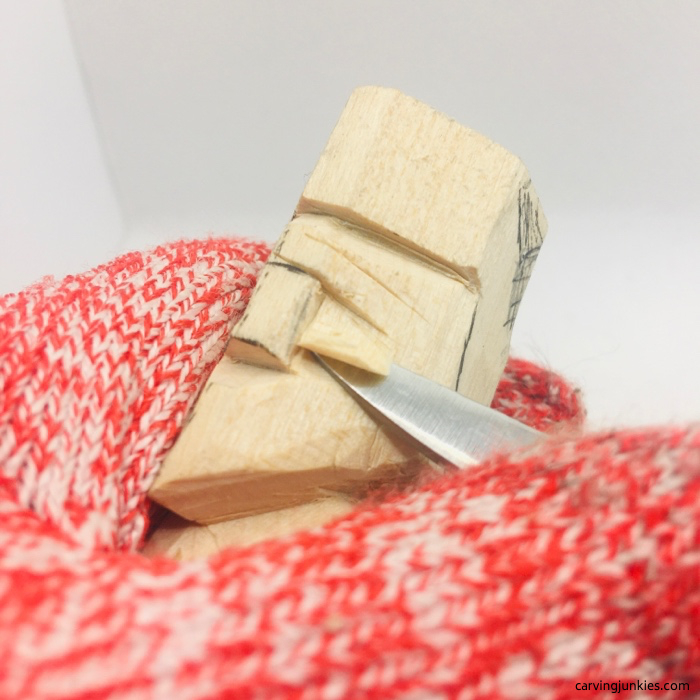 24. Wood is cleanly removed
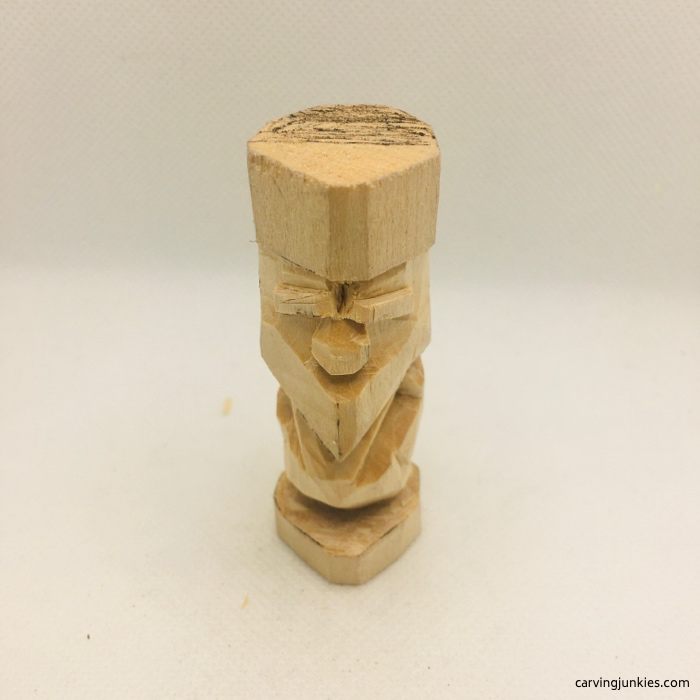 25. Nose and eyebrows are cut
8. Carve some details on the flat plane wood carving
- Draw a line around the back to mark the bottom of the hat (photo 26).
- Use a stop cut to separate the hat from the head all around (photos 27-29).
- Draw the mustache (photo 28) and carve it (photo 29).
- Start to shape the beard and the cheeks, which will be angular in shape in the style of flat plane wood carving (photos 29, 32).
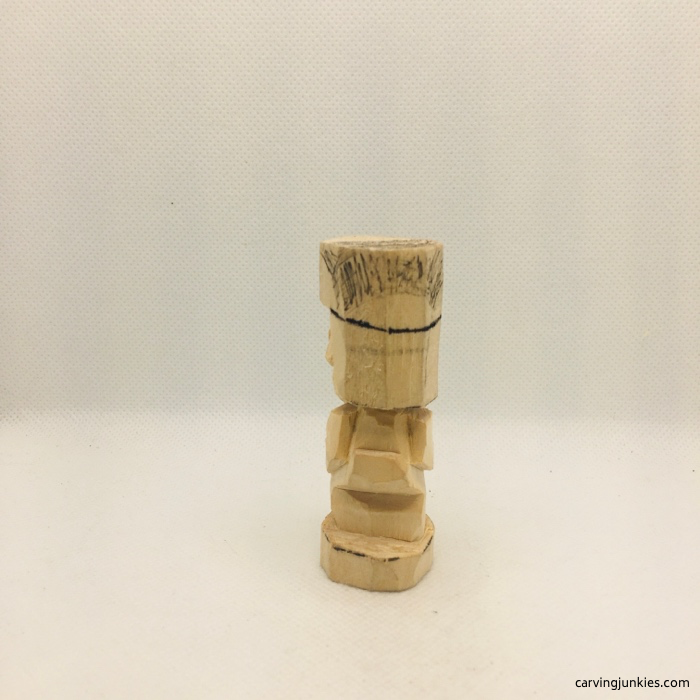 26. Bottom of hat is drawn all around
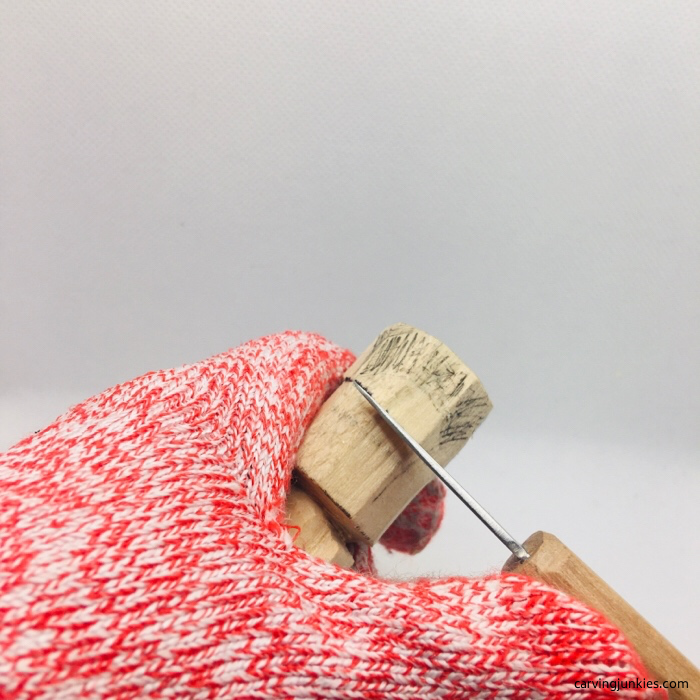 27. Using a stop cut to separate hat
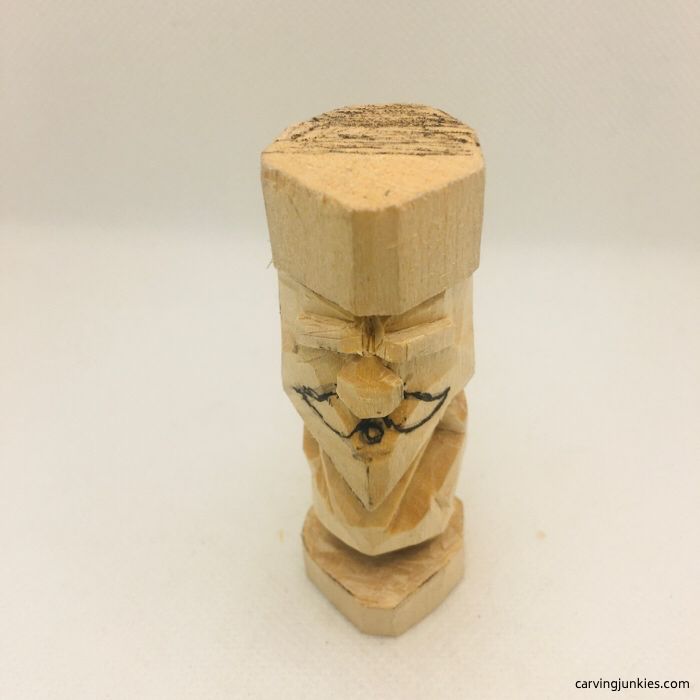 28. Mustache is drawn
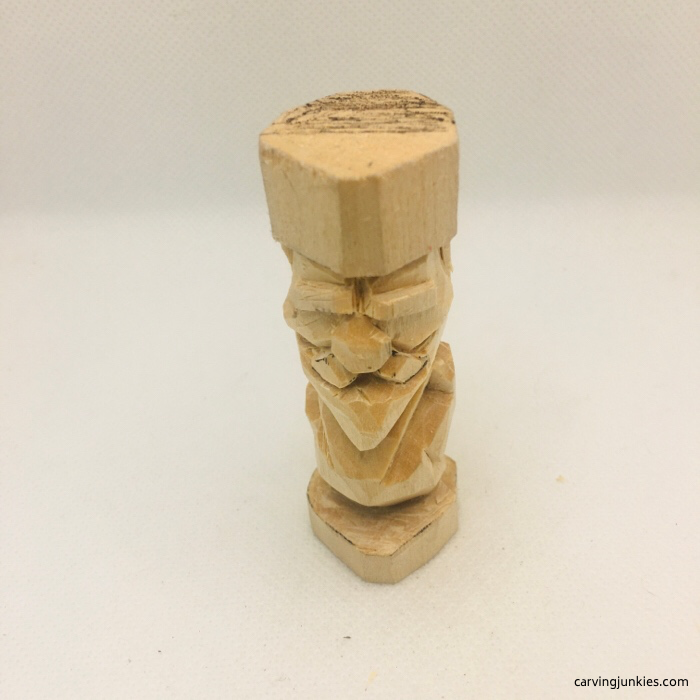 29. Mustache, mouth, and cheeks are carved
9. Carve the eyes and shape the hat of the flat plane wood carving
- Shape the hat, carving it down toward the head (photo 30).
- Draw on the eyes (photo 31).
- Carve a little belt and belt buckle and draw the buttons (photo 31).
- Use a V-cut to split the legs (photo 31).
- Shape the shoes of the flat plane wood carving (photo 31).
- Carve the eyes by cutting along the guideline (photo 32). Round the eyeballs and remove a chip from both corners of each eye to create a shadow (photo 33).
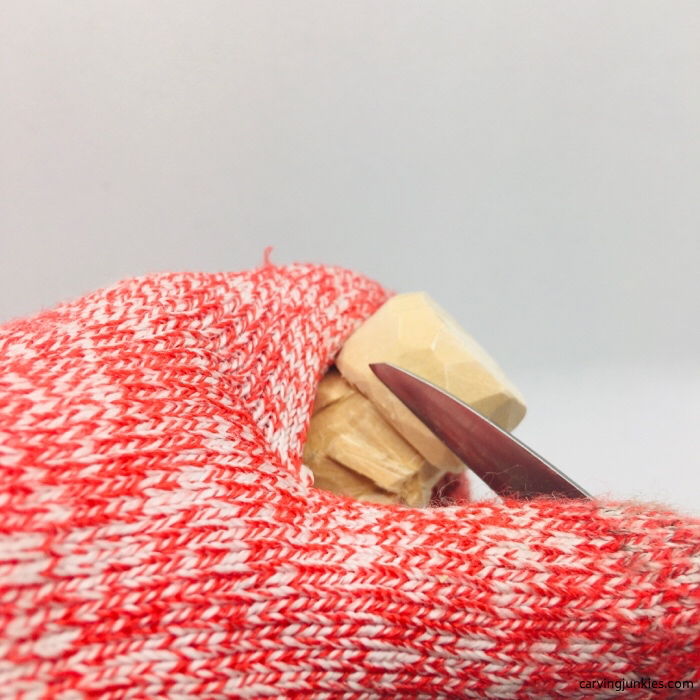 30. Hat is shaped
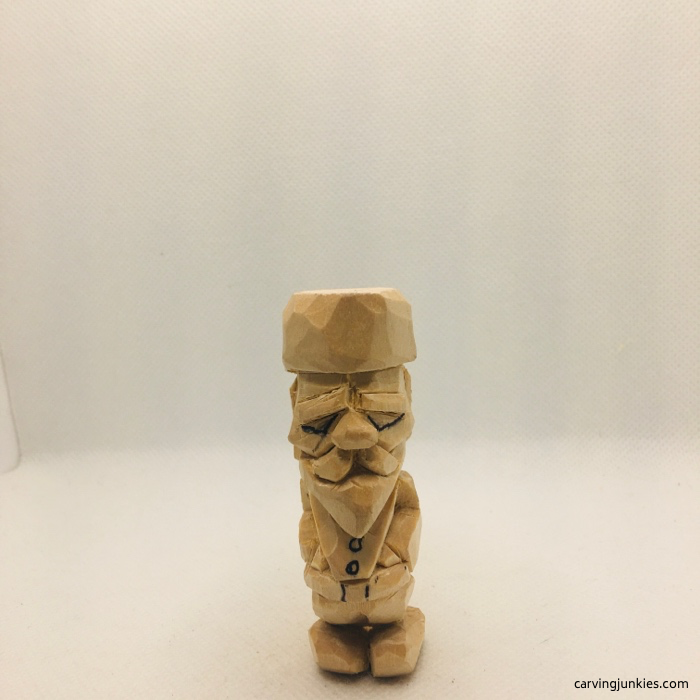 31. Legs are split and eyes are drawn
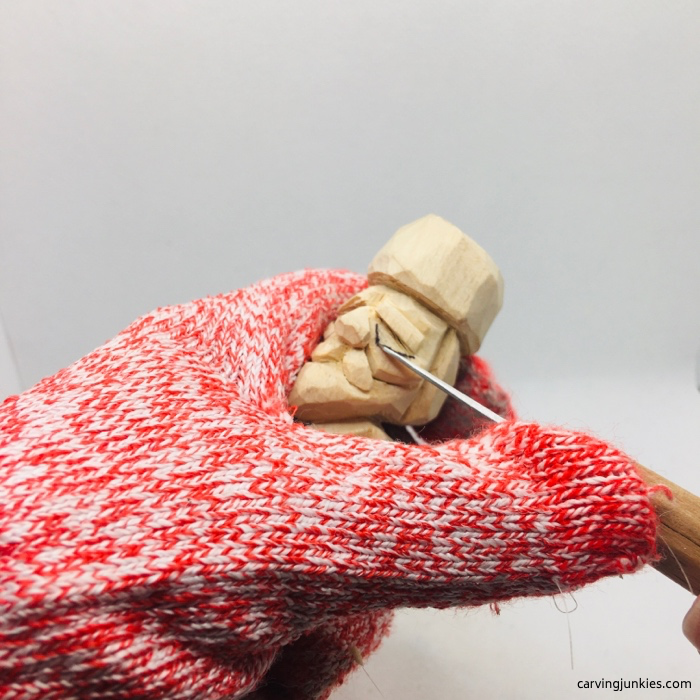 32. Outline of eyes are cut
10. Refine the details of the flat plane wood carving
- Use your knife to carefully carve hair lines in the mustache, beard, and hair (photos 33-36). If using a small block like ours be careful about adding hair lines to the eyebrows (they can crumble easily). You can paint your hair lines, if you prefer.
- Carve the belt buckle (photo 33).
- To make the hands, cut an outline of a triangle and shave down a little wood (like rounding down an eyeball). Then remove a chip on each side to create a shadow (photo 33).
- Make a small pyramid cut on the backside to create the tush pant wrinkle (photo 36).
- Add a few wrinkles to the shirt arms and pants (photos 34-36).
- Before painting your flat plane wood carving, clean up your cuts and deepen them, if necessary (photos 33-36).
Tip: Deepening your cuts will help avoid paint from bleeding.
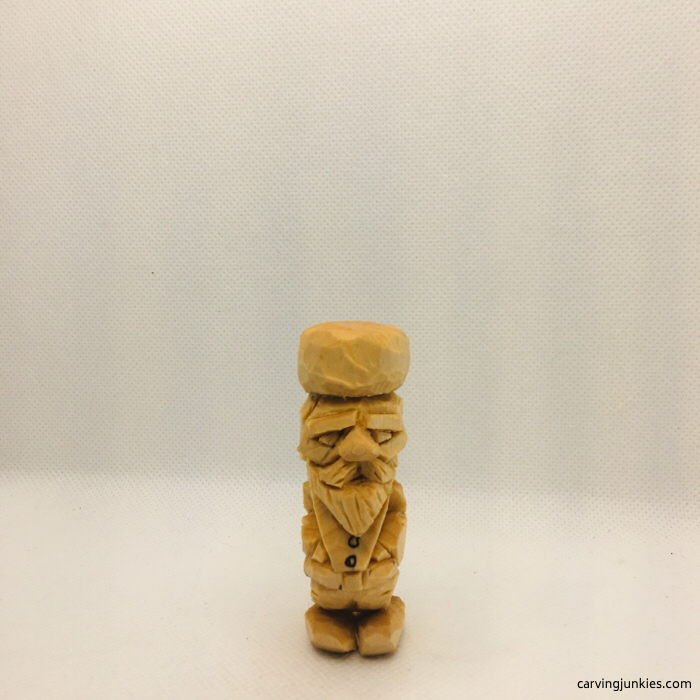 33. Details are refined
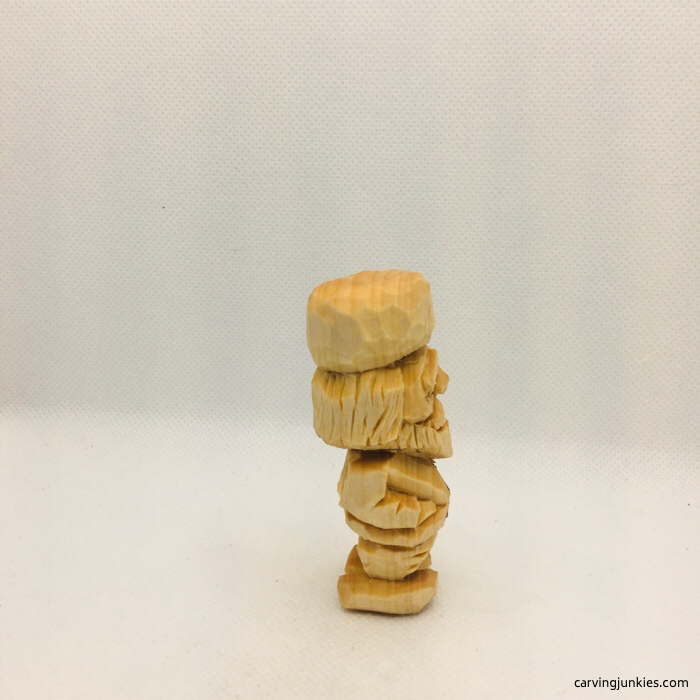 34. Right view
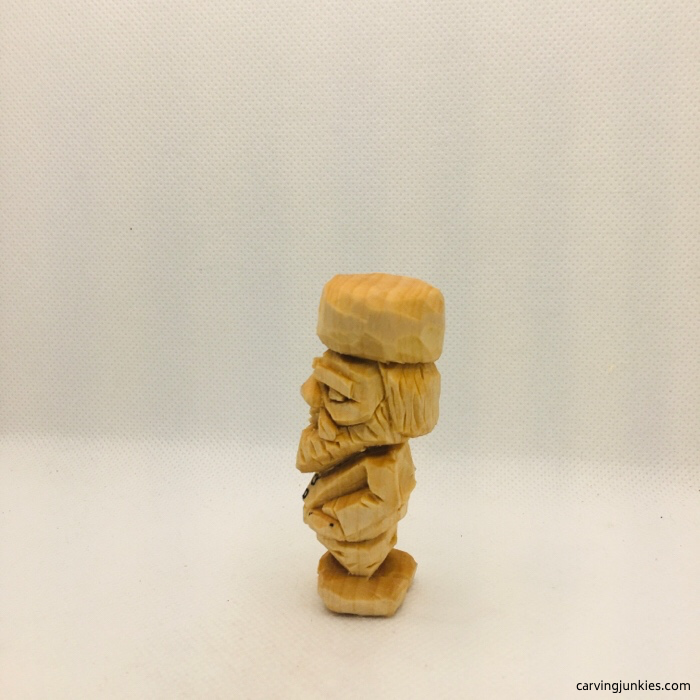 35. Left view
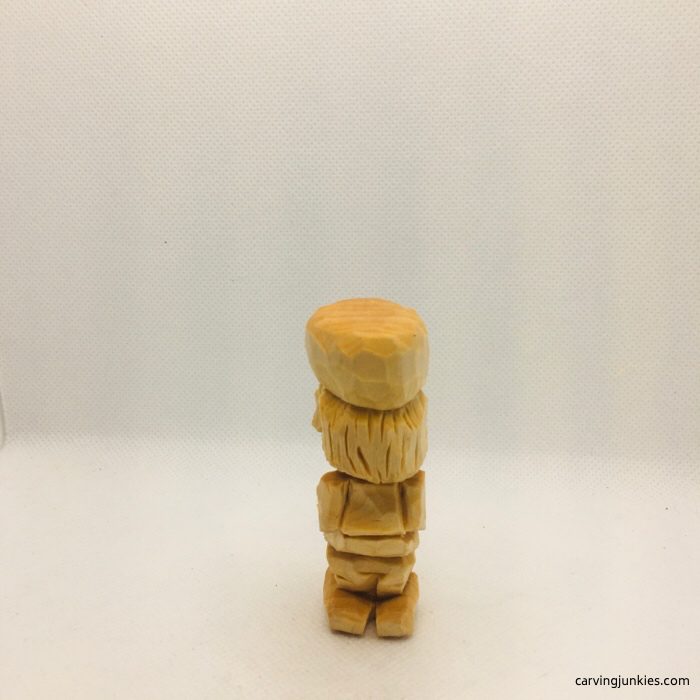 36. Back view
11. Paint the flat plane wood carving
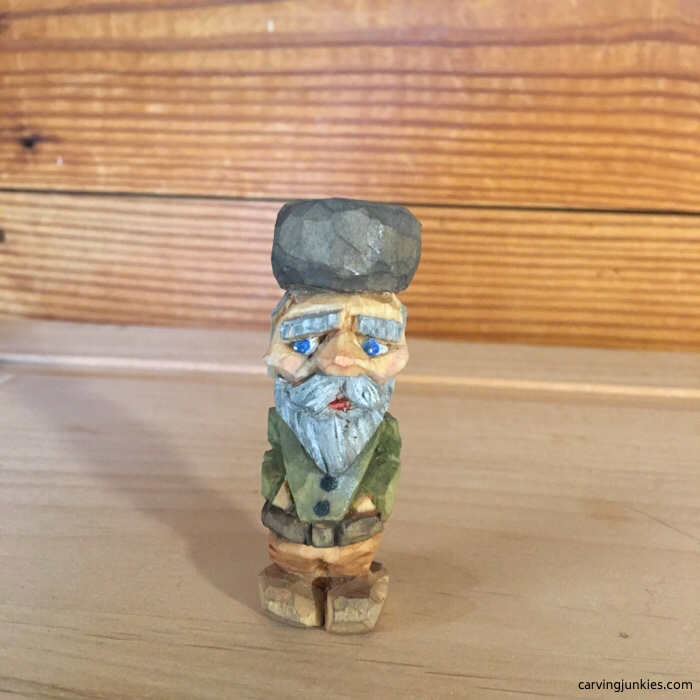
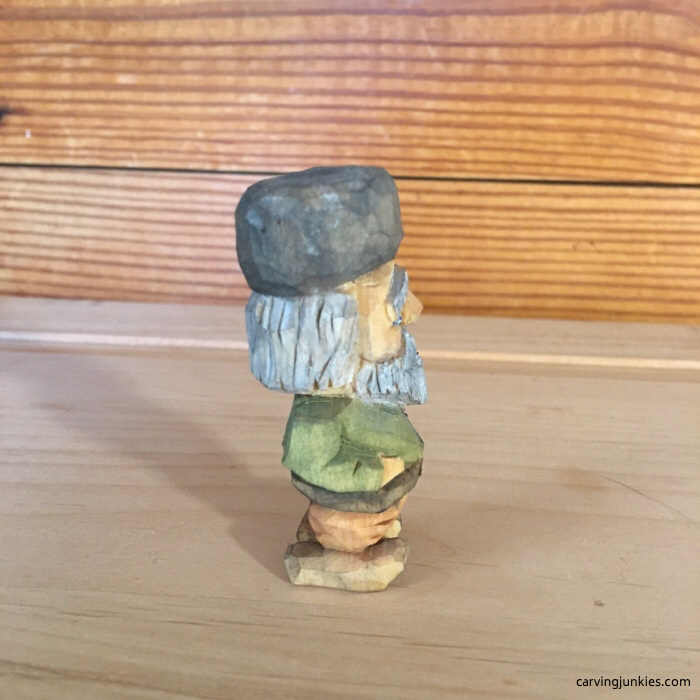
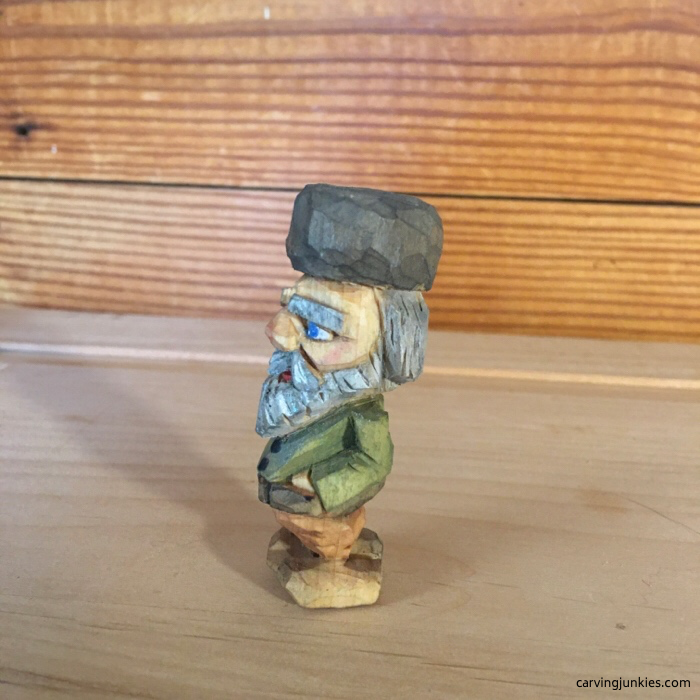
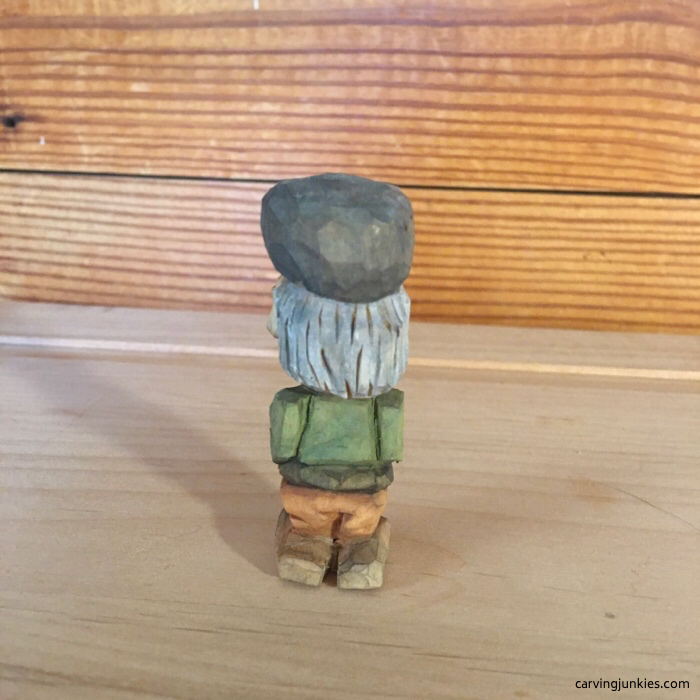
To get this look (all paints are CraftSmart except where noted):
- Before painting, we dipped the entire carving into Minwax wood stain (natural) to get a natural flesh tone color (optional).
- Eyes: 100% white paint for eye whites; 1 drop of blue paint with 5 drops of water for irises; black magic marker for pupils; spec of white applied with toothpick.
- Shirt: 1 drop Artists acrylic deep green permanent mixed with 1.5 drops of golden brown paint and 5 drops of water.
- Pants: 1 drop of brown paint mixed with 5 drops of water and a touch of white paint (on a toothpick).
- Hat and shoes: 1 drop of dark grey mixed with 4 drops of water.
- Belt: 1 drop of black paint mixed with 5 drops of water.
- Buttons: filled in with black magic marker (or black paint, if you prefer).
- Beard, mustache, eyebrows, and hair: base coat of 1 drop of dark grey paint mixed with 4 drops of water. Allow to completely dry and dry brush cut areas with white paint.
- Mouth and cheeks: 1 drop bright red paint mixed with a toothpick drop of cameo pink and 5 drops of water. Apply with brush, then quickly use another clean, wet brush to blend.
- Finish: Apply 2 coats of Minwax polyurethane spray to seal the flat plane wood carving (gloss).
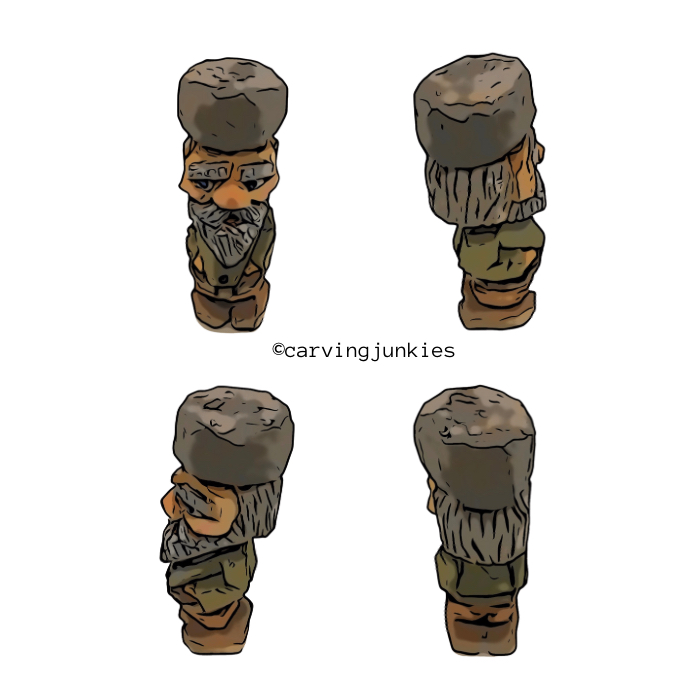
Free flat plane wood carving pattern
If you prefer to carve your flat plane with a pattern, photocopy this to size to fit your wood block.
Also read our essential flat plane carving guide.
Summary of our flat plane wood carving tutorial
- Flat plane wood carving is a fun style of carving that uses minimal cuts.
- It looks deceptively simple, but it can actually be a challenge.
- You can carve our little man as is, or make yours bigger.
Get 50 Wood Carving & Painting Tips when you join our FREE Covered in Chips club.
Share this page
carvingjunkies.com never sells your personal information.
This site uses cookies for its operation and to enhance your experience. As an Amazon Associate and Focuser Carving affiliate we earn from qualifying purchases.
Home | About Us | Privacy Policy | Terms of Use | Contact | Sitemap
