- Home
- Things to carve
- Halloween pumpkin wood carving
Halloween pumpkin wood carving tutorial
Carve this cool ghost pumpkin in a few easy steps.
LEVEL: EASY
Looking for a Halloween pumpkin wood carving project that’s as fun as it is unique? This step-by-step ghost pumpkin wood carving tutorial walks you through the process of creating a half-ghost/half-pumpkin design. It was inspired by some half-real/half-clay pumpkins I saw on Pinterest that I thought would make a cool wood carving. It makes a wonderful spooky ornament or seasonal decoration.
One of the best parts of this carving is how easy it is to take with you and enjoy on the go. I carved mine on a beautiful beach in Cape Cod (Wellfleet, MA). I hope you enjoy the scenic pictures!
By the end of this tutorial, you’ll have a festive ghost pumpkin carving that’s ready to display, gift, or enjoy as part of your Halloween tradition.

What you will need for this Halloween pumpkin wood carving
- I used a flat wood block that is 3.5 inches x 3.5 inches x 3/4 inch (7.62 cm x 7.62 cm 1.9 cm).
- You will need pencil (or a pen or magic marker) to sketch your ghost pumpkin.
- I used a roughout knife to carve off wood and a smaller, detail knife to carve the eyes, nose, and curvy lines. I also used a #47 V-tool to carve the pumpkin ridges (I provide methods for using a knife if you do not have one).
- Wear a good, protective carving glove always, always, always! Even the best wood carvers slip every now and then.
- I use a small, plastic cutting board to protect my leg arteries whenever I carve on the go. Another must in my book!
- To get similar results, I've included a free painting guide at the end of this Halloween pumpkin wood carving tutorial.
- If you prefer using a bandsaw, use the free pattern (also at the end of this page).
Video peek of the tutorial
Check out the key steps to this tutorial–before you start carving your ghost pumpkin–in the short video below.
Getting started
Sketch your pumpkin design on the front (photo 1).
Start by removing excess wood around the corners (photo 2). I often start with a push cut because I prefer to carve away from my body when I can!
Continue to remove wood all around (photo 3) to shape the pumpkin.
I switched to a pull cut to start the inside of the stem (photo 4) to give my hands a rest. Note: I forgot to bring my thumb guard, which I always recommend wearing for protection. It's key to position your thumb safely (see photo 4), so you won't cut your thumb if your knife slips.
To define the stem I used a stop cut (photo 5), removing wood up to my initial cut. Tip: Lay your piece on a table so you have more leverage to rock your knife back and forth, and make a deep stop cut. Take your time and be careful here not to break your knife. I had to make several passes to remove all of the wood.
To achieve the inner curve of the stem, I made a sweeping cut where I turn my wrist as I carve to remove wood. You need a knife that has some flex to it so you won't break the tip. I used my Helvie Blake Lunsford signature knife, which is one of my go-to knives these days.
Tip: Be sure to remove all of the end grain on your piece or your paint won’t look even in the end.
 1. Pumpkin is sketched
 2. Removing wood
 3. Removing more wood
 4. Making a pull cut
 5. Making a stop cut
Carve some details
Once your Halloween pumpkin wood carving is roughed out, it's time to add some details. Run your knife along the curvy bottom guideline (photo 6). You can grip your knife like I did, or hold it like a pencil to move it along the guideline. Note: I removed my other hand (which I used to hold the piece) to provide a clear photo.
As you remove wood, you want to keep your cut curves as smooth as possible (photo 7). I removed wood in layers to create some depth. Take your time here as well.
Once the bottom line was carved, I pressed my knife down against the wood on the cutting board, and rotated the piece around while holding the knife to separate the nose guideline (photo 8). Then I made a second slicing cut with a smaller detail knife to remove wood (photo 9).
I repeated this same process for carving the eyes (photo 10).
I used a stop cut to remove wood at the bottom of the stem (photo 11) to set it back a bit.
 6. Separating curvy guideline
 7. Removing wood
 8. Separating the nose
 9. Slicing wood off
 10. Carving the eyes
 11. Making a stop cut
Add more details
Sketch the ridge lines on the pumpkin front (photo 12) and back (photo 13).
I used a #47 (Stubai) V-tool to carve the ridge lines (photo 14). Instead of pushing the V-tool forward, I invert my hand with the gouge for better control, which prevents the V-tool from running away from you. Tip: Practice first on a scrap piece of wood. If you don't have a V-tool, you can use narrow V-cuts to carve the ridges. Repeat this process on the back of your Halloween pumpkin wood carving.
 12. Front ridge lines
 13. Back ridge lines
 14. Carving ridge lines
Refine your pumpkin
Clean up your cuts and refine the overall shape of your pumpkin (photos 15,16). I used sandpaper to smooth out the eyes, nose, and ridge line, which prevents paint from clumping in those areas. Tip: If you do use sandpaper, do not use a knife again on your piece. The sandpaper residue isn't good for a knife.
 15. Front view
 16. Back view
Paint your pumpkin


If you're new to wood carving, check out this page for some great painting tips. I also mention the acrylic paint brand and brushes I prefer here (scroll to bottom of the page).
To get a similar look use:
White section: Apple Barrel antique parchment wash.
Eyes and nose: Ceramcoat black wash.
Pumpkin area: Apple Barrel Jack O'lantern (100%) paint for the ridges and border line, then I used a wash to blend the color.
Stem: Ceramcoat Burnt Umber wash.
Finish the piece any way you prefer (such as oil, wax, or spray). I didn't finish mine.
Halloween pumpkin wood carving pattern
Prefer to make a larger pumpkin and use a bandsaw to roughout your piece? Photocopy/size this pattern to fit the size of your wood block.

Halloween pumpkin wood carving tutorial summary
- This ghost pumpkin wood carving is fun, fast, and a great project for beginners or advanced carvers looking for an easy project.
- This tutorial uses only a few tools and you can substitute narrow V-cuts for a V-tool.
- You can vary up the eyes and nose to create a set of different Halloween pumpkins.
You might like these
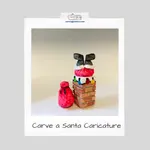
Santa Caricature Carving With a Knife From a Block of Wood
Santa caricature carving tutorial from a block of wood using primarily a knife to make a beautiful Christmas ornament.
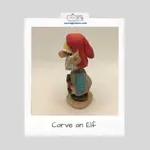
Christmas Elf Wood Carving Tutorial
This elf wood carving is easy to make and is the perfect ornament or decoration for Christmas.
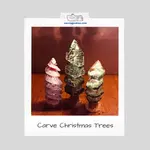
Easy Christmas Tree Carving Tutorials With Just A Knife
This Christmas tree carving tutorial provides you with a trio of beautiful trees that are easy to carve.
Get 50 Wood Carving & Painting Tips when you join our FREE Covered in Chips club.
Share this page
carvingjunkies.com never sells your personal information.
This site uses cookies for its operation and to enhance your experience. As an Amazon Associate and Focuser Carving affiliate we earn from qualifying purchases.
Home | About Us | Privacy Policy | Terms of Use | Contact | Sitemap