- Home
- Wood carving gnomes
- Gnome wood carving
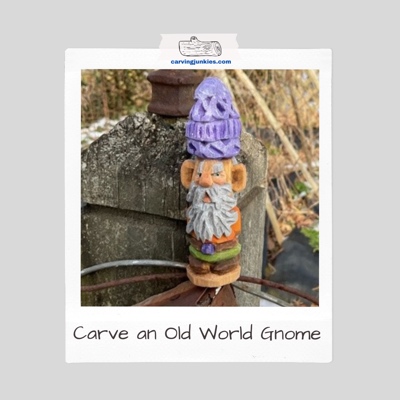
Old world gnome wood carving
Hone your detail skills by carving this fabulous gnome from a block of wood.
LEVEL: SOME CHALLENGES
Following our simple modern ski gnome wood carving tutorial, we wanted to create an old world gnome that would be a little more challenging. So we added eyes, ears, and a detailed hat to this tutorial.
This gnome carving is a bit taller than our usual little guys. It also includes an easy-to-carve base. No worries about carving a wobbly gnome!
What you need for this gnome wood carving tutorial
- One basswood block. Ours is 1 x 1 x 4 inches (2.43 x 2.54 x 10.16 cm) but you can easily adapt the pattern to any size.
- Knives of choice (we suggest a roughout knife and a detail knife).
- V-tool for the beard, mustache, hair, and eyebrows (we use a #47) or try a small detail knife with V-cuts if you do not own a V-tool.
- #11 U-gouge to shape the inner ear (or try shaving wood off with a knife that has some flex if you do not own a U-gouge).
- Pencil, pen, or magic marker.
- Acrylic paints and paint brushes of choice.
- Boiled linseed oil (optional prior to painting your gnome wood carving).
- Good carving gloves for safety.
See the carving tools that we love and recommend.
Gnome wood carving tutorial at a glance
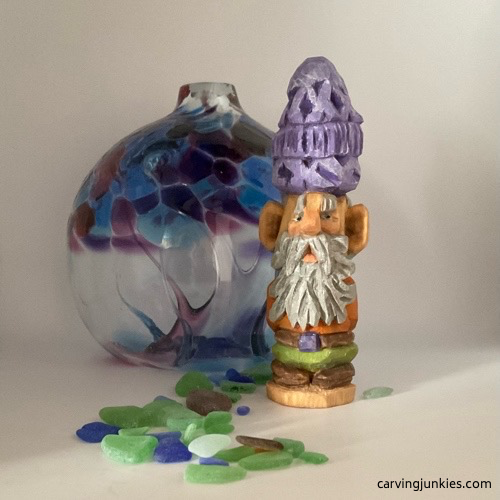 Makes an awesome decoration
Draw your gnome wood carving guidelines
For this gnome wood carving you will be working off the corner. Draw guidelines that are approximately:
- 1.5 inches (3.8 cm) from the top to mark the bottom of the hat (photos 1-4).
- 2.5 inches (6.3 cm) from the top to mark the bottom of the head (photos 1-4).
- 3.25 inches (8.3 cm) from the top to mark the top of the feet/shoes (photos 1-4).
Also:
- Draw a box on each side to reserve wood for the ears, which we like to carve at the end to avoid breaking them (photos 1-4).
- Draw a guideline for the nose and use our triangle-by triangle nose carving technique (video is provided further down on this page).
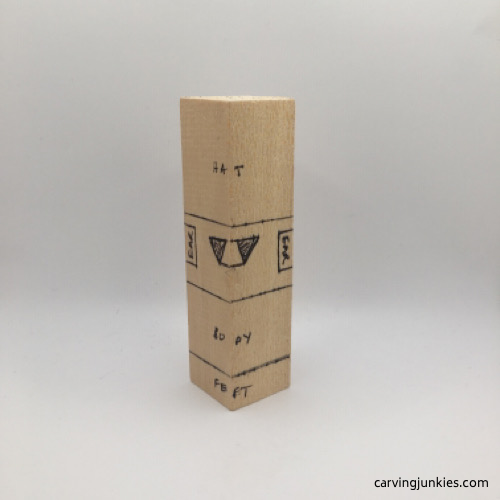 1. Front view of guidelines
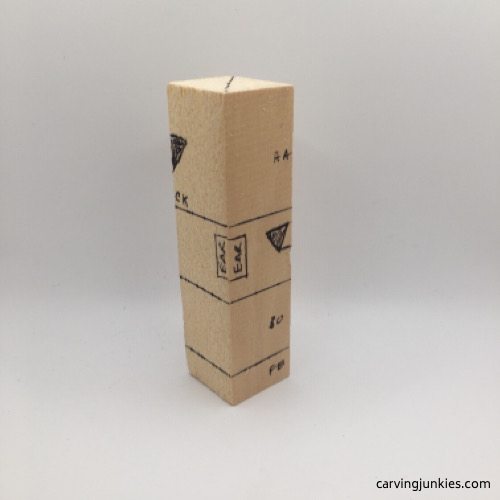 2. Right view
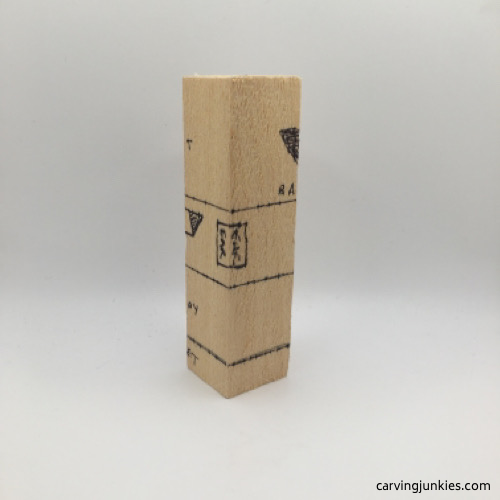 3. Left view
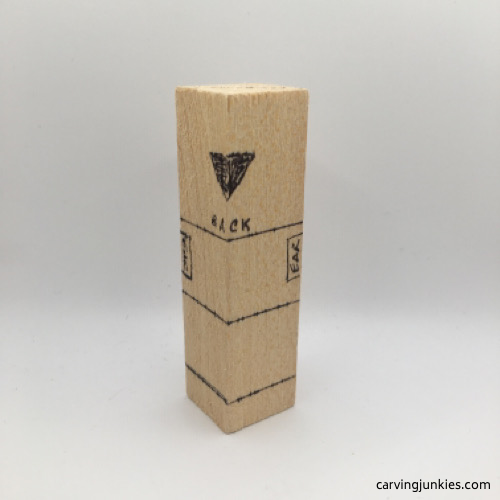 4. Back view
Separate the hat and feet/shoes of the gnome wood carving
- Round all 4 corners of the gnome wood carving from the bottom of the hat up (photos 5-8).
- Use stop cuts to separate the bottom of the hat all around, removing from from underneath (photos 5-8).
- Use stop cuts to separate the bottom of the body all around, removing from from underneath (photos 5-8).
- Do not cut the middle line that separates the head from the body (you will reserve the front area for the beard).
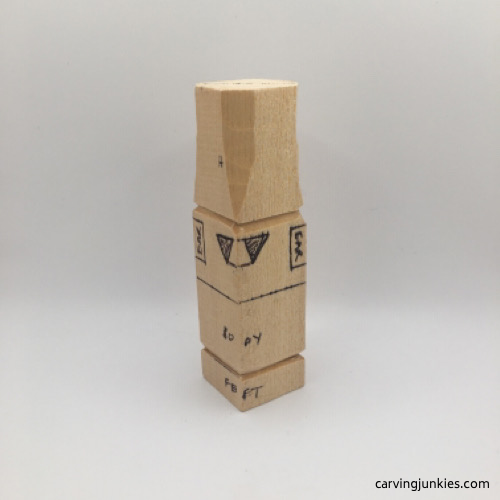 5. Head and feet are separated (front view)
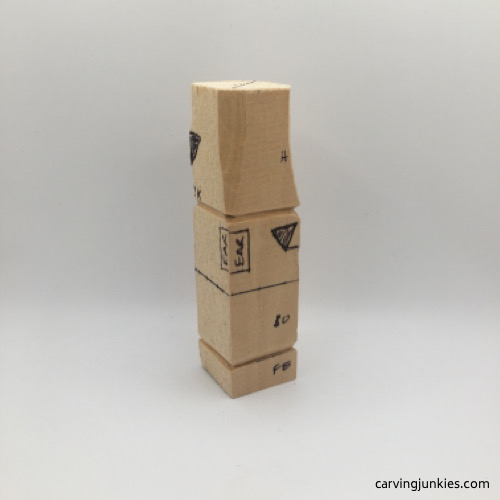 6. Right view
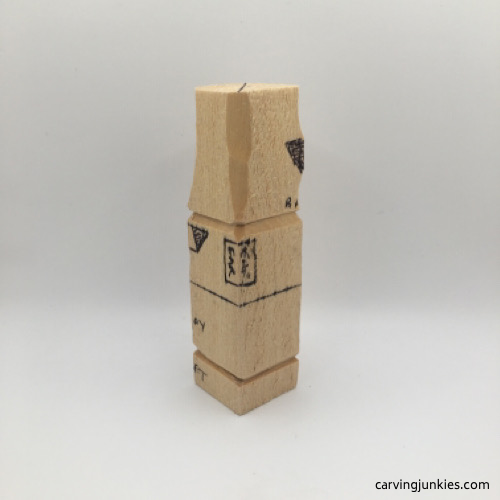 7. Left view
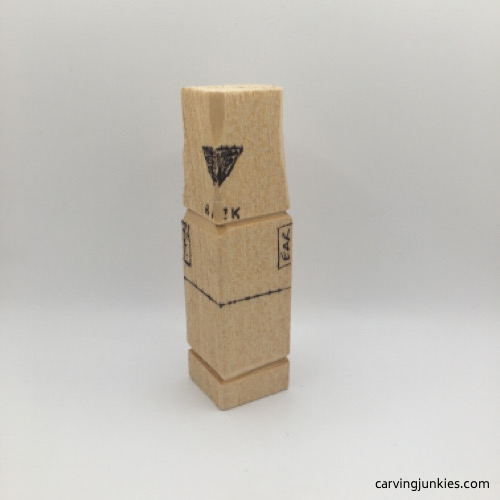 8. Back view
Carve the hat and tassel of the gnome wood carving
- Starting on the front side (photo 9), begin removing wood to shape and angle the hat toward the back (a little like how you sharpen a pencil).
- Keep your hat shape thick for now, which will make it easier to cut the tassel without fear of breaking it.
- Draw an upside down triangle on the back to indicate wood to remove for the tassel (photo 10).
- Use a stop cut to make your first cut (photo 10) and remove wood from underneath (if you have a big, sharp, and sturdy knife you could make a pyramid cut instead).
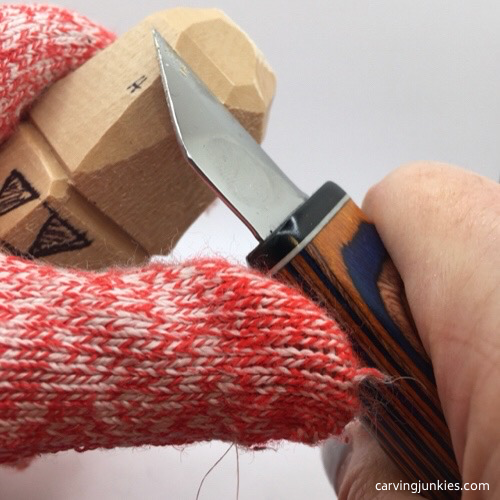 9. Shaping the hat
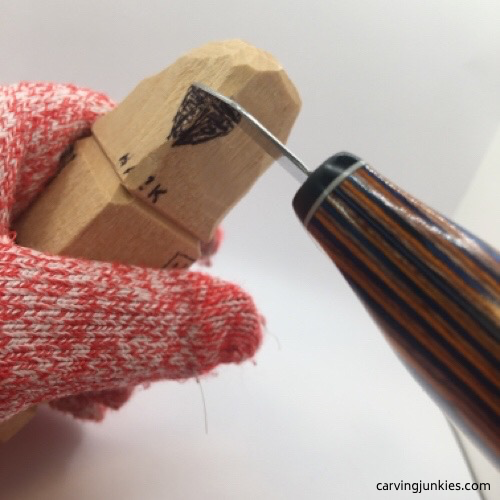 10. Starting the tassel
Gnome wood carving tassel progress
- Once you are happy with the shape of the tassel, draw a line around the hat to mark the top of the brim (photos 11-14).
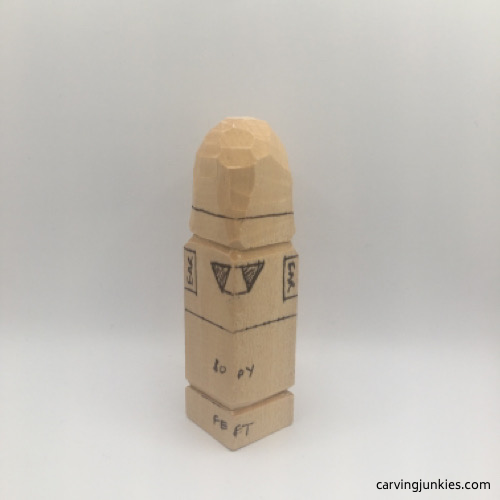 11. Front of carved hat
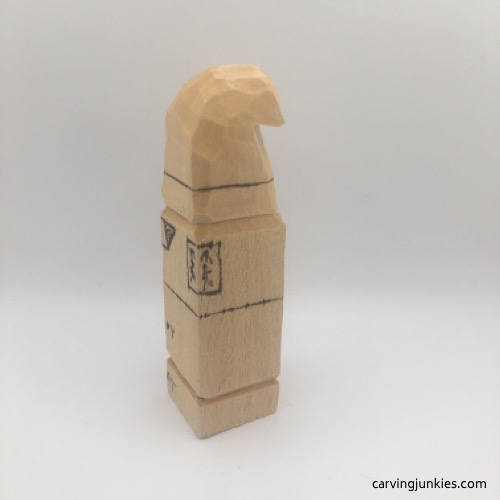 13. Left view
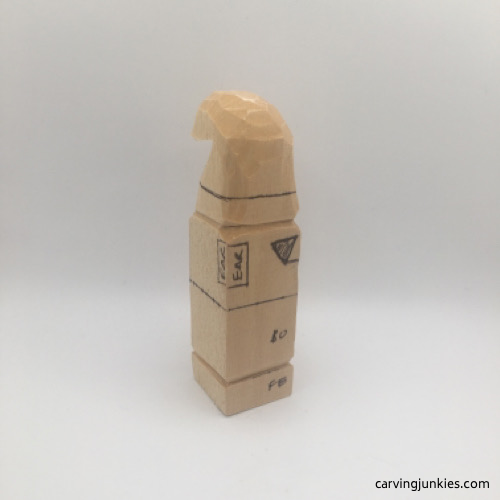 12. Right view
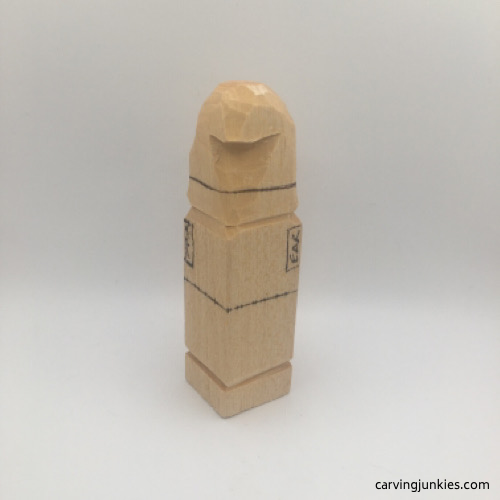 14. Back view
Start the nose of the gnome wood carving
- Watch the short video below to see how to use our triangle-by-triangle nose carving technique (great for those who have trouble carving noses) for this gnome wood carving.
- Basically, you will make a stop cut under the nose and remove wood from underneath (photo 15).
- Then you will make a pyramid cut on each side (photos 16-18), which creates space for the eyes and allows you to easily shape the nose.
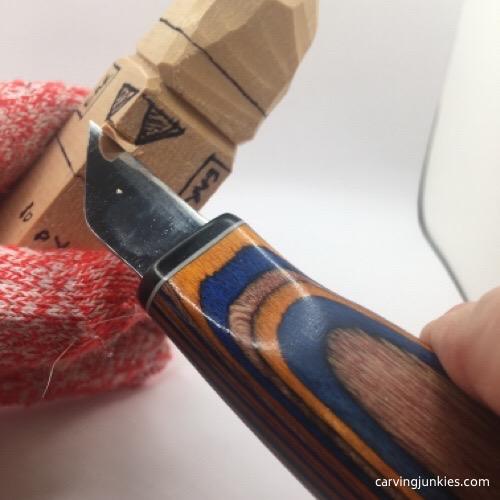 15. Making stop cut under the nose
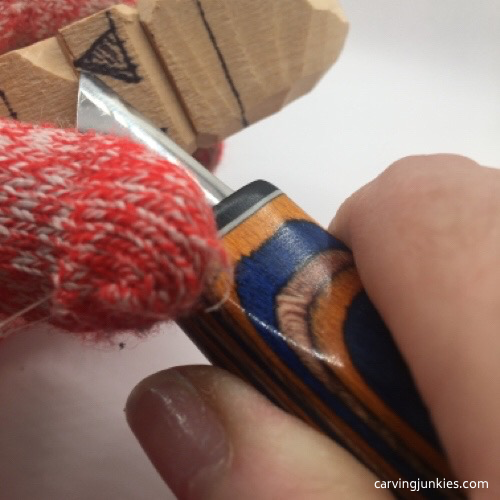 16. Starting a pyramid cut
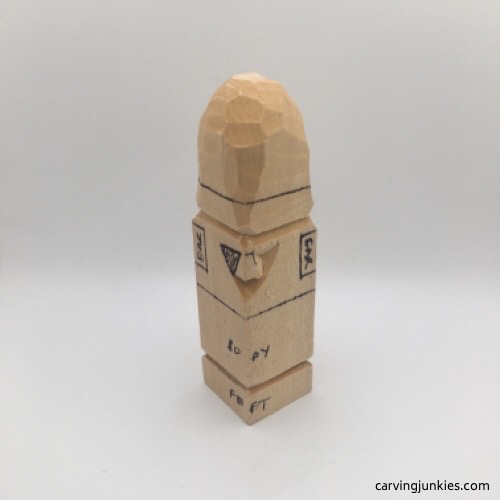 17. First pyramid cut is completed
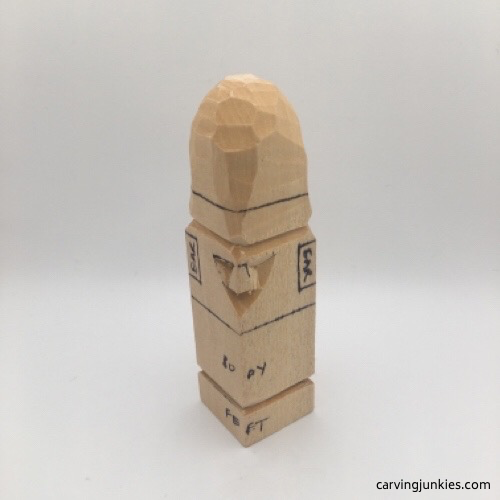 18. Nose will be further shaped later
Draw the beard on the gnome wood carving
- Round the front corner below the nose and draw on the beard (photo 19).
- Using your knife, separate the rest of the head from the body all around the gnome wood carving (photos 20-23).
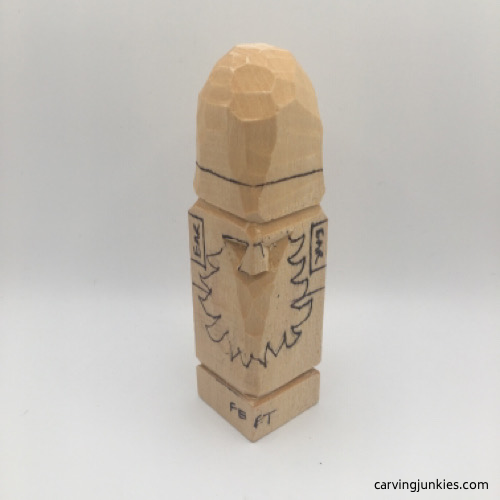 19. Beard is drawn
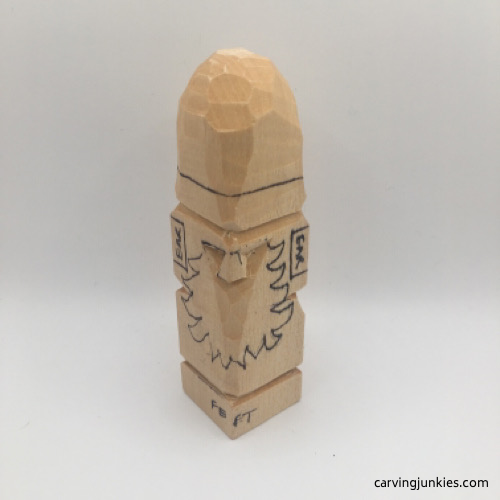 20. Front view of separated head
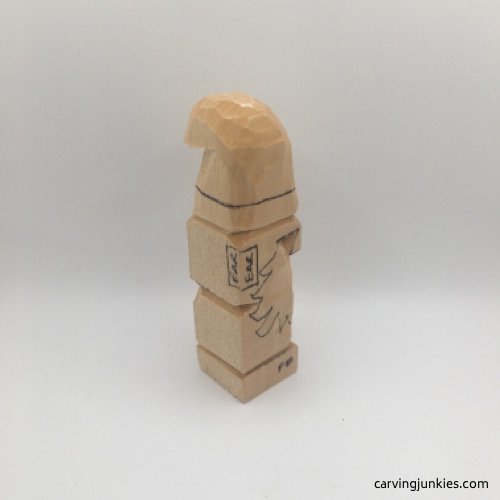 21. RIght view
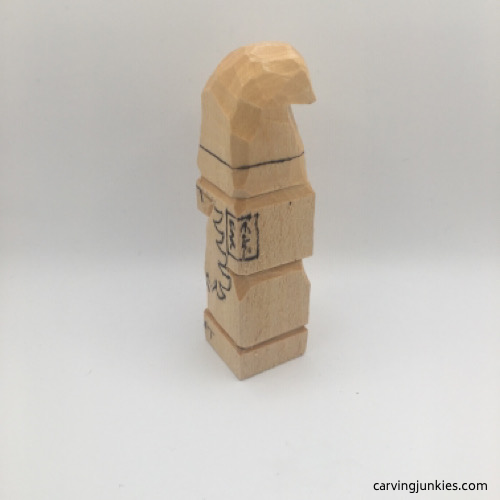 22. Left view
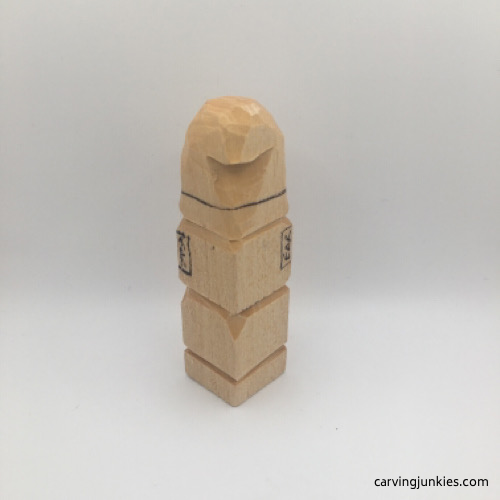 23. Back view
Draw more gnome wood carving details
- Round the corners on the lower part of the body and draw on the arms, which are clasped behind the back of the gnome wood carving (photos 24-28).
- Also draw the mittens (photo 27).
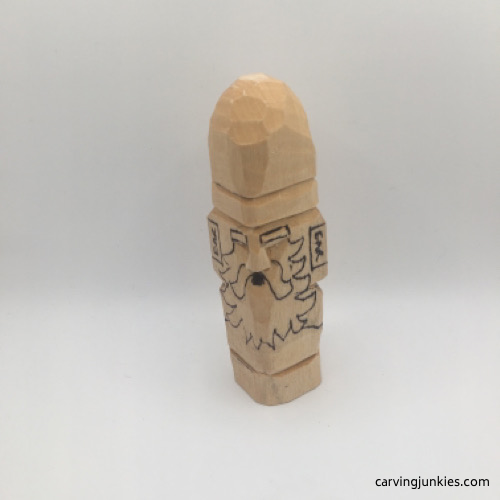 24. Head is separated and details are added
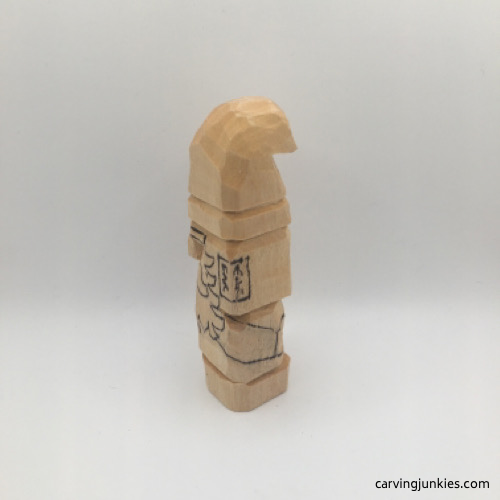 26. Left view
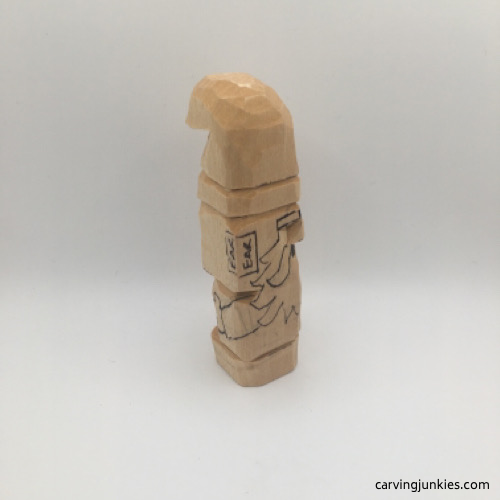 25. Right view of clasped arms
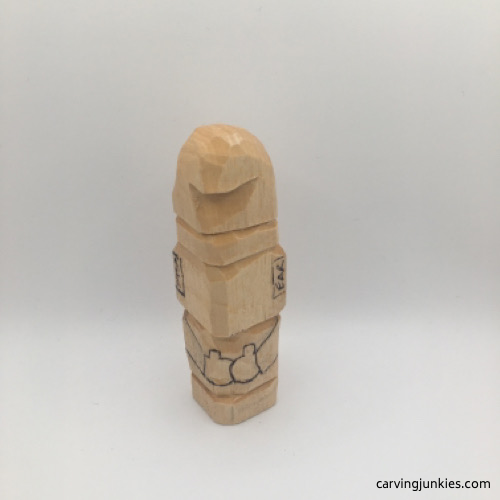 27. Back of arms and mittens
Carve more details on the gnome wood carving
- Carefully cut the beard (Tip: take your time and and use a knife with a point that allows you to easily get in between the cuts (photo 28). You may have to slice off a few layers of wood at a time to create the desired depth (photo 31).
- Carve the mustache like you carve the beard (photos 29-31).
- Use a pyramid cut to make a little triangle for the mouth. Make a small stop cut under the mouth and remove wood from underneath to create the lip (photo 29).
- Carefully separate the eyebrows (photos 29-31).
- Draw the cheeks (photo 29) and the hat details (photos 29-31).
- Use a V-cut on the front side to separate the ears (photo 29).
- Carve the arms and mittens (photos 30-32) on the gnome wood carving.
- Refine the nose by rounding the corners and making small pyramid cuts in the corners for shadow (photos 29-31).
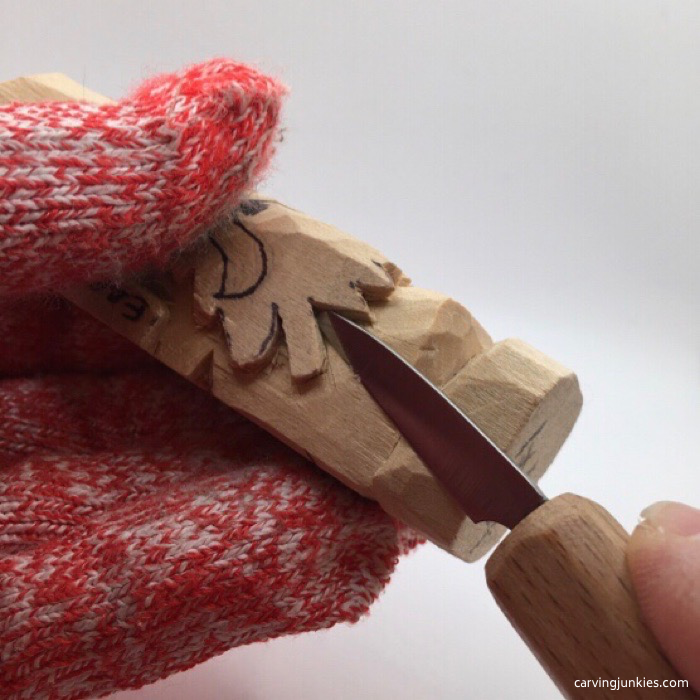 28. Carving the beard
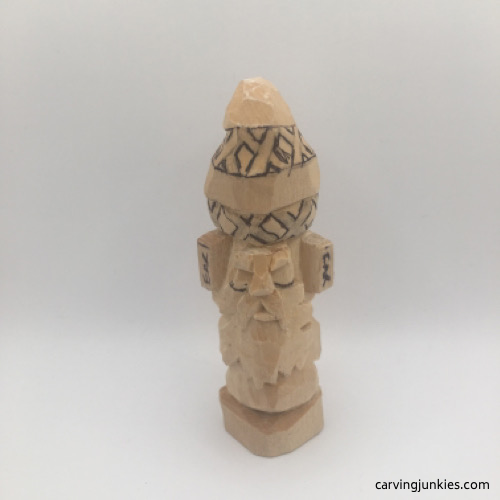 29. Cuts are made and details are drawn
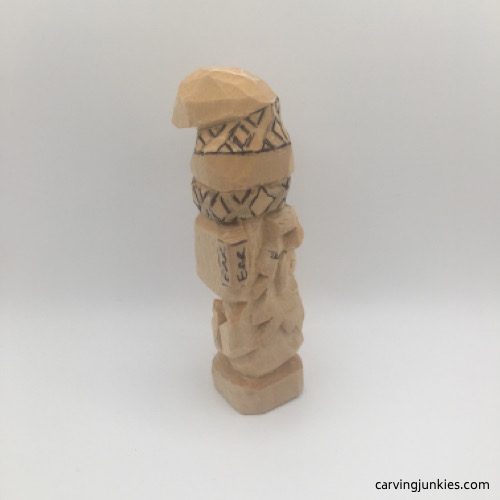 30. Right view
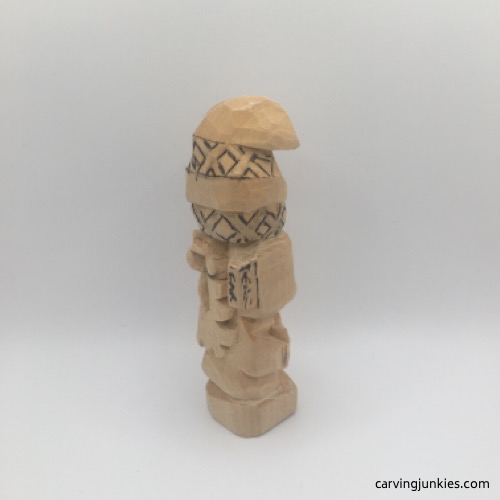 31. Left view
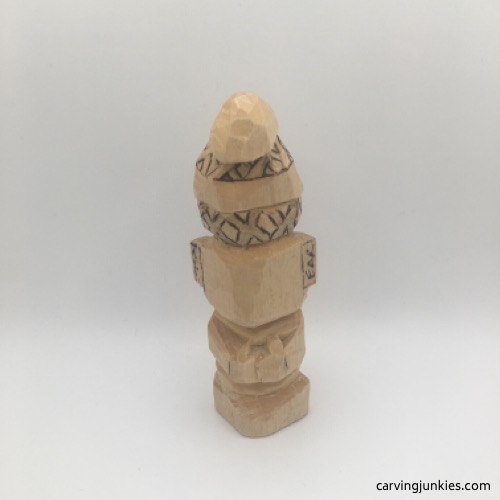 32. Back view
Refine the hat on the gnome wood carving
- Make the diamond cuts on the hat design first. Then use a stop cut all around to separate the brim (photos 33,34).
- Tip: use a good detail knife and make pyramid cuts to remove the wood. Later, you can use a small metal file or roll a piece of sandpaper to clean up any fuzzies on your gnome wood carving.
- Once the beard is completed you can round the front belly (photo 33).
- Draw a line about a 1/4 inch (0.6 cm) around the bottom and separate it with your knife to create the base. Also draw a little triangle on the front and back where you will split the shoes with a V-cut (photos 33,34).
- Define the cheeks (photo 33).
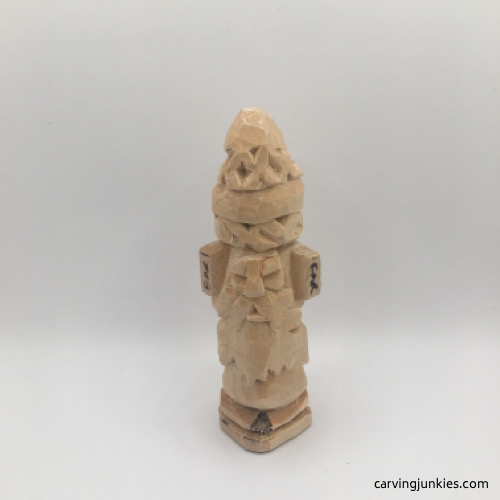 33. Hat and base are carved
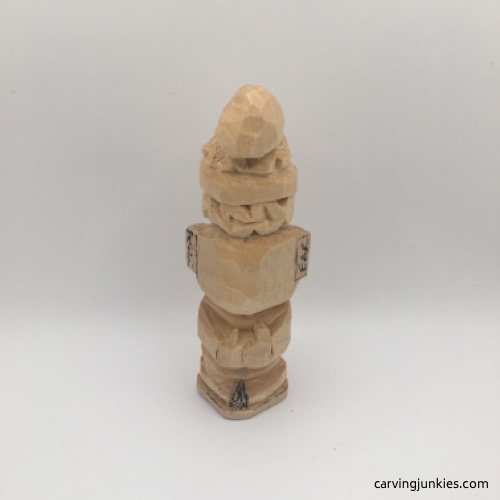 34. Back view
Add more details to the gnome wood carving
- Draw the shape of the ears (photo 35).
- Draw on the hair (photos 36-38).
- Split and carve the shoes (photos 35-38) on the gnome wood carving.
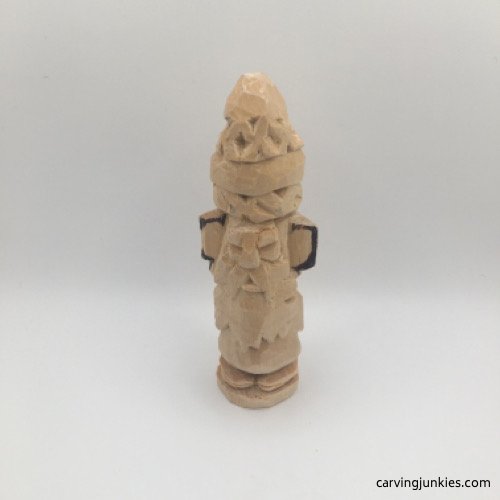 35. Shaping the ears
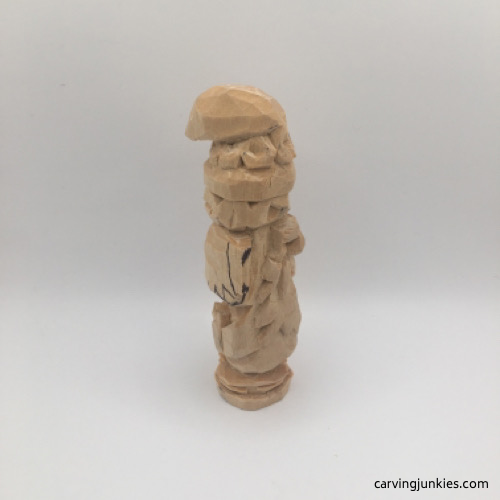 36. Hair is drawn
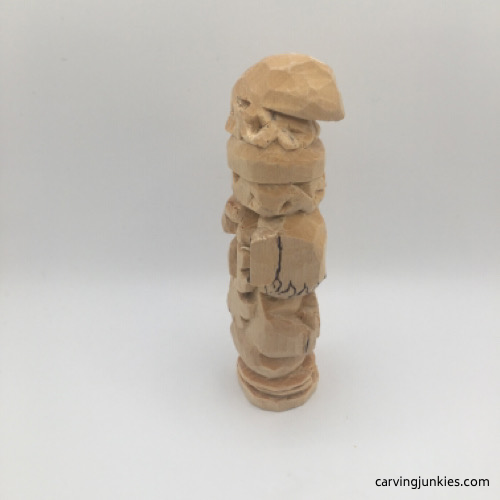 37. Left view
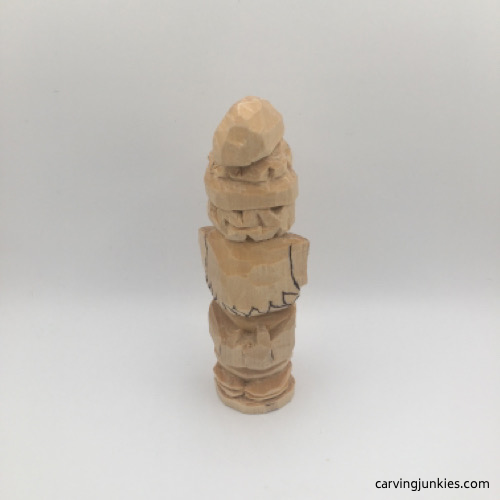 38. Back view
Refine the ears and hair of the gnome wood carving
- Carefully use a U-gouge to shape the inner ear, working from the outside in (photo 39). Tip: Our U-gouge is laminated and it’s a pleasure to use.
- You can also use the U-gouge to smooth the bridge of the nose and create the nostrils (photo 39).
- Use V-cuts to separate each ear on the back and to carve the jagged bottom of the hairline (photo 43).
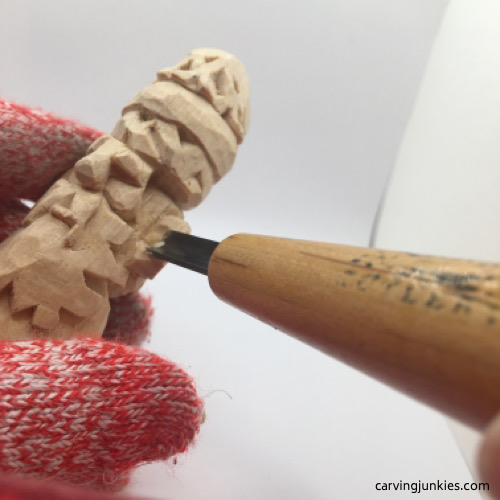 39. Shaping the inner ear
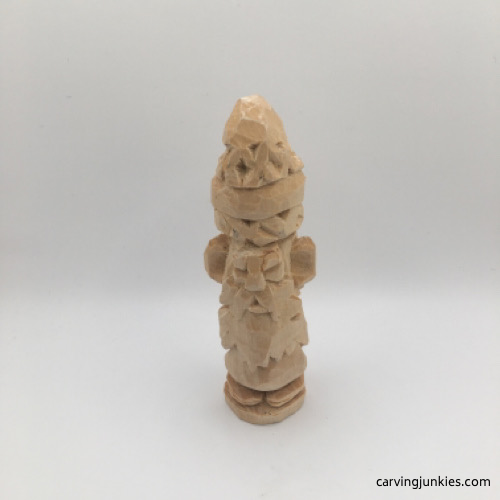 40. Progress from the front
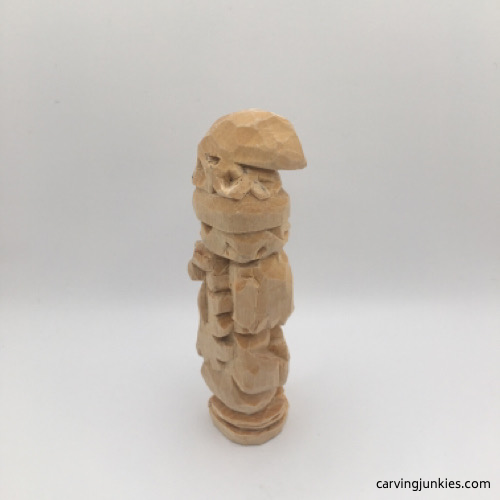 42. Left view
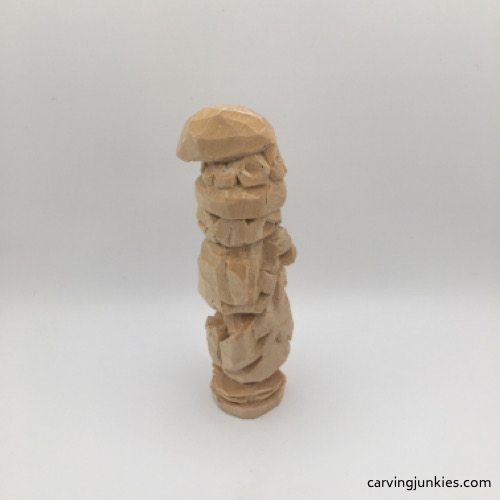 41. Right view
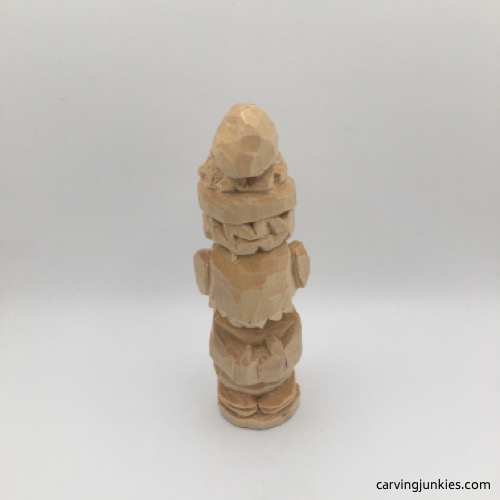 43. Back view
Add eyes to the gnome wood carving
- For this gnome wood carving, we made the eyes triangular in shape by carefully making a wide pyramid cut on each side (photo 44). This allows you to get your knife into the eye socket to flatten the surface for painting on the eyes.
- We also added little crows feet slits in each outer corner of the eyes.
- Make another very small pyramid cut to remove a chip from the inner corners of the eyes for shadow.
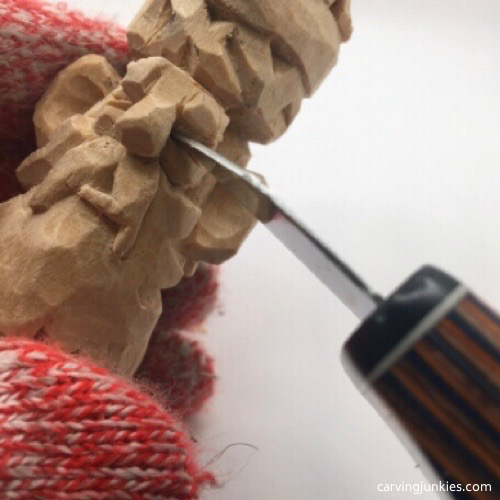 44. Carving the eyes
Draw the belt on the gnome wood carving
- Draw the belt on the front and sides and add the belt buckle (photos 45-47).
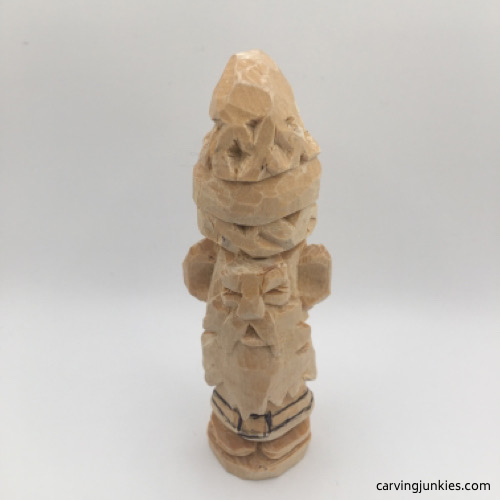 45. The belt is drawn
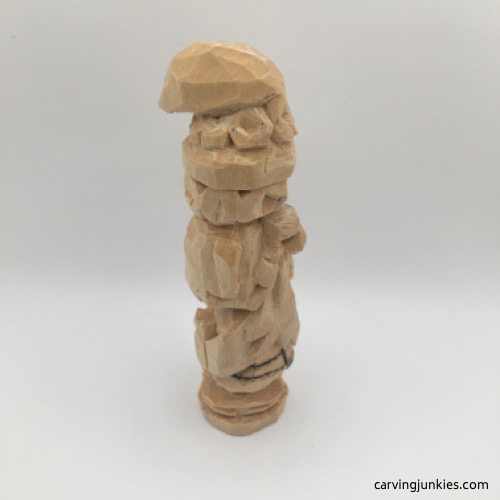 46. Right view
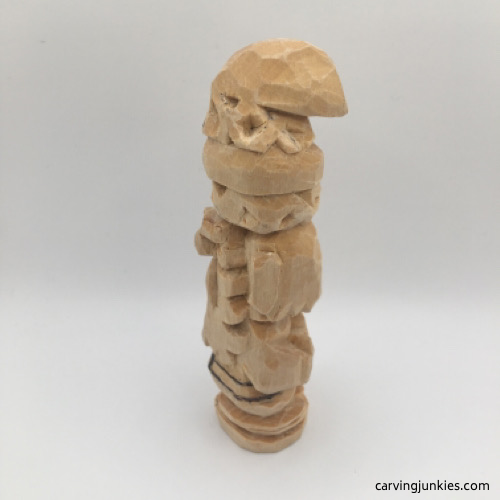 47. Left view
Refine the gnome wood carving
- Carve the belt buckle and belt (photos 48-51).
- Use a V-tool (or a small, sharp detail knife) to create texture for the beard, mustache, eyebrows, and hat brim (photos 48-51). Tip: start from the middle and work your way up, then turn the carving upside down to complete the cut. Vary the sizes of your cuts and make some curve and intersect for added interest.
- It’s hard to see, but we cut a little Y on the back of the tush (easier to see in the final painted version below).
- Inspect the carving and clean up your cuts (Tip: taking a photo of your carving will help you see cuts that may need work).
- Feel free to add a few wrinkles on the arms (oops… we forgot them!).
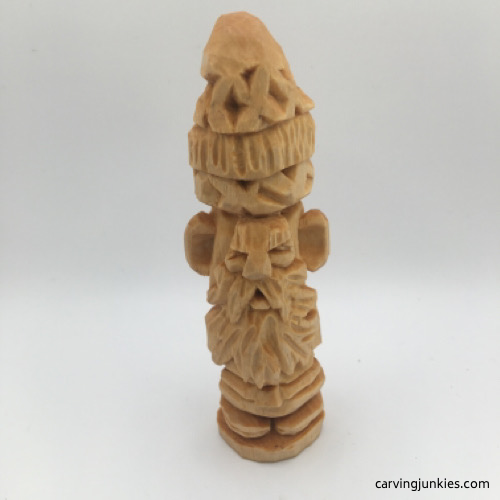 48. Front view prior to painting
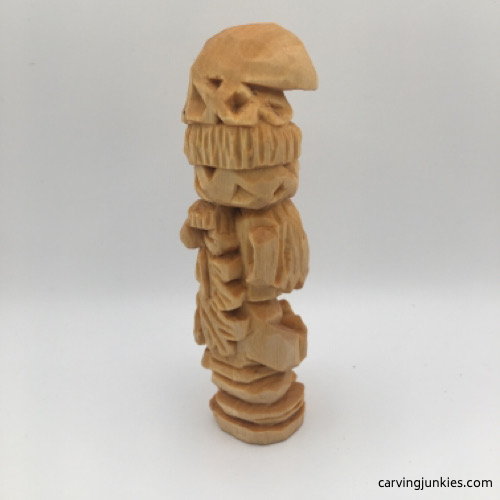 50. Left view
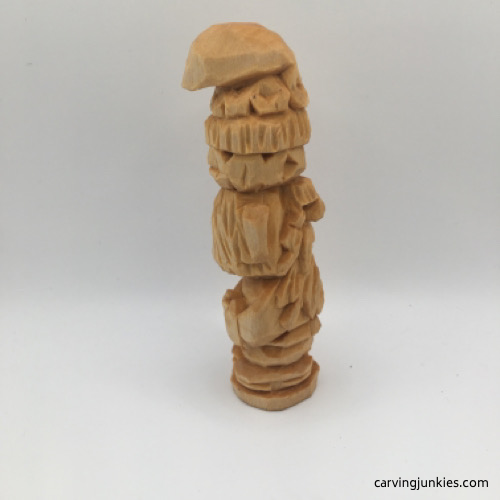 49. Right view
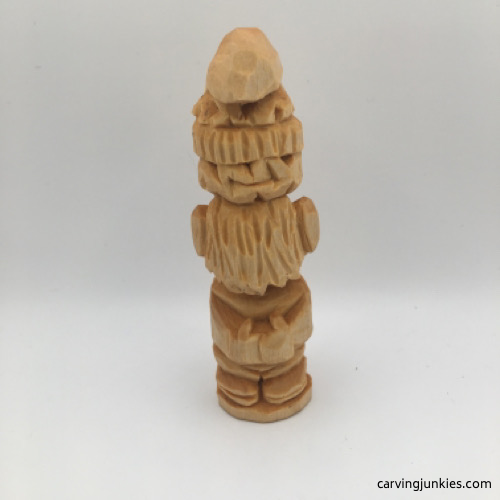 51. Back view
Time to paint the gnome wood carving
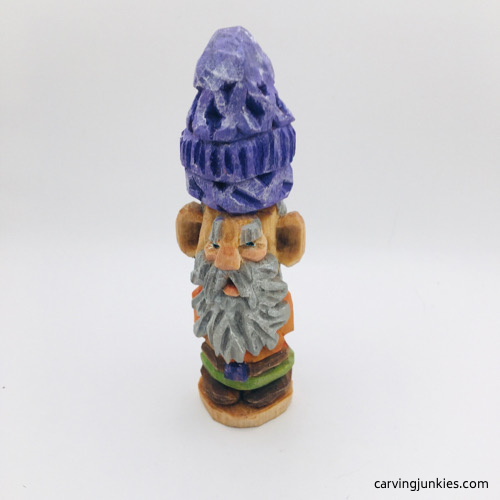
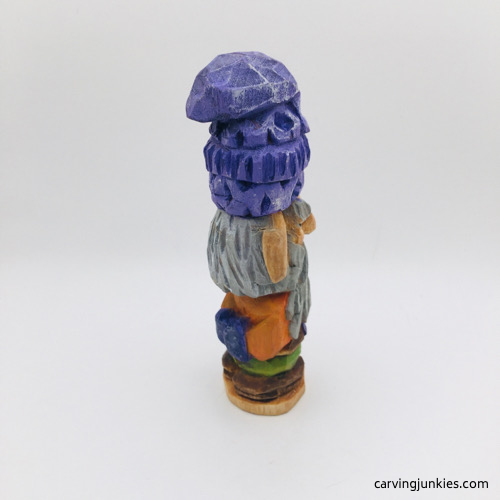
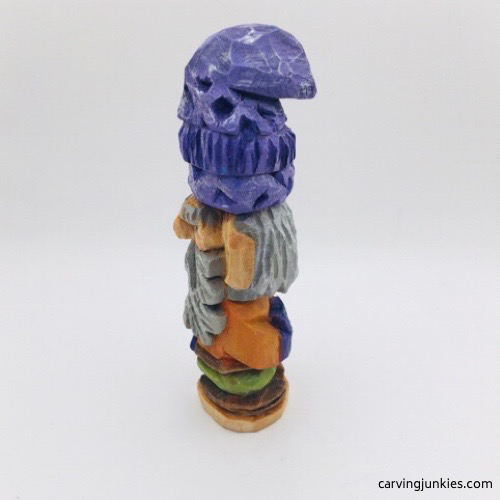
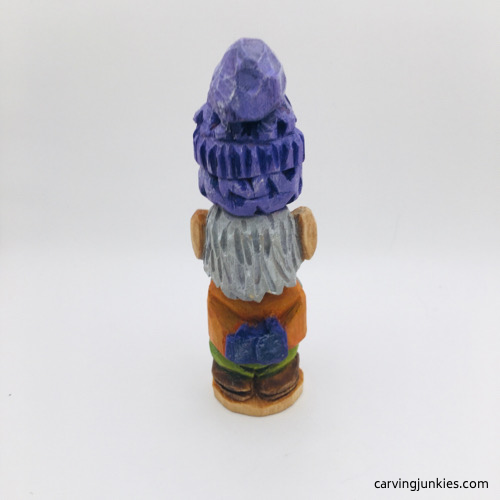
To get this look (all acrylic paints are Ceramcoat from Delta Creative unless otherwise noted):
- First, we dip the entire gnome wood carving into boiled linseed oil. We like to start painting within 10 minutes (some carvers let it dry overnight). We prefer the natural wood-grain look for our gnome’s face (versus creating flesh-colored paint) and the base.
- Eye whites: 100% Artist’s Loft titanium white paint (applied with a toothpick).
- Beard and hair: 100% FolkArt steel gray paint (reserve leftover paint). After drying completely, we dry brushed with titanium white paint. After allowing it to dry, we dry brushed the steel gray paint reserve in some of the hair cuts for shadow.
- Hat: 1 drop GP purple paint mixed with 3 drops water. We blended from dark to light with 1 drop of purple paint mixed with 3 drops of water. Reserve leftover paints. Once completely dry, we dry brushed the hat cuts with the GP purple paint to create shadow. After allowing to dry completely, we dry brushed with 100% titanium white paint.
- Shirt: 1 drop of tangerine paint mixed with 3 drops of water (reserve leftover paint). We blended from dark to light with 1 drop of pumpkin paint mixed with 3 drops of water. After drying completely, we used the darker orange reserved paint for creases in the arms and below the shirt.
- Lip, cheeks, end of nose, and tops of ears: 1 drop of rosy beige paint mixed with 1 drop of bright red paint and 10 drops of water.
- Pants: 2 drops of leaf green paint mixed with 5 drops of water. We blended from dark to light with 2 drops of FolkArt apple orchard paint mixed with 5 drops of water. For the pant crease, we mixed 1 drop of burnt umber paint to the leaf green paint reserve.
- Belt and shoes: 1 drop of burnt umber paint mixed with 3 drops of water.
For painting tips and techniques, click here.
Gnome wood carving summary
- This old world gnome is great to practice fine cuts and details.
- It can also help you create simple eyes that can work for any caricature carving.
- If you don’t have a V-tool, you can carve the beard, hair, and eyebrow cuts with a super-sharp detail knife (go slow and be careful to avoid crumbling).
- Feel free to change up the paint colors, or follow our painting guide.
Get 50 Wood Carving & Painting Tips when you join our FREE Covered in Chips club.
Share this page
carvingjunkies.com never sells your personal information.
This site uses cookies for its operation and to enhance your experience. As an Amazon Associate and Focuser Carving affiliate we earn from qualifying purchases.
Home | About Us | Privacy Policy | Terms of Use | Contact | Sitemap
