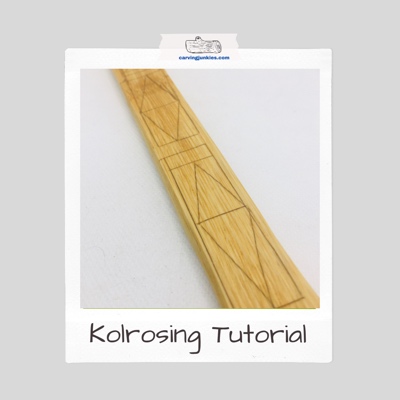
- Home
- How to hand carve wood
- Kolrosing
Simple kolrosing tutorial
Enhance your wood carvings with this ancient folk art.
LEVEL: EASY
Kolrosing is a simple, yet elegant way to embellish any wood carving.
Unlike wood carving, however, you are not cutting and removing any wood.
You are incising the wood. This means you are cutting the wood fibers to create a design.
Items with a smooth surface will be your best bet with kolrosing, and your colorant will pop more if you used light-colored wood.
The origins of Kolrosing
Kolrosing (sometimes referred to as Kohlrosing) can be traced back to the early Scandinavian Vikings who used the technique to create ornamentation on wood.
Sometimes, designs were also made on bone (a bit like scrimshaw).
In Norway, kolrosing was a tradition of decorating wood pieces that were often used for everyday life, including plates, bowls, or tankards.
Ground bark or ash was often used as the colorant.
In modern days, some carvers combine chip carving with kolrosing.
It is also sometimes referred to as a wood tattoo.
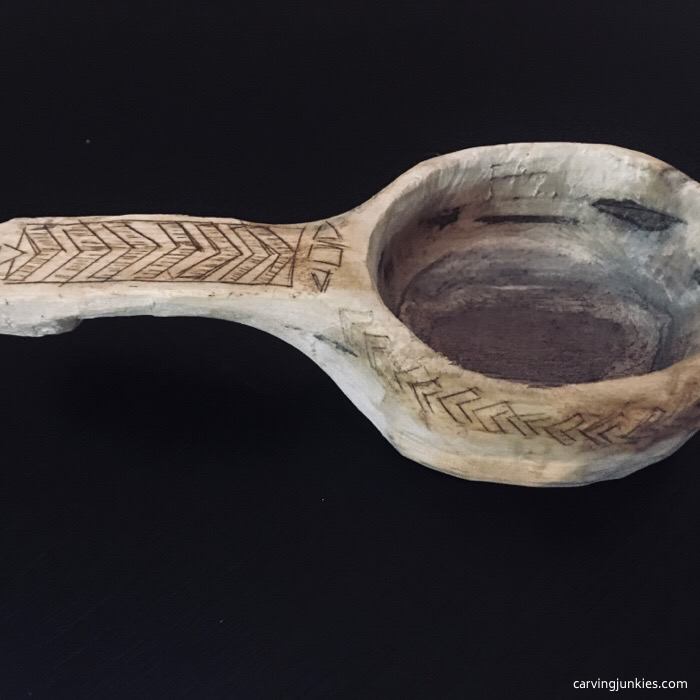 Kolrosing on a primitive kuksa
Breaking the kolrosing name down
If you break down the word kolrosing, rosing means decorating.
The early Norwegians often used coal dust as their colorant, which is called kol.
Put it all together and kolrosing simply means decorating with coal.
What can you kolrose?
You can pretty much kolrose any item, including:
- Spoons, knives, and forks
- Spatulas and other cooking utensils
- Plates
- Mugs
- Kuksas
- Furniture
- Mirror or picture frames
- Walking sticks
- Wands
Is a special kolrosing knife needed?
There are some knives that are specially designed for kolrosing (photo 1).
The key is to hold the knife like a pen, which we admit is easier to do with a kolrosing knife (photo 2).
We’ve had success using the tip of a small detail knife on simple line designs without any curves.
Since most people do not own a kolrosing knife, we used a detail knife for our tutorial to see how it would turn out.
If you want to create a fancier design with curves, and a lot of twists and turns, you may want to consider buying a kolrosing knife. It will set you back about $30 US.
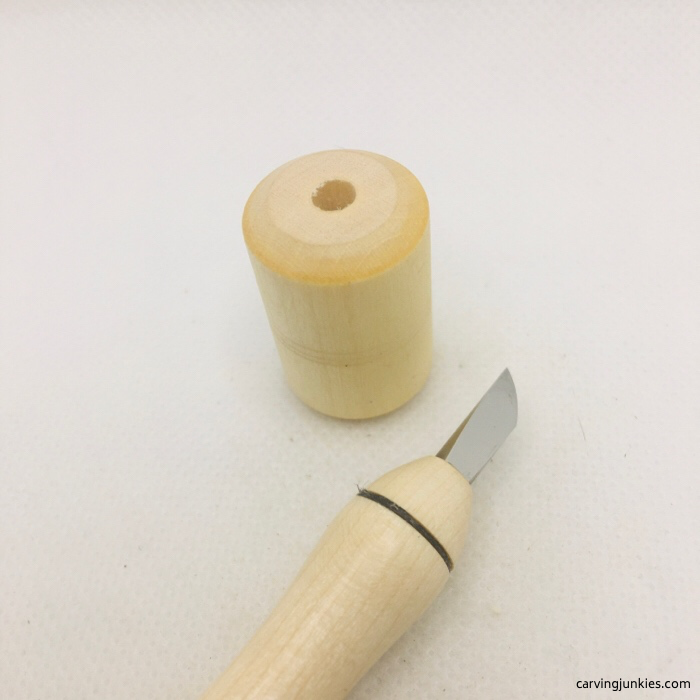 1. Kolrosing knife and cap
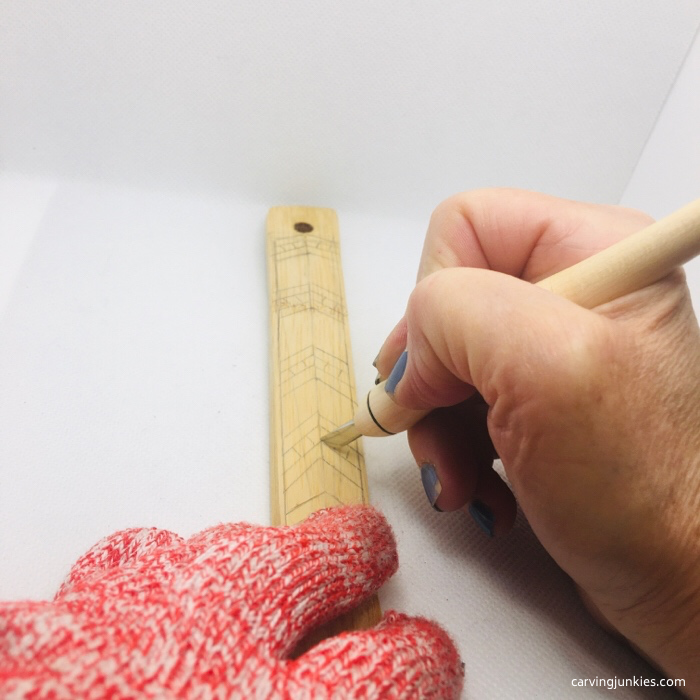 2. Hold a kolrosing knife like a pen
Simple kolrosing tutorial at a glance
For this tutorial, we used an inexpensive spatula that we purchased at a dollar store.
If you don’t have the time to hand carve an item, you can easily turn a set of plain store-bought wooden spoons into lovely (and inexpensive) utensils that would make a perfect housewarming gift.
Tiny wooden spoons are also nice a nice gift for parents of a new baby.
Of course, you could carve your own utensils, too.
Just remember to always use food-safe oils to finish all eating utensils.
You may want to avoid mineral oil as it has a laxative effect!
Kolrosing step 1: Preparing
Some folks like to sand a wood surface before kolrosing, using very fine sandpaper. Then they:
- Lightly draw their design on wood with a pencil.
- Rub wax paper on the design (the wax lubricates the wood, making it easier to turn your knife blade).
- Begin their cuts.
Another option to smooth wood is to burnish it with a deer antler or another piece of wood. In fact, you can use small wood chips to burnish a wood surface.
Is all this preparation absolutely necessary? On the first piece we kolrosed we didn’t prepare the surface in any way. It ended up looking just fine.
But since we are using a spatula we purchased, we took some fine sandpaper to it for our tutorial.
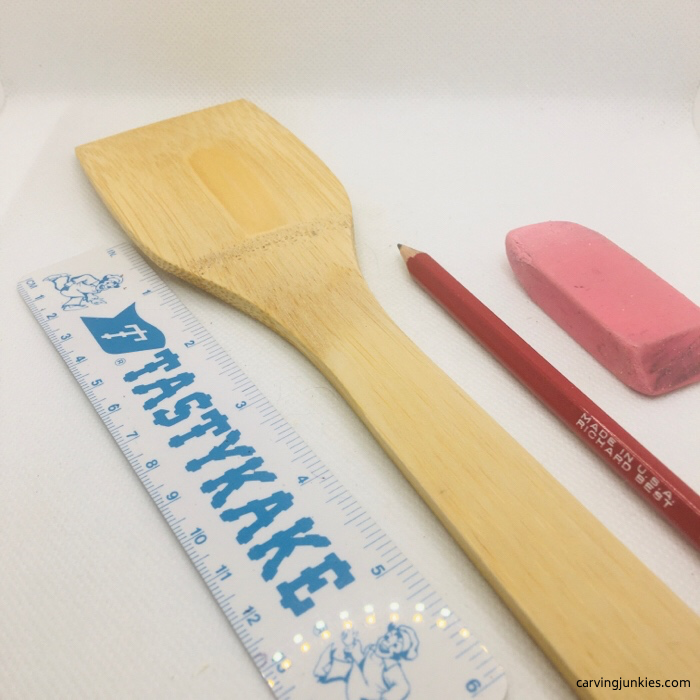 3. Getting ready for kolrosing
Kolrosing step 2: Draw your design
If you want, you can trace your spoon, or other piece you want to kolrose, onto a piece of paper and sketch your design.
You can also use graphite paper to transfer your design.
We like to keep things simple (code for winging it!), so for this tutorial, simply:
- Draw your design lightly with pencil (ours is darker so you can see it).
- Some people like using a mechanical or soft pencil.
- Keep a good eraser nearby to fix any mistakes!
- It may help to create a center line in the middle to guide you (photo 4).
- Using a small ruler will also help you keep your lines straight and balanced.
Suggestion: You may want to keep your first kolrosing design fairly simple, such as straight lines and geometric shapes (photo 5).
As your kolrosing skills improve, you can challenge yourself with curved or wavy lines.
 4. Drawing the center line
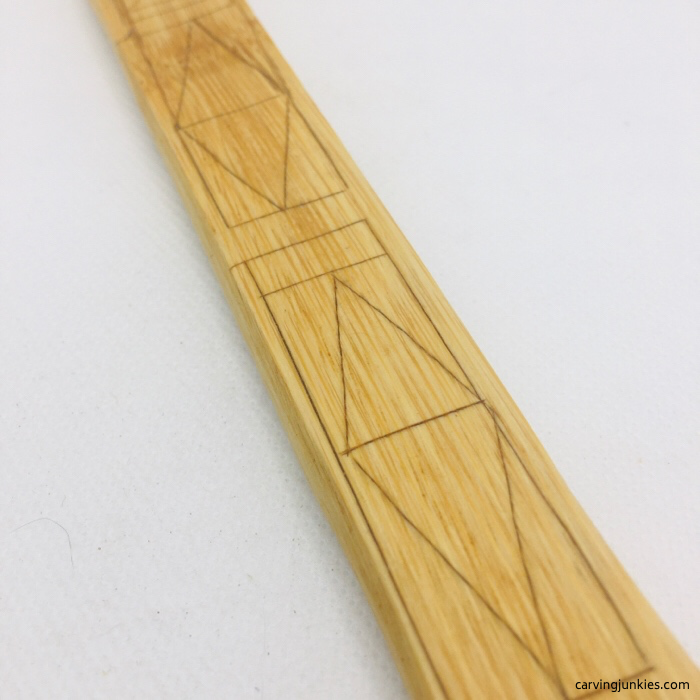 5. Fully drawn design
Kolrosing step 3: Incising (cutting) the wood
Once your design is on the wood, use a knife to make your cuts (photo 6). It helps to hold your knife the same way you hold a pen or pencil.
Use your other hand to secure the wood piece. Or, you can use a vise to keep your piece in place.
- Work from the outside in on a piece (in other words, start with the outer border and then complete the middle section).
- Strive to make one clean line without pressing the knife down too hard.
- If you make a double cut, it will show up when you add your colorant (photo 11).
Like wood carving, you want to be able to easily see the lines you cut.
This can be aided by using a bright light or working outdoors on a sunny day.
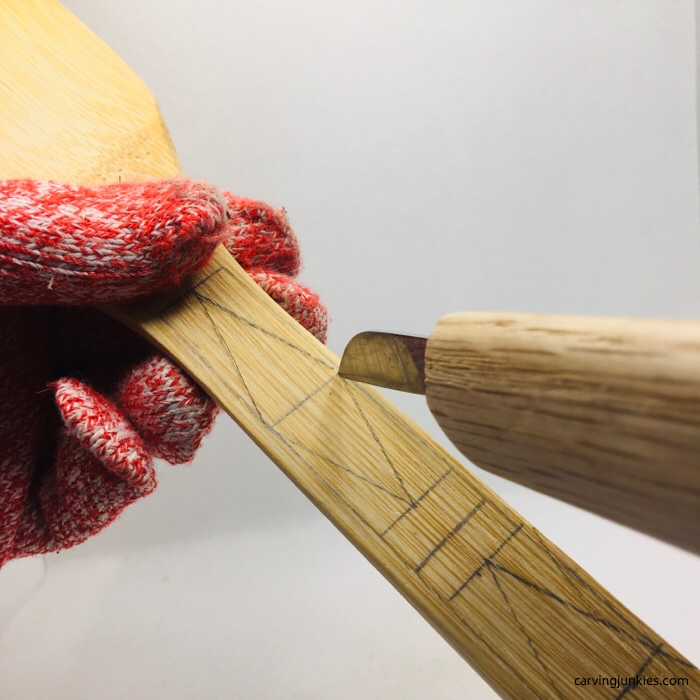 6. Incising the wood with a scalpel knife
Kolrosing step 4: Rubbing in your colorant
For colorant, you can use:
- Powdered wood or bark (sometimes called barkrosing).
- Instant coffee (extra fine grind).
- Cinnamon (which is powdered bark).
Bear in mind that coffee and cinnamon are both food safe, making them good choices for kitchen utensils.
Coffee grounds will give you a nice dark effect while cinnamon may have a reddish tint. We’ve always preferred cinnamon because we like the reddish color.
Simply rub your cinnamon (or other colorant), with your finger, into the cuts you made (photo 7).
Wipe off any excess cinnamon with a paper towel.
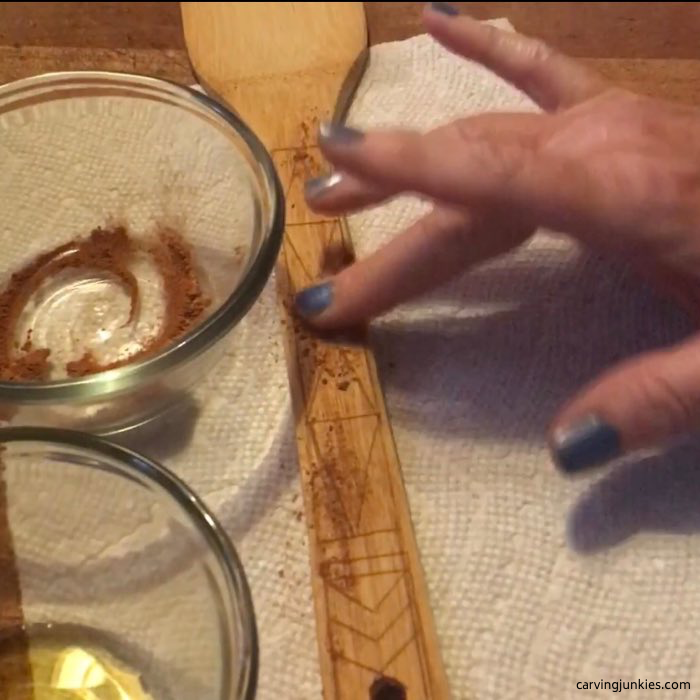 7. Rubbing in cinnamon
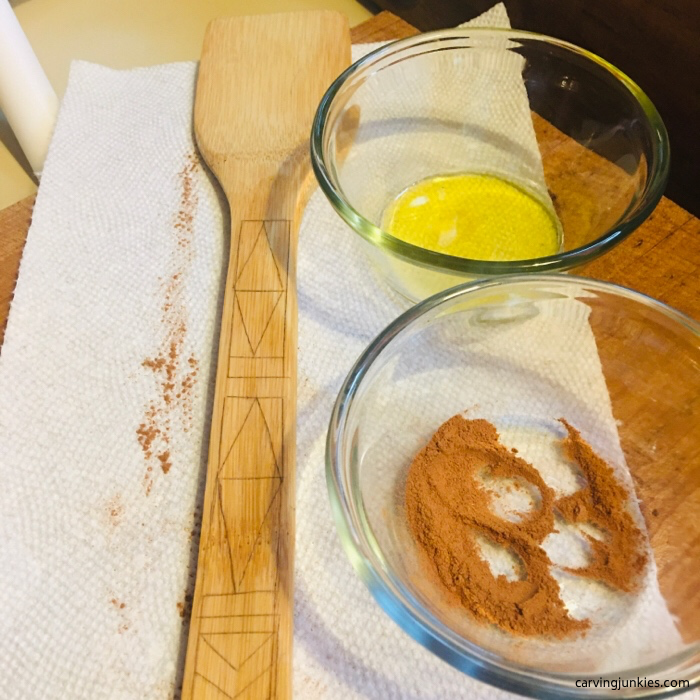 8. Keep your colorant and oil in nearby bowls
Kolrosing step 5: Finishing
Finish by rubbing some food-safe oil (we use olive oil) into the cuts (photo 9).
You can also use a food-safe linseed oil.
This should darken your design.
Let your piece set for a minute and then wipe it down with a paper towel or cloth rag (photo 10).
Throw your towels or rags in the garbage outside your home because they are flammable.
 9. Rubbing in oil
 10. Wiping off excess oil
Side-by-side kolrosing comparison
We decided to do a comparison by creating another quick design with an actual kolrosing knife. Here's what we learned:
- It is much easier to hold the kolrosing knife and make deeper cuts .
- However, using a kolrosing knife takes practice and we had more slips with it than with our detail knife (photo 11).
- When you use a detail knife, you may need to add another round of colorant and oil, if you want a darker color (that is what we did).
- Definitely cut your design outside or with a bright light... we missed some spots using indoor lighting! (photo 11).
 11. Oops! Spots missed, plus dreaded double lines
Getting inspiration for your kolrosing
If you are looking for kolrosing inspiration, the “Queen of kolrosing” is Judy Ritger.
She sells a 90-minute DVD that you can purchase at Pinewood Forge.
Her DVD includes:
- An introduction to kolrosing.
- Tools and materials.
- How to transfer patterns.
- Different cutting methods.
- How to stay safe and sharpen your knife.
- Different finishing methods.
- How to decorate a spoon and other objects.
- Design principles and how to create designs.
- Various work positions.
- A gallery of fine kolrosing.
Celtic pattern books are another great source for design ideas.
Summary of kolrosing history and tutorial
- Kolrosing is a simple way to jazz up a plain spoon or other utensil.
- You can experiment with different colorants to determine what you like best (cinnamon is our favorite).
- The lighter the wood the better to make your design stand out.
- If you don’t get great results with your knife tip, consider buying a kolrosing knife (you can never have too many tools, we say!).
Sources:
Vesterheim National Norwegian Museum & Heritage Center.Norwegian Woodcarving booklet.
RavenLore Bushcraft and Wilderness skills.
Ritger J. Kolrosing: Norwegian Line Carving.
Vogel, Joshua (10 November 2015). The Artful Wooden Spoon: How to Make Exquisite Keepsakes for the Kitchen.
Basics of kolrosing. Pinewoodforge.com.
Get 50 Wood Carving & Painting Tips when you join our FREE Covered in Chips club.
Share this page
carvingjunkies.com never sells your personal information.
This site uses cookies for its operation and to enhance your experience. As an Amazon Associate and Focuser Carving affiliate we earn from qualifying purchases.
Home | About Us | Privacy Policy | Terms of Use | Contact | Sitemap
