- Home
- Easy wood carving ideas
- Mushroom wood carving
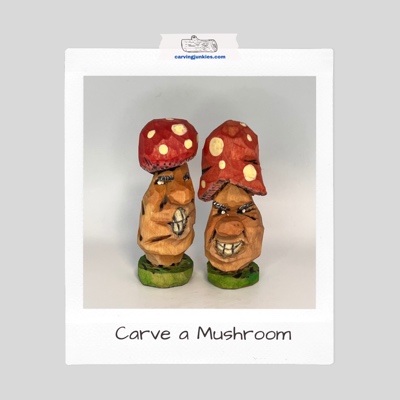
Marvelous mushroom wood carving tutorial
Expressive, easy, and fun for you to carve.
LEVEL: EASY
This mushroom wood carving with a caricature face is super easy to carve with our step-by-step instructions. You can change up the facial expression to make a whole community of little mushrooms.
This tutorial is also great practice if you want to improve how you carve faces. Instead of making a study stick, you can spend a few minutes more and create your own little mushroom man.
In case you didn’t know… mushrooms are actually fungi that have a plant-like form. These adorable toadstools would make a wonderful and comical addition to any kitchen!
What you will need to make your mushroom wood carving
You will need a block of wood that is 1 x 1 x 3 inches (2.5 x 2.5 x 7.6 cm). As always with our little whittles, you can easily double, triple, or even quadruple the size.
There is not that much wood to remove so you can get away with just using a detail knive. I (Dana) used my trusty OCC Tools straight knife (1-7/8 inch blade), which seems to prevent wood from crumbling, especially on little blocks of basswood.
You will need something to draw your guidelines. A ruler is also helpful for measuring the guidelines.
A painting guide is provided at the end.
Mushroom wood carving at-a-glance
Watch and the key steps to this easy mushroom wood carving tutorial.
Draw your guidelines on the mushroom wood carving
You will carve off the corner for this mushroom wood carving. This gives you a ready-made plane to create a big nose with depth.
Draw the nose box on the front corner of the wood block (photos 1-3). You will use our triangle-by-triangle nose carving technique to carve the nose (unless you prefer using another nose-carving method). The colored triangles mark the wood that you will remove using a pyramid cut (photos 1-3).
To set up the nose box on the front corner, the top guideline is 1.25 inches (3.2 cm) across. The guideline across the bottom is 1 inch (2.5 cm) across. The nose box is 1/2-inch (1.3 cm) tall.
Don’t worry if the dimensions are not totally perfect. It does not matter. You have a lot of leeway with these little mushroom wood carvings.
Draw a curvy line that runs around the block, which marks the bottom of the mushroom tip (photos 1-4). Again, it can be as curvy as you want.
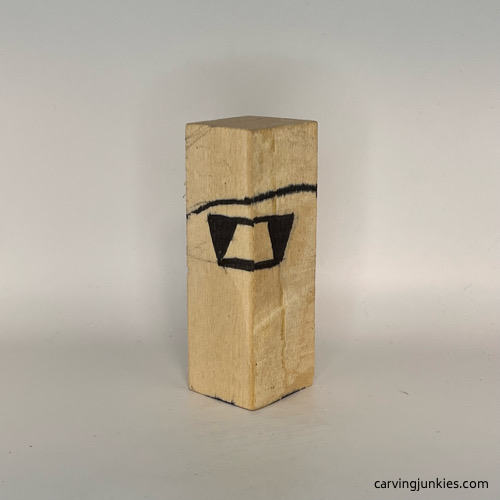 1. The nose box runs across the front corner
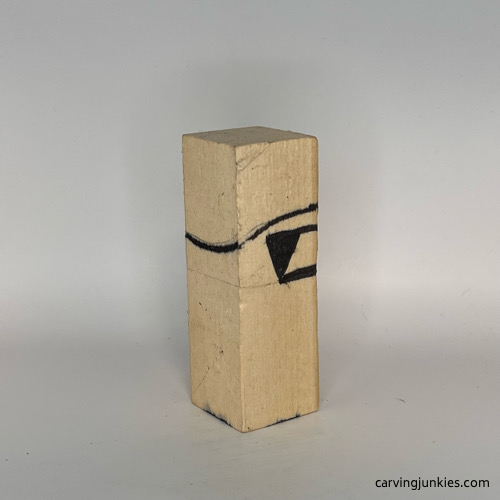 2. Right view of the mushroom
 3. Left view of the mushroom
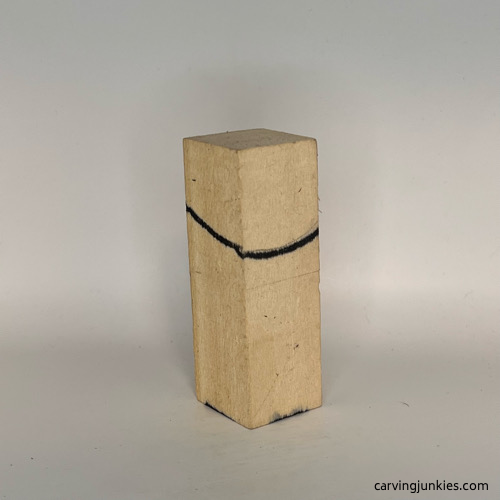 4. Back of the mushroom
Carve the nose on your mushroom wood carving
Make a stop cut under the nose (photo 5), removing (or relieving as some like to call it) wood from underneath.
Make a pyramid cut on one side (photo 6). Make a second pyramid cut on the opposite side (photo 7).
Draw two small triangles on each side of the nose that you will slice off to shape the nose (photo 7).
Make a cut at the top of the nose to angle it down (photo 8). You can refine the nose further later, including adding chip cuts in the corners, which I like to add after I carve the smile lines.
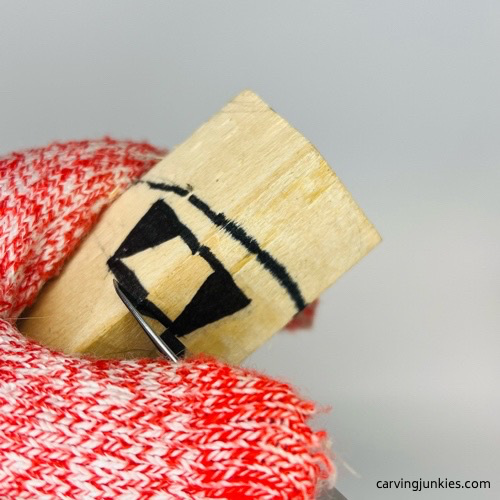 5. Making a stop cut
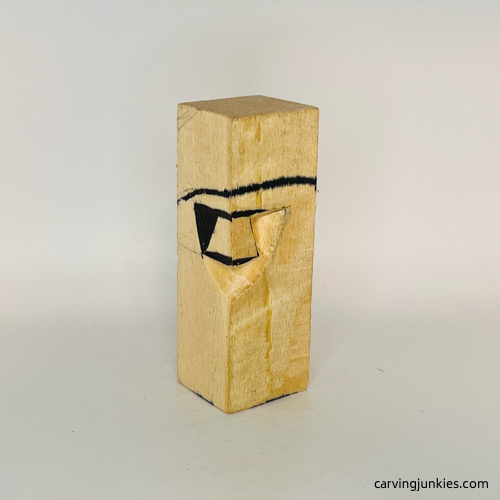 6. First pyramid cut is completed
 7. Second set of triangles are drawn
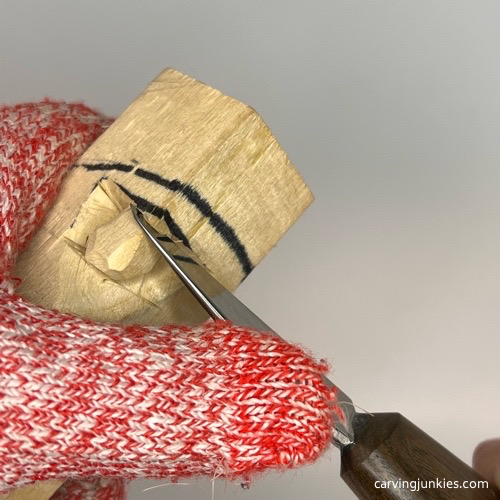 8. Cutting the bridge of the nose at an angle
Carve the top of your mushroom wood carving
Once you have a rough shape of the nose, make stop cuts along the guideline for the bottom of the mushroom top (completed cuts are visible in photos 9,10). Use your knife to remove wood from underneath. You can also use V-cuts here, if you prefer using them.
Round all the corners on the lower part of the mushroom wood carving (photos 9,10). Draw a guideline that is 1/4-inch (0.6 cm) from the bottom to mark the top of the base (photos 9,10). Make stop cuts along the guideline and remove wood from above it to separate the base (photo 11).
Draw the outline of the mouth and cut along the guideline (photo 12). You can hold your knife like a pencil here or push the knife with your thumb. Tip: Carefully remove wood from the middle outward inside the mouth (to avoid carving against the grain).
Draw the teeth for the mushroom wood carving (photo 13).
 9. Base guideline from the front
 10. Back view of the mushroom wood carving
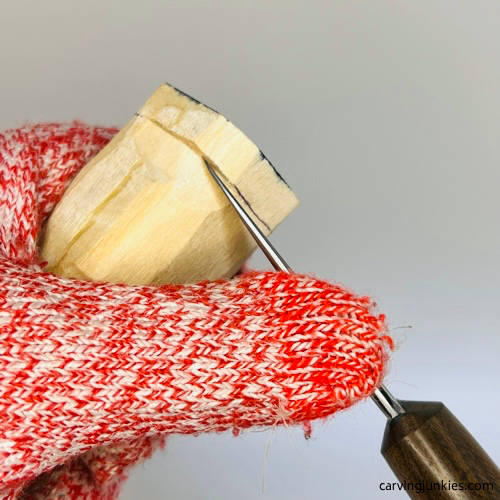 11. Separating the base
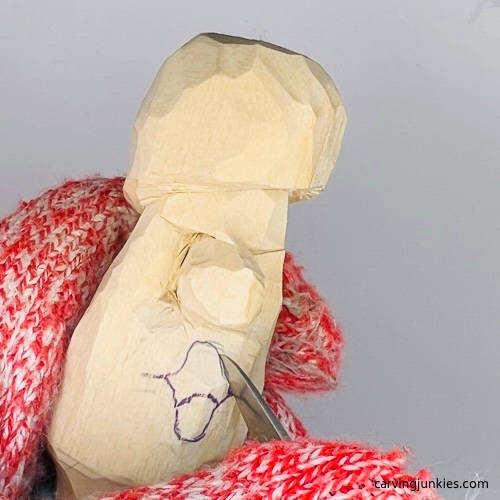 12. Separating the mouth
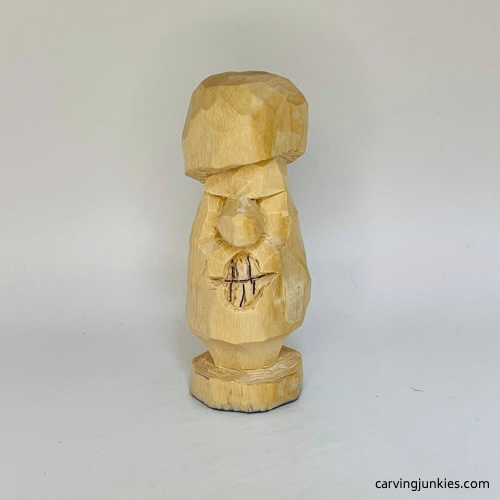 13. Teeth are drawn
Carve the teeth on your mushroom wood carving
Carefully make a stop cut along the guideline between the upper and lower teeth and remove wood from underneath (photo 14). The top of the bottom teeth should be angled back a little so it looks like they are behind the top teeth.
Also use V-cuts or slicing cuts to separate the individual teeth (photo 15).
Make some wide V-cuts on the face, and around the mushroom, to create facets that will reflect light (visible in photos 18-21).
 14. Cutting the top teeth from the bottom teeth
 15. Cutting the individual teeth
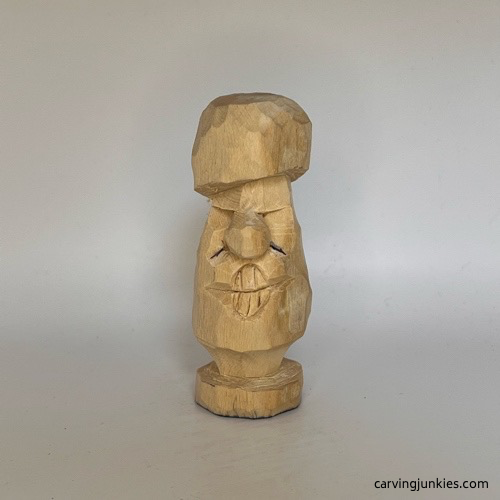 16. Smile lines are drawn
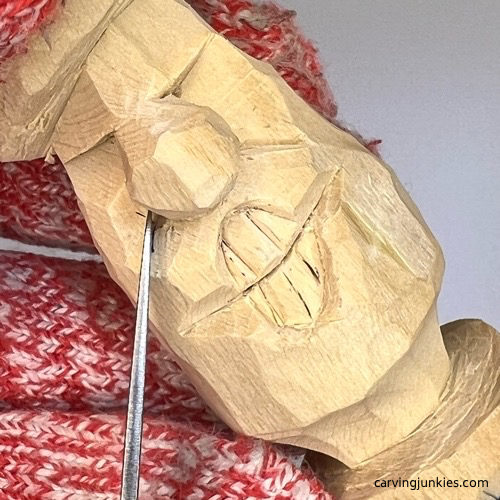 17. Cutting the smile lines
Wood burn your mushroom wood carving (optional)
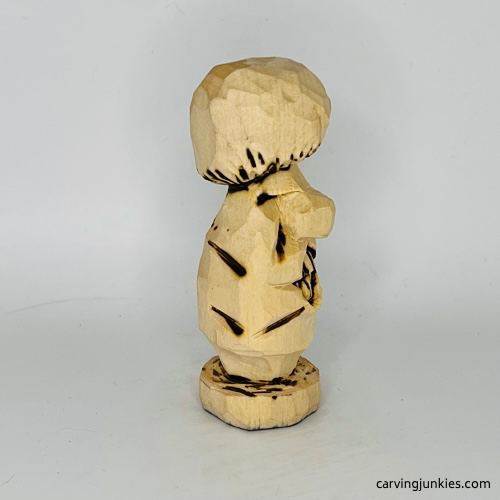
Use a wood burner to accentuate the mouth, teeth, underpart of the mushroom, and a few wrinkles that you carved on your mushroom wood carving (photos 18-21).
Tip: If you don’t have a wood burner, you can use brown paint instead with a toothpick (but wait until after you paint the white teeth).
 18. Front view after wood burning
 19. Right view of mushroom wood carving
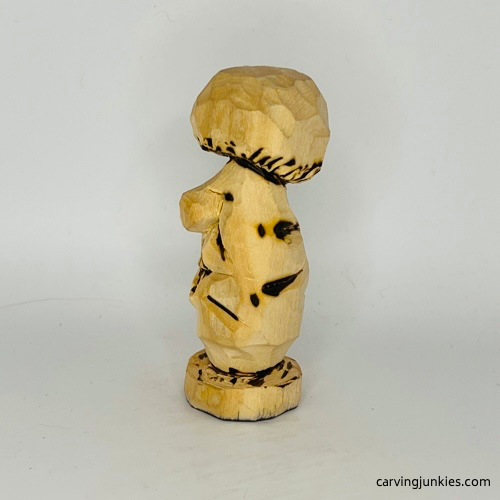 20. Left view of mushroom wood carving
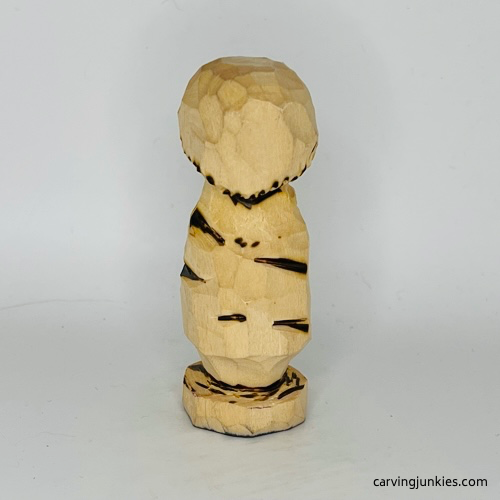 21. Back view of mushroom wood carving
Paint your mushroom wood carving
All the acrylic paints used are listed below and have been diluted with water to create a wash. You can use whatever paint brushes that you want. Keep a toothpick, and a pencil without an eraser, on hand for making the different-sized polka dots.
To get an antique look, you will start with a very thin wash using Academy burnt sienna. This is a technique that caricaturist Ryan Olsen uses. Then, add new color washes layer by layer until you reach the desired color.
- Mushroom body: Apple Barrel light mocha wash.
- Eye whites: 100% Craftsmart vanilla.
- Border under mushroom top: dry brush with Ceramcoat ivory.
- Teeth: first layer is 100% Ceramcoat ivory. Second layer is 100% Craftsmart vanilla.
- Mushroom top: FolkArt red lipstick wash.
- Nose and cheeks: very diluted Winsor & Newton cadmium red light wash (apply and dab with your fingers).
- Base: Folk Art bright green wash.
- Eyebrows: Black magic marker and 100% Craftsmart vanilla applied with a toothpick.
- Polka dots: 100% Ceramcoat ivory applied with the end of a pencil and the end of a toothpick.
- Finish with Howard Feed-N-Wax polish and brush after setting for a half-hour (note: always properly dispose of cloths or paper towels as this finish is combustible).
 22. Front of mushroom wood carving
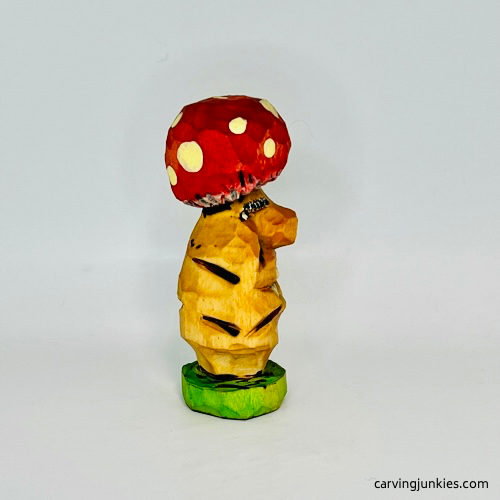 23. Right view of mushroom wood carving
 24. Left view of mushroom wood carving
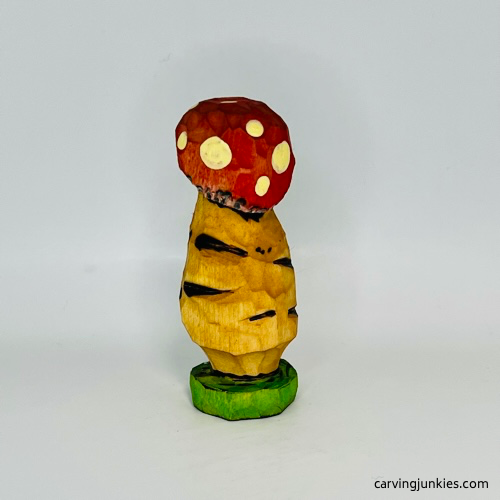 25. Back view of mushroom wood carving
Free mushroom wood carving pattern
If you prefer to make your mushroom wood carving from a pattern, photocopy this to size to fit your wood block.
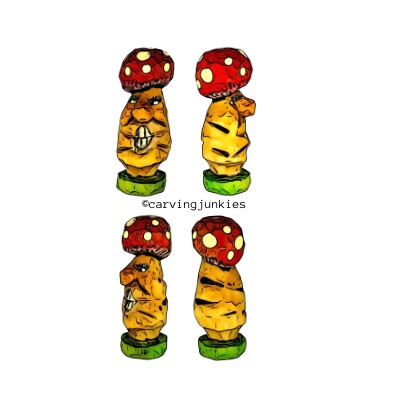
Mushroom wood carving tutorial summary
- These little mushroom wood carvings are super easy and fun to carve.
- Change up the size and shape of the mushroom, nose, or mouth to create more little mushroom wood carving whittles.
- Vary the size of the polka dots to add interest.
- A wood burner adds texture, but if you do not have one, you can use your knife and some brown paint—or even gel stain.
Get 50 Wood Carving & Painting Tips when you join our FREE Covered in Chips club.
Share this page
carvingjunkies.com never sells your personal information.
This site uses cookies for its operation and to enhance your experience. As an Amazon Associate and Focuser Carving affiliate we earn from qualifying purchases.
Home | About Us | Privacy Policy | Terms of Use | Contact | Sitemap
