- Home
- Things to carve
- Pear wood carving caricature
Pear wood carving caricature tutorial
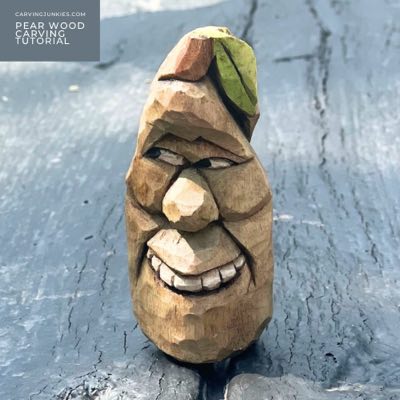
Carve yourself a "pear person" with a toothy grin!
LEVEL: SOME CHALLENGES
If you're looking to craft an adorable pear wood carving caricature, you've come to the right place! This tutorial is your go-to guide for turning a simple piece of wood into a delightful caricature with lots of personality.
Experience the joy of carving out the pear’s big, beaming smile (with individual teeth) and his charmingly, oversized nose. Let your creativity run wild with this fun caricature carving that is sure to make you grin.
The steps to this tutorial are super easy to follow. Grab your knife, bring along your sense of humor, and let's get carving!
Gather your supplies
- Grab a piece of basswood (or another easy-to-carve wood) that is 1 x 1 x 3 inches (2.5 x 2.5 x 7.6 cm). Want to carve a much bigger pear and/or use a bandsaw for your roughout? Use the free pattern at the end of this page.
- Keep a pencil or pen handy to sketch your guidelines.
- You probably only need one sharp knife for this piece, but you might want to use a smaller detail knife on the facial details.
- I also used a #11 U-gouge for the nostrils, but you could also use a small detail knife.
- I can never stress this enough: Always use a good carving glove for safety, along with something to protect your lap (if you lap carve) like a thick, square piece of wood or a large cutting board.
- A free painting guide is included at the end of the tutorial.
Pear wood carving at-a-glance
Check out this short video of all the key steps to this pear wood carving tutorial before you begin carving.
Set up your pear wood carving
You will carve off the corner for this pear wood carving caricature. Sketch the face of the pear, marking areas where you will remove wood (photo 1).
Carve off the wood you just marked (photo 2) and roughly shape the pear. I started by slicing the wood off with push cuts but you could also use pull cuts.
Use a stop cut to separate the pear stem (photo 3), removing wood from around your cut. Note: Keep the pear stem a bit wider than usual to avoid breaking the wood.
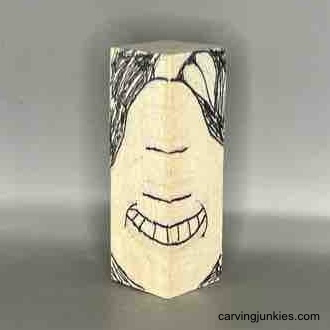 1. Guidelines are sketched
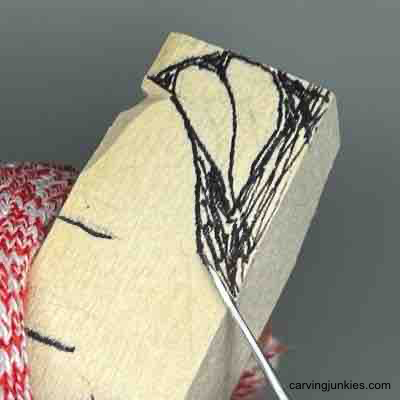 2. Slicing off wood
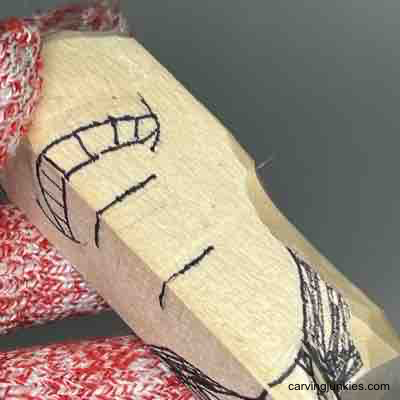 3. Making a stop cut
Shape your pear wood carving
After removing all of the marked wood shape the body on the front and sides (completed in photos 4,5).
Make a stop cut under the nose and remove wood from underneath (photo 4). Make another stop cut above the nose and remove wood from above your cut (completed in photo 5).
Sketch the sides of the nose and the eyebrows (photo 5).
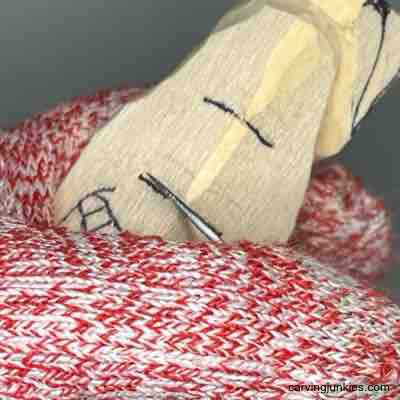 4. Making a stop cut
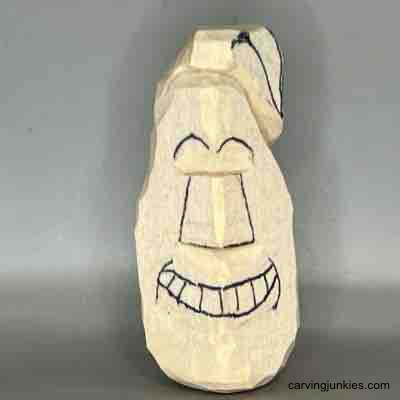 5. More details are added
Shape the nose
Carve each side of the nose (photo 6): I made my cut at an angle (photo 6) and then made a slicing cut up the other side to remove wood. Tip: If you struggle with carving noses and nostrils, do the next step first to avoid crumbling the wood.
Carve the nostrils: I used a #11 U-gouge and twirled it halfway around (photo 7). If you are going to use a knife here, sketch the nostrils for guidance.
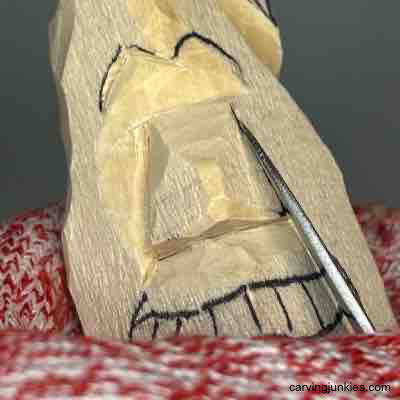 6. Carving the nose
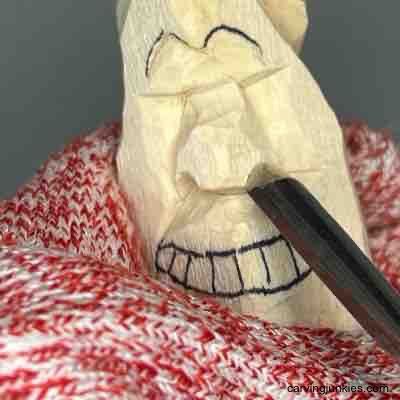 7. Carving the nostril
Carve more details on your pear wood carving
Carve the mouth and teeth: I used a stop cut (photo 8) to separate the top lip, removing wood from underneath. On the bottom lip, I removed wood from above my cut (completed in photo 9). I also made a stop cut along each tooth guideline and used a second slicing cut. Once the teeth are separated, make tiny pyramid cuts in the corners of each tooth to round them a bit (photo 9).
Carve the smile lines (completed in photo 9). I held my knife like a pencil to make my first cut and made a second slicing cut. You could also use a stop cut.
Reduce the depth of the wood for the eye sockets (photo 10). I used a push cut, cutting up to the eyebrows. I also removed some wood from the forehead. You may need to re-sketch the stem of the pear (visible in photo 10).
Sketch the eyes (photo 11): I typically keep my eyes simple on small caricatures to avoid crumbling.
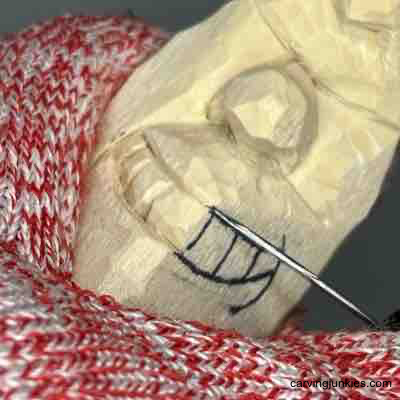 8. Carving the teeth
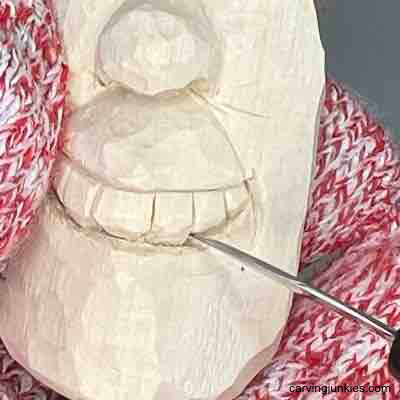 9. Making pyramid cut
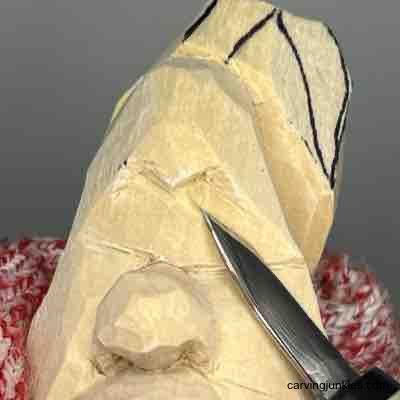 10. Carving the eye socket
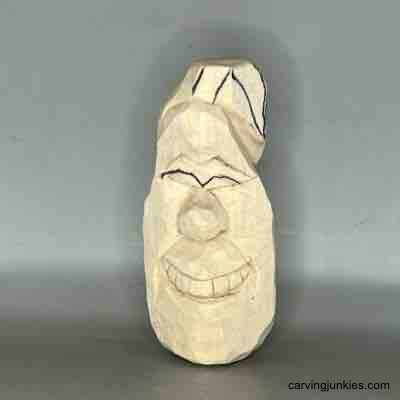 11. Eyes are sketched
Carve more details
Use your knife to separate the eyes (photo 12): I ran my knife along the guideline and made a second slicing cut. Then I rounded each eye slightly and made a small pyramid cut in each corner to create some shadow.
Sketch the cheeks on your pear wood carving (photo 13) and separate them.
Separate the stem (photo 14) and the leaf (photo 15). I used stop cuts, removing wood from around my cuts.
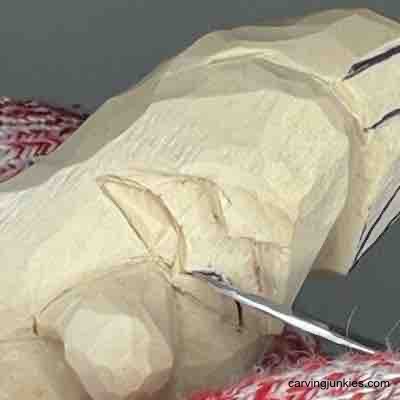 12. Carving the eyes
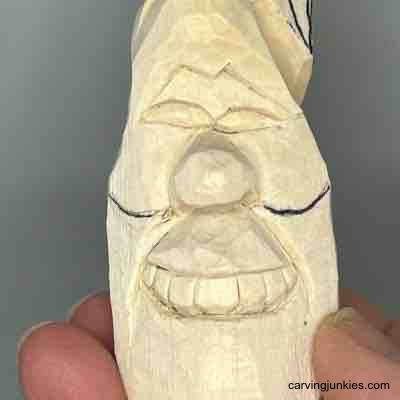 13. Cheeks are sketched
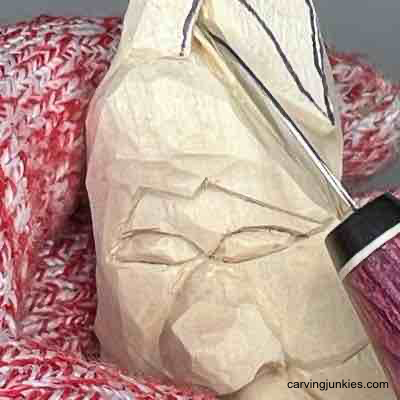 14. Shaping the stem
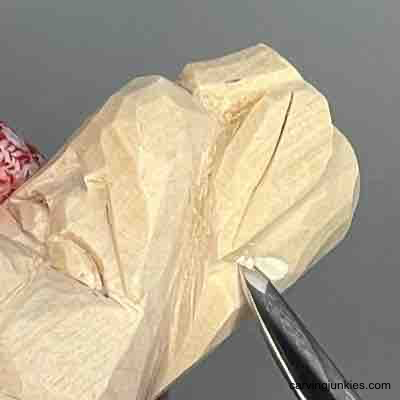 15. Shaping the leaf
Refine your pear wood carving
Shape the back of your pear wood carving (completed in photo 19). Shape and refine the details and the shape of your pear wood carving all around (photos 16-18).
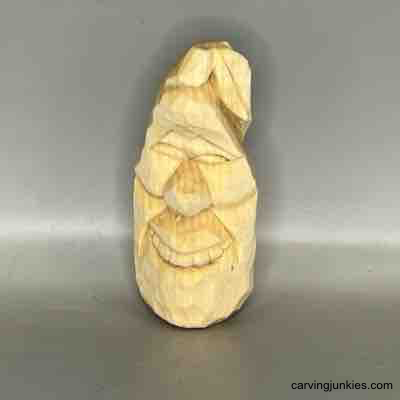 16. Front of carved pear
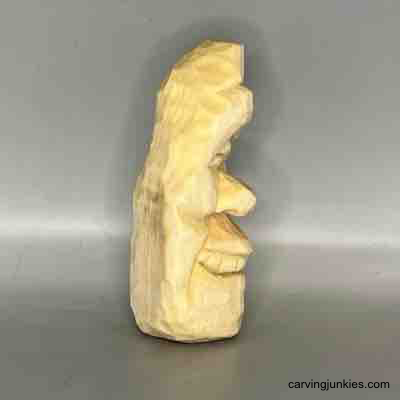 17. Right view of carved pear
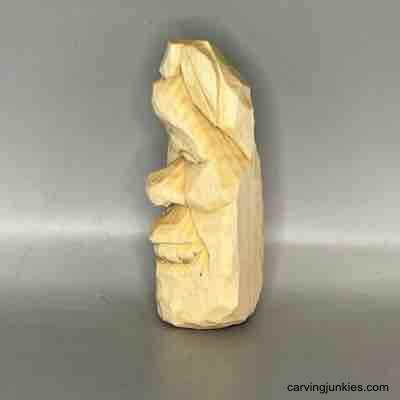 18. Left view of carved pear
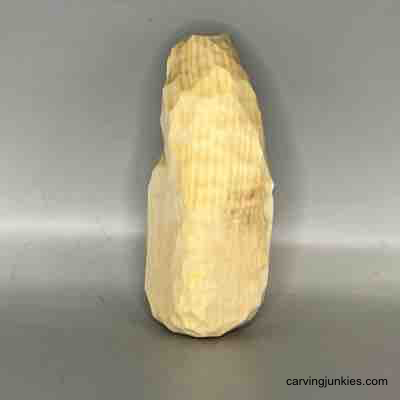 19. Back of carved pear
Paint your pear wood carving
If you want some painting tips, read this page about painting a wood carving.
Dilute the paint with drops of water to create a "wash." I used up to 10 drops of water and built my colors in layers by applying several coats.
Here are the colors/brands I used if you would like to get this same look:
- Teeth and eye whites: CraftSmart vanilla wash.
- Pear base layer: FolkArt wasabi wash.
- Stem: FolkArt Dark Brown wash (make enough to reserve some).
- Pear second layer: Brown wash, blotting my brush on the piece to apply the paint, and quickly patting areas dry with paper towel. Also use the brown wash to accentuate smile lines and under the cheeks and mouth.
- Cheeks and nose: Windsor & Newton pale terracotta wash.
- Pear highlights: Continue to blot the pear with brown wash to build color and depth.
- Leaf: FolkArt Apple orchard wash.
- Finish (optional): Seal with two coats. I used Mod Podge Spray. Then I applied "turd polish" (as caricaturist Chris Hammack calls it), which is 3 parts Minwax Aged Oake Gel Stain and 1 part mineral spirits. Remove immediately with paper towels and properly dispose of the towels outside (may be combustible).
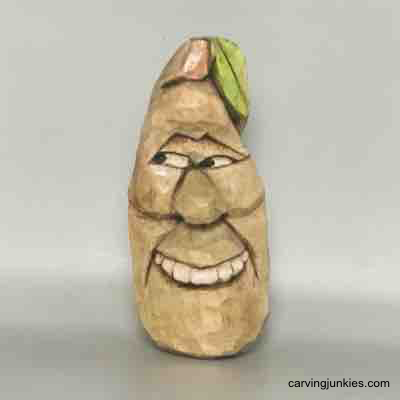 20. Front view of painted pear
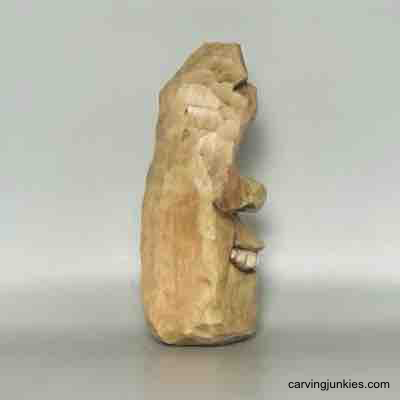 21. Right view of painted pear
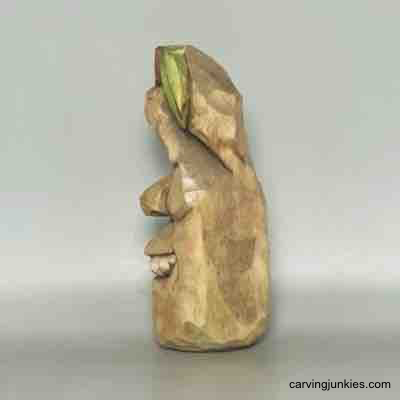 22. Left view of painted pear
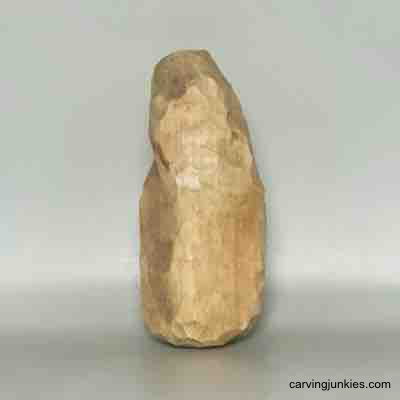 23. Back view of painted pear
Pear wood carving pattern
Simply photocopy this pear wood carving pattern to size to fit any wood block.
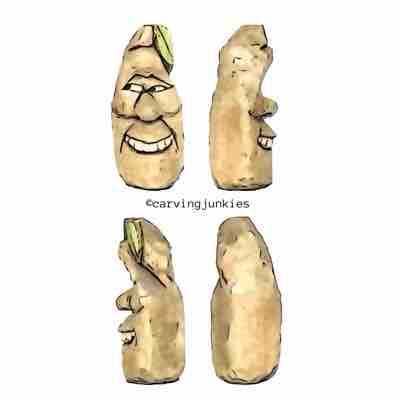
Pear wood carving tutorial summary
- This pear wood carving caricature tutorial is super fun and fast to carve.
- It is a great practice piece for carving teeth and finessing a nose.
- You can vary the mouth and teeth to create other fun pear carvings.
- Use the "turd polish" for some extra pop on this simple design.
Get 50 Wood Carving & Painting Tips when you join our FREE Covered in Chips club.
Share this page
carvingjunkies.com never sells your personal information.
This site uses cookies for its operation and to enhance your experience. As an Amazon Associate and Focuser Carving affiliate we earn from qualifying purchases.
Home | About Us | Privacy Policy | Terms of Use | Contact | Sitemap


