- Home
- Christmas wood carving ideas
- Carving a snowman
Carving a snowman on ice skates
Add a few magnets to make him twirl.
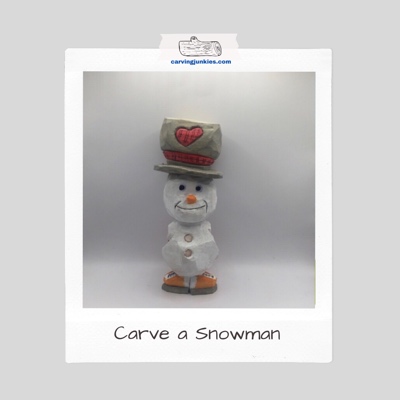
Carving a snowman can be so much fun! Our carving has a vintage look and feel, which is accentuated by the old-time ice skates and the tilted hat.
The simple plaid design on the hat band, heart, and mittens also adds interest to this cute wood carving. His hands are clasped behind him.
Carving a snowman tutorial at a glance
Carving a snowman: What you will need
For this tutorial you will need:
- One basswood block that is 1 3/4 x 4 inches (4.4 x 10.16 cm) for the snowman.
- One basswood block that is 2 x 2 inches (5.08 x 5.08 cm) for the hat, which you will glue to his head.
- A roughout and a detail knife.
- 1 U gouge (to easily remove wood from inside the hat).
- Pencil (or magic marker).
- Good carving gloves to protect your hands.
- Acrylic paints and brush of choice (painting guide is at the end).
Carving a snowman: Getting started
- Draw a line 1/2-inch (1.27 cm) from the bottom all around to mark the top of the skates (photo 1).
- Draw a second line 1.75 (4.445 cm) inches from the bottom all around to mark the bottom of the head (photo 1).
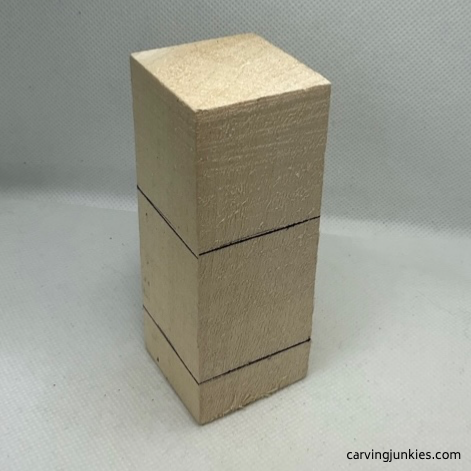 1. Guidelines are drawn all around
Carving a snowman: Initial cuts
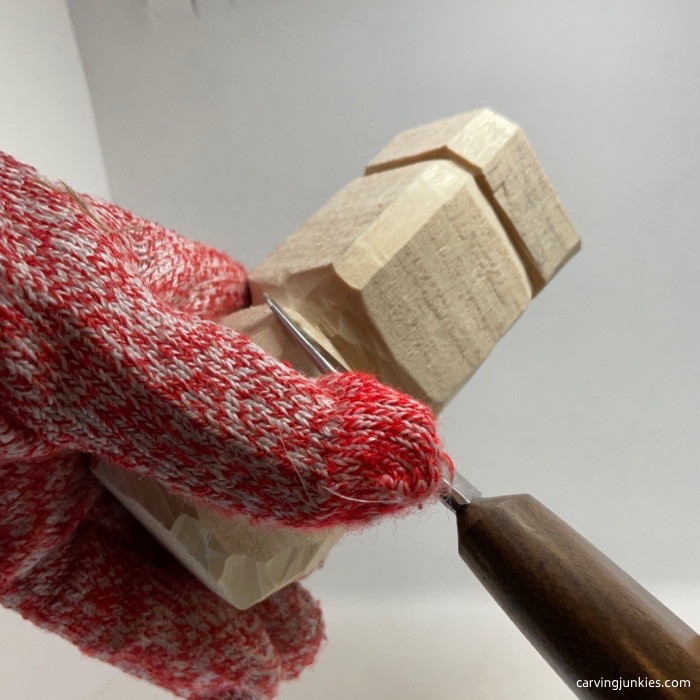
- Use stop cuts at each corner and remove wood from underneath to create a notch (photo 2).
- Continue to use stop cuts (or V cuts) to separate the head all around (photo 2).
- Use the same method to notch the lower corners and separate the wood for the skates all round (photo 3).
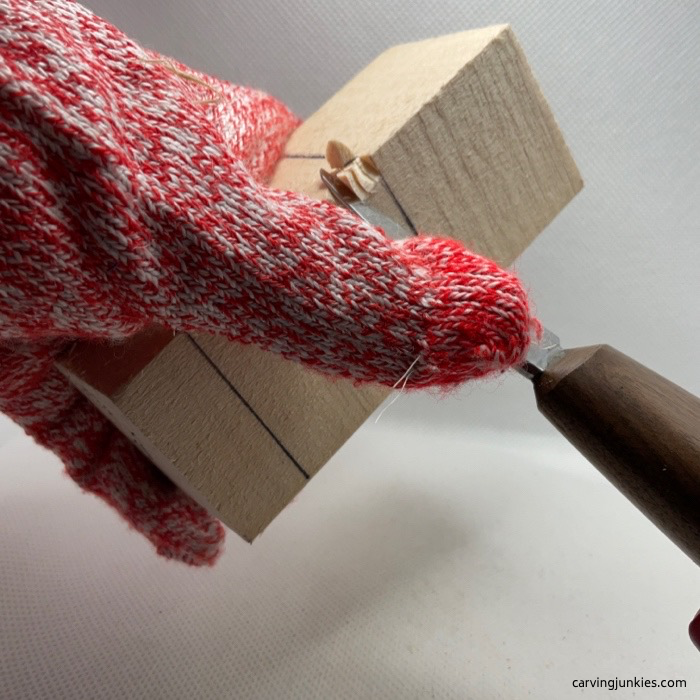 2. Notch each corner
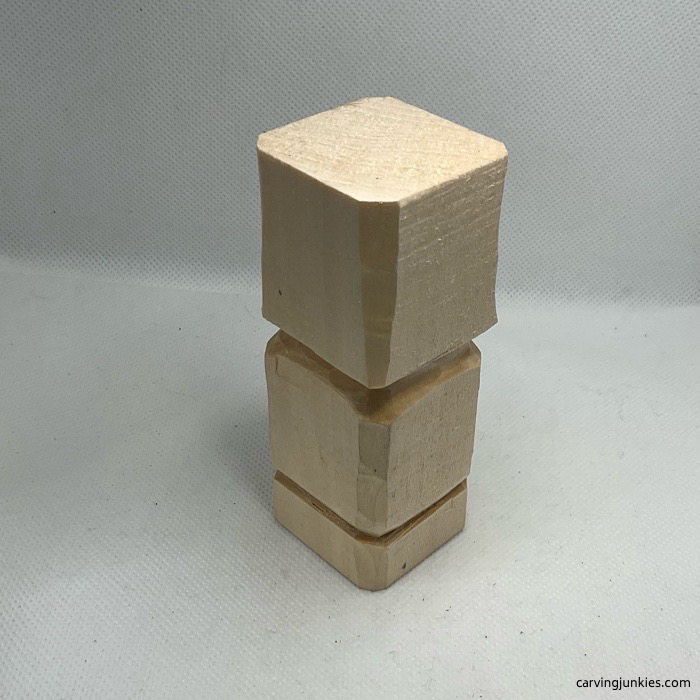 3. Head and skates are separated all around
Carving a snowman: Round the head and start the shoulders
- Using a series of V-cuts, round the head all around (photo 4).
- Use a pyramid cut to create a triangle in the front and back where the skates will be separated (photo 5).
- Start to round the body of the snowman. He will be pear shaped with a pot belly, and have an indentation at each shoulder because his arms will be clasped behind him. Start from the sides and work your way inward (photo 6).
 4. Rounding the head
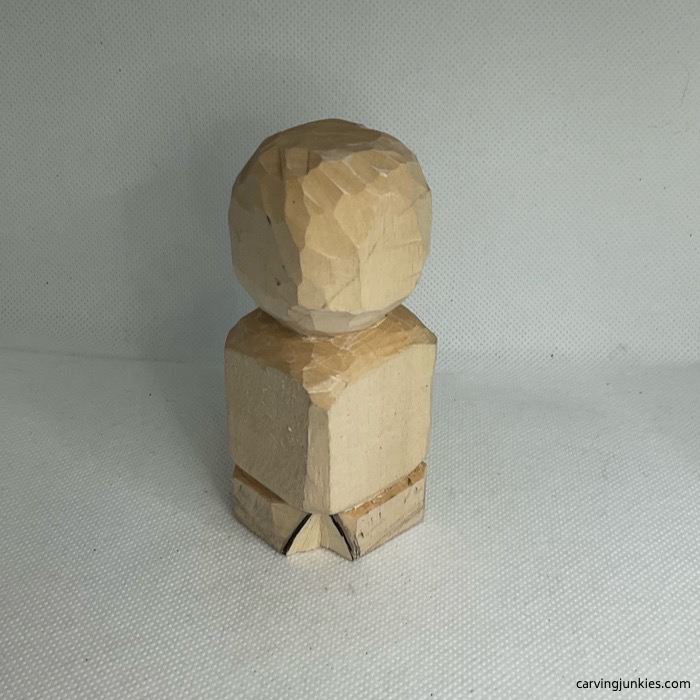 5. Skates are separated (repeat on back)
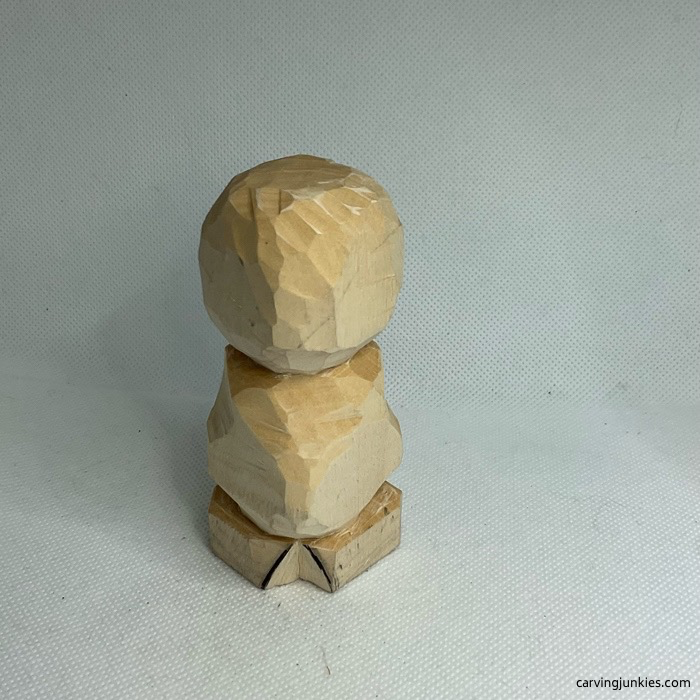 6. Shoulders and body taking shape
Carving a snowman: Add some details
- Roughly draw the skates on the front (photo 7).
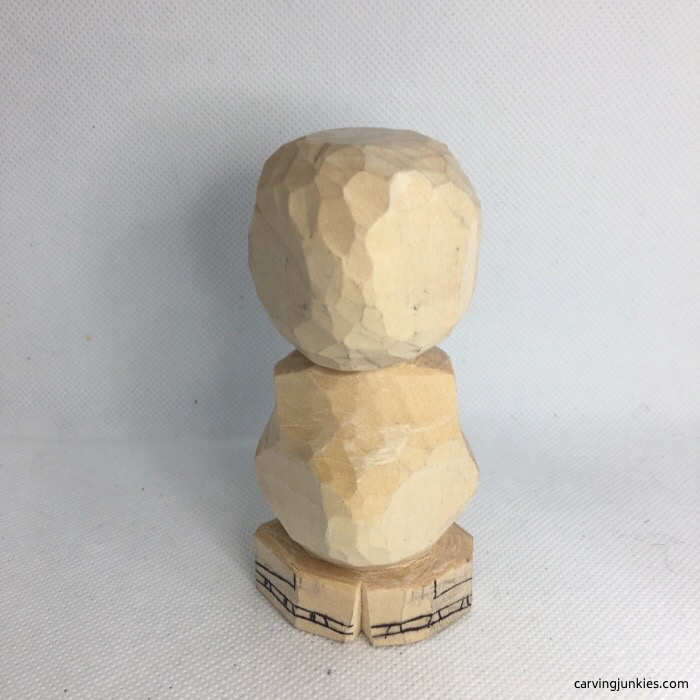
- Draw the skates on the back and add the arms (photo 8).
 7. Skates are drawn (front)
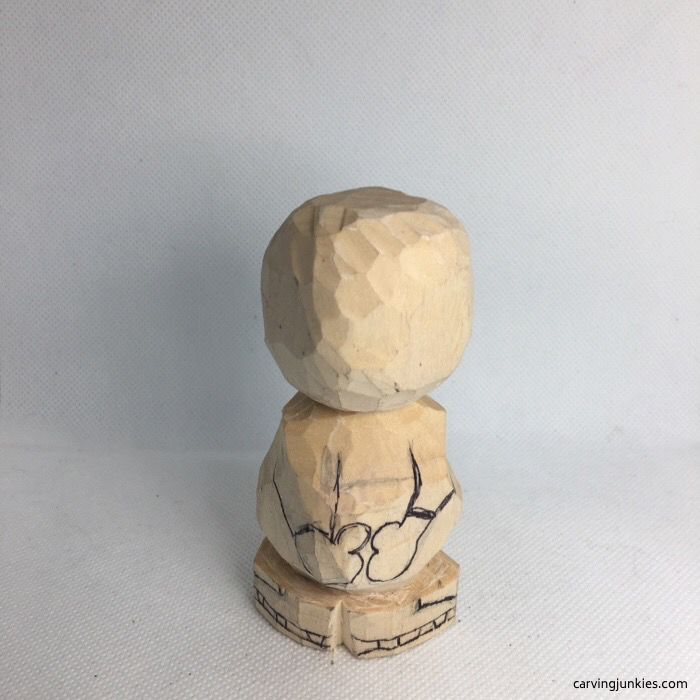 8. Skates and arms (back)
Carving a snowman: Separate the arms and mittens
- Use a stop cut across the guideline and remove wood from underneath to separate the arms and mittens on each side (photo 9). You can also use a line cut if that’s easier for you.
- Remove wood in between the arms to create the back and shoulder blades. We switched to a detail knife to define the mittens (photo 10).
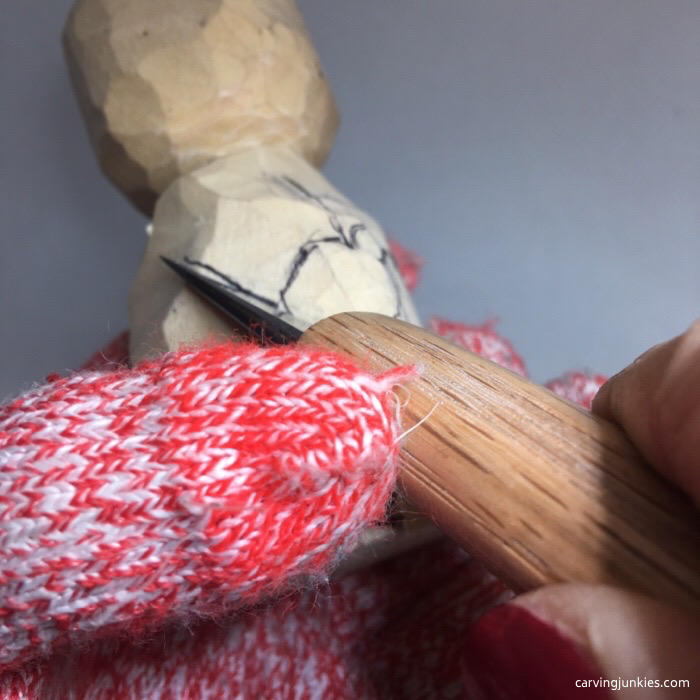 9. Separating the arms
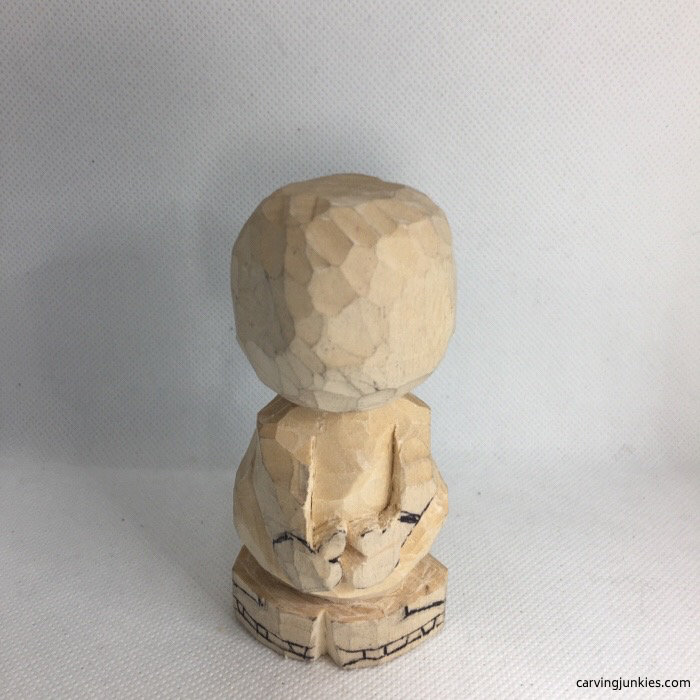 10. Arms and mittens are cut
Carving a snowman: Add more details
- Draw buttons on the front of the snowman (photo 11).
- Also draw the set up for the nose using our triangle-by-triangle nose carving technique (photo 11).
- Cut wood off the base to shape the skates. Be careful to leave enough wood for stability (photos 11-14).
- Shave a little wood off the top of the skates to create a curve for the top of the skate (photos 11, 14).
- Draw lines for the mitten bands (photo 14) that you will separate using narrow V-cuts.
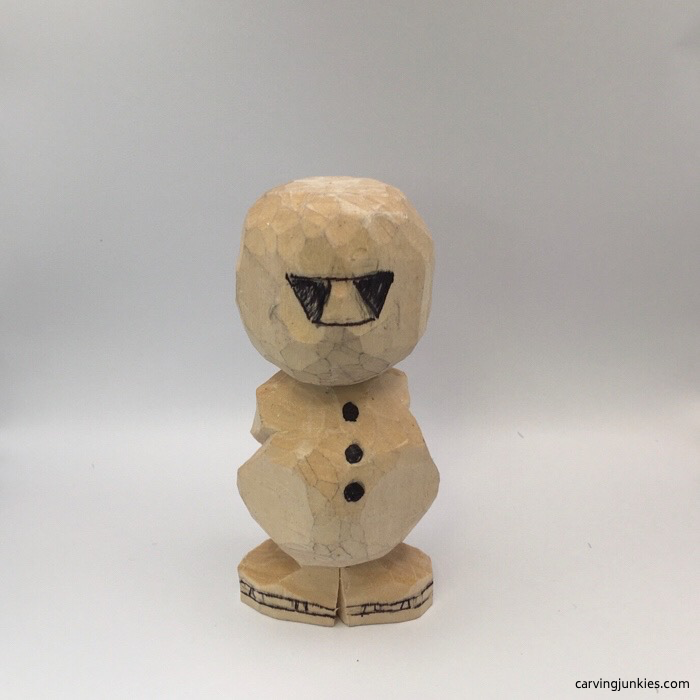 11. Details are drawn
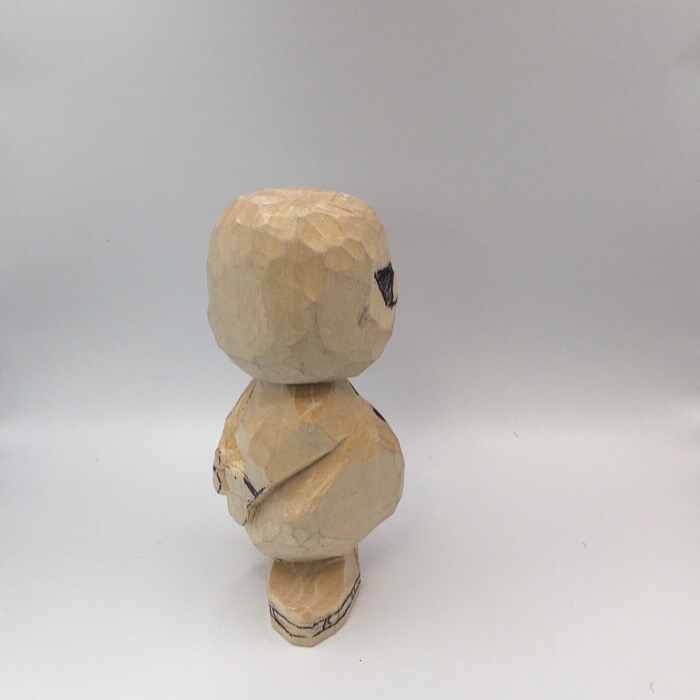 12. Right view
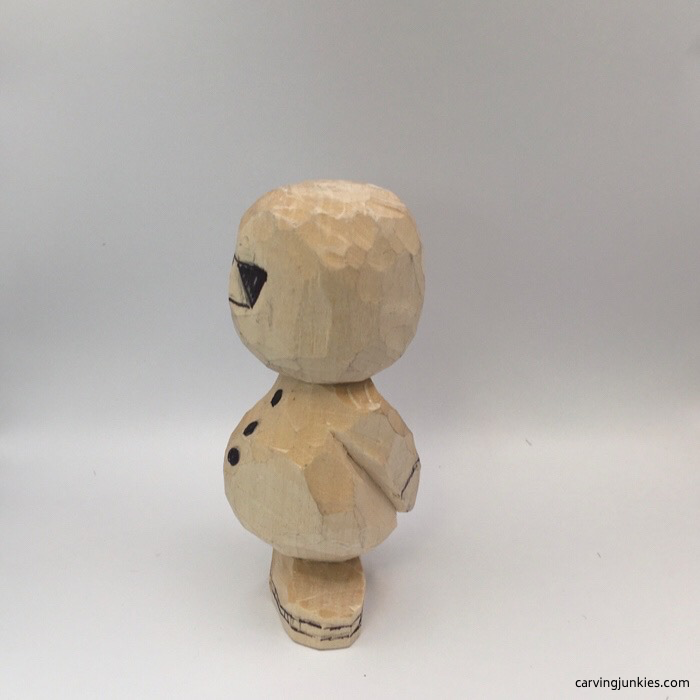 13. Left view
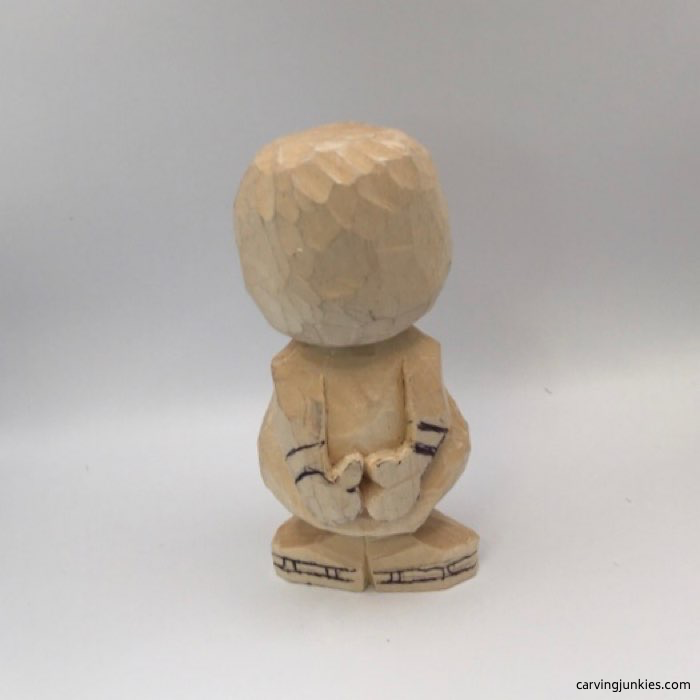 14. Back view
Carve the nose
- Using our nose carving technique, make a stop cut under nose and a pyramid cut on each side of the nose (photo 15).
- Since the nose will be pointed, make an angled cut under the forehead, giving you access to shape the nose further (photo 16).
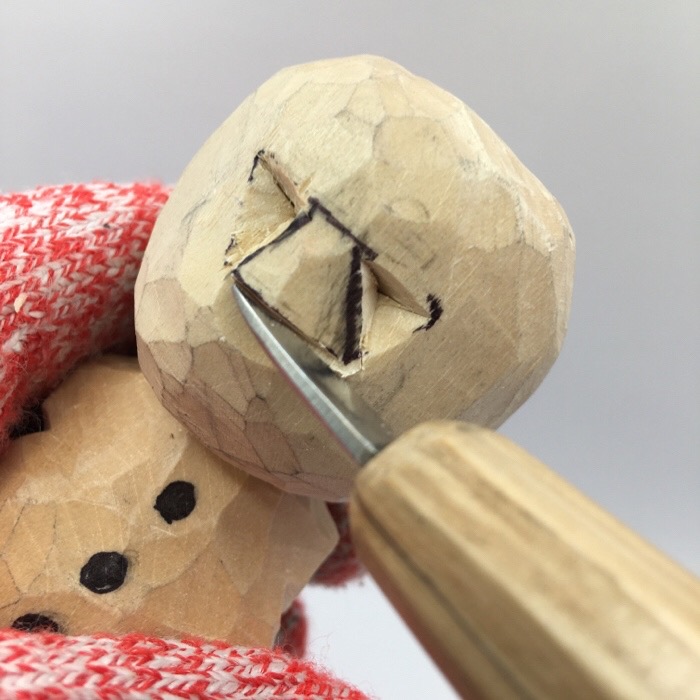 15. Starting the nose
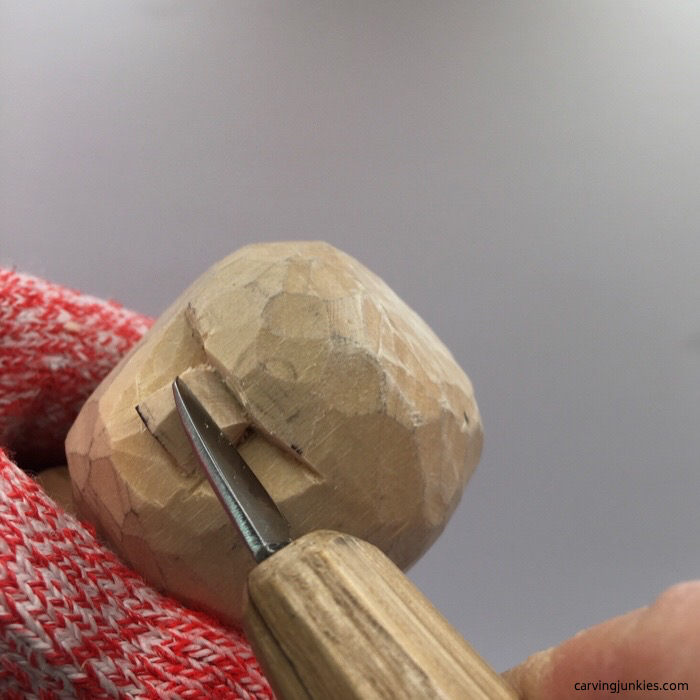 16. Angled cut at top of nose
Carving a snowman: Shape the nose and draw the face
- Shape the nose to a point by evenly slicing wood off on each side and making another angled cut underneath. Also smooth and round the forehead back to create a flat surface for the eyes (photos 17-19).
- Draw on the eyes, lip, smile lines, and buttons (photo 17).
- Use stop cuts and remove wood from above to shape the skates all around (photo 21). We made a design change to carve just one rim for the skates to avoid crumbling.
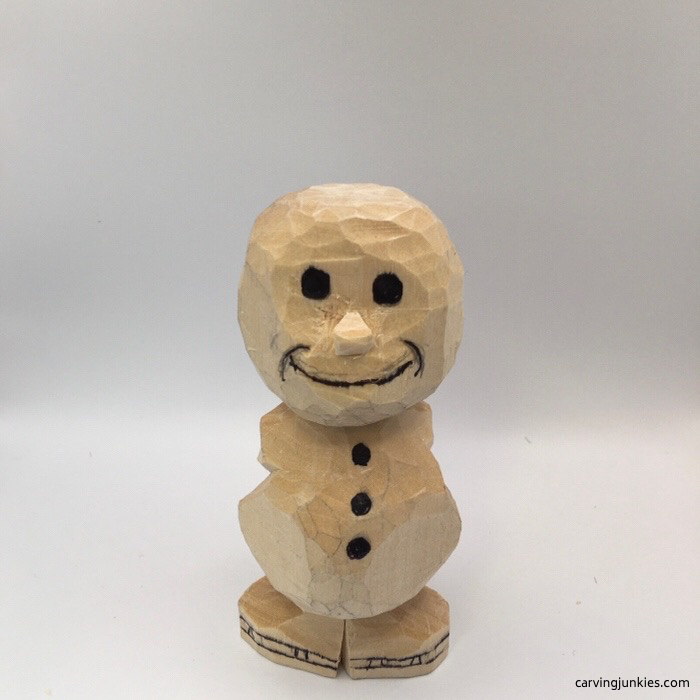 17. Details are added
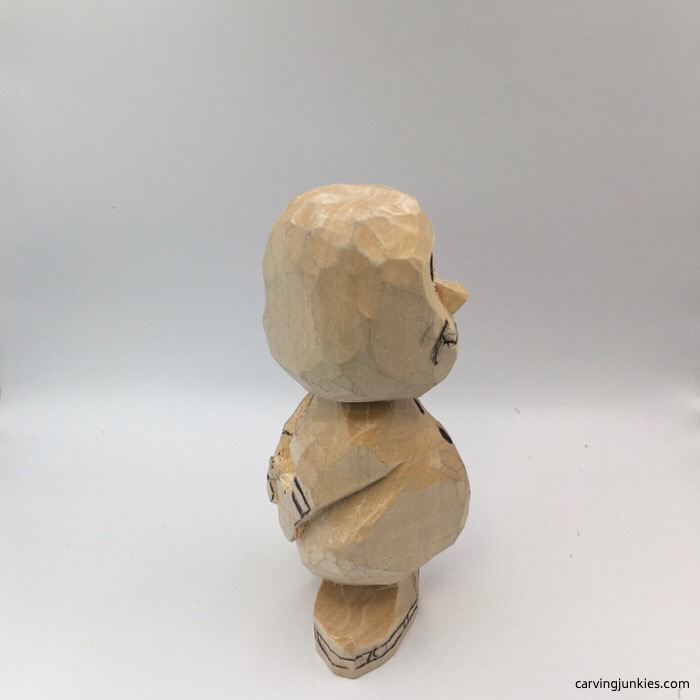 18. Nose is shaped
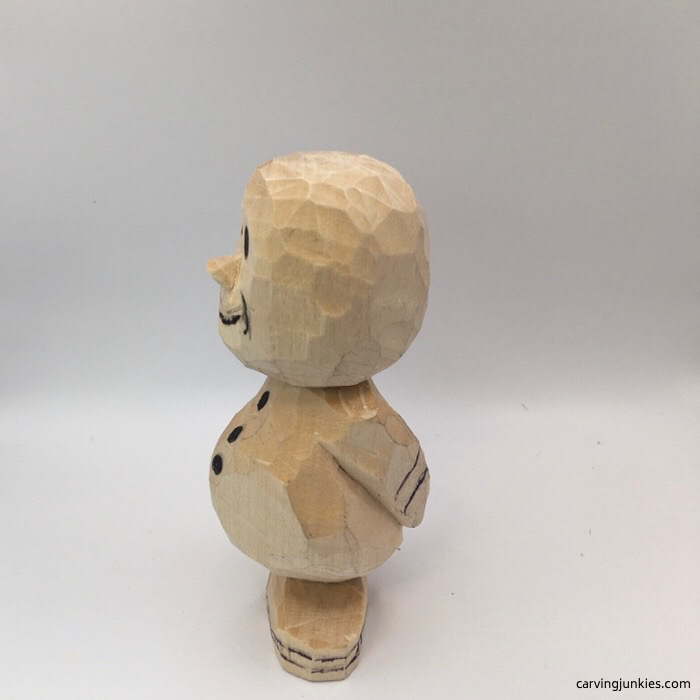 19. Left view
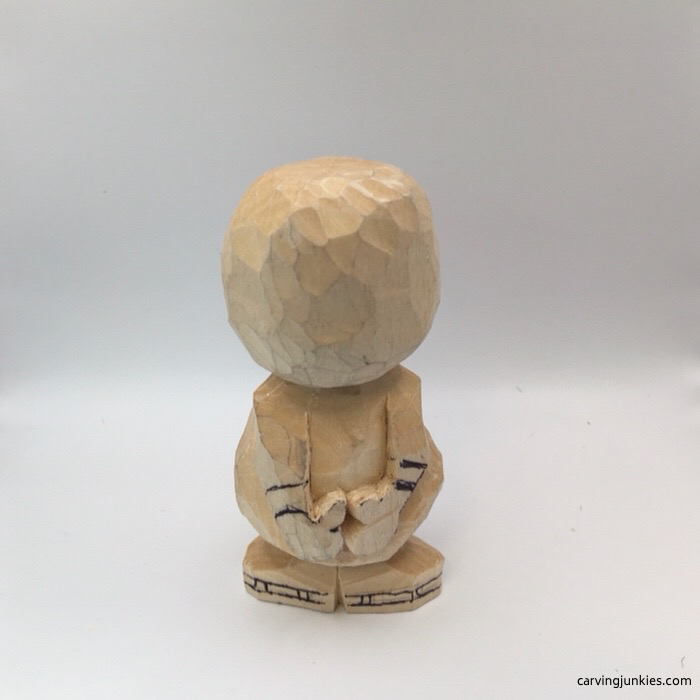 20. Back view
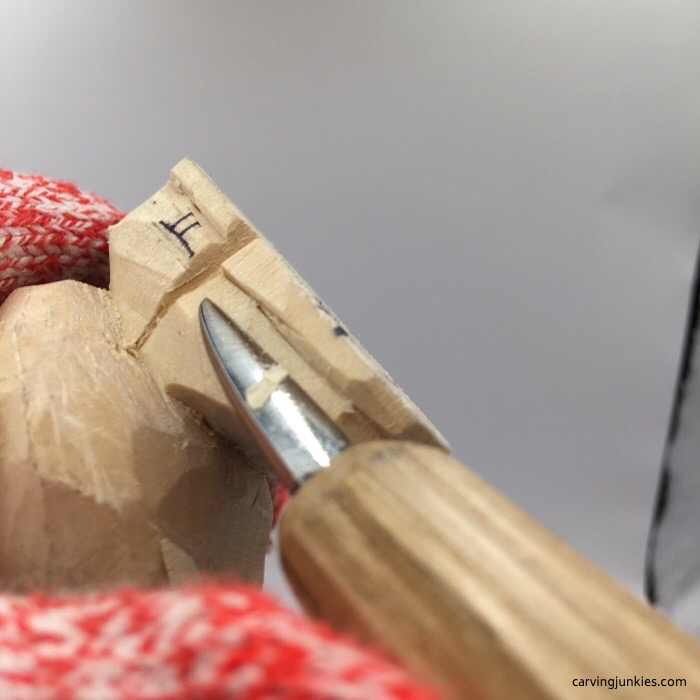 21. Carving the skates
Carving a snowman: Start the hat
- Draw a line about a 1/4-inch (1.2 cm) from the bottom of your 2 x 2-inch (5.08 x 5.08 cm) block for the brim of the hat. You want to keep it a little thick so you don’t break it (photo 22).
- Also draw a circle on the top of the hat to mark the cylinder that you will carve (photo 22).
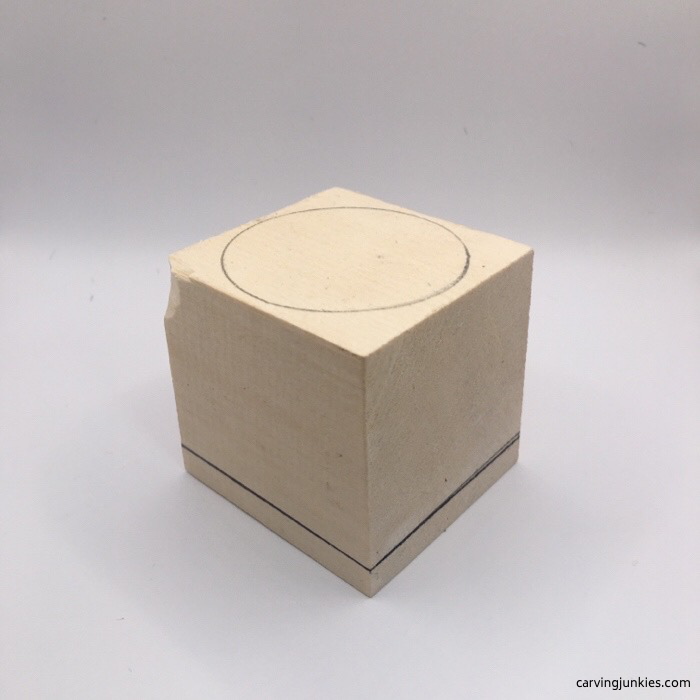 22. Hat guidelines are drawn
Carving a snowman: Shape the hat
- Use a roughout knife to carve the hat into a cylinder shape (photo 23).
- Separate the brim all around (photo 24).
- Shave wood off the lower third of the hat to create the final shape (photo 25).
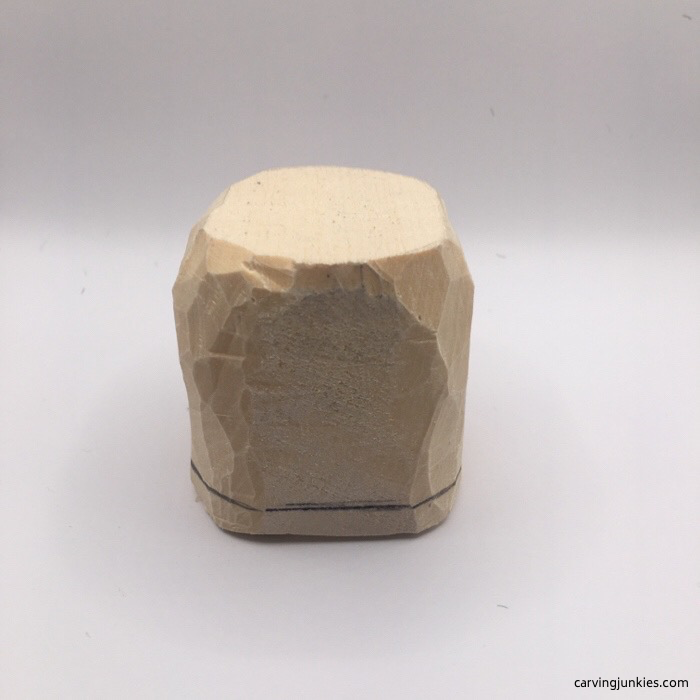 23. Creating the cylinder shape
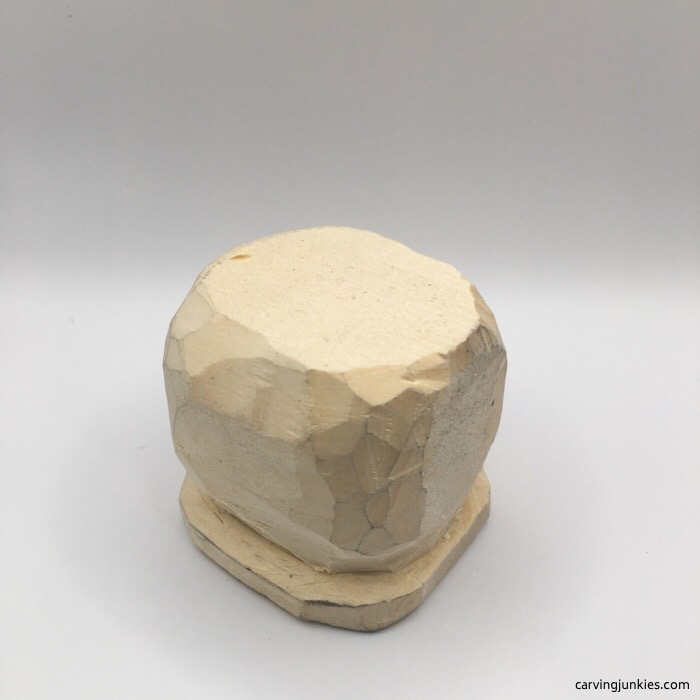 24. Hat brim is separated
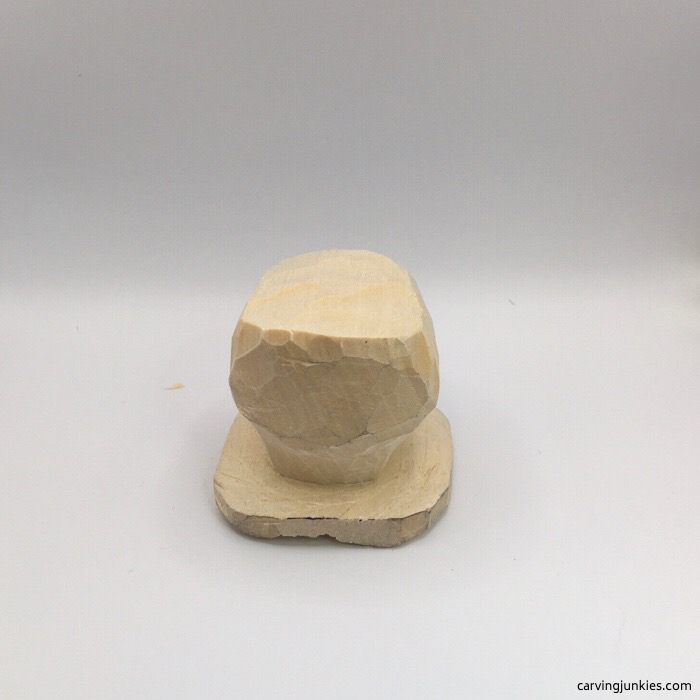 25. Hat is fully carved
Carving a snowman: Add hat details
- Draw the band around the hat (photo 26) and add the heart to the front (photo 27).
- Define the hat band and heart with narrow V cuts or stop cuts (photo 31).
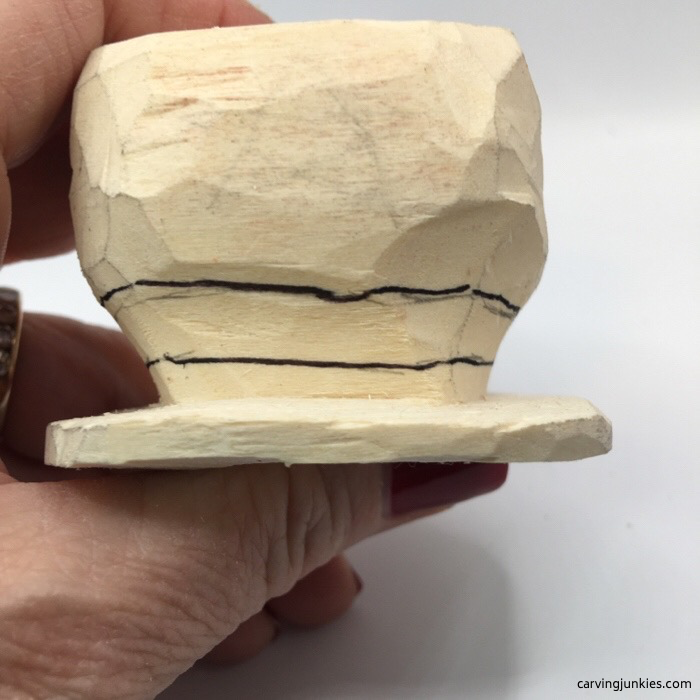 26. Hat band is drawn all around
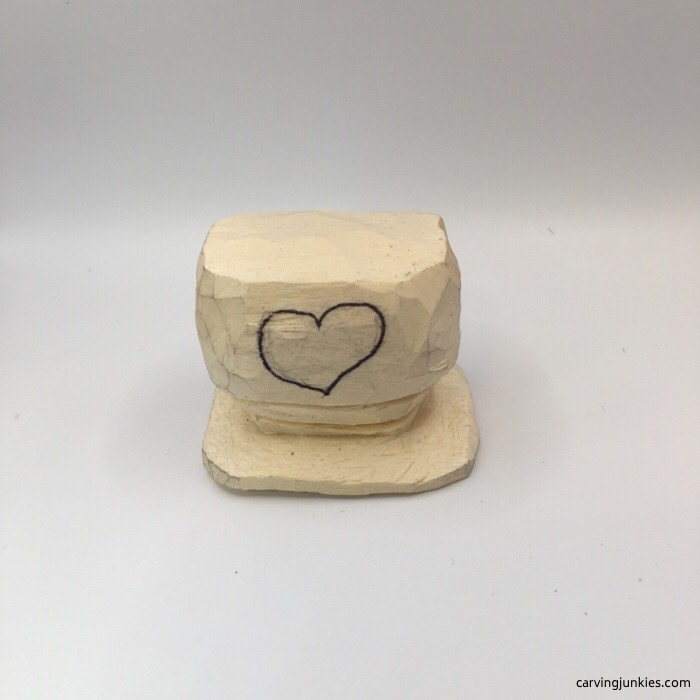 27. Heart is drawn
Carving a snowman: Fit the hat to the head
- Place the snowman upside down against the hat and trace the shape of the head all around (photo 28).
- Use a U gouge to scoop some wood out to create space for the head (photo 29).
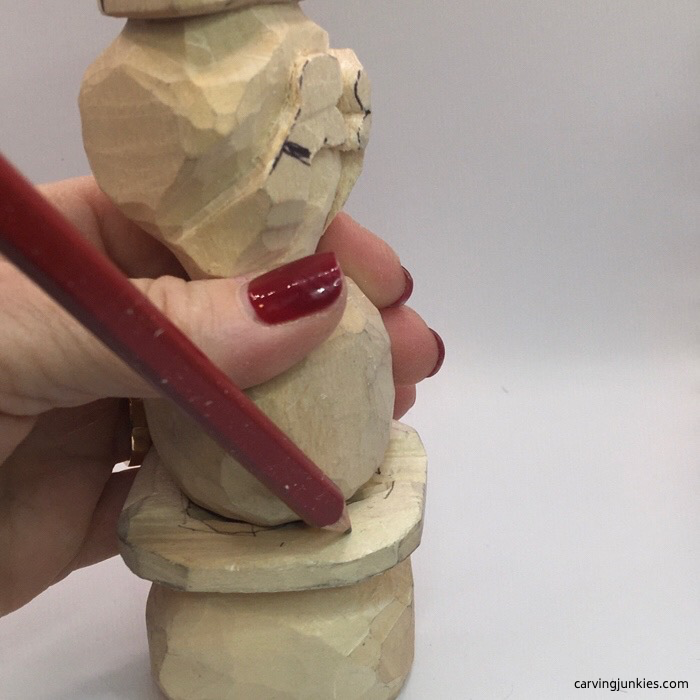 28. Outlining the head
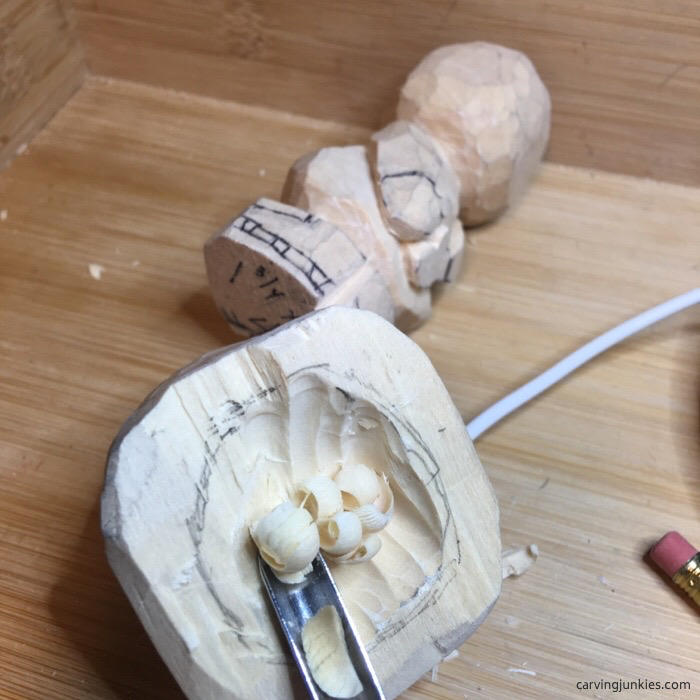 29. Making space to attach the head
Carving a snowman: Add magnets (optional)
- Use a U gouge to carve circles on each side and glue on the magnets (let dry overnight). Make sure you make the holes deep enough so they are flush to the bottom of the skates (photo 30).
- Tip: Add a third hole for a magnet in the middle for stability (two ended up being a bit wobbly).
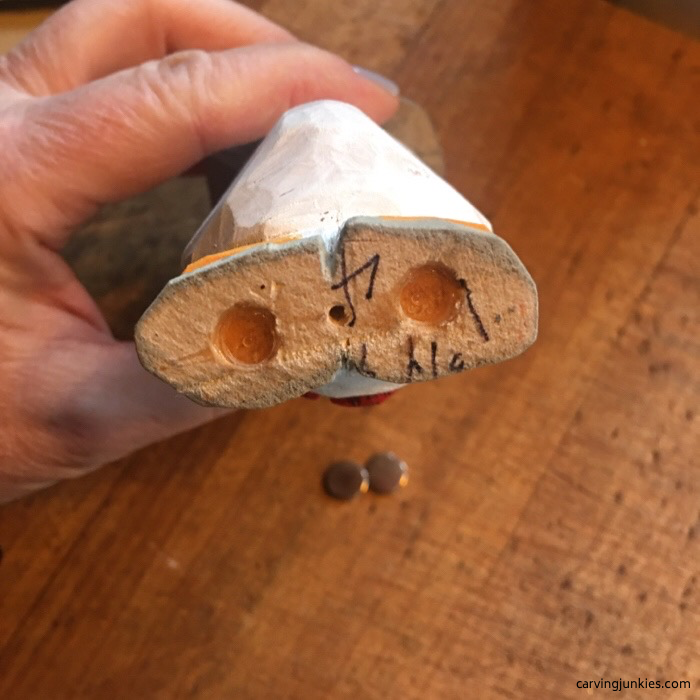 30. Adding magnets
Carving a snowman: Carve the details
- The lip and smile lines, buttons, mittens, and skates should all all carved (photos 31-34).
- The eyes are colored with black magic marker (photo 31).
- Use wood glue to attach the hat to the head and let dry overnight. Tip: lean it against something, especially if you are tilting the hat.
- Use a U gouge to get perfect circles for the buttons (photo 31). Note: we decided to go with just two buttons.
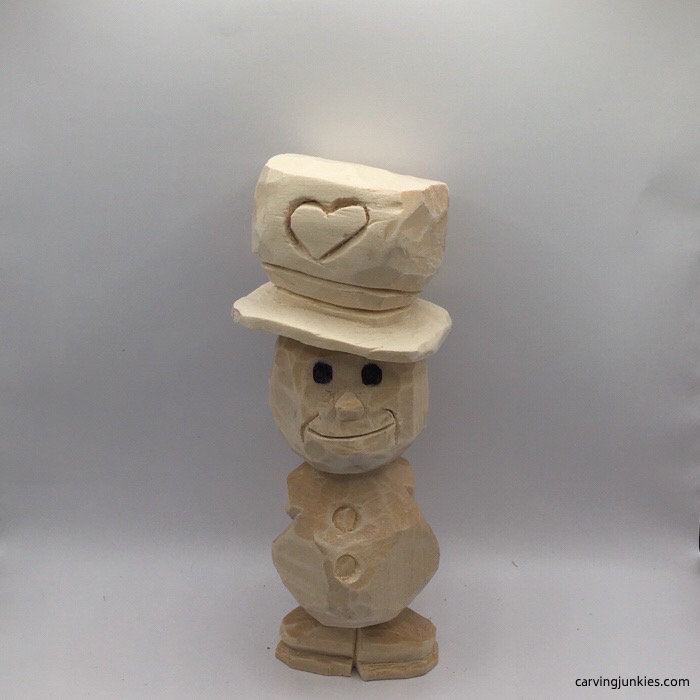 31. All details are carved
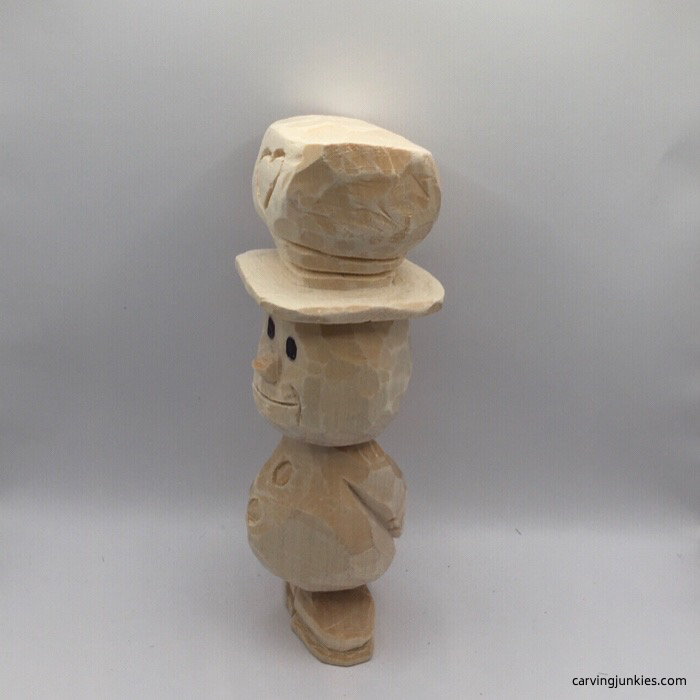 33. Left view
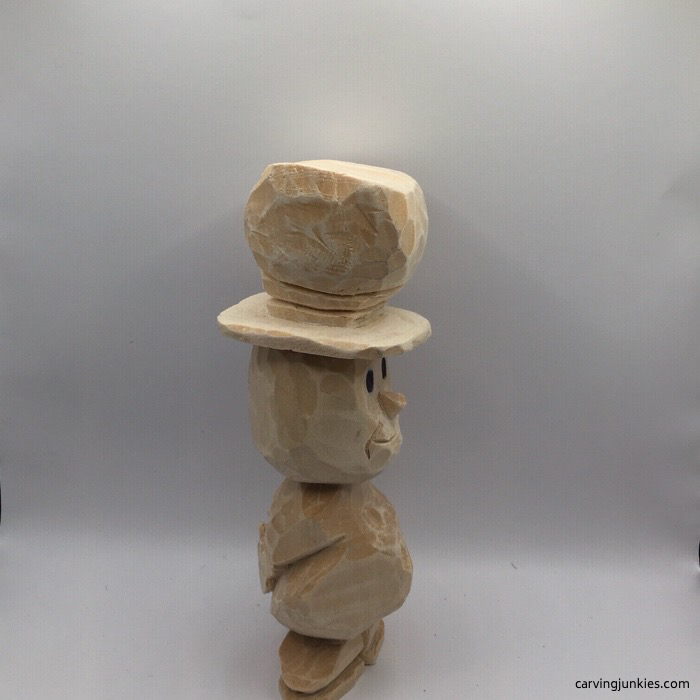 32. Right view
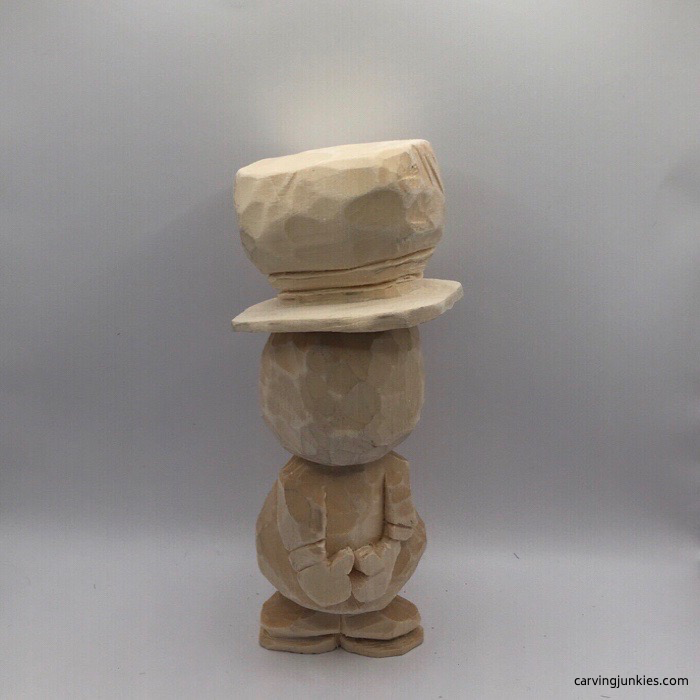 33. Back view
Carving a snowman: Time to paint
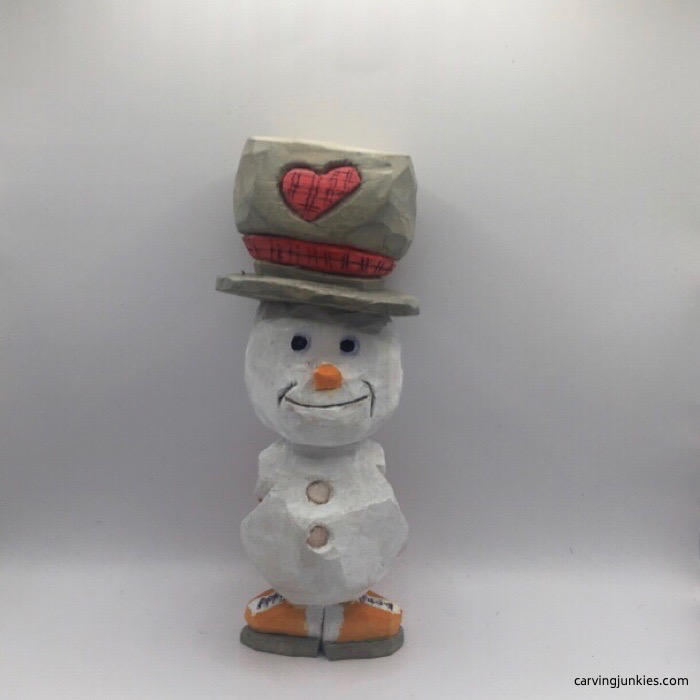
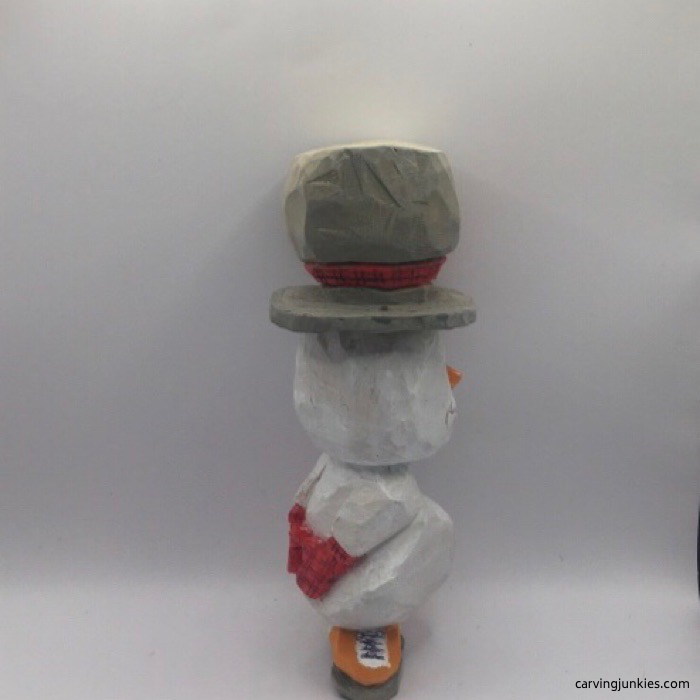
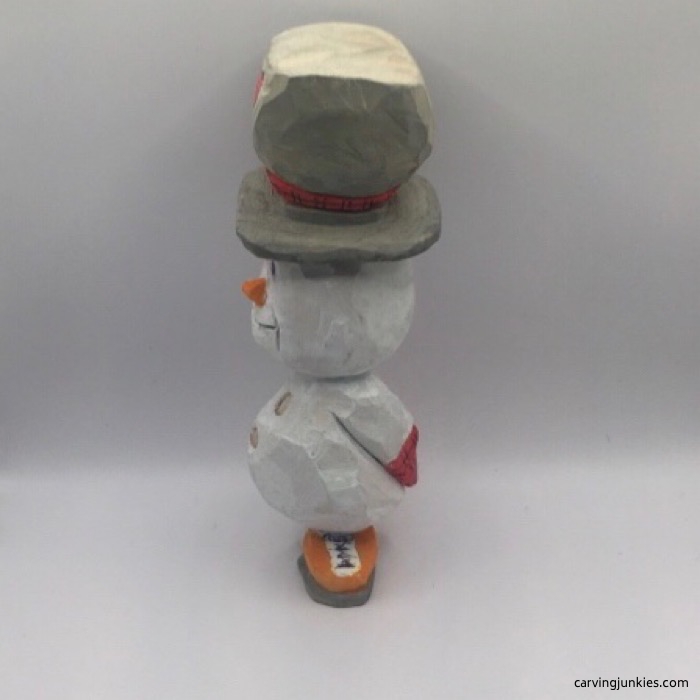
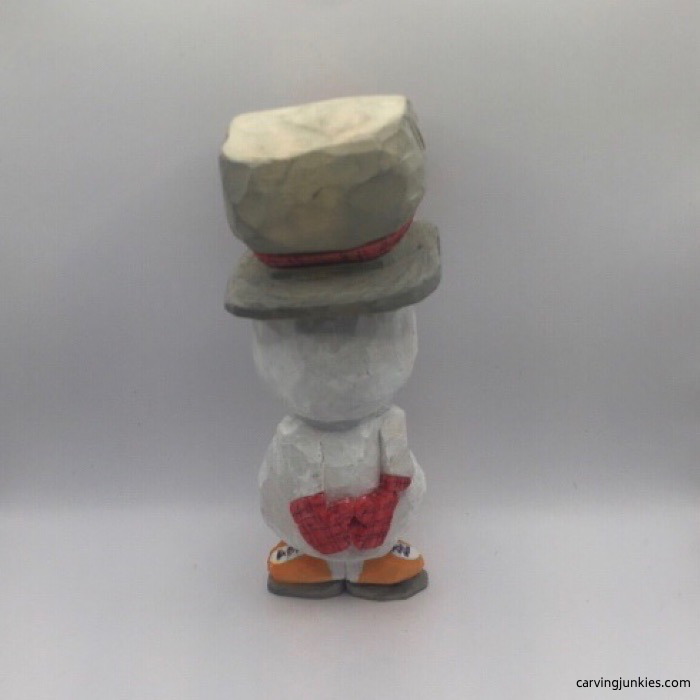
To get this look
- Body and top of the skates: 100% Artists Loft titanium white (skate shoe laces are added with black magic marker).
- Heart, gloves, hat band: 1 drop of ArtSkills red paint mixed with 5 drops of water (plaid design is added with black magic marker).
- Hat and skate blades: 1 drop of Craft Smart dark grey paint mixed with 5 drops of water.
- Nose: 1 drop of Craft Smart Jack o’ lantern paint mixed with 5 drops of water.
- Eyes: black magic marker (or black paint).
- Buttons: 1 drop of Craft Smart brown paint mixed with 5 drops of water.
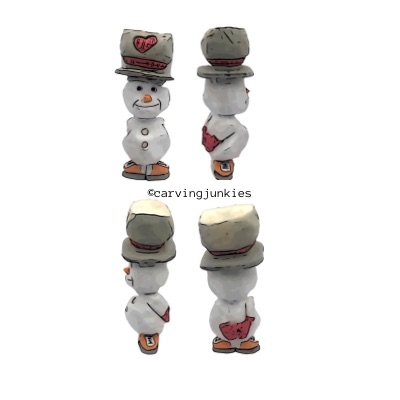
Free pattern for carving a snowman
If you prefer to carve your snowman with a pattern, photocopy this to size to fit your wood block.
Carving a snowman summary
- Carving a snowman is fast and fun.
- The vintage design details are simple yet elegant.
- Carving the hat separately gives you the option to tilt the hat, which adds to the overall design.
- Use wood glue to adhere the hat and magnets (let dry overnight).
Get 50 Wood Carving & Painting Tips when you join our FREE Covered in Chips club.
Share this page
carvingjunkies.com never sells your personal information.
This site uses cookies for its operation and to enhance your experience. As an Amazon Associate and Focuser Carving affiliate we earn from qualifying purchases.
Home | About Us | Privacy Policy | Terms of Use | Contact | Sitemap
