- Home
- Carving wood animals
- Alligator wood carving
Awesome alligator wood carving
Carve yourself a little green reptile.
LEVEL: EASY
If you want a fun, fast project to work on, this alligator wood carving tutorial is perfect for you! I carved mine with big cartoon eyes, but you can easily make it more realistic.

Supplies needed for your alligator wood carving
I used a basswood block that is 1 x 1 x 4 inches (2.5 x 2.5 x 10.2 cm). Going larger is super easy. Just increase the dimensions to fit your wood block.
If you love exact measurements, you will need a ruler and something to sketch with.
The majority of this alligator wood carving can be carved with one good, sharp knife. The holes on the back of the alligator’s body were created with a wood burner. You could also use a micro U-gouge or a pin vise. I also used a U-gouge to refine the snout (but you could make a curved cut instead).
I also used a wood burner to highlight some details, but you can simply use brown paint instead.
Please always wear a good carving glove. And protect your thighs with something hard (like a piece of wood) if you are a lap carver. Slips can happen (unfortunately).
A painting guide is provided at the end, including the acrylic paints you can use to get the same look. Use whatever paint brushes you like.
Alligator wood carving tutorial at-a-glance
This short video provides a quick overview of the key steps for this tutorial. It will help you see the full tutorial before you start carving.
Starting your alligator wood carving
Draw a line 1 inch (2.5 cm) from one end of the block all around to mark the front of the eyes. Draw another guideline 1.25 inches (3.2 cm) from the same end that extends about a 1/4 inch (0.6 cm) on each side to mark the back of the eyes. Then, add a connecting line between the two guidelines on each side (you will understand better by looking at photos 1,2). The section for the eyes will be about about 1/4 inch (0.6 cm) in width.
Make a stop cut that is about 1/4 inch (0.6 cm) deep (photo 3), which gives you access to remove wood and create the top of the snout (completed in photo 4). Tip: Rock your knife back and forth to go deeper with your stop cut. You will have to make several passes to get your desired shape. Take your time and check for symmetry as you carve.
Mark the middle of the snout (photo 4) where you will use a V-cut to remove wood (photo 5). It is about a 1/2 inch (1.3 cm) wide. Tip: If you have a U-gouge, you can use it here to make a rounded indentation (visible in photo 5). Or, try turning your wrist to “scoop out” the wood. Just be sure your knife has some flex or you may break it.
Also, mark the wood on each side of the snout for removal (photo 5), which is about 1/4 inch (0.6 cm) wide. Use a stop cut (photo 5) on each side, removing wood from each side (visible on photo 18).
Make a rough sketch of the body of your alligator on each side (photos 6,7). The tail will curve from the back around to the right side (photo 7).
 1. Right view of guidelines
 2. Left view of guidelines
 3. Making a stop cut
 4. Snout wood is marked for removal
 5. Making a stop cut
 6. Left side body guidelines
 7. Right side body guidelines
Shape the body of your alligator wood carving
Make a stop cut along the front leg of the alligator wood carving (photo 8). This will give you access to remove wood under the head (completed in photo 9). Continue on the back legs to shape the body of the alligator wood carving. It may take several passes to remove the wood, especially if you do not have the hand strength to make one deep stop cut.
Once the body is roughed out (you will refine the shape later), mark wood for removal to shape the tail (photos 10,14). Slice that marked wood off (photo 11) to shape the tail.
Using a paring cut or holding your knife like a pencil, separate the tail of the alligator on the right side (photo 12). Remove wood from around your cut (photo 13). The tail will rest up against the alligator (visible in photo 15) to keep it stable.
 8. Making a stop cut
 9. Head is separated
 10. Wood around tail is marked for removal
 11. Slicing wood off
 12. Separating the tail
 13. Shaping the tail
 14. View of top of the tail
Refine the shape of your alligator wood carving
Sketch details of your alligator wood carving, including the line for the mouth, the teeth on each side, and the lines on the belly (photos 15-18). The lines for the belly are about 1/2-inch (1.3 cm) wide. Some can be a little closer together. The distance between the teeth can vary from 1/4 inch (0.6 cm) to 1/2 inch (1.3 cm). The teeth are also about 1/4 inch (0.6 cm) long. But make one or two a little shorter for interest.
Also, mark the wood that you will remove to shape the round eyes (photo 18). Don’t worry if one eye is a little smaller. Cartoon eyes don’t have to be matchy-matchy.
 15. Right side details are drawn
 16. Left side details are drawn
 17. Belly details are drawn
 18. Wood marked for removal for eyes
Carve the details on your alligator wood carving
Start by separating the lines on the belly of your alligator wood carving. You can make a stop cut (photo 19) and remove wood from underneath. Or, you could use a V-tool here.
Draw the two teeth on the front (photo 20). They are about 1/4 inch (0.6 cm) long. Use stop cuts to carefully separate the teeth, removing wood from each side (photo 21). Or, you can use a V-tool or hold your knife like a pencil to make your cuts.
Now carve the eyes, starting in the corners (photo 22). Use a V-cut to carve the wood between the eyes. Be careful here as it’s easy to break a knife tip or crack the wood. You may find it easier to make two passes, removing a little wood at a time.
 19. Making a stop cut
 20. Front teeth are drawn
 21. Separating teeth
 22. Carving the eyes
Refine the details on your alligator wood carving
Mark wood to remove to shape the legs on each side (photos 23, 24). I started with a V-cut to get access into this tight space (photo 25). This is a good place to use a V-tool if you have one. If you do crack a leg, simply fix it with some wood glue. Let it set for 24 hours before you carve it again.
Turn your alligator wood carving upside down and mark little triangles to remove for the claws (photo 26). Use small pyramid cuts to carve the claws (photo 27).
 23. Right legs are marked for wood removal
 24. Left legs are marked for wood removal
 25. Carving the foot
 26. Claws are drawn
 27. Carving the claws
Highlight details on your alligator wood carving
I used my wood burner to accentuate the eyes, snout, teeth, and belly. I also used it to create the holes and texture on the back of the alligator wood carving (photos 28-31).
If you do not have a wood burner, you can use 100% brown paint to get the same effect. Let it dry completely before adding more paint.
 28. Wood burned front details
 29. Right view of wood burning
 30. Left view of wood burning
 31. Back view of wood burning
Want the same look for your alligator wood carving?
Here are the acrylic paints (and brands) used for this alligator wood carving. For great tips on painting, read this page. Unless noted, all paints were made by creating a wash with water.
To get the same look as our carve a gnome figure:
- Belly: FolkArt apple orchard wash (reserve some). Allow to dry completely and dry brush with Ceramcoat bright yellow.
- Top of alligator: 2 drops FolkArt bright green mixed with 2 drops of CraftSmart dark grey and added to reserved apple orchard wash. Allow to dry completely and dry brush with CraftSmart vanilla.
- Eye whites: 100% CraftSmart vanilla.
- Eye pupil: 100% CraftSmart dark grey applied with a stylus dot tool. Allow to dry completely and apply 100% vanilla with a smaller sized dot tool. You can also use a pencil eraser, toothpick, or brush.
- Use a finish of your choice (I did not add a finish).
 32. Painted front of alligator wood carving
 33. Right side of painted alligator wood carving
 34. Left side of painted alligator wood carving
 35. Back of painted alligator wood carving
 36. Belly of painted alligator wood carving
Alligator wood carving pattern
If you prefer using a pattern to wood carve, photocopy this pattern to size to fit your wood block.

Alligator wood carving tutorial summary
- This little alligator wood carving is super easy and a great project for beginners.
- The cartoon eyes make this alligator wood carving fun and friendly.
- A good wood burner comes in handy to highlight your cuts but you can substitute with brown paint.
Get 50 Wood Carving & Painting Tips when you join our FREE Covered in Chips club.
You might like these
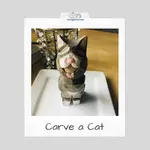
Carving a Cat Using Just a Knife Tutorial
Carving a cat is easy with our step by step tutorial with tons of photos from every angle
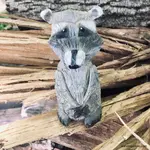
Raccoon Wood Carving With a Knife Tutorial From A Block of Wood
Raccoon wood carving tutorial carved from a block of wood with just a knife and no bandsaw.
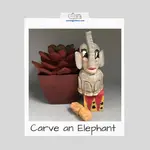
How to Carve an Elephant With Just a Knife
How to carve an elephant with only a knife is easy with this tutorial.
%20to%20get%20tips%2C%20techniques%2C%20and%20get%20%E2%80%9C50%20Woodcarving%20%26%20Painting%20Tips%E2%80%9D%20too!%20%20Happy%20carving!)
Share this page
carvingjunkies.com never sells your personal information.
This site uses cookies for its operation and to enhance your experience. As an Amazon Associate and Focuser Carving affiliate we earn from qualifying purchases.
Home | About Us | Privacy Policy | Terms of Use | Contact | Sitemap