- Home
- Carving wood animals
- How to carve an elephant
How to carve an elephant tutorial
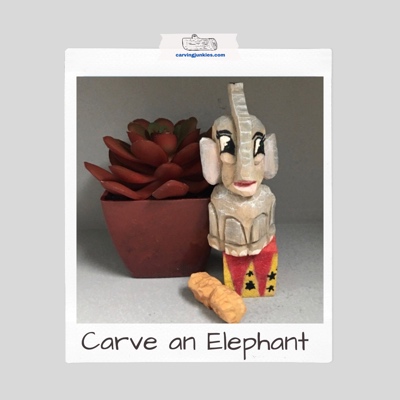
Carve this circus elephant with just a knife.
Want to know how to carve an elephant? This step-by-step tutorial makes it easy to create an eye-catching circus performer that is willing to work for one (giant) peanut. Note: I carved this piece when I was first learning how to carve. It is a great practice piece for beginners!
How to carve an elephant: What you will need
- 1 basswood block. Ours is about 1-inch x 1-inch by 3-inches (2.54 x 2.54 by 7.62 cm), but you can easily make it bigger if you want.
- Scrap wood for the peanut and stand (optional).
- Wood carving knife of choice.
- Paint and paint brushes (painting guide provided at the end).
- Pencil to draw on details (magic marker is optional).
- How to carve an elephant safely is to always use good carving gloves!
How to carve an elephant: Prepare your basswood block
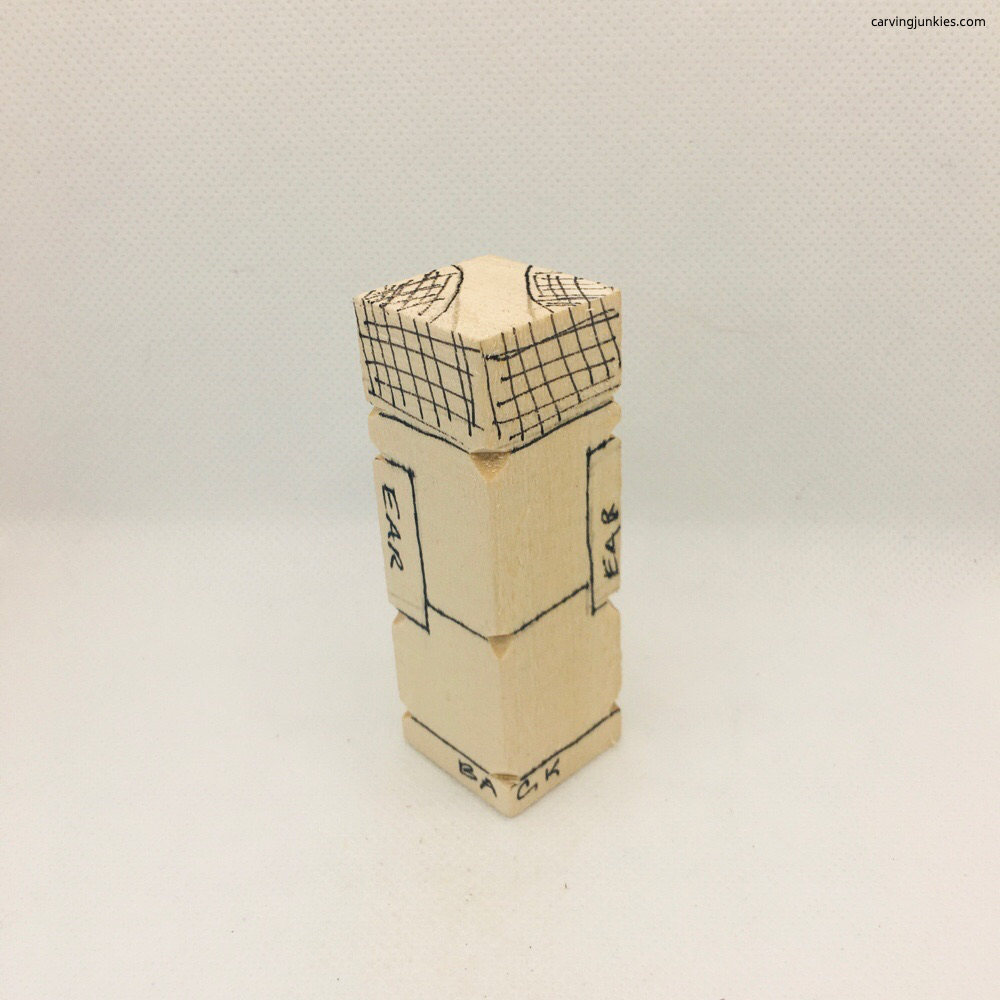
You will carve the front of the elephant on the corner (photo 1). Draw your:
- First line a 1/4-inch (3.81 cm) from the bottom all around for the feet (photos 1-4).
- Second line 1-inch (2.54 cm) above the first line to mark the bottom of the head (photos 1-4).
- A box to reserve wood for the ears that starts a little lower than line 2 and runs about 1- inch (2.54 cm) high (photos 1-4). The ears extend from the front around to the sides.
- Third line about 2.5 inches (6.35 cm) from the bottom to mark the top of the head (photos 1-4).
- Box for the trunk, which extends 1.5 inches (3.81 cm) down from the top (photos 1-4).
Mark the areas around the trunk that will be removed (photos 1-4). Optional: notch your lines for the feet, bottom and top of ears, trunk, bottom of head, top of head (in case you carve the lines off).
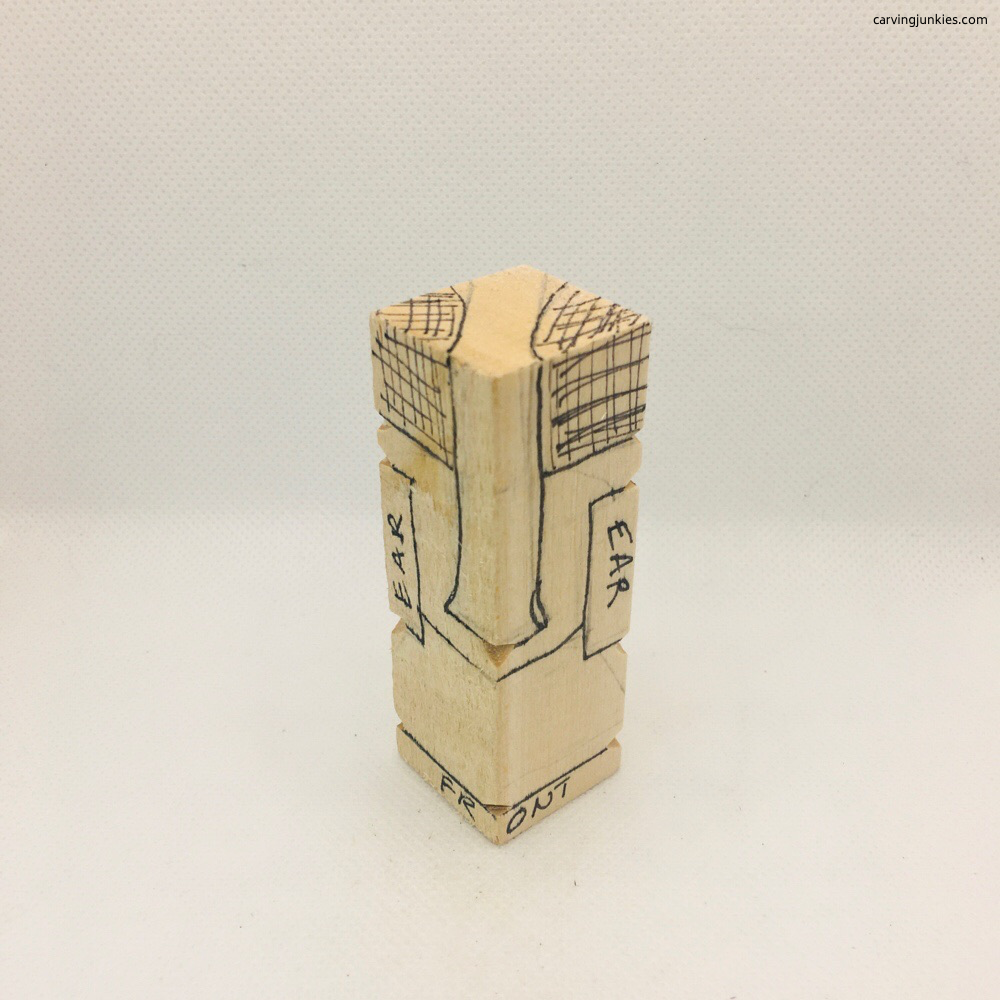 1. Lines are drawn and notched
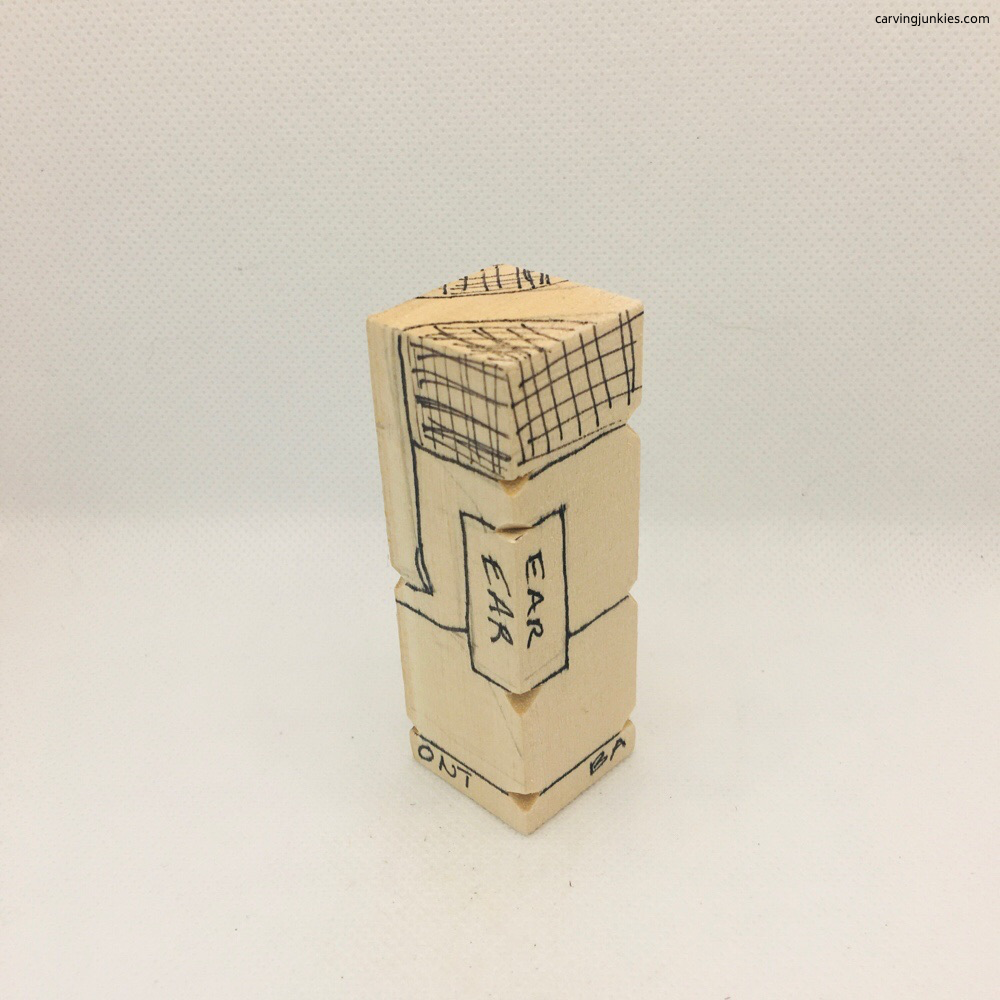 3. Left view
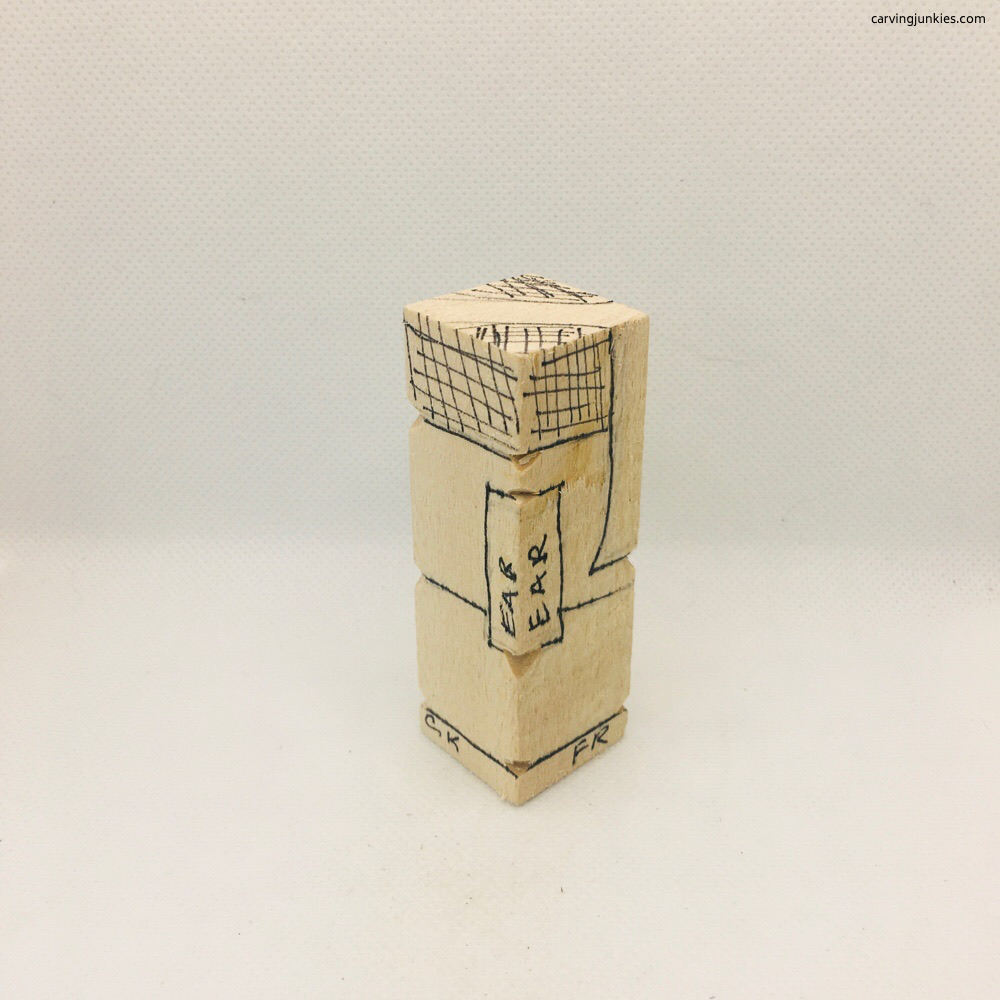 2. Right view
 4. Back view
How to carve an elephant: Start the trunk
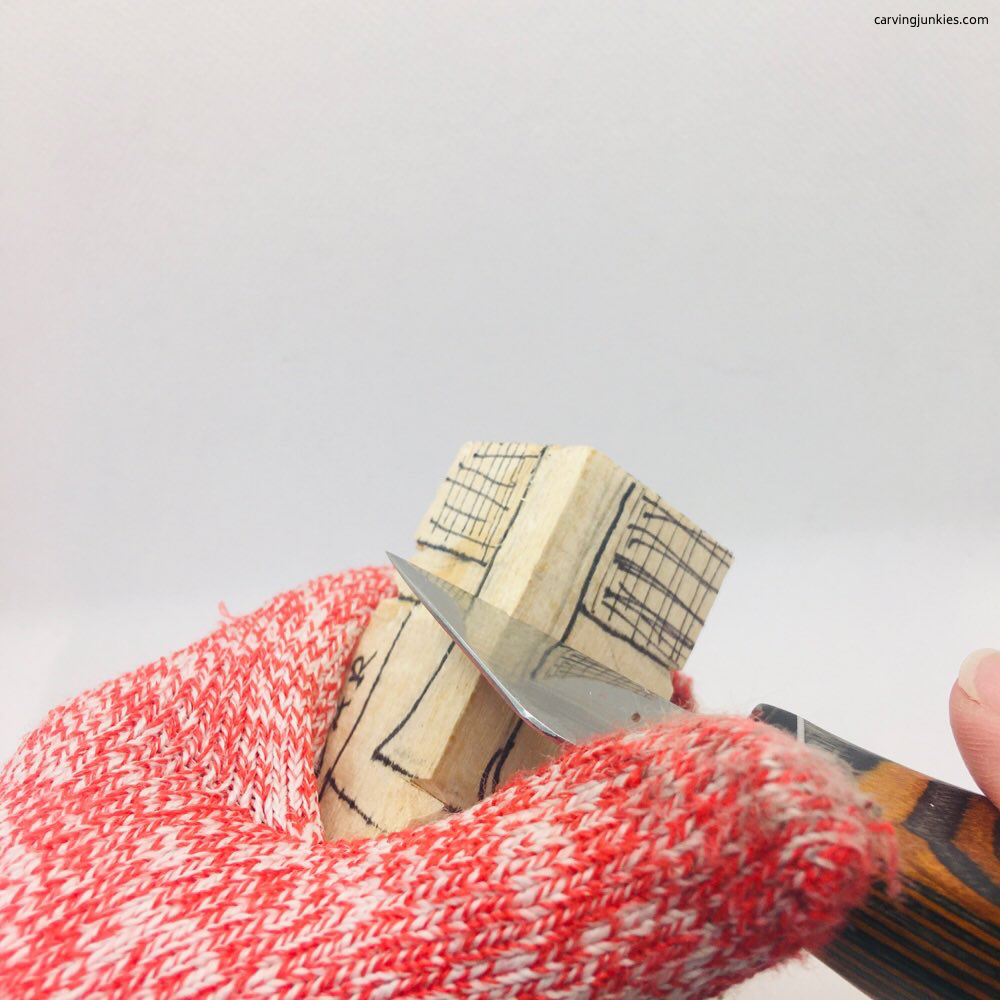
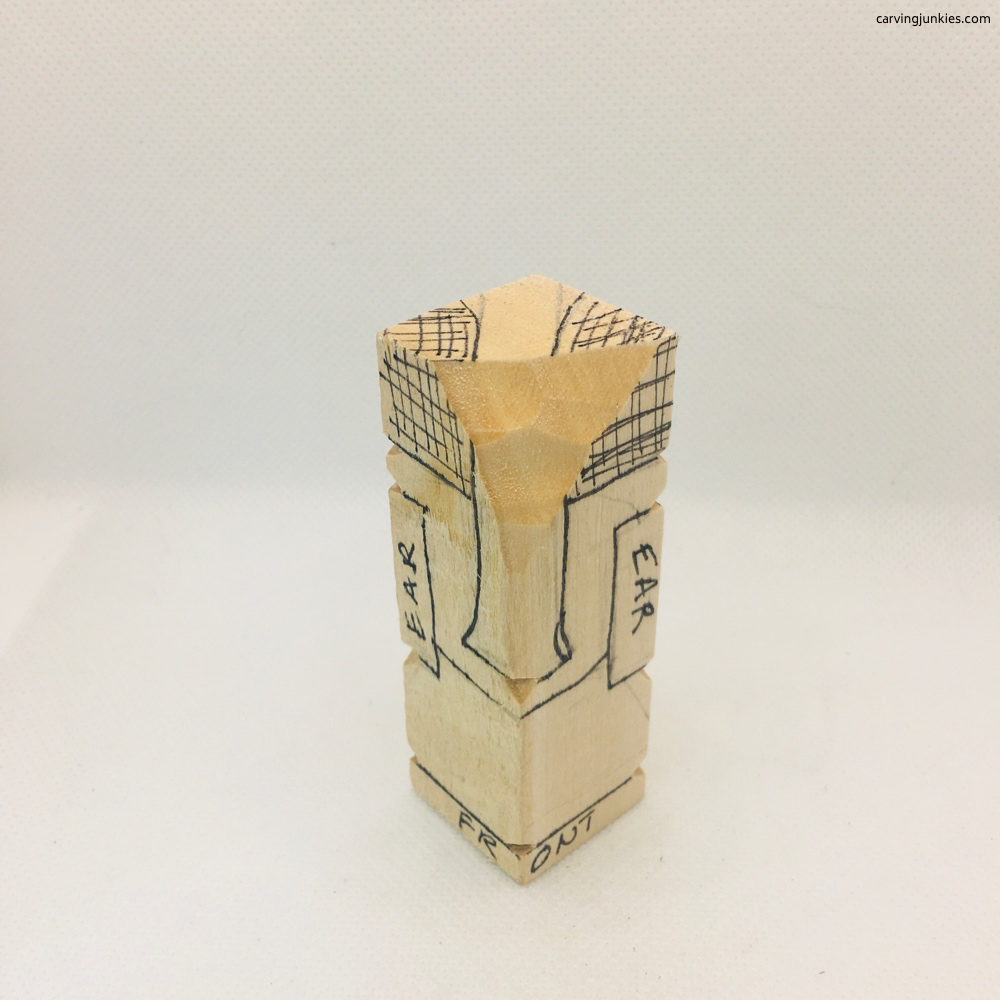
- Round the front corner and shave the top half of the trunk back (photos 5,6).
 5. Cut back the trunk
 6. Corner is rounded, trunk is shaved back
How to carve an elephant: Carve the trunk
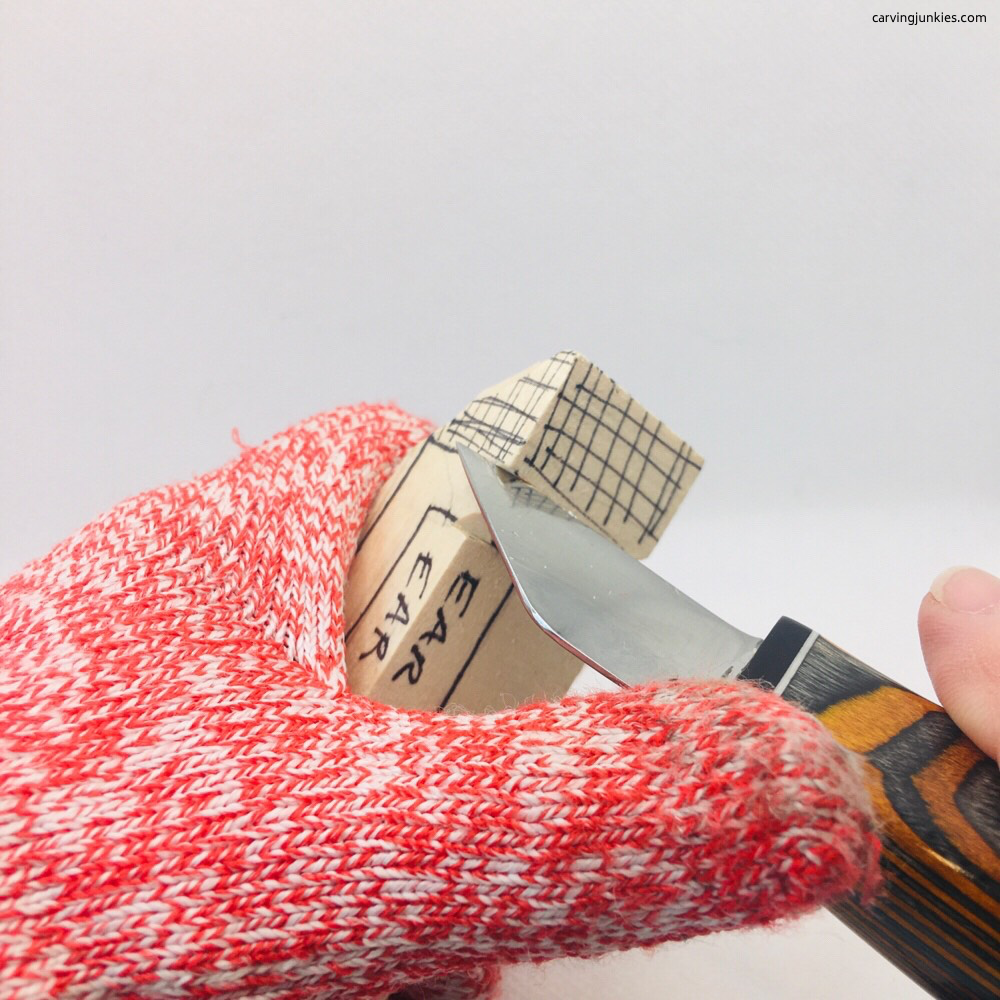
- Using deep stop cuts, start to remove marked wood around the trunk (the end grain is tough so you may have to rock your knife back and forth to get a deep cut). We suggest using a sturdy roughout knife for this section (photos 7-10).
- Take your time and be careful not to snap off the tip of your knife. You may also have to remove wood in sections and clean up your cuts (another option is to use a fishtail gouge, being careful not the split the wood too far).
 7. Remove wood around the trunk
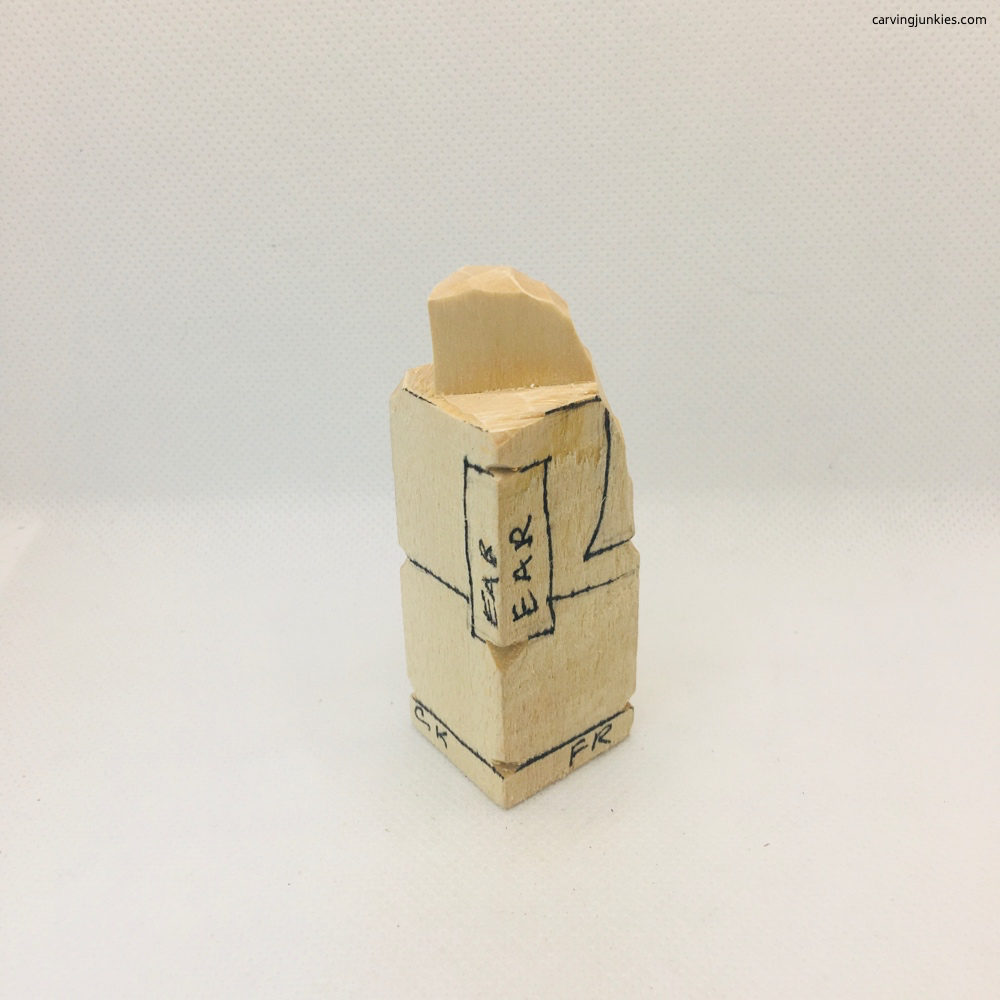 9. Right side view
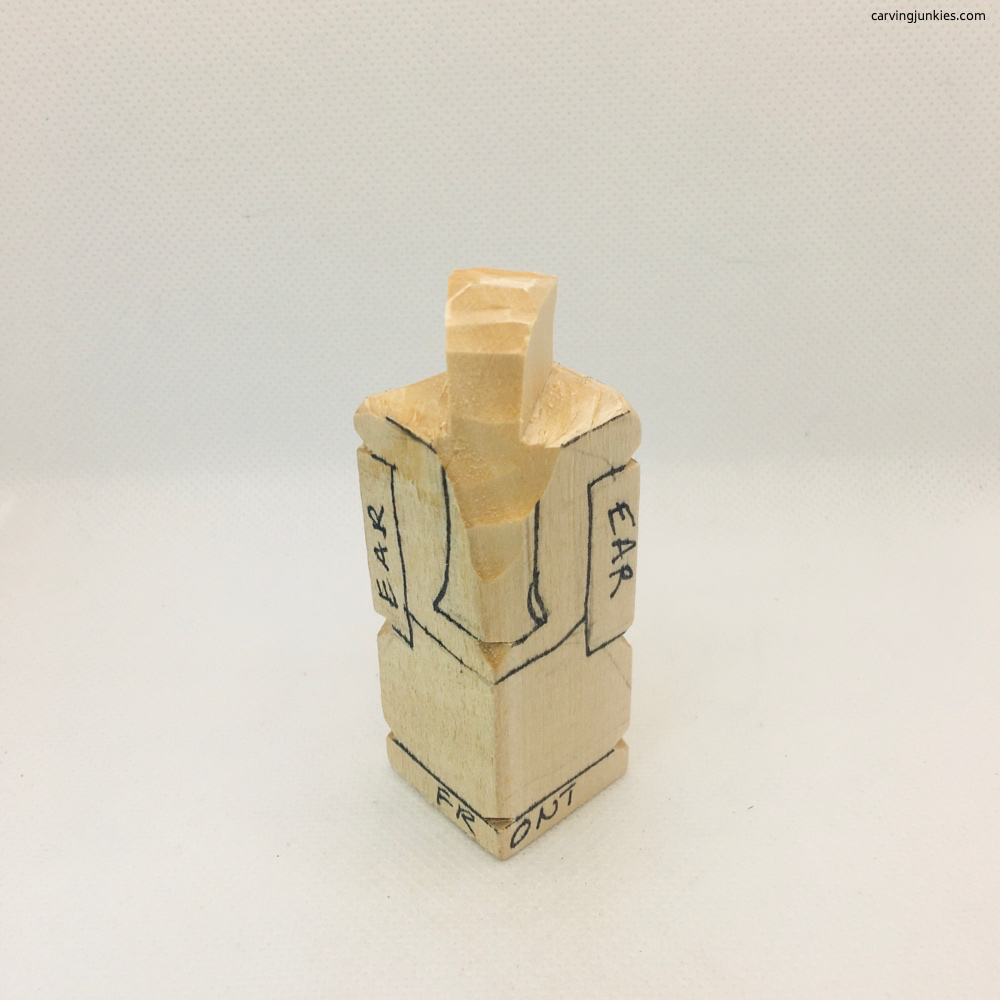 8. Front view of carved trunk
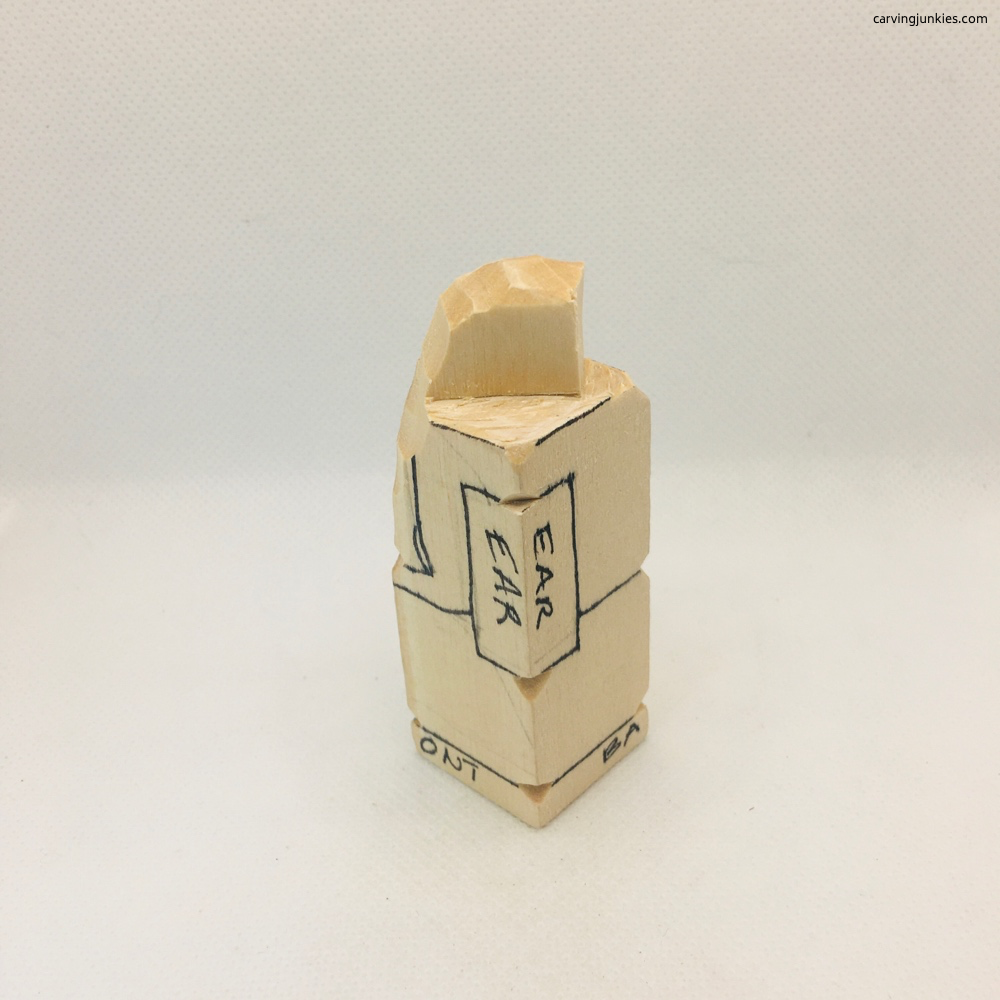 10. Left side view
How to carve an elephant: Notch the trunk
- Draw a line a little more than midway on the top of the trunk and using a V cut, make your first cut (photo 11). Be really careful here and go slow so you don’t crack the trunk.
- When you are done, mark the areas of wood under the trunk that you will remove with your next cut (photo 12).
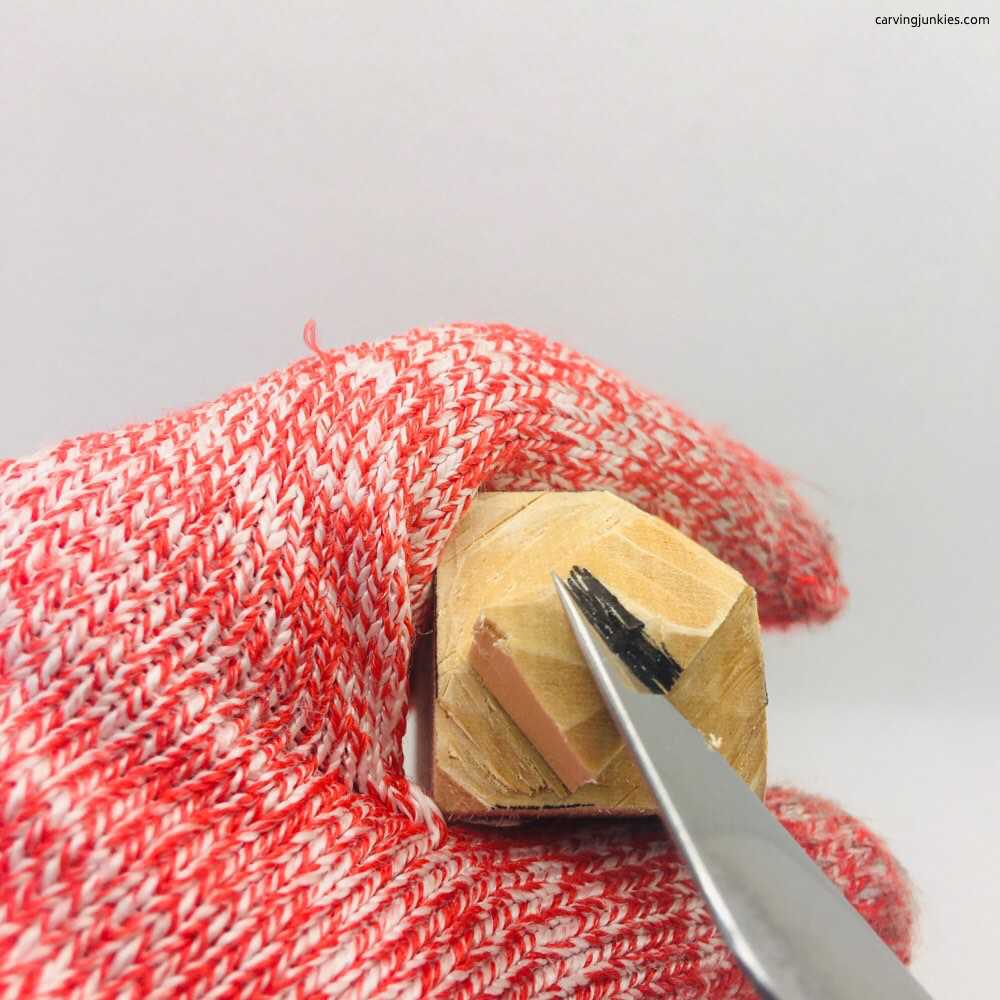 11. Add a line and make a V- cut
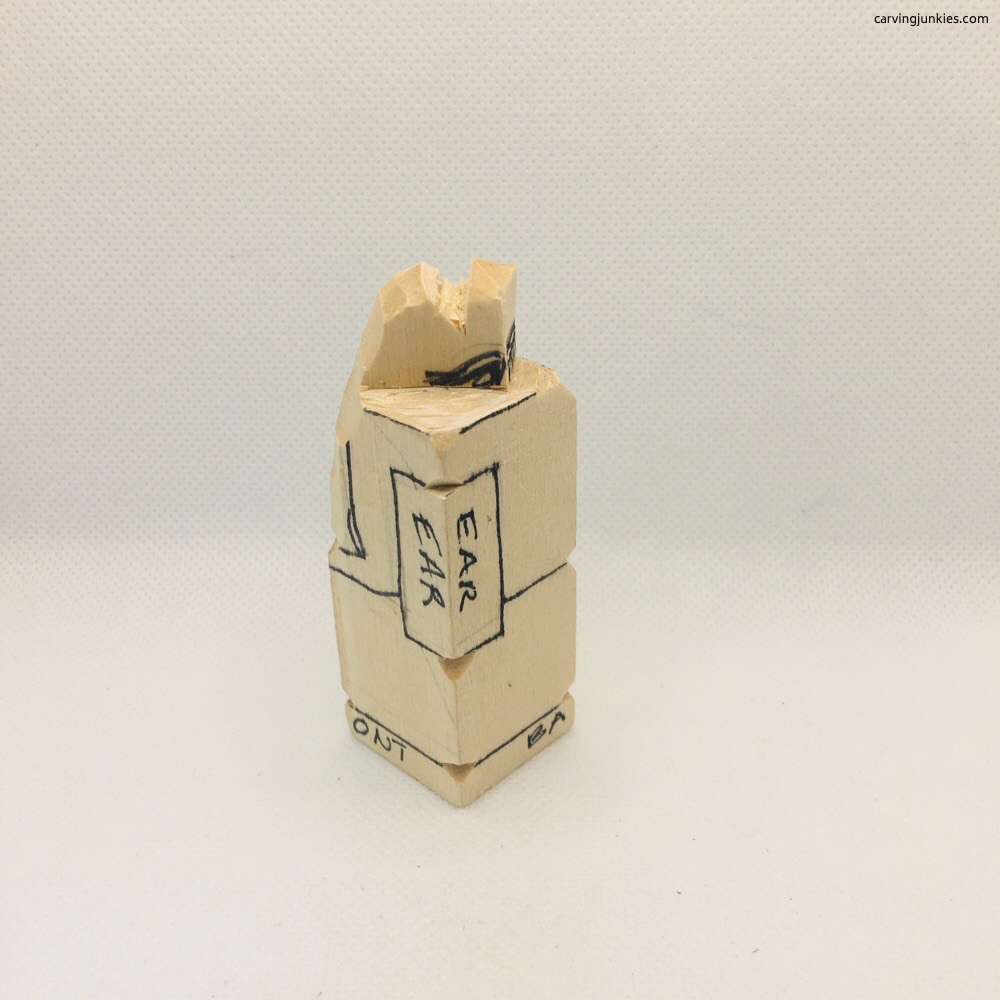 12. Trunk is cut and marked for second cut
How to carve an elephant: Continue shaping the trunk
- Very carefully, make a deep stop cut on all sides and remove wood from underneath the trunk (photos 14-16). If it snaps, wood glue is your friend! Just be sure to wipe away all the glue or your paint will not adhere.
- You will shape the trunk further later.
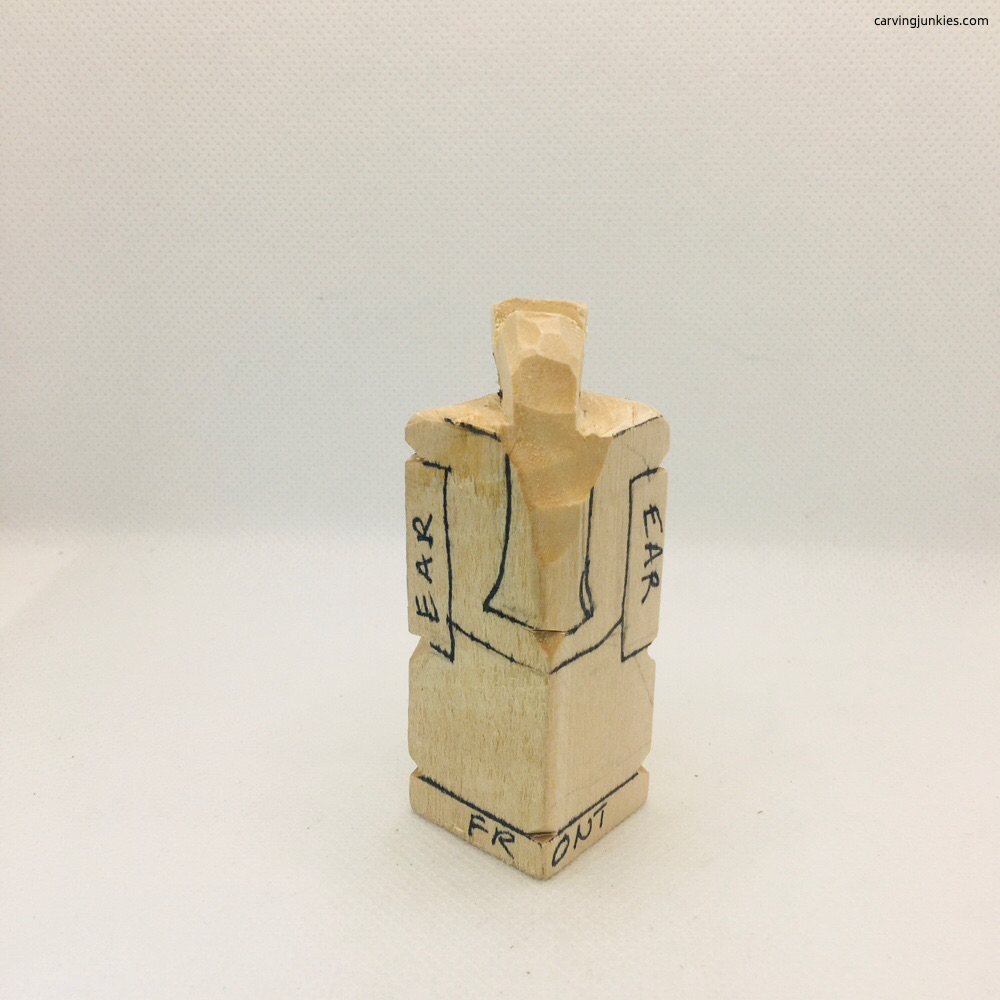 13. Trunk progress, front view
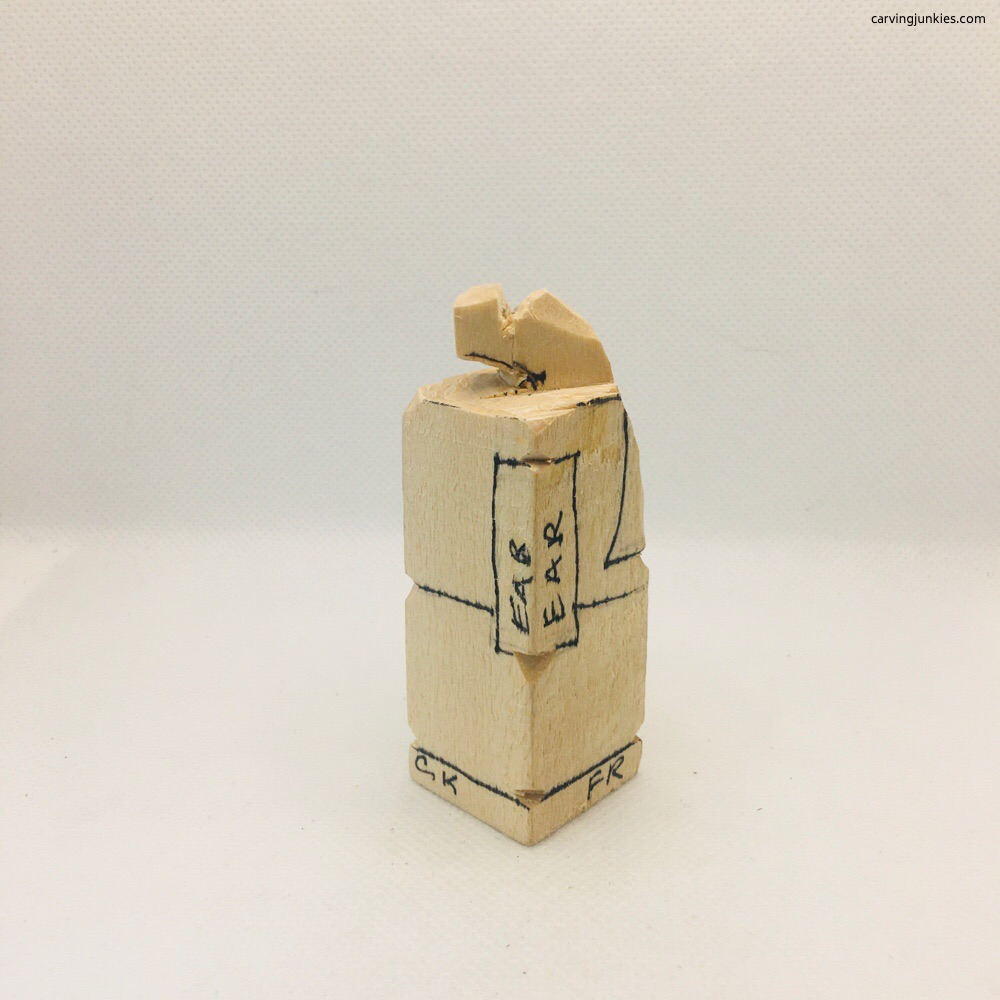 14. Right view
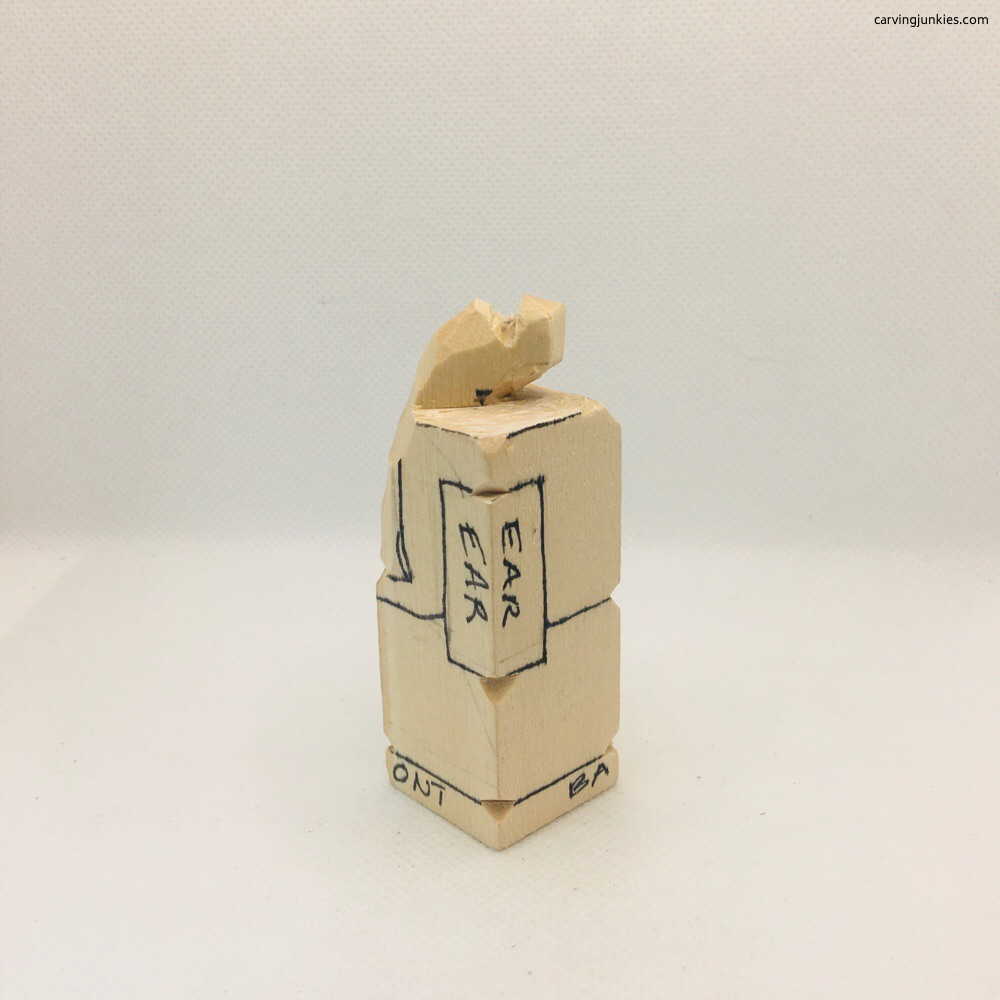 15. Left view
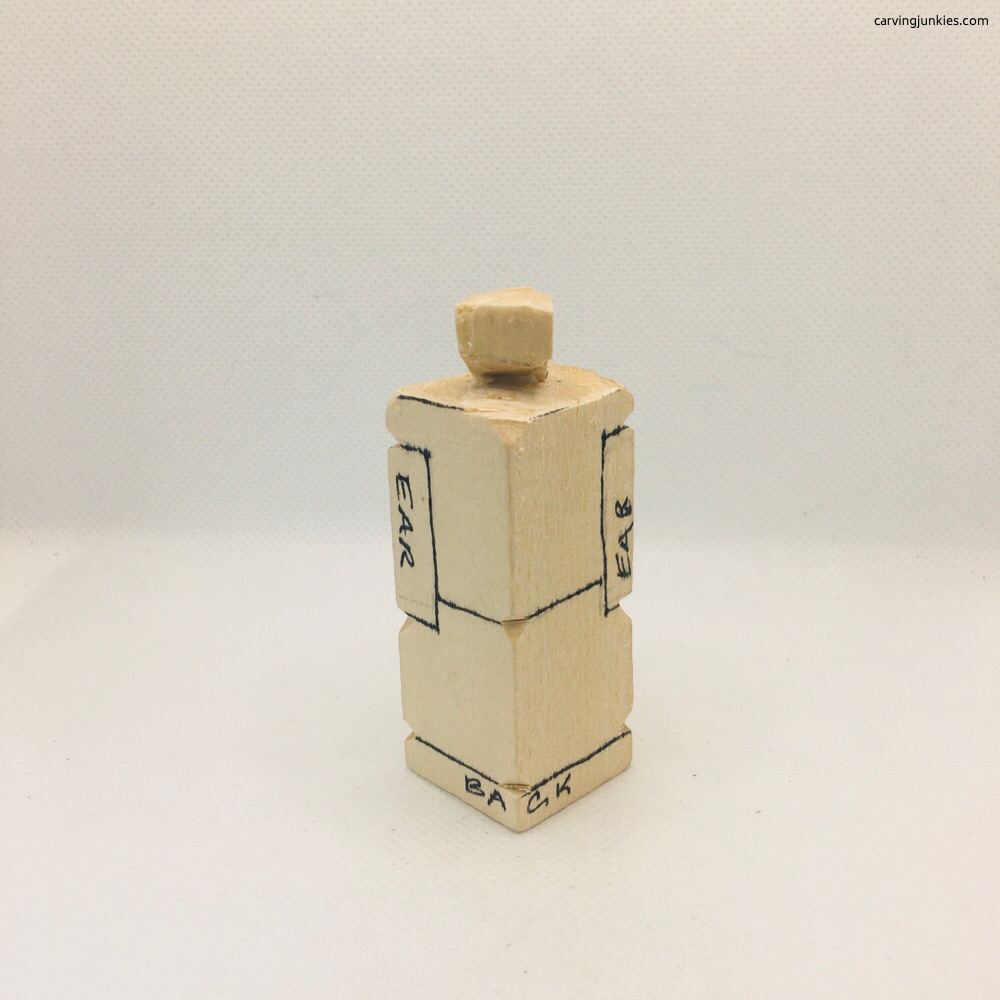 16. Back
How to carve an elephant: Work on the lower trunk
- Using stop cuts, define the outline of the bottom of the trunk (photos 17-20).
- Also mark where you will remove wood to round the head (photos 17-20).
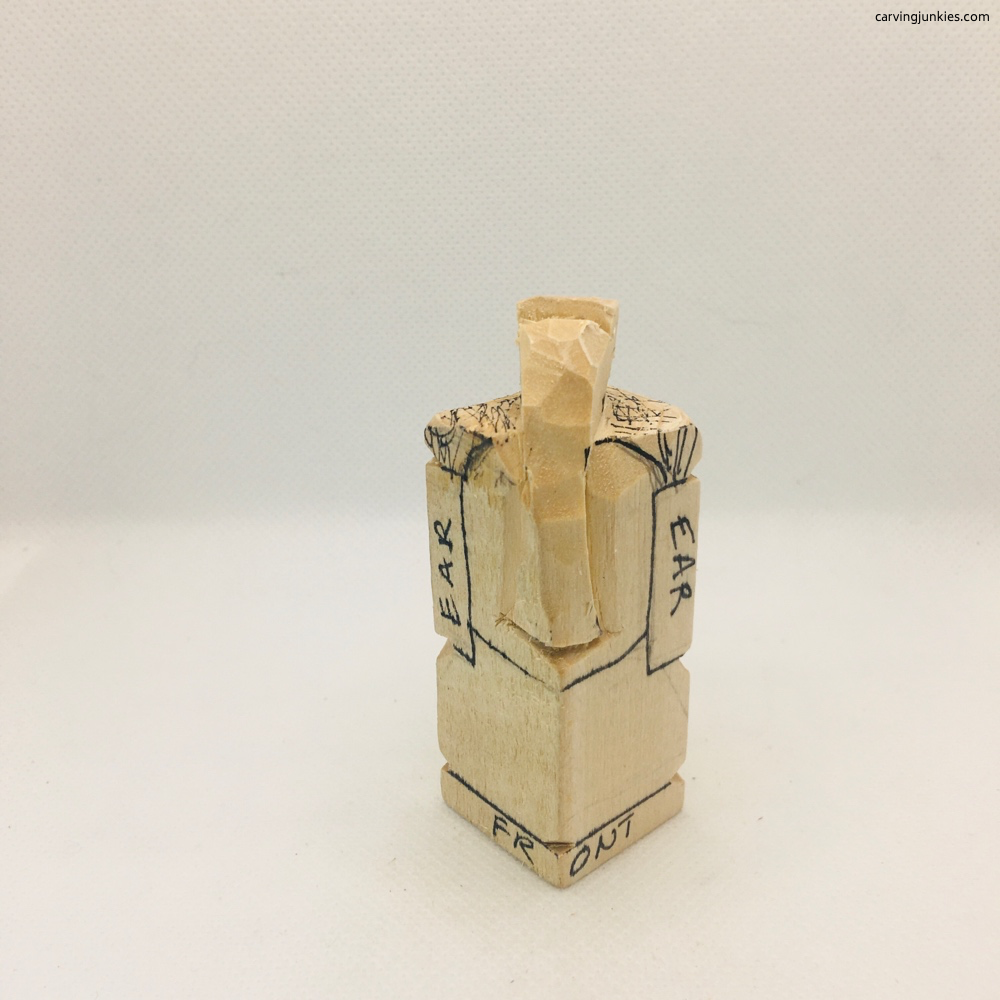 17. Trunk is defined (front view)
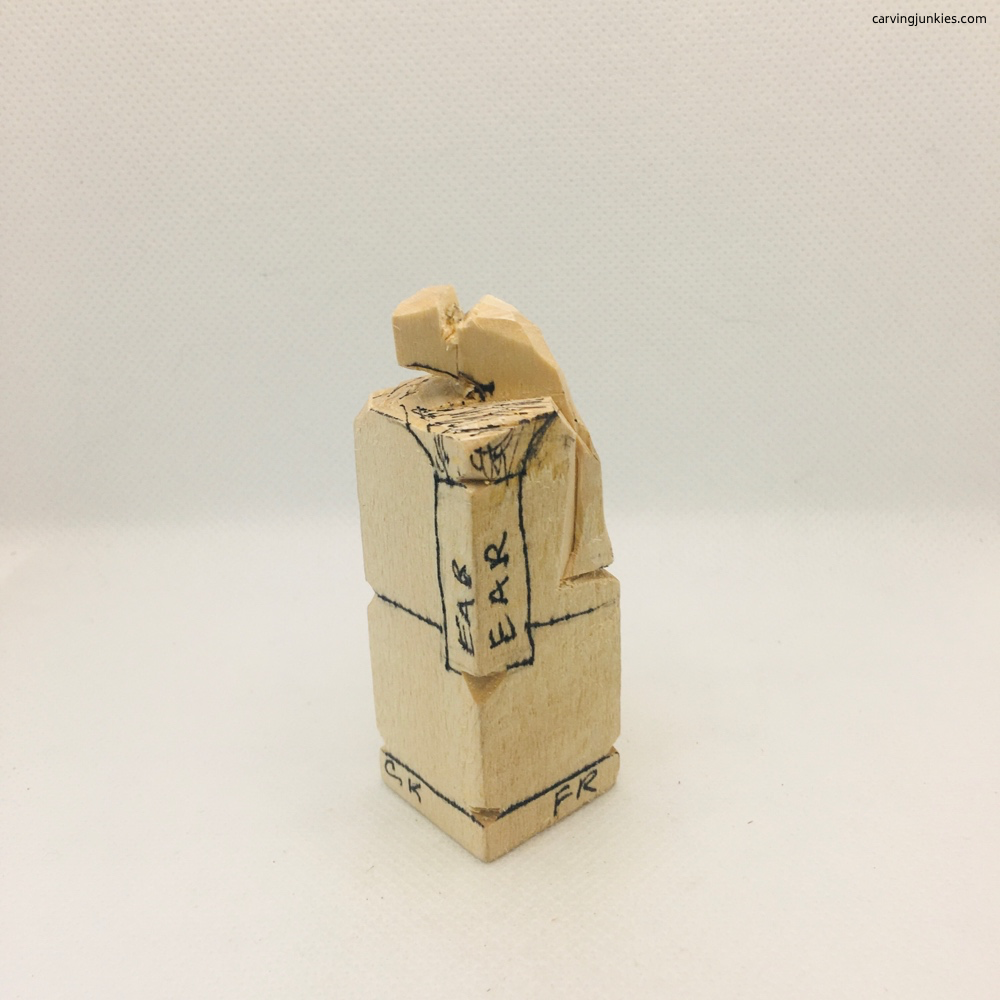 18. Right view
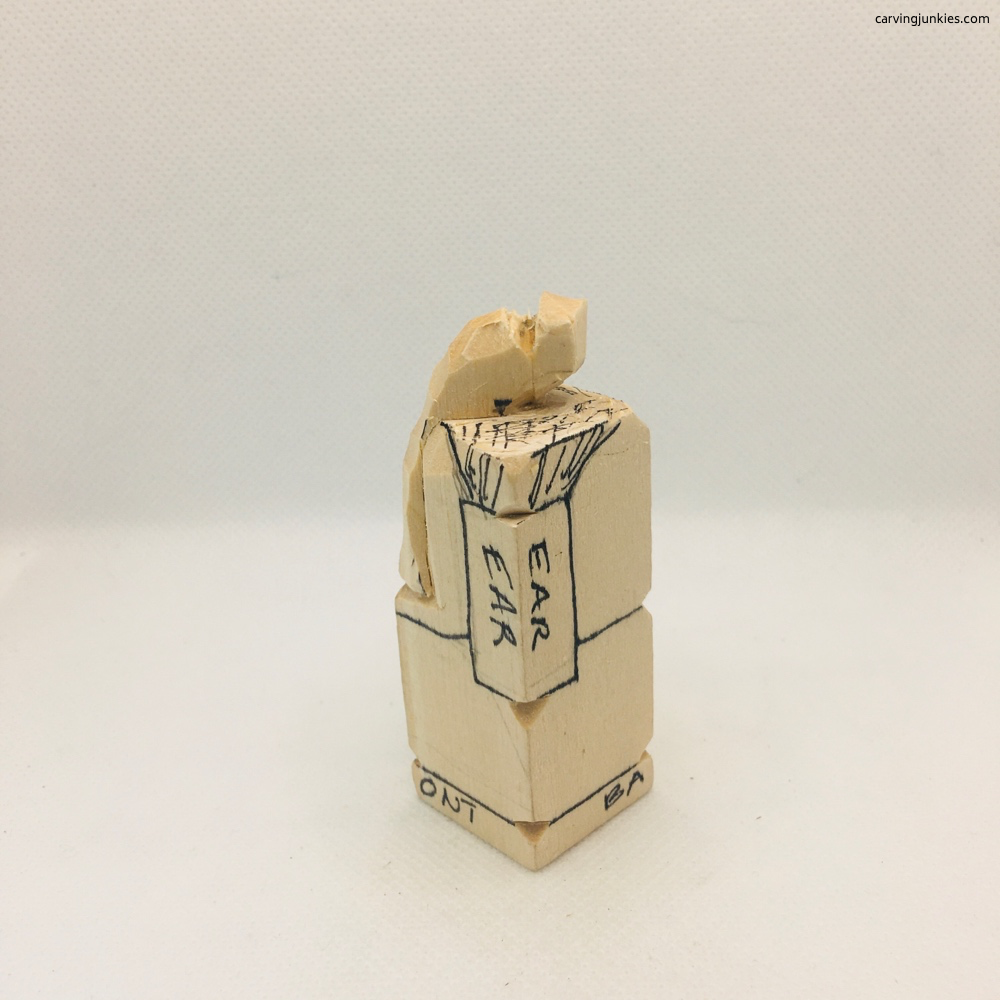 19. Left view
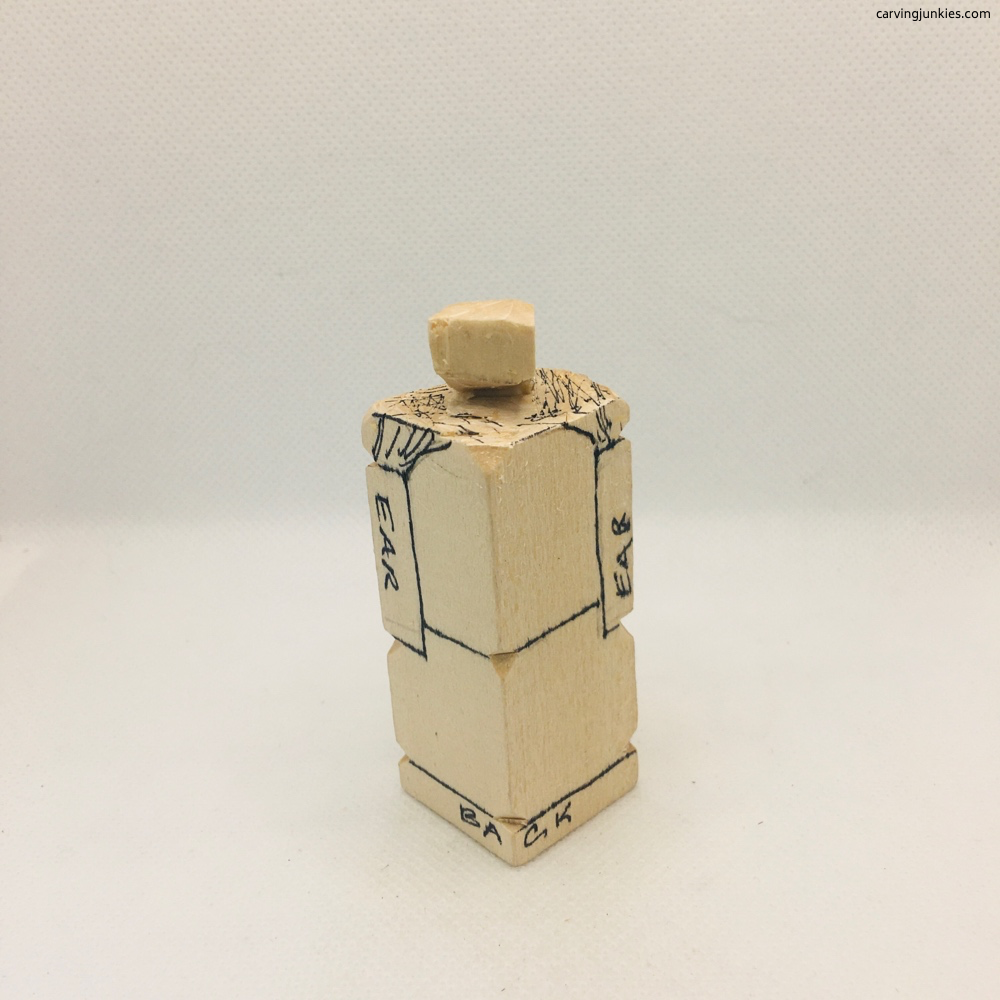 20. Back
How to carve an elephant: Separate the head on the back
- Round the back corner, and using a stop cut, separate the head from the lower body, removing wood from underneath (photo 21).
- Use deep stop cuts (photo 22) to separate the wood above the ear, removing wood from underneath.
- Shape the lower back of the head, and very carefully, narrow the end of the trunk.
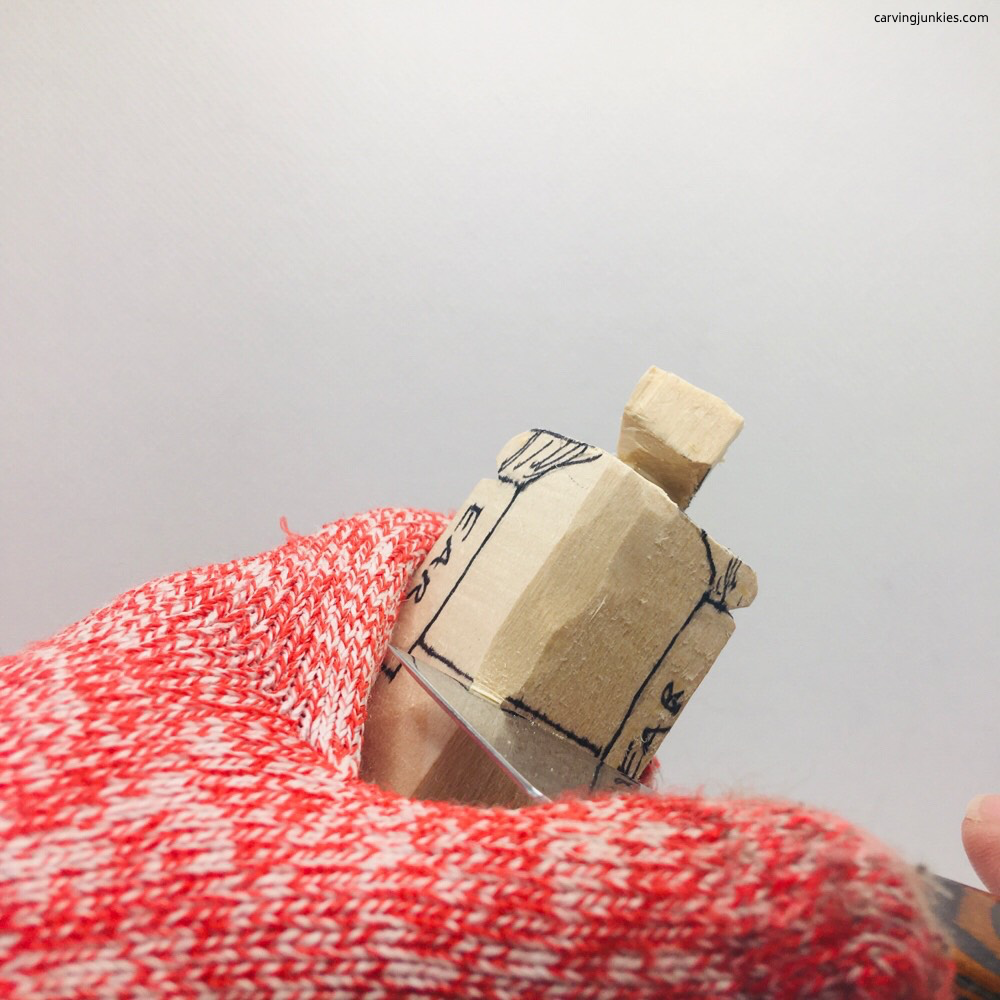 21. Make a stop cut to separate the head
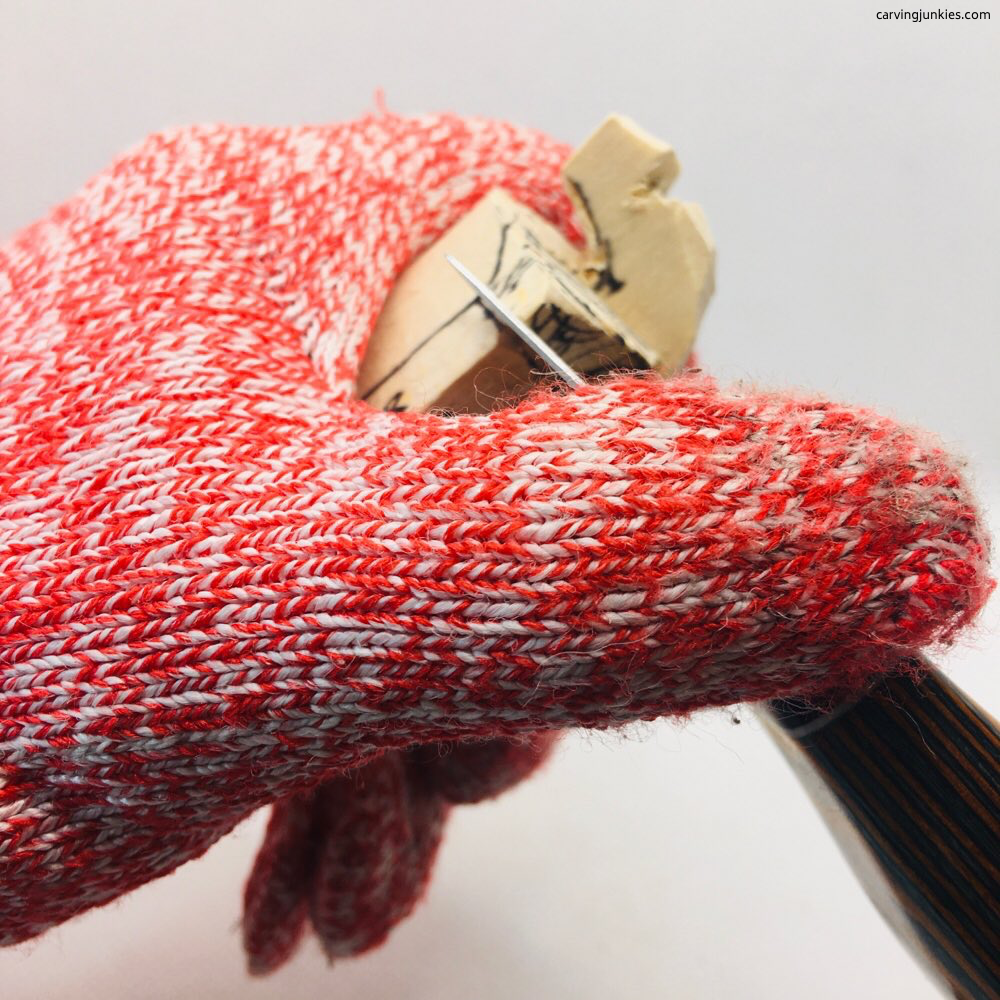 22. Make a deep stop cut to start the ear
How to carve an elephant: Start the face
- Shave the face back to expose more of the trunk and set up the eye sockets (photo 23). It will help to first make a deep stop cut along the outline of the trunk.
- Using a stop cut, separate the head from the lower body and round the lower front corner. Then draw on the legs. The hind legs will be a little higher (photo 24) and extend around to the sides (photos 25,26).
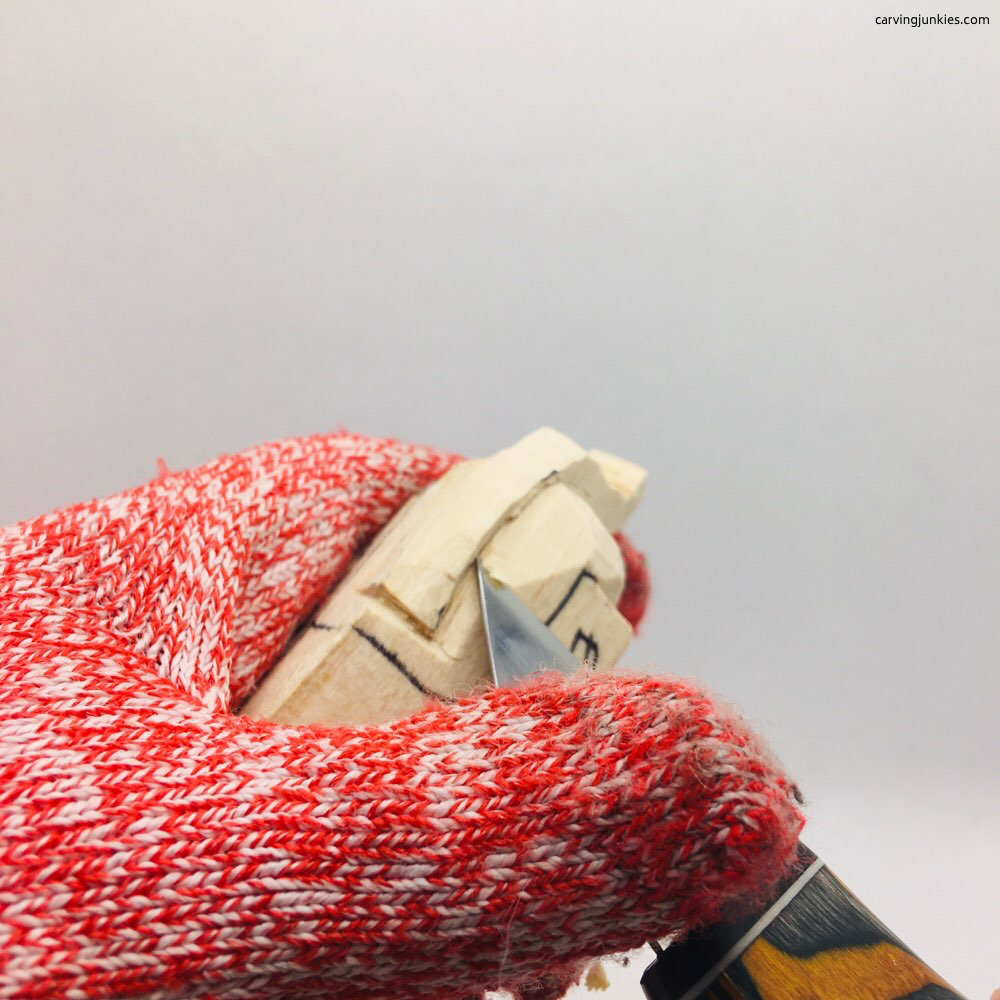 23. Shave wood off the face
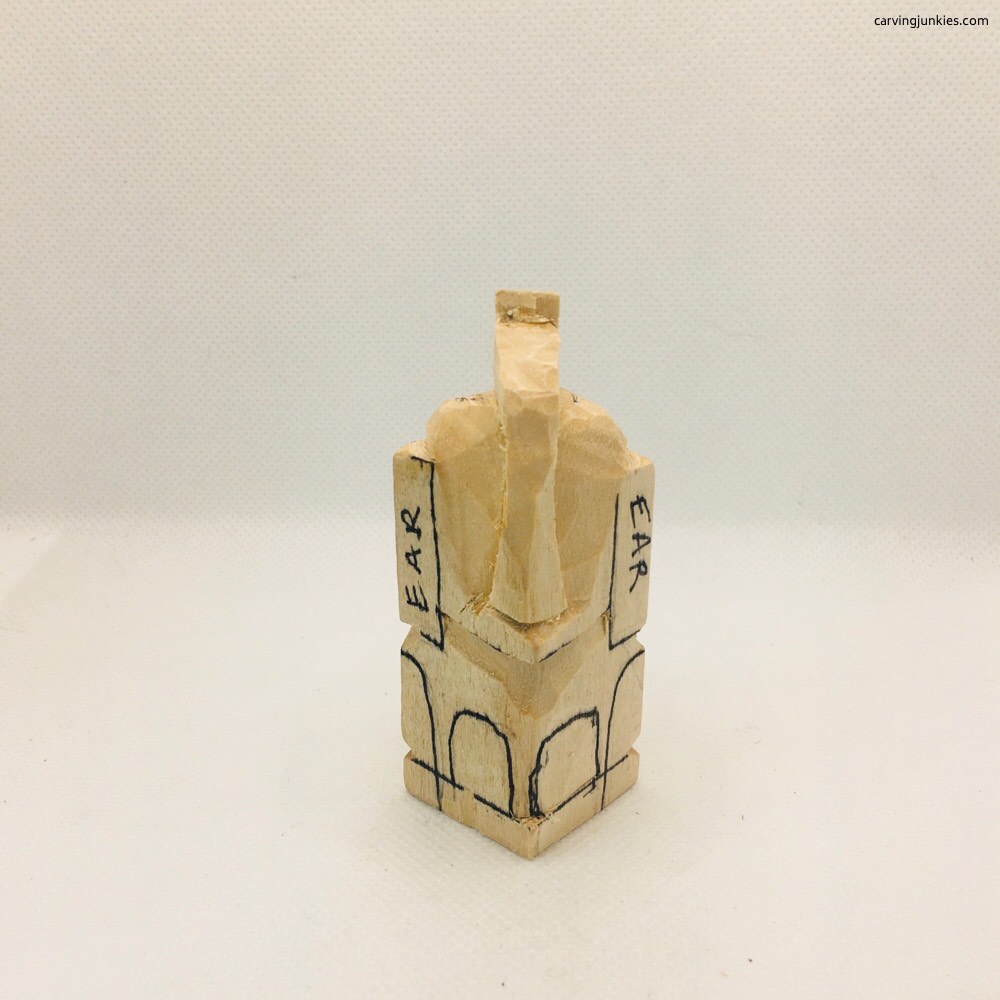 24. The face has been shaved back
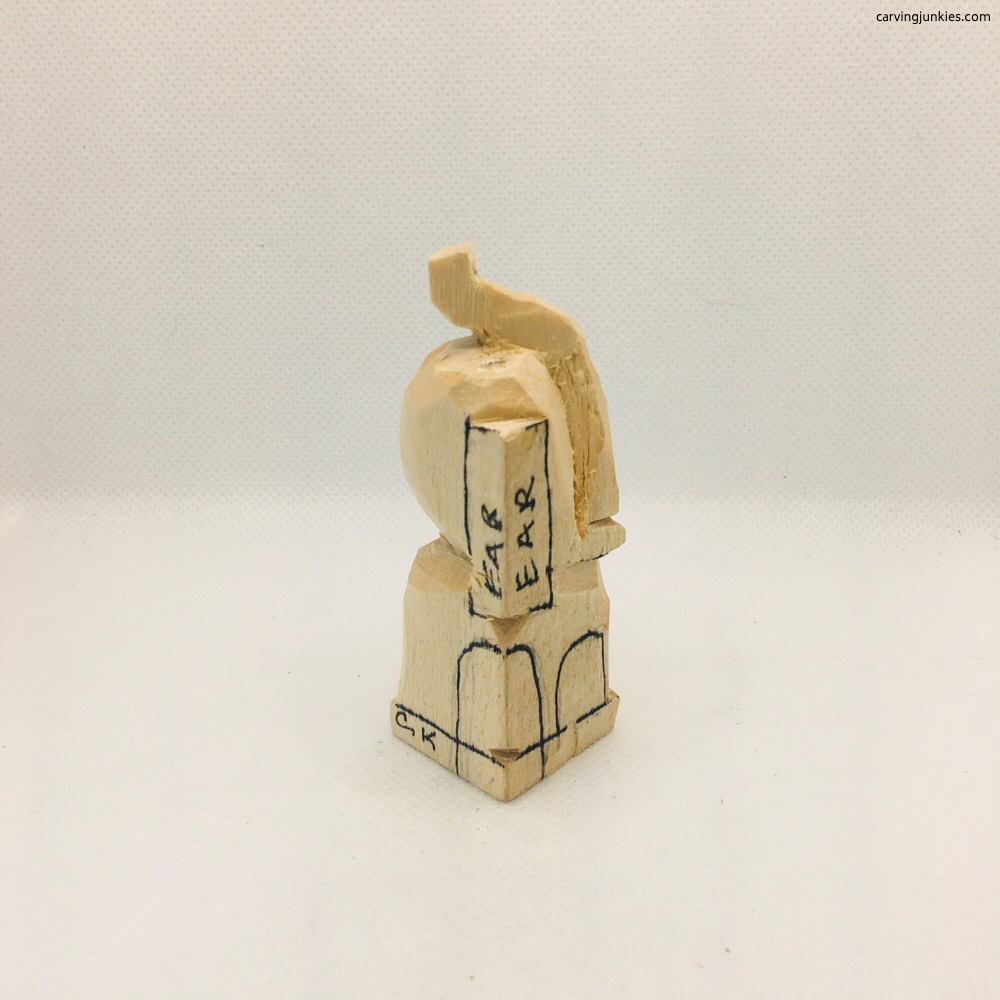 25. Right side
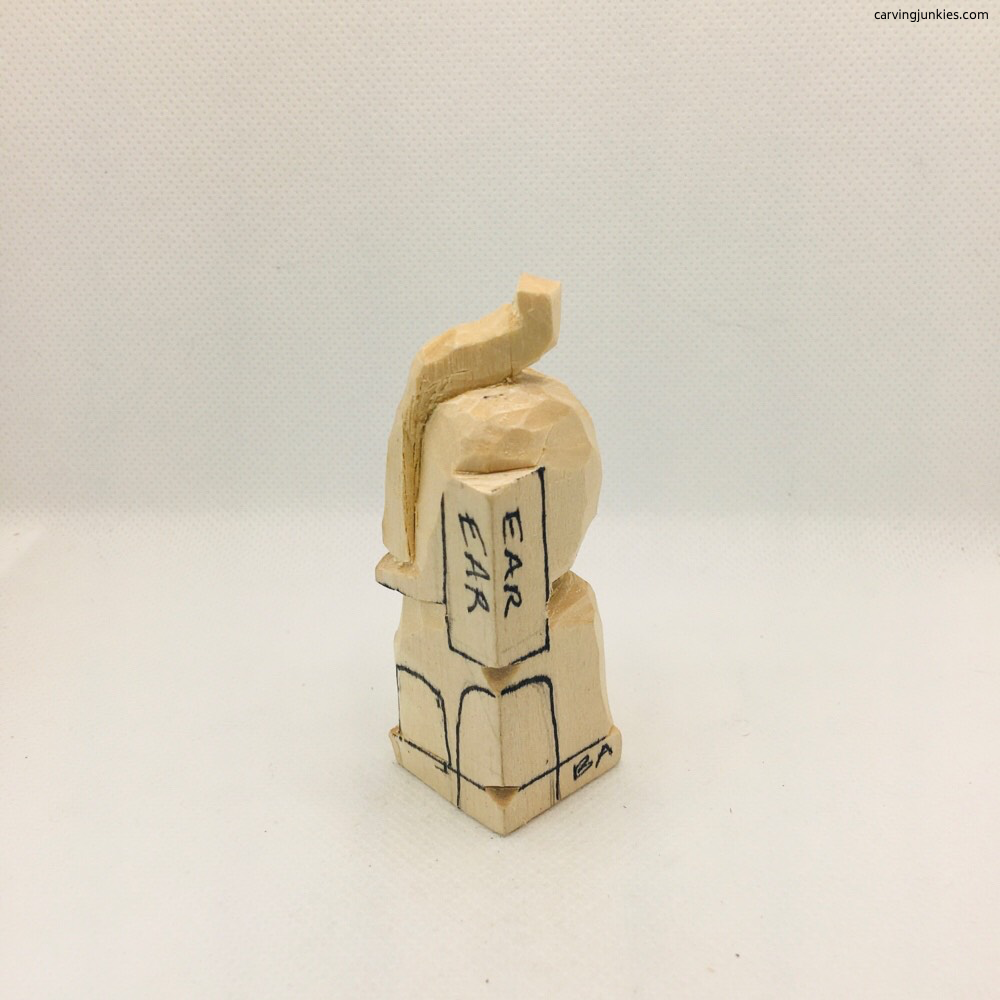 26. Left side
How to carve an elephant tip: the wood around the trunk gets a little stringy,
smooth it with sandpaper (photo 27).
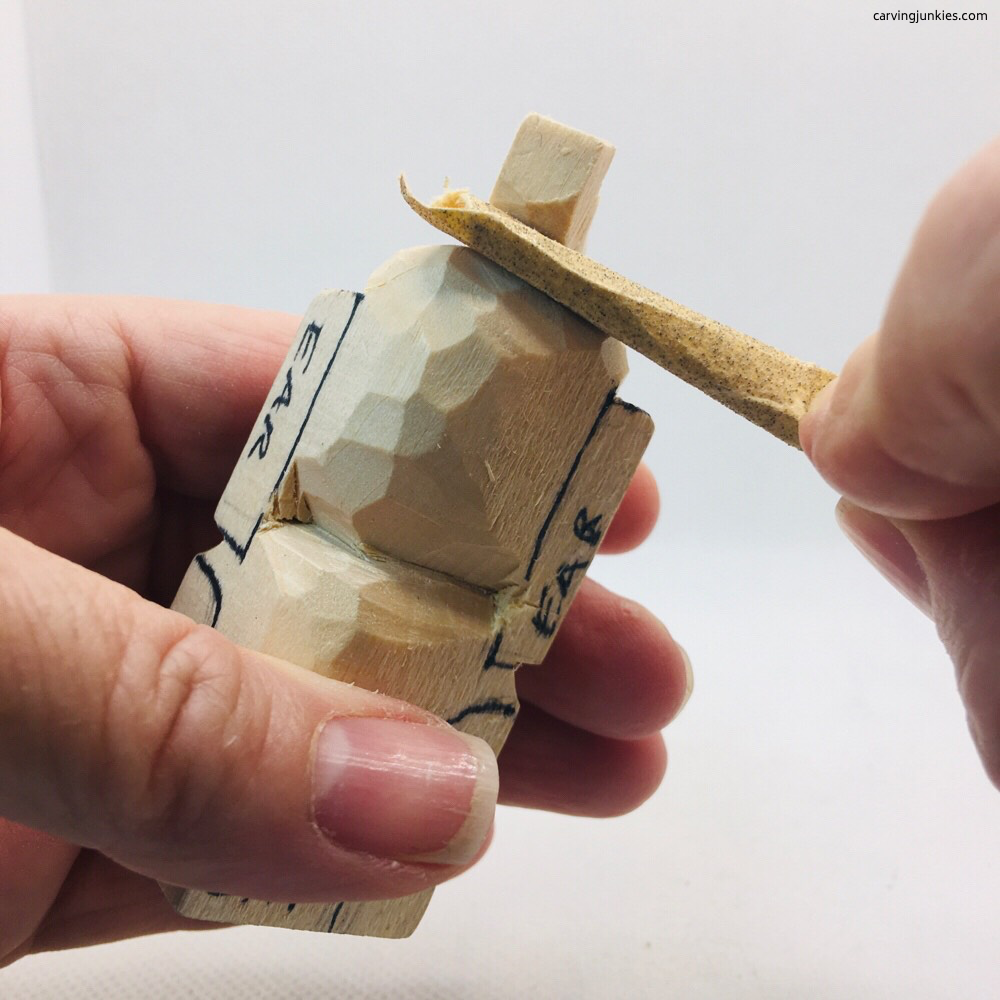 27. Smooth wood with sandpaper if needed
How to carve an elephant: Define the legs
- Using stop cuts, separate the feet from the legs and define the legs (photo 28).
- Round the bottom of the legs. Use a V-cut to split the front legs (photo 29).
- Also shape the neck and reduce a little wood from under the ears (photo 30). First, define the lower ears with deep stop cuts so you can get your knife in there.
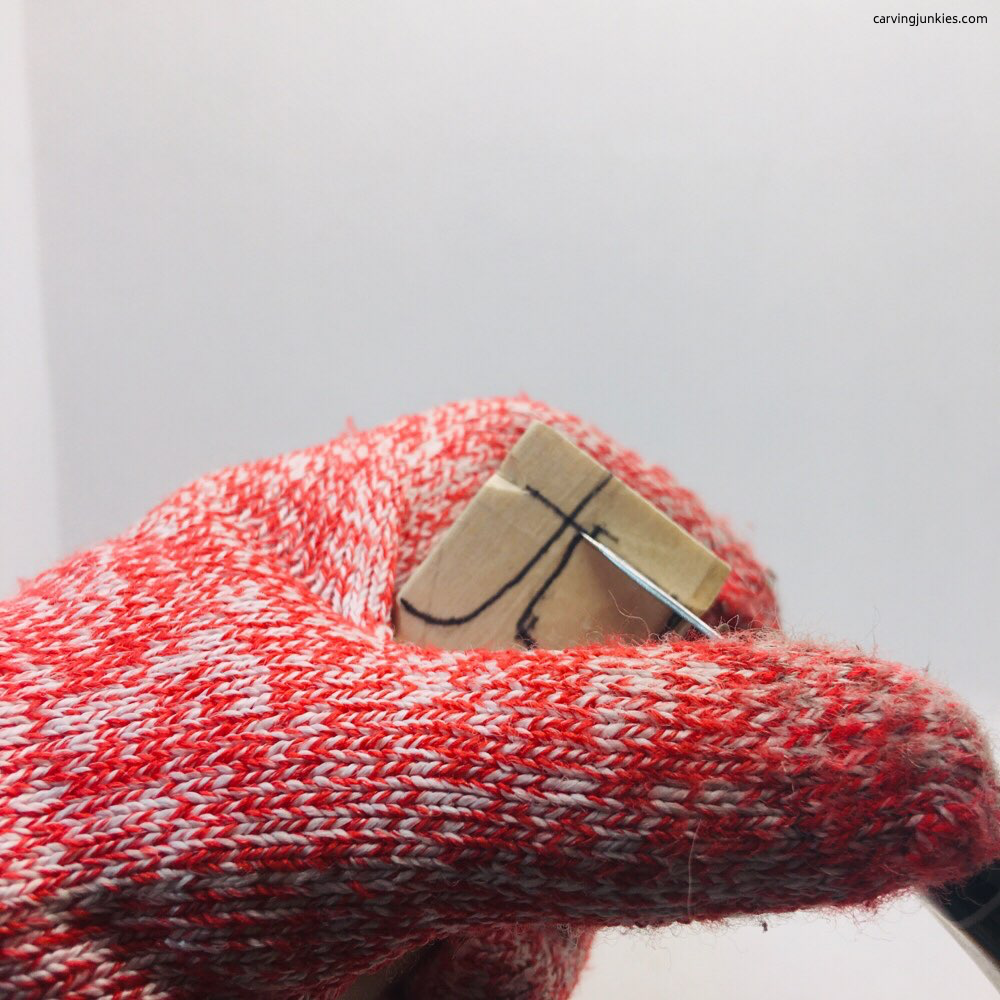 28. Stop cut to separate the feet
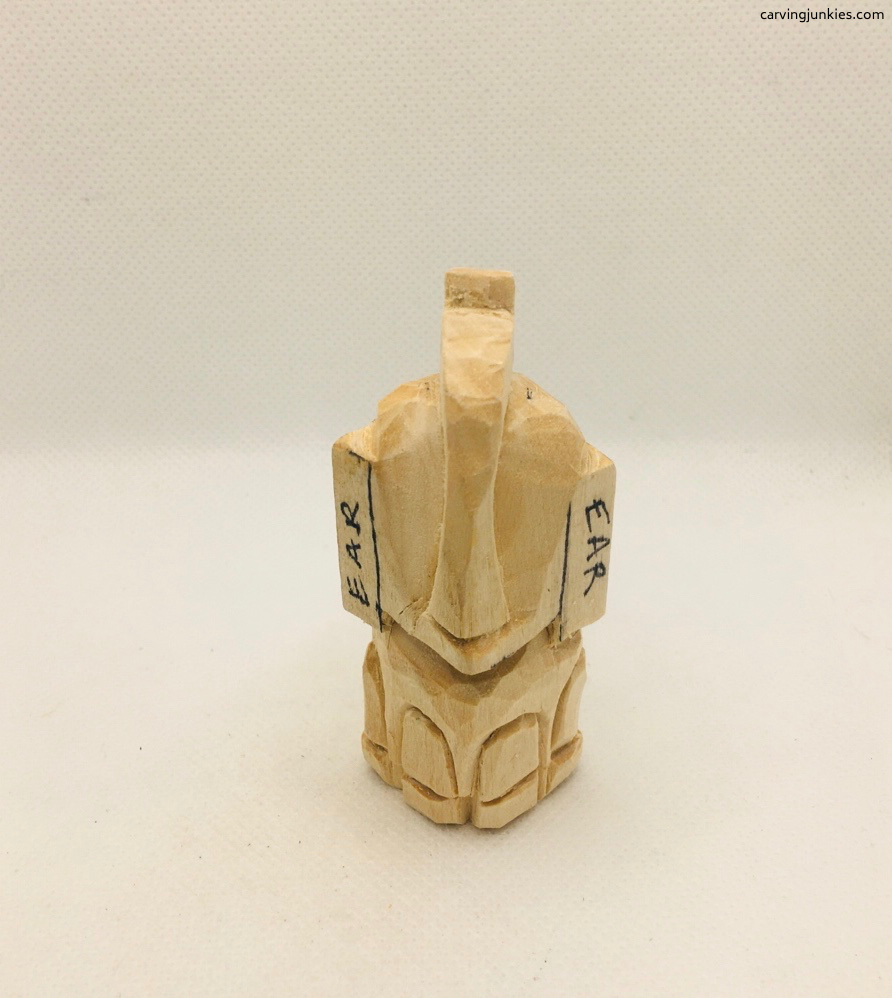 29. Front view of legs defined
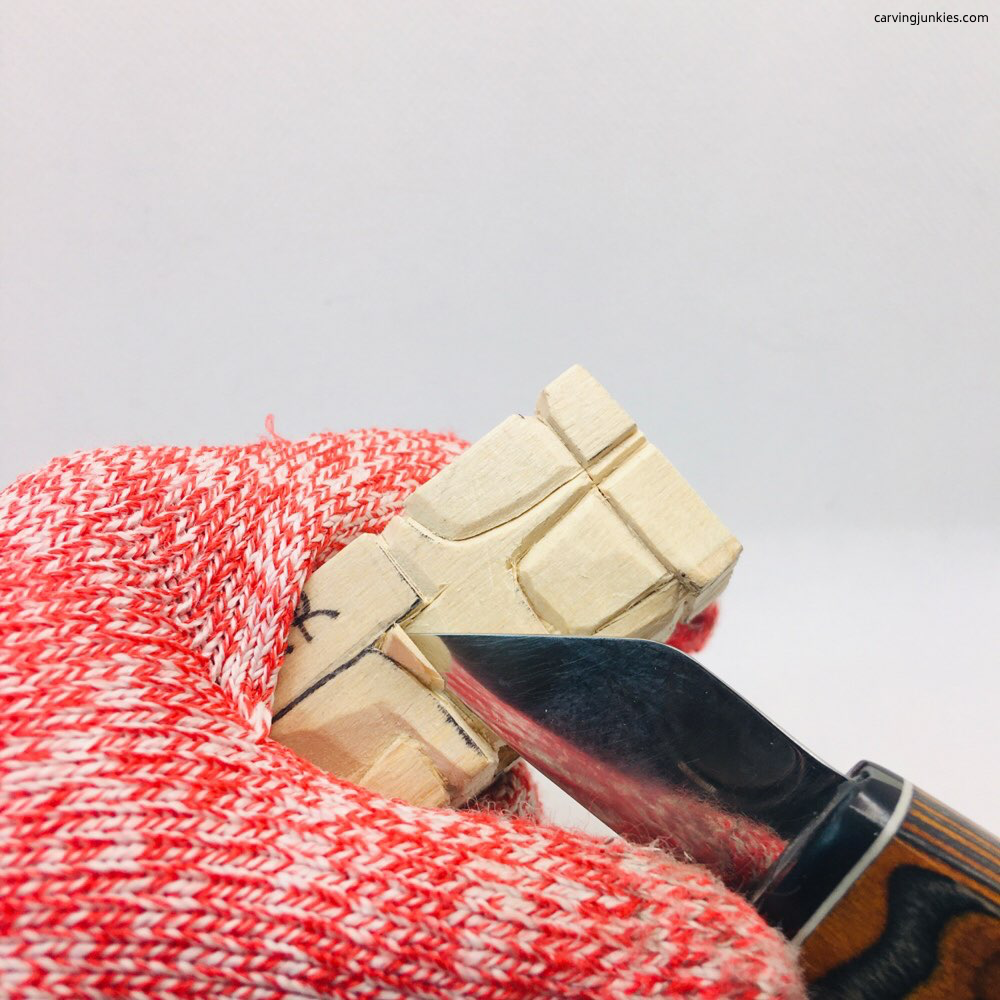 30. Reduce wood under the neck
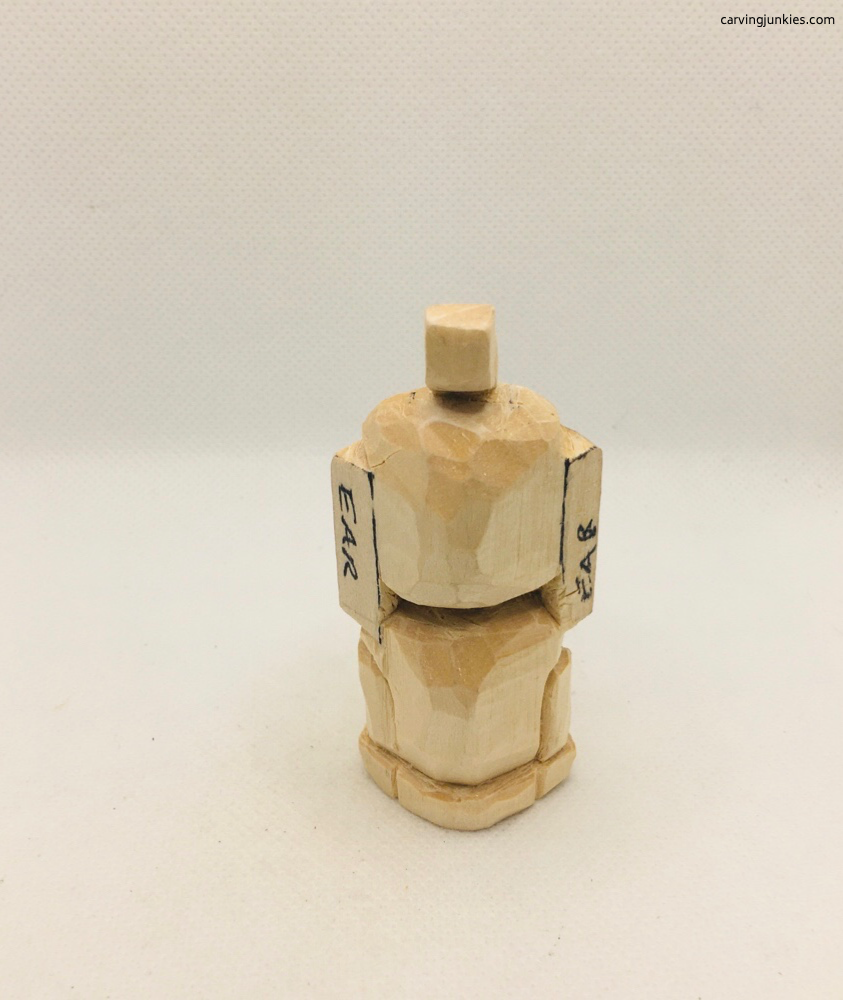 31. Back view
How to carve an elephant: Carve the ears
- Using your knife, make a stop cut along the outline of the ears near the face, then flatten the ears on both sides (photo 32).
- Mark the ears to make further cuts (photo 33). Use a V-cut on the top and be very careful not to split the ear. Add a chip cut in the corner of the bottom each ear for shadow. Also widen the bottom lip of the mouth a bit.
- Draw the tail on the back (photo 34).
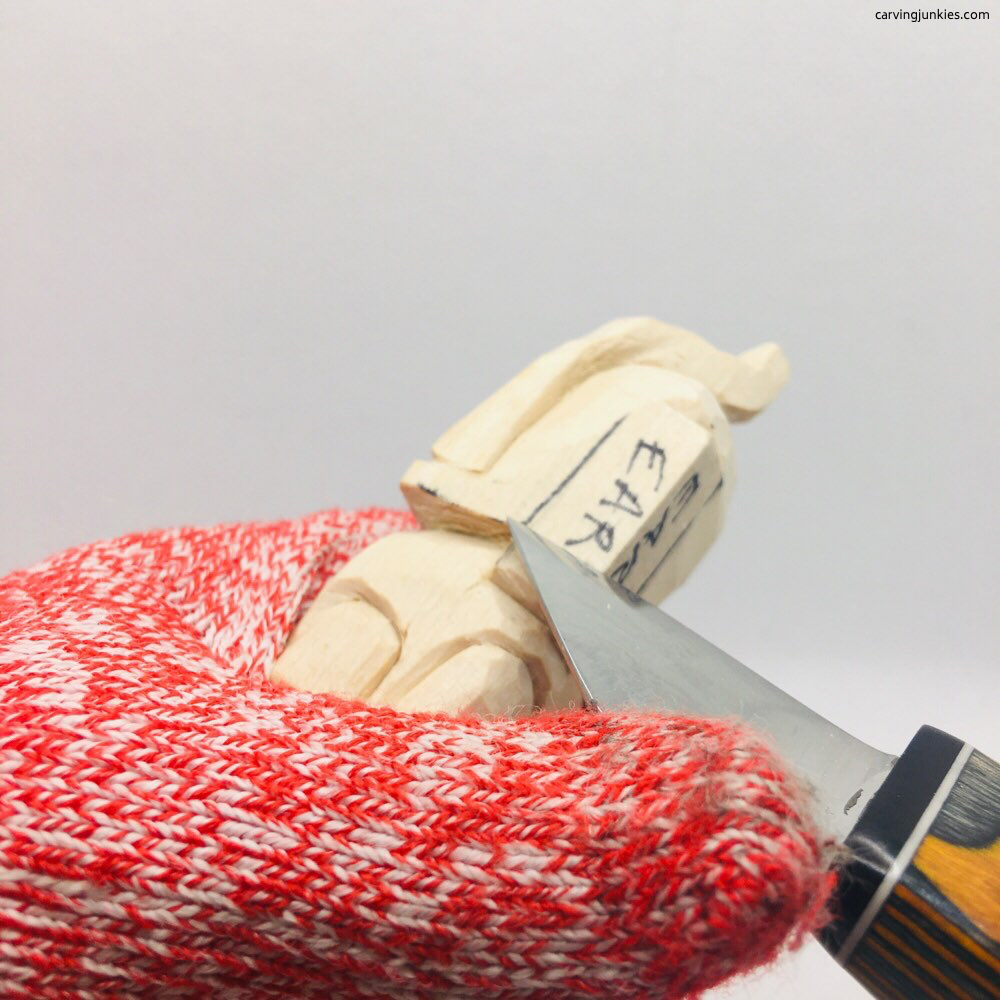 32. Shave wood off the ears
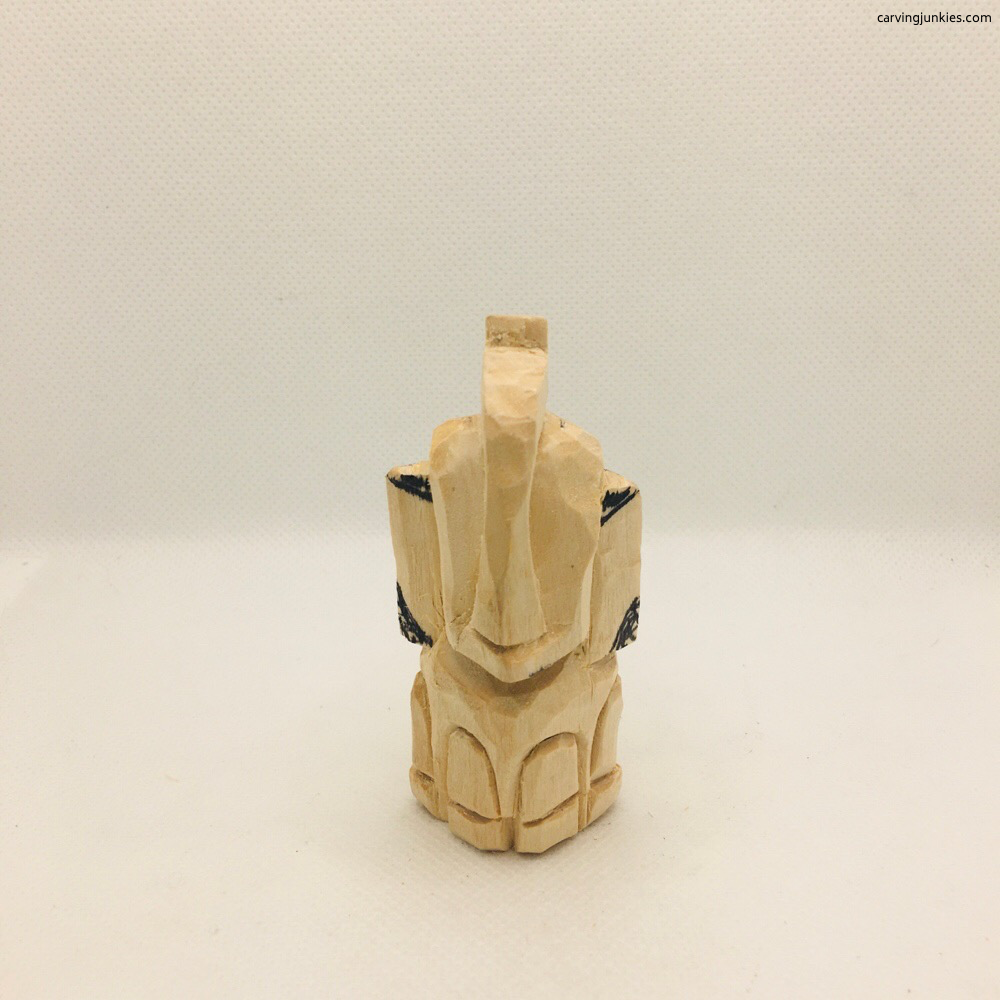 33. Wood to remove is marked
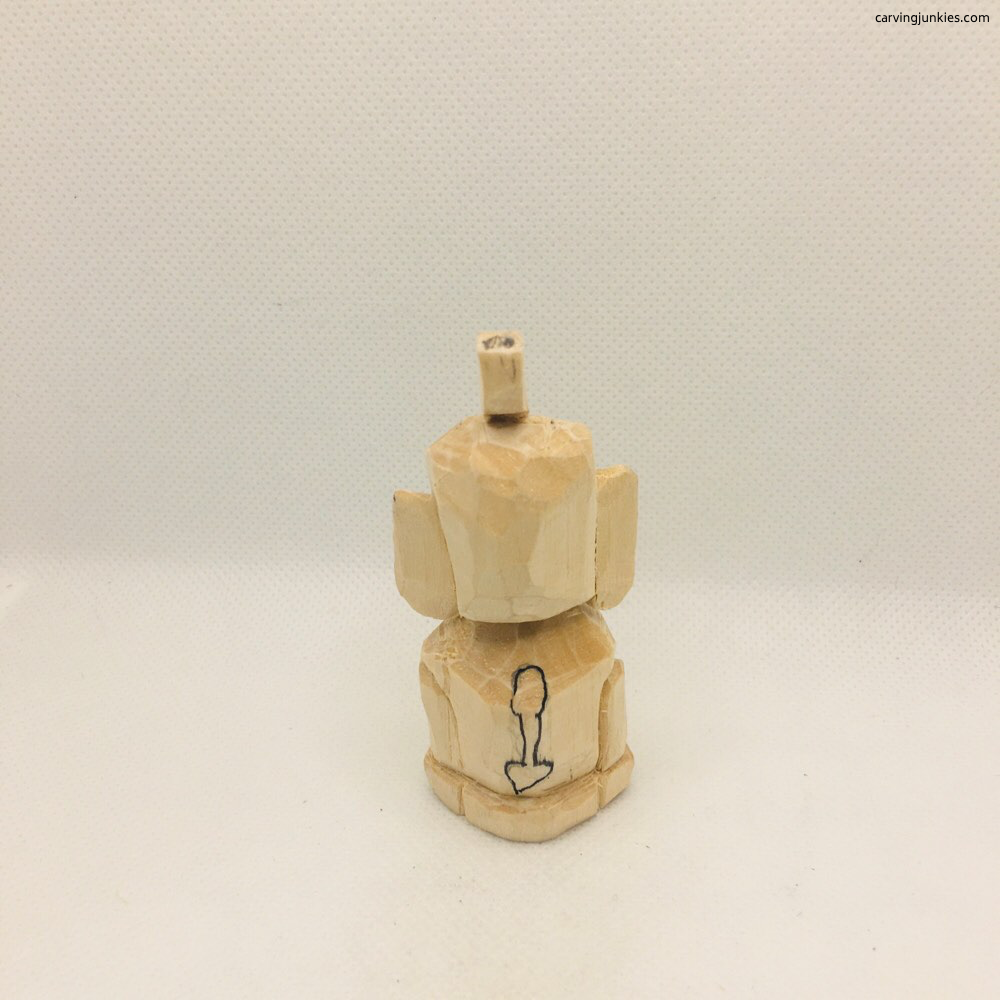 34. Ears are cut and tail is drawn
How to carve an elephant: Carve the details
- Define the tail. Start by using stop cuts along the outline (photo 35).
- Add some cheek lines by using a stop cut and removing wood from underneath. Also add a little smile line on either side of the mouth (photo 36).
- You can further shape the trunk and the backside so it slopes down from the neck.
- How to carve an elephant tip: draw the eyes in pencil to guide your painting (photo 36).
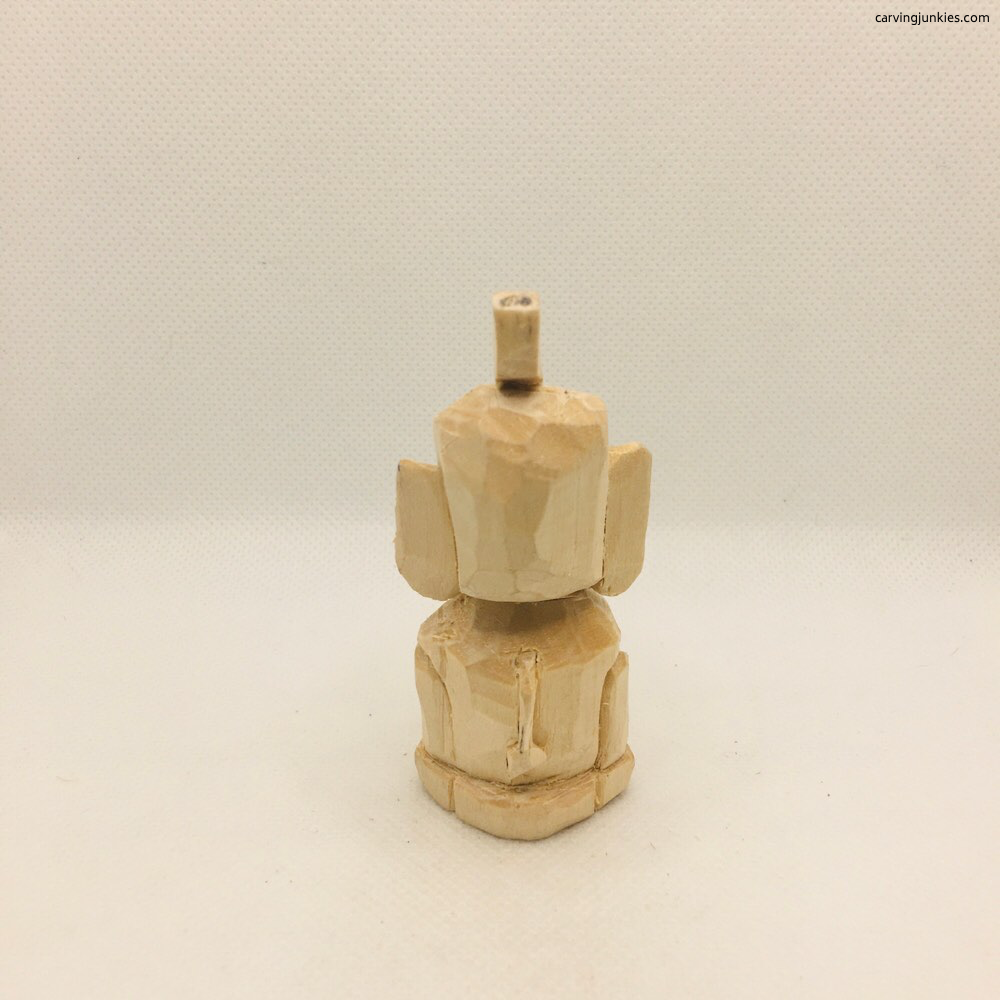 35. Tail is defined
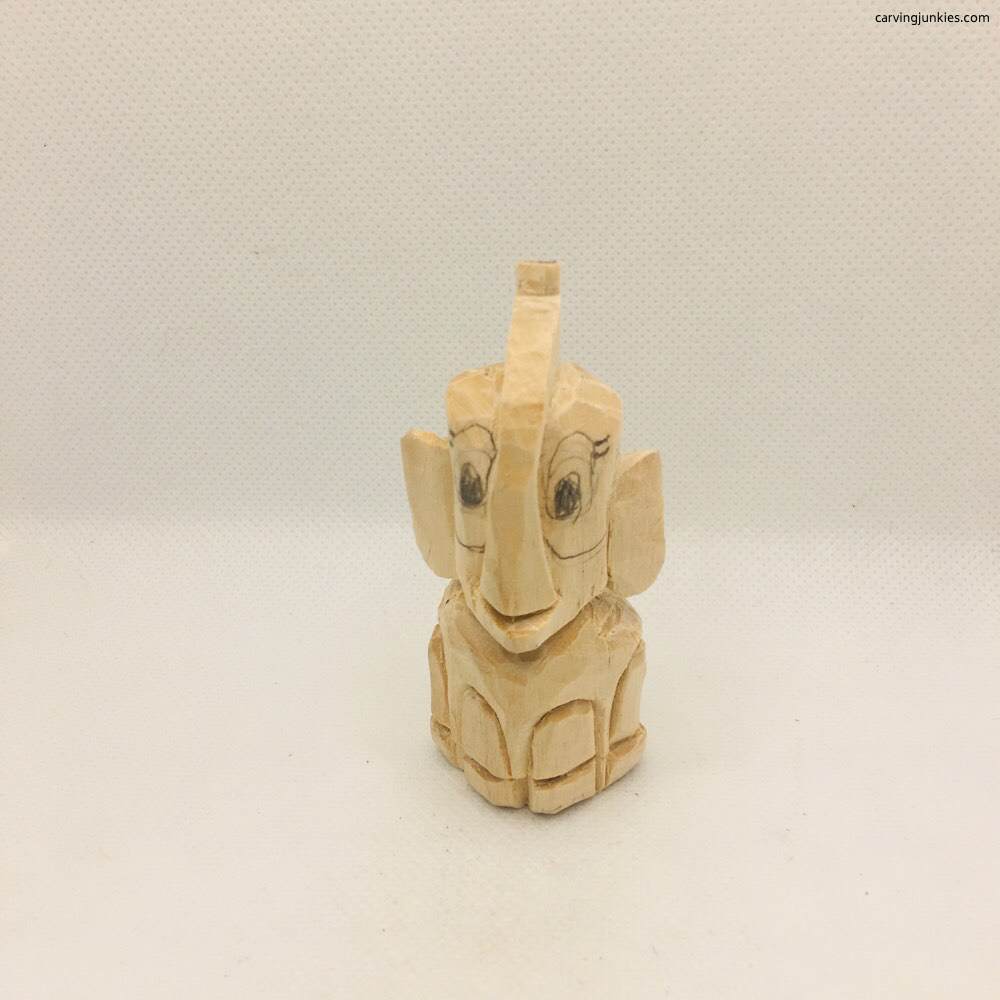 36. Cheek and smile lines are added
How to carve an elephant: Carve the accessories
- Use a piece of scrap wood to carve the wooden circus stand (we used a failed carving!). If you don't have a saw, use stop cuts to remove wood all around until you can snap off the block. Then shave it down.
- Use another scrap to carve the peanut. We used a U-gouge to carve the indentations but you could use a small detail knife as well.
 37. Removing wood to create the stand
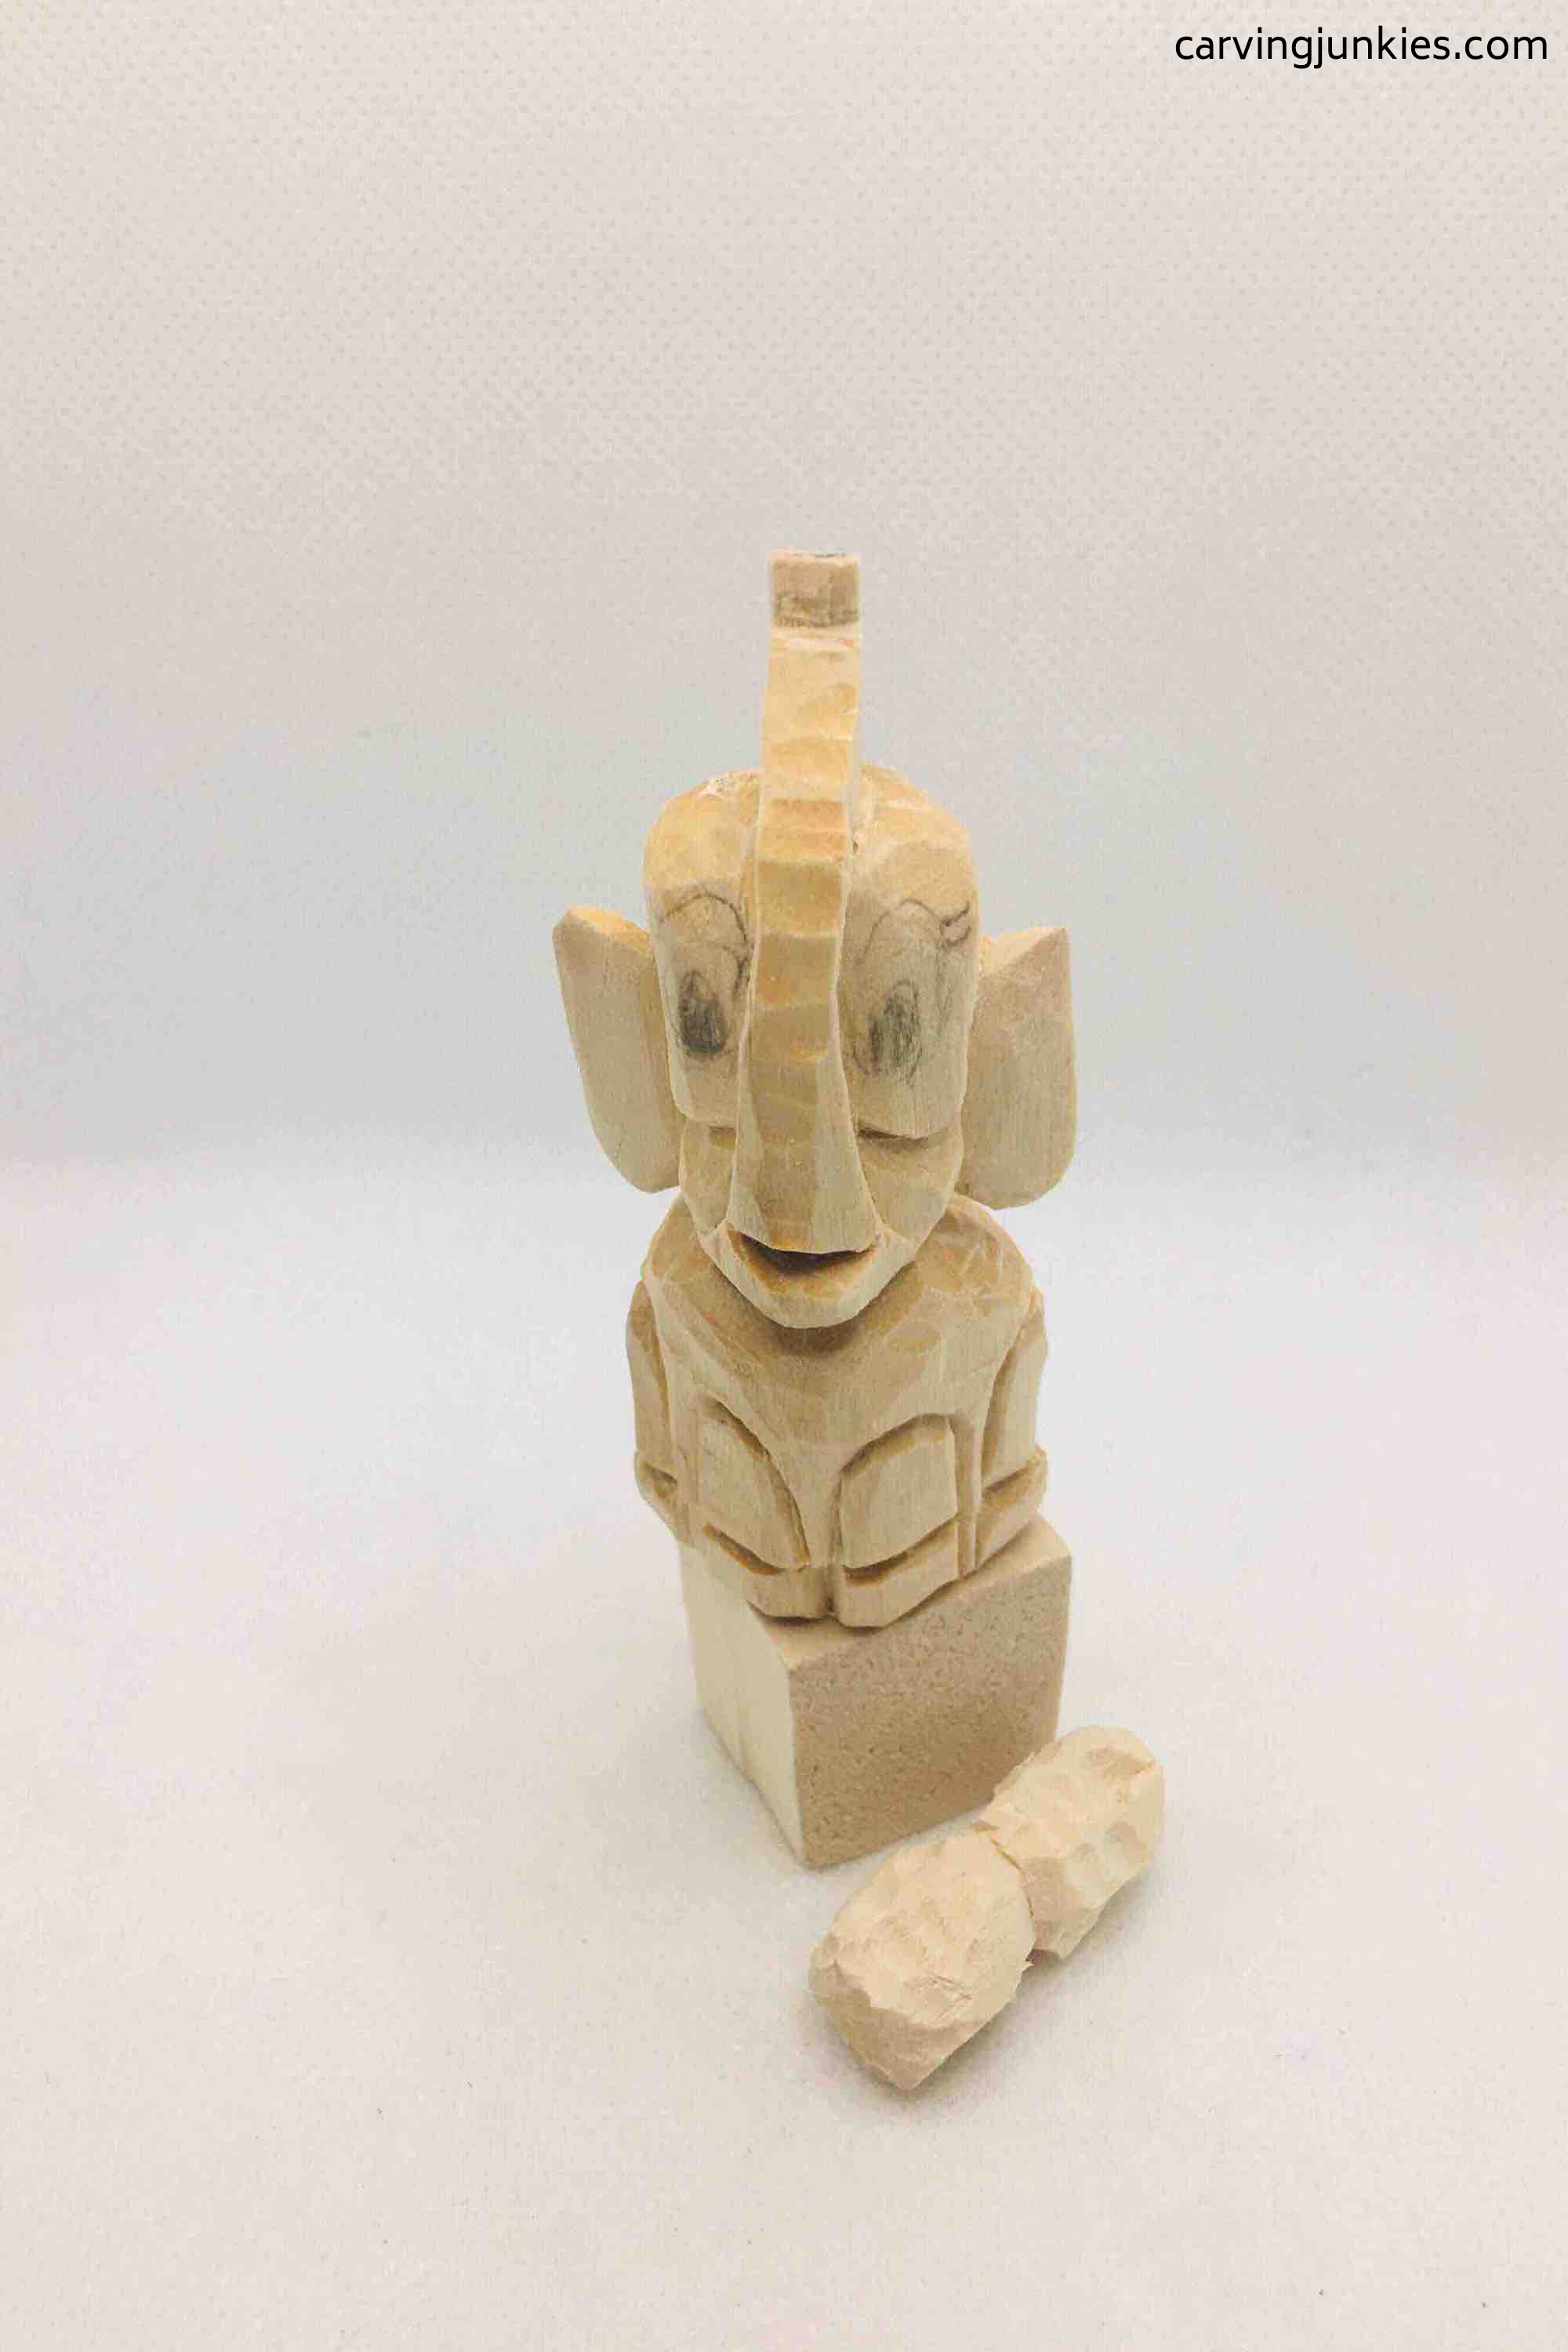 38. Finished stand and peanut
Paint the elephant and accessories
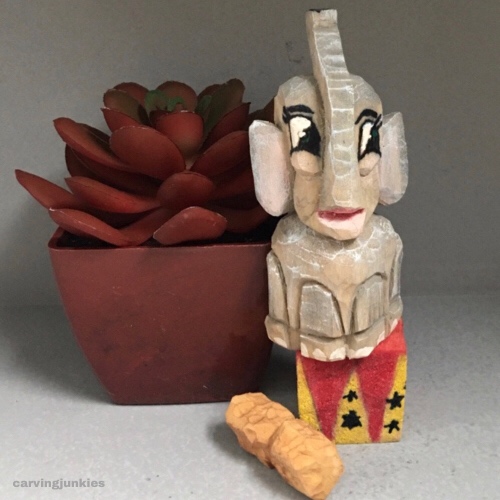
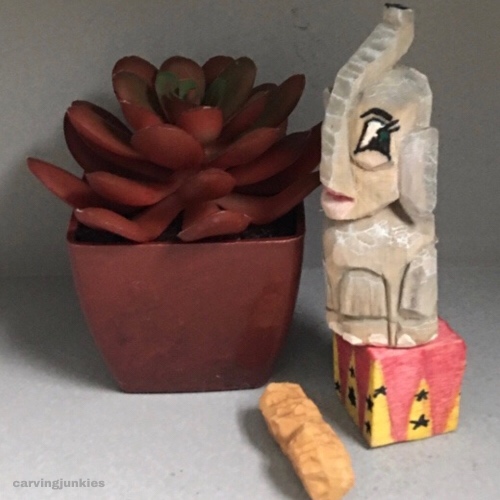
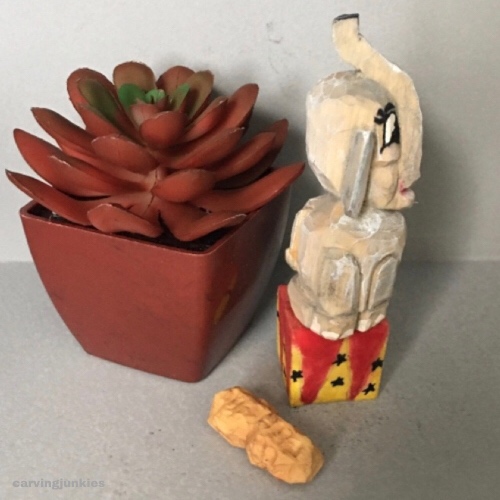
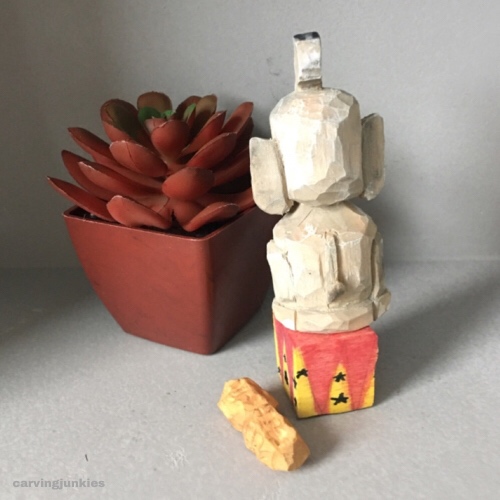
All paints are CraftSmart except where noted:
- Eyes: We first outlined the eyes using black magic marker and colored the pupils with a teal marker (Artwerk). For eye whites: Mix 6 drops of white paint with 1 drop of lite mocha (save leftover paint).
- Ears and mouth: add 2 drops of cameo pink paint and 10 drops of water to the leftover eye paint (save this too).
- Ears outer corner: 2 drops of dark grey paint mixed with 10 drops of water.
- Body: 2 drops of Folk Art steel gray mixed with 20 drops of water.
- Bottom of tail: dry brush with dark grey, then dry bush with black.
- Cheeks: dilute cameo pink further with 10 drops of water. Save and use as dry brush to further accent the cheeks.
- Peanut: 1 drop of golden brown paint mixed with 1 drop of bright yellow and 10 drops of water. Then dry brush with golden brown.
- Block triangles and top: 4 drops of Artistic acrylic cadmium red deep hue paint mixed with 25 drops of water. Save mixture and apply to inside of elephant’s mouth. Other triangles are 2 drops of bright yellow paint mixed with 10 drops of water. Stars are drawn with black magic marker (Artwerk).
- Body: dry brush with white and then dry brush with steel gray.
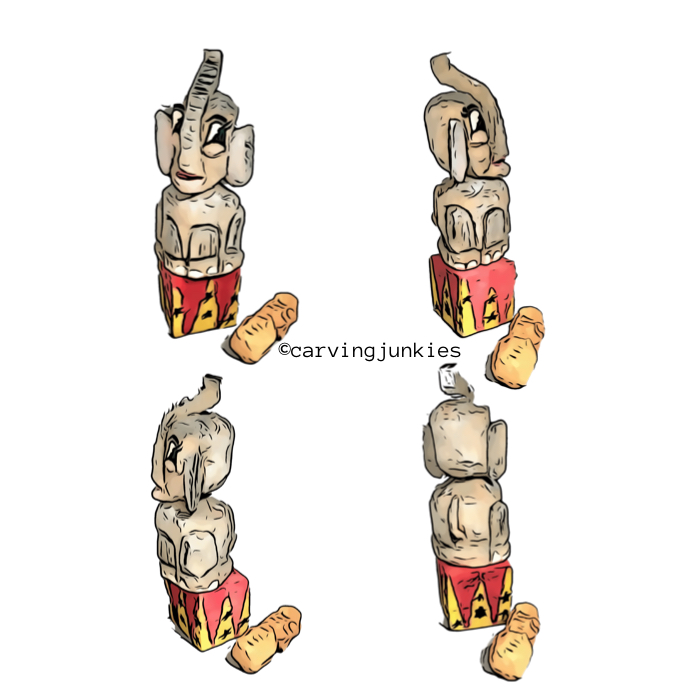
Elephant wood carving pattern
If you prefer to carve your elephant with a pattern, photocopy this to size to fit your wood block.
Summary of how to carve an elephant
- This tutorial teaches you how to carve an elephant with just a knife.
- It will help you learn to how to carve a curve in wood, which can be challenging.
- Take your time when you are creating the trunk as it is easy to break it.
- The accessories are optional, but add a nice touch to the final wood carving.
- Change up the paint colors if you want.
Get 50 Wood Carving & Painting Tips when you join our FREE Covered in Chips club.
Share this page
carvingjunkies.com never sells your personal information.
This site uses cookies for its operation and to enhance your experience. As an Amazon Associate and Focuser Carving affiliate we earn from qualifying purchases.
Home | About Us | Privacy Policy | Terms of Use | Contact | Sitemap
