- Home
- Things to carve
- Avocado pit carving
Awesome avocado pit carving tutorial
Learn how to make a beautiful heart pendant.
LEVEL: EASY
We’ve been wanting to try an avocado pit carving for a while and we’re glad we did! We also decided to experiment to find the ultimate way to carve an avocado heart pendant.
Here is everything that we learned.

Starting the avocado pit carving
The first step after removing the pit (also called the seed) from the avocado (photo 1) is to remove the outer brown layer.
Some say you need to let the pit dry first before peeling it. But we wanted to see what happens if you start to carve the pit right away versus letting it dry for a few days.
We used a fingernail to peel the pit, which was pretty easy (photo 2).
 1. Removing pit from ripe avocado
 2. Starting to peel the avocado pit
This is what the avocado pit looked like without the outer layer (photo 3). The dark brown marks are where the fingernails penetrated the pit.
 3. Outer layer is peeled
The next step in our experiment was to cut the pit in half. We don’t recommend using your good wood carving knife to split the avocado pit.
In our opinion, use either a sharp kitchen knife or bushcraft knife to cut the avocado pit in half. Look for the line that marks the halfway point of the avocado pIt. You can see it faintly in photo 3 above.
We used a brand new Benchmade Knife Company station knife to split our avocado seed (photo 4). Dang, it cut super sweetly (like butter).
Since we had this big, badass knife out already, we decided to roughly shape each half of the avocado pit into a heart shape.
 4. Advocado pit is halved and shaped
The avocado pit carving experiment continues
The next step in our avocado pit carving experiment was to carve one side while it is soft and wet (green), and carve the other half after letting it dry for 3 days.
Green avocado pit carving
For the green half of the avocado pit carving, we made an initial stop cut across the heart and removed wood from underneath (photo 5).
The avocado pit is super easy to carve while it is still green.
You just have to be careful while you carve because it is easy to cut right through the entire pit.
 5. Stop cut on the green pit
We continued to make stop cuts across the heart to create a raised texture (photo 6). At this point the textured heart looks a little like a small piece of grilled salmon!
Now it was time to set our textured heart avocado pit carving aside to dry (photo 7).
 6. Cool raised texture
 7. Ready to dry
The avocado pit carving experiment continues…
Impatient that we are, we couldn’t resist trying to carve the other half of the avocado pit after drying it for one day.
While it was crusty on the outside. The inside was still much too green.
Back to the drying board!
Two days into the great avocado pit carving experiment
We decided to carve a simple, flat heart with the semi-dried pit. It was very easy to carve and we let it dry for another two days.
Now the avocado pit kind of looks like a bagel crisp (photo 8). We realized it wasn’t thick enough to turn into a pendant, but we will add to a future carving (surprise to come).
 8. Flat heart from avocado pit
Turning the textured avocado pit carving into a pendant
After brushing our textured avocado pit heart with boiled linseed oil and letting it dry, we used a pin vise (part of an Exacto set) to carefully hand drill a hole in order to glue the eyelet into the heart (photo 9). P.S. I now use this walnut oil medium (affiliate link) to finish my pieces.
You can get the eyelets at a big-box craft store (photo 10).
You have to be patient as you make your hole and clear the drill channel out frequently by blowing on it.
Looking back, we should have made the hole after only 3 days. Our pit sat for a week and it became very hard to drill!
 9. Carefully hand drilling a hole with a pin vise
 10. Eyelets come in different colors
Once the hole is drilled, glue the eyelet into the hole with Duco Cement (affiliate link) and let it sit for 24 hours.
We used red cording to make the necklace (photo 11). You can easily make it adjustable by using a Fisherman’s knot.
Or, you can add a jump ring to your eyelet and use a gold or silver chain, if you prefer.
 11. Beautiful necklace to wear and cherish
Summary of our avocado pit carving experience
- Avocado pit carving is fun and the possibilities are endless.
- Our design is very simple so you can determine if avocado pit carving is for you.
- Carving a green pit is easy, but stability is an issue.
- If you are going to carve a fully dried pit, we recommend using a vise for stability as it’s hard to hold the pit in your hand and safely carve it.
- Carve the pit as soon as it is fully dried (about 3 days). If you wait too long it will be very hard to carve.
You might like these
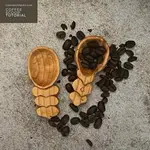
Coffee Scoop Wood Carving Tutorial
Make a cool coffee scoop wood carving with this easy and step by step tutorial.
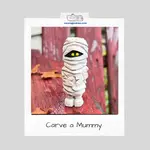
Marvelous Mummy Wood Carving Tutorial
This mummy wood carving is super easy and can be carved in no time with our free step by step tutorial.
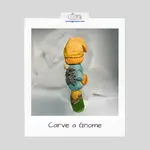
Gnome Carving on A Snowboard Tutorial
This gnome carving is a chance to elevate your wood carving skills and add subtle movement.
%20to%20get%20tips%2C%20techniques%2C%20and%20get%20%E2%80%9C50%20Woodcarving%20%26%20Painting%20Tips%E2%80%9D%20too!)
Get 50 Wood Carving & Painting Tips when you join our FREE Covered in Chips club.
Share this page
carvingjunkies.com never sells your personal information.
This site uses cookies for its operation and to enhance your experience. As an Amazon Associate and Focuser Carving affiliate we earn from qualifying purchases.
Home | About Us | Privacy Policy | Terms of Use | Contact | Sitemap