- Home
- Things to carve
- Mermaid wood carving
Mesmerizing mermaid wood carving
Make this unique, two-piece wood carving.
LEVEL: SOME CHALLENGES
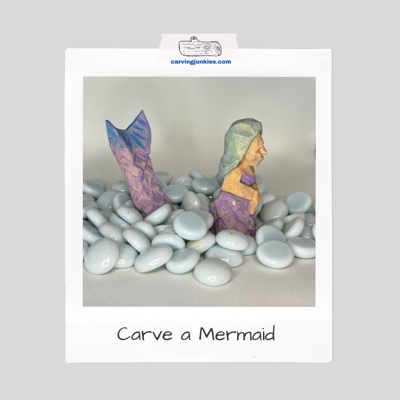
This mermaid wood carving tutorial makes it easy to carve a two-piece mermaid that you can place on a flat surface—surrounded by glass pebbles—or in a shadow box picture frame that is filled with sand.
The inspiration for this carving came from a two-piece, lawn dragon sculpture that looked pretty cool! I wanted to try the same concept with a mermaid.
Another option is to glue the tail on the back.You will just need to shape the back and tail to fit together.
What you will need for your mermaid wood carving
Use two basswood blocks that are each 1 x 1 x 3 inches (2.5 x 2.5 x 7.6 cm). Of course, if you want a bigger mermaid, just double or triple the dimensions.
Use whatever knife you want (tip: a long blade may help to shape the tail). I used a #39 Stubai V-tool to create the scales. You can substitute another V-tool, wood burn the scales, try a knife, or skip the scales altogether.
A carving glove for safety is always highly recommended. If you’re a lap carver, also protect your precious leg arteries with something hard and flat—like a piece of wood or even a plastic cutting board.
You will also need a ruler and something to sketch your guidelines. I use magic marker so it shows up in the photos. If you make a mistake, simply carve it off and start again.
As always, an acrylic painting guide is included at the bottom of the page. Use whatever brushes you like best.
Mermaid wood carving tutorial at-a-glance
It may help to watch this video before you start carving your mermaid to understand the key steps.
Prepare the tail of your mermaid wood carving
You will carve off the corner of your wood block to give you a wider plane to work with. Round off the front and back corners (photo 1).
Mark wood for removal on the top of the block that is about 1/4 inch (0.64 cm) in width on each side to help you roughout the tail (photo 2).
The tail will curve from the middle up to the top. Draw a horizontal guideline on the front that is about 1.25 inches (3.2 cm) from the top of the block (photo 2).
Start from the midline (photo 3) and remove wood up to the top of the block. Once the block is narrowed, use your knife to continue to shave wood off—and to curve the end of the tail (photo 4). Tip: turn your wrist as you carve to cleanly shave the wood off. If the wood grain gets in the way, simply change the direction of your carving.
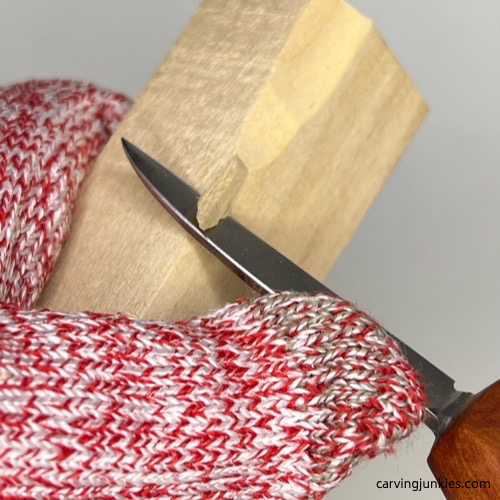 1. Rounding off the corners
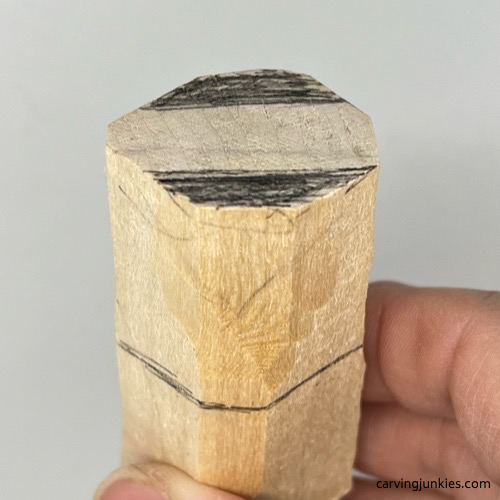 2. Wood is marked for removal
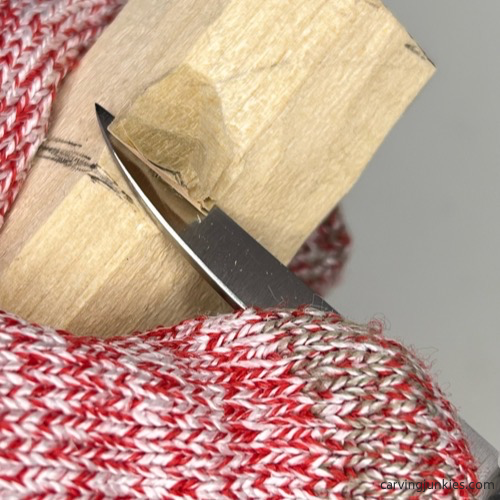 3. Removing wood from the midline up
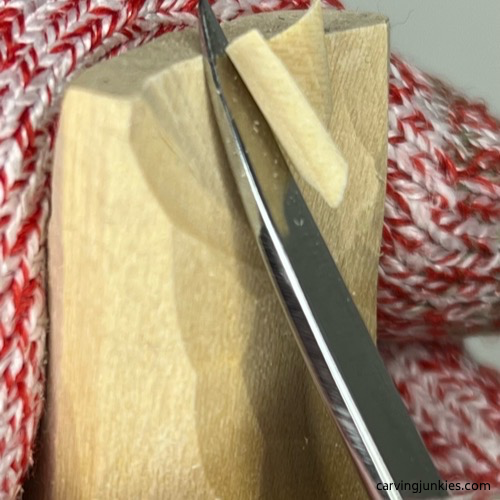 4. Creating a curve for the tail
Sketch the tail on your mermaid wood carving
Sketch the tail on the front of your wood block (photo 5). The tail is about 3/4 of an inch (1.9 cm) wide at the bottom, and narrows to 1/2 inch (1.3 cm) in the middle (photo 5). The colored triangle on the top is about 1 inch (2.5 cm) wide across the top. The midpoint is about 1/2 inch (1.3 cm) down from the top of the wood block.
Remove wood on the sides first (photo 6). Once the sides are removed, shape the front and back to create a curve (until the tail looks a little like a banana) from the side (photo 7).
To split the tail (also called the fluke), make a deep stop cut on one side, and remove wood around the stop cut (photo 8). Tip: Rock your knife back and forth to make a deep stop cut. Be very careful here not to crack the wood or break your knife. You may need to make several passes. Repeat on the other side of the tail (completed in photo 10).
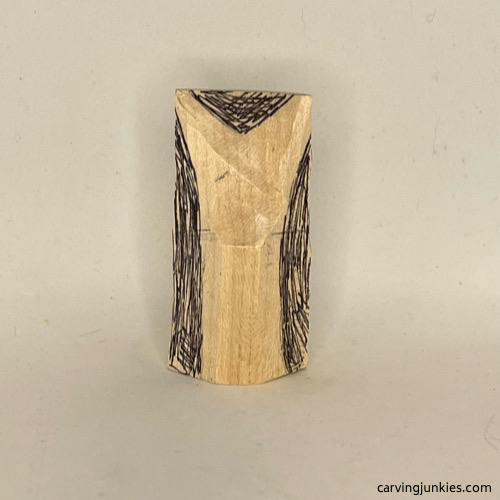 5. Tail is marked for shaping
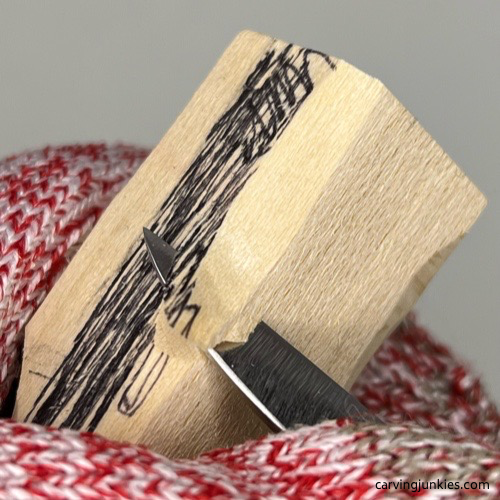 6. Removing wood from the sides
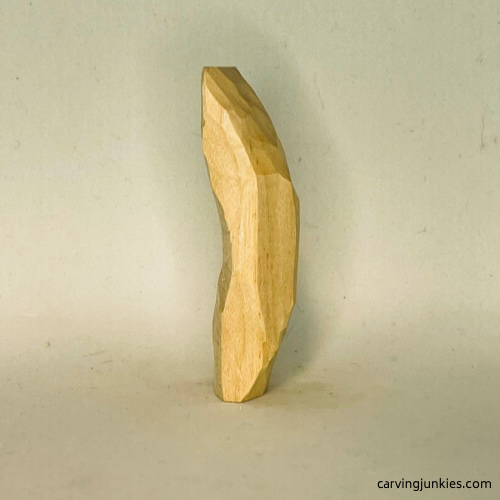 7. The curved tail is shaped
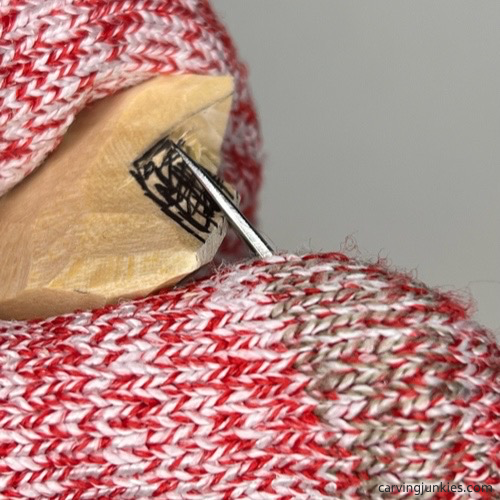 8. Removing wood around the stop cut
Refine the tail on your mermaid wood carving
Now that you have greater access, refine the end of the tail. Use your knife to scoop wood off from the middle outward on one side (photo 9). Then, scoop wood from the middle outward on the other side (completed in photo 10). You cannot make one long, clean cut across the entire tail, due to the wood grain. Take your time here—and avoid cutting too deeply—or your knife will snag against the wood.
To make the curves on the sides of the tail, scoop wood off from the bottom up—to the midpoint—and then change direction, scooping wood downward to the midpoint (completed in photo 10).
Mermaid tails typically have lines on their flukes (sketched in photo 11). You can hold your knife like a pencil, move it along the guideline (photo 12), and make a second, slicing cut. Or, you can use a V-tool here. Tip: Support the tail in the palm of your hand—and do not make deep cuts—to avoid breaking the tail.
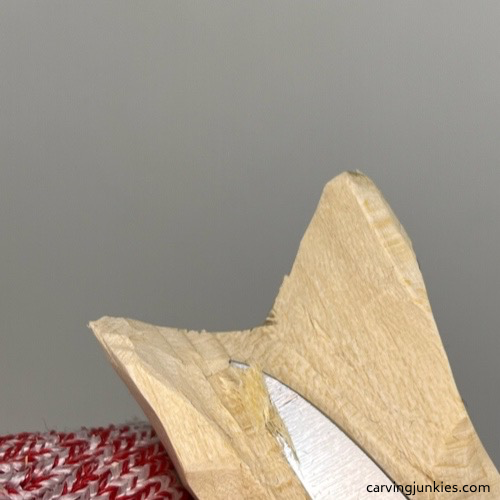 9. Scooping wood from the middle outward
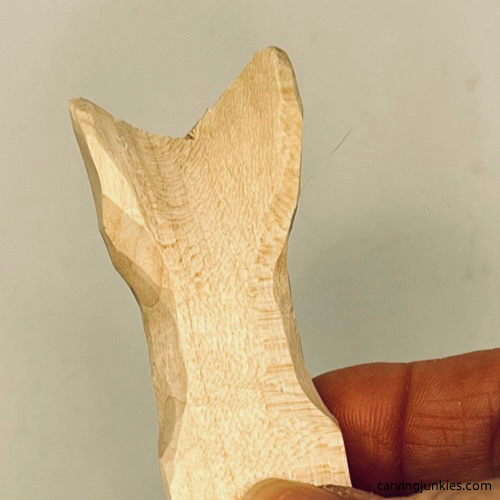 10. Tail is curved and narrowed
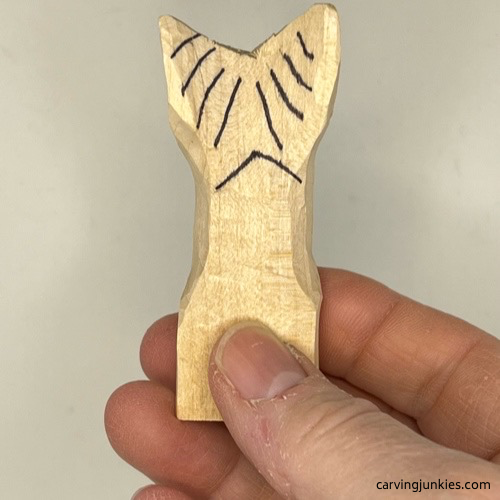 11. Fluke lines are sketched
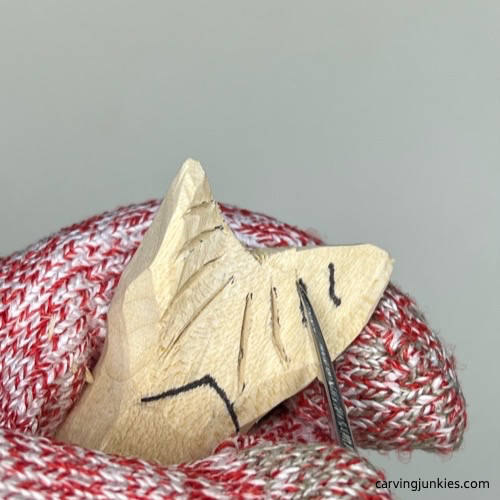 12. Carving the fluke lines
Start the body of your mermaid wood carving
Draw a guideline all around the second wood block that is a little less than 1 inch (2.5 cm) from the bottom (photo 13).
Round off all the corners (completed in photo 14). Draw a midline on the front of the block (photo 14) to help you sketch the oval face. The arms of the mermaid will be crossed in front (photo 14). Draw the shoulders and arms on each side (photos 15,16).
Make the width of the arms at least 1/2 inch (1.3 cm) to have enough wood to work with. The arms extend down about 1/2 inch (1.3 cm) in the front. The hands are about 1/2 inch (1.3 cm) long and 1/4 inch (0.6 cm) at the widest point (visible in photo 14). The colored triangles on the sides and back (photos 15-17) are just to help guide proper placement of the body.
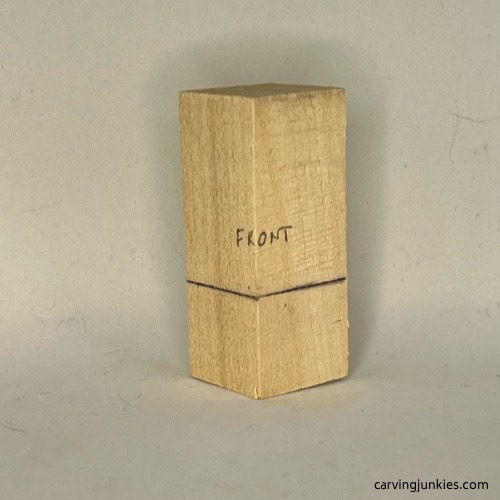 13. Guideline on the body
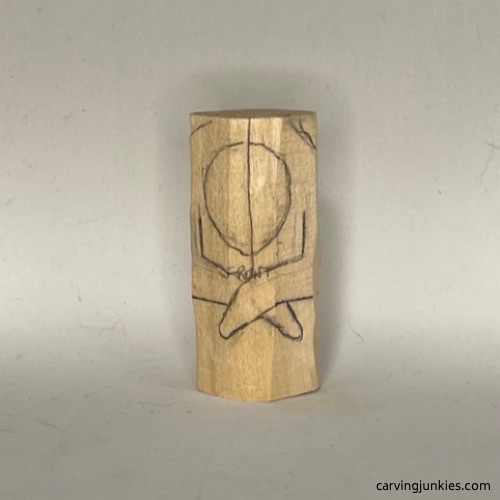 14. Front guidelines are sketched
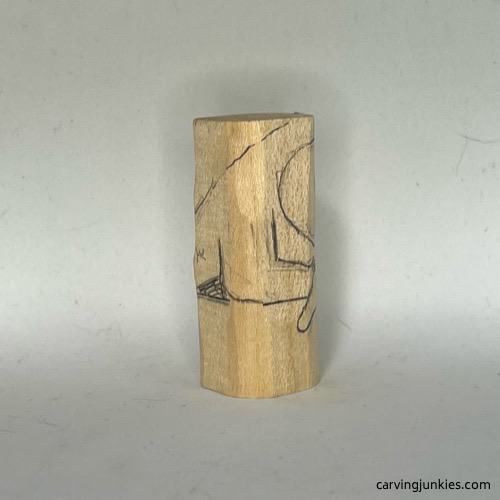 15. Right view
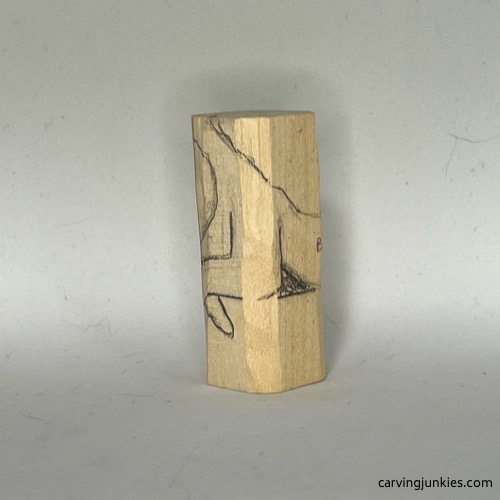 16. Left view
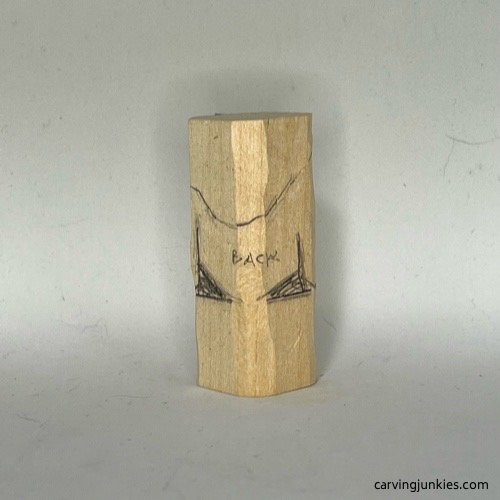 17. Back view
Start the head of your mermaid wood carving
Remove wood to shape the front and back of the head (photos 18,19). Draw the hairline from the front to the back (photos 19-21). The hairline extends about 1.5 inches (3.8 cm) from the top—across the back (photo 19)—and curves up on the sides (photos 20,21).
Use stop cuts to separate the bottom of the hairline all around. Separate the hairline around the face in the same manner (completed in photo 22).
Mark where you will carve the bottom of the nose (about 1/2 inch [1.3 cm] down from the hairline), and make a stop cut (photo 22), removing wood from underneath (completed in photo 23).
Sketch the facial details—the eyes, shape of the nose, and the smile lines (photo 23).
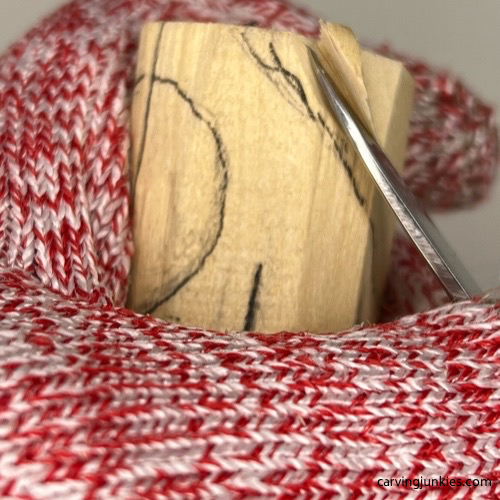 18. Carving the head back
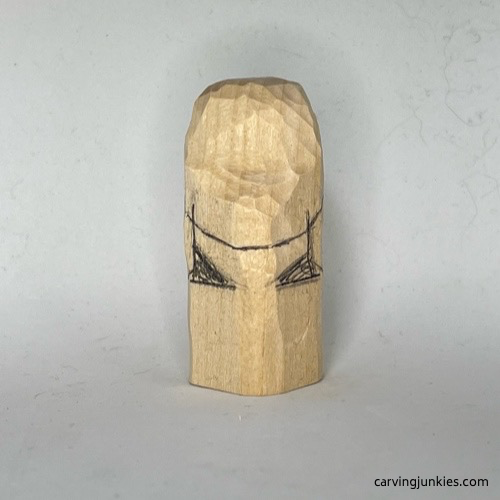 19. Hairline on the back
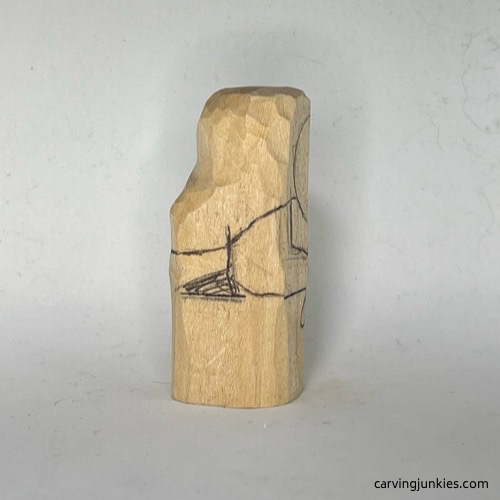 20. Hairline on right side
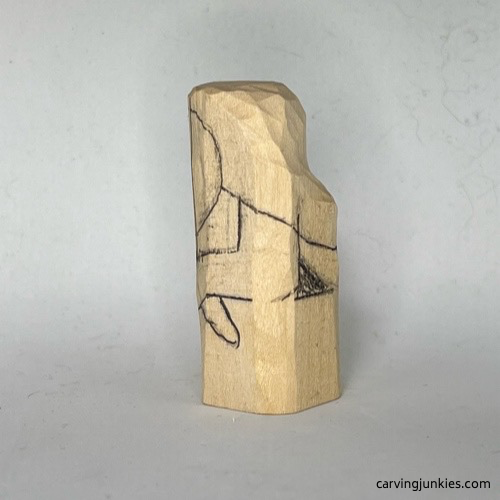 21. Hairline on left side
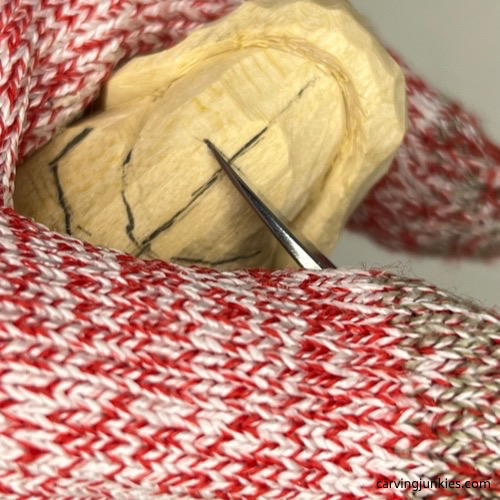 22. Making a stop cut
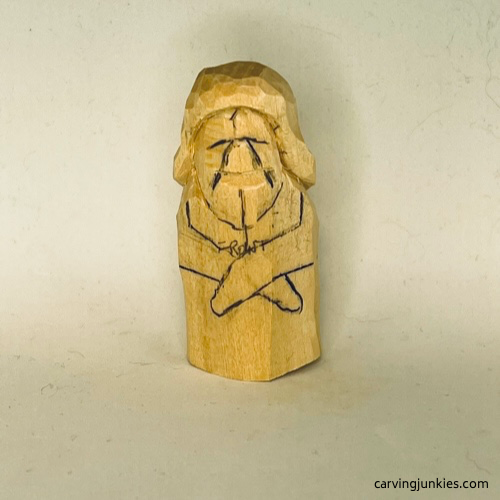 23. Facial details are added
Refine the face of your mermaid wood carving
Make a pyramid cut that goes up the nose, under the eye-line, and across the cheek. Once you have access on both sides, you can shape and refine the nose and cheeks further (photos 24,25).
Carve the smile lines with stop cuts (completed in photo 25).
Narrow the sides and shape the shoulders (photo 26).
To carve the mouth, draw your knife along the guideline, and make a second slicing cut (completed in photo 27). I used a 1.5 mm micro U-gouge to make a slight indentation on the bridge of the nose (photo 27). You could also make a small V-cut.
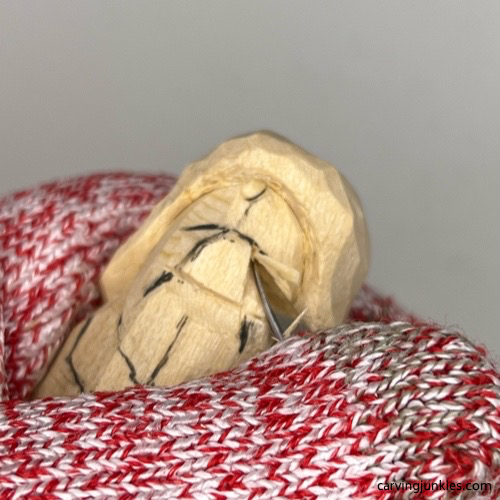 24. Carving the nose
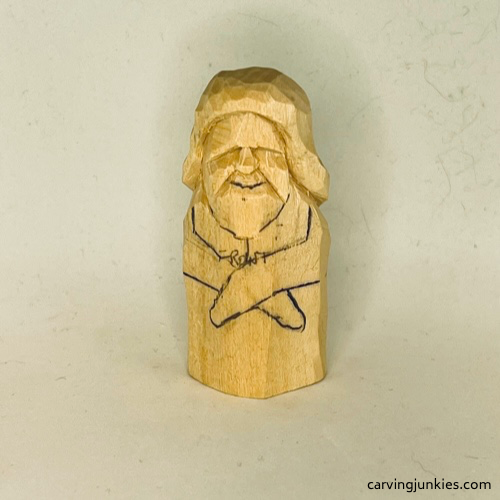 25. Mouth line is drawn
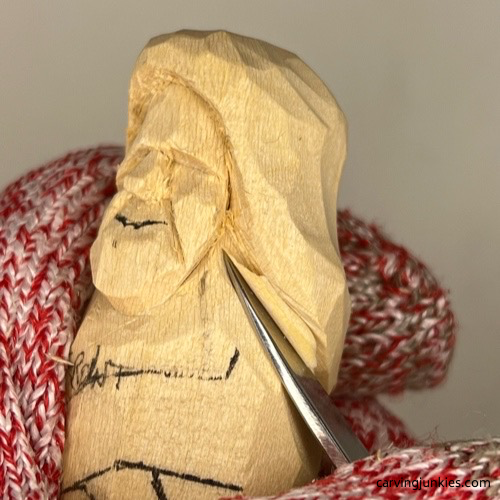 26. Carving the shoulders
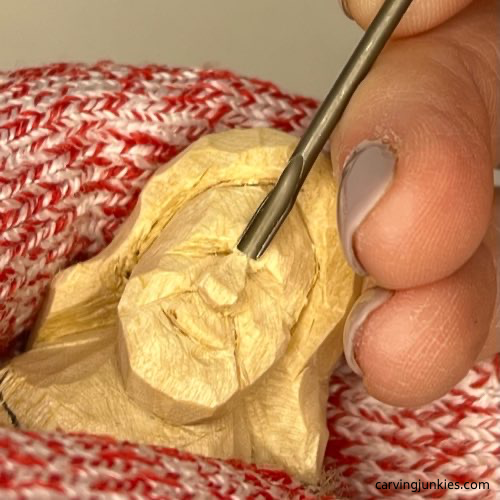 27. Carving the nose bridge
Separate the arms on your mermaid wood carving
Use stop cuts to separate the top of the arms (photo 28), removing wood from underneath. Separate the bottom of the arms—and the hands—in the same manner (completed in photo 29).
Sketch a line to mark the middle of the mermaid’ s breasts (photo 29). Use a V-cut (or a stop cut and second slicing cut) to separate the breasts. Once you have access you can refine the shape of the breasts and the neckline. Note: I painted the top of the mermaid’s purple ”dress” to avoid the risk of the wood crumbling. You could use a stop cut if you prefer.
Separate the back of the arms (photo 30) with stop cuts, removing wood from around your cuts (or use pyramid cuts to remove the wood).
Once you have greater access, you can refine the shape of the back (photo 31).
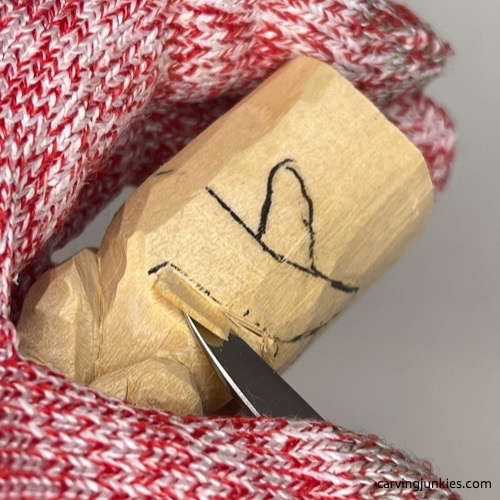 28. Separating the arm
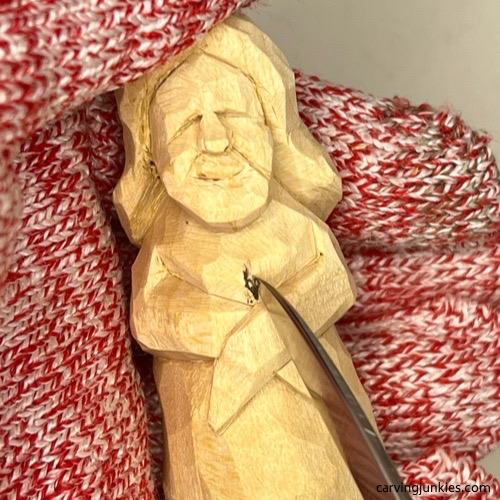 29. Separating the breasts
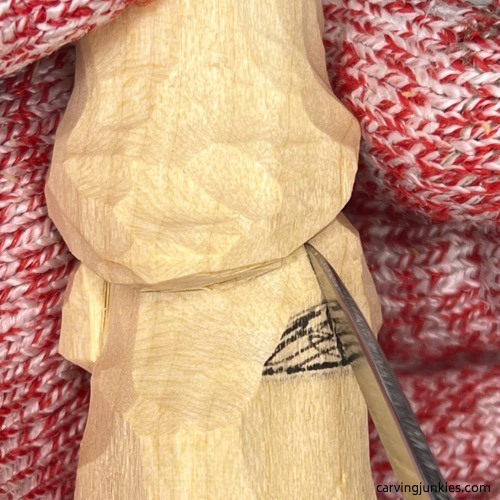 30. Separating the back of the arms
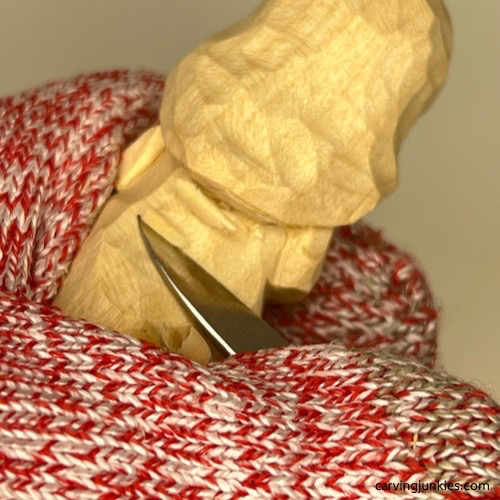 31. Shaping the back
Refine your mermaid wood carving
Use a large V-tool to create the diamond shape scales (photo 32) on the tail and the lower body of the mermaid wood carving. Extend the scales around the sides of the tail and the body (completed in photos 34-37).
Refine the final shape of your mermaid wood carving. Carving feminine faces can be challenging! If you compare photo 29 with photo 34, you can see the difference after the face has been narrowed.
You can also use wide V-cuts to create flowing curls on the sides of the hair (visible in photos 34-37). Turn your wrist as you carve to shave wood off—to thin and curl the hair—on the back (visible in photos 35,36).
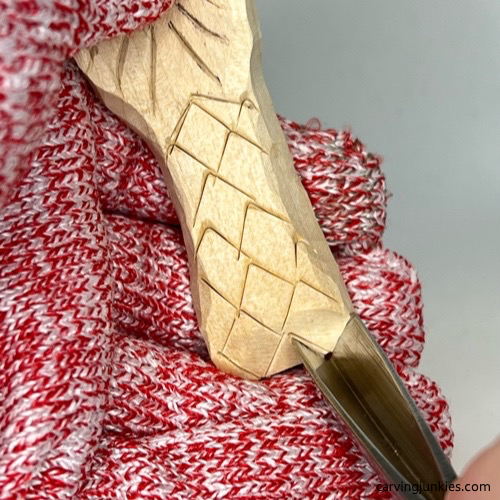 32. Creating the scales
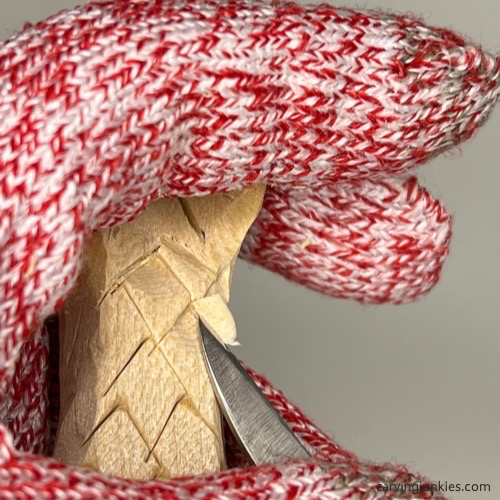 33. Removing wood from the top of the scale
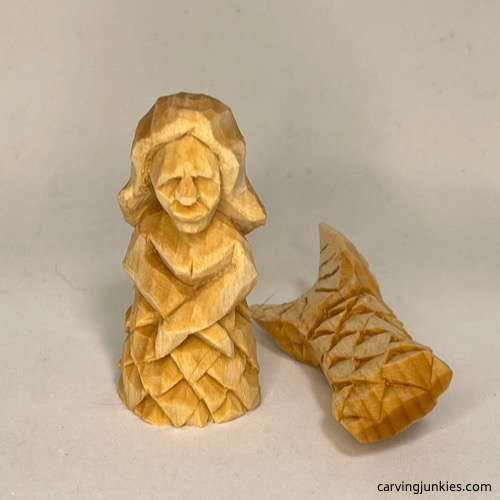 34. Front view prior to painting
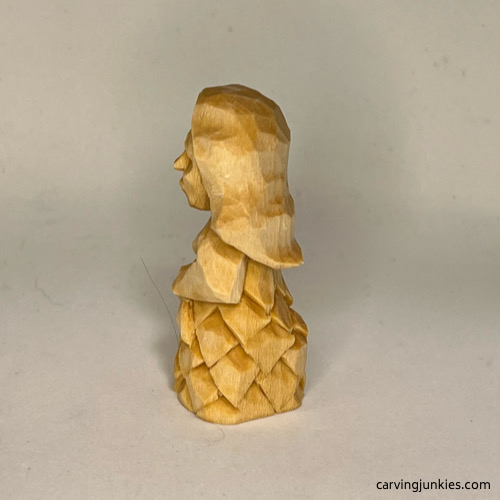 36. Left view of unpainted carving
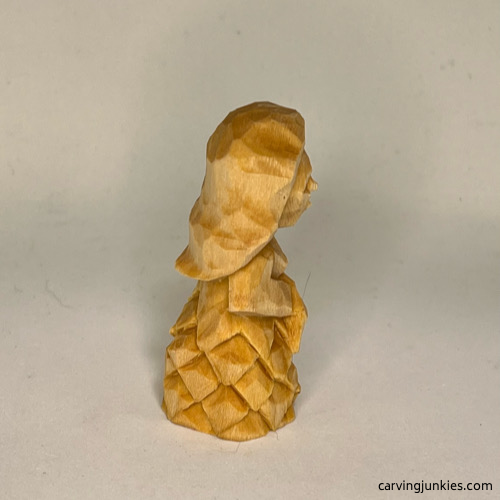 35. Right view prior to painting
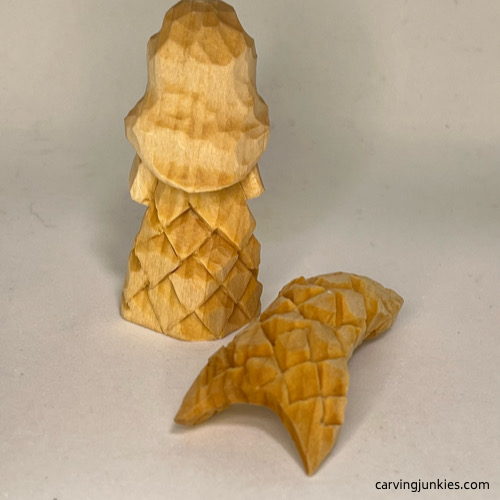 37. Back view of unpainted carving
Finish your mermaid wood carving
Here are the acrylic paints that were used if you want to get a similar look.
For great painting tips and techniques, read this.
- Tail and body: Very diluted wash of Ceramcoat purple applied in two layers. Use 100% paint to highlight the sides of each scale. Allow to dry completely. Then apply 100% FolkArt metallic silver sterling with a mandala dot, toothpick, or pencil tip. Highlight the fluke lines with 100% Ceramcoat tahiti blue that you dab against a paper towel first, leaving a little more paint on your brush than you would ordinarily use with a dry brush.
- Hair: Ceramcoat tahiti blue wash. Allow to dry completely and dry brush with Craftsmart vanilla.
- Face and arms: One drop of Winsor & Newton cadmium red light that is super diluted with water.
- All cuts: To create shadow, use one drop of Ceramcoat that is super diluted with water to highlight cuts in the body, tail, and arms.
- Use finish of choice (such as boiled linseed oil, wood polish, or polyurethane spray).
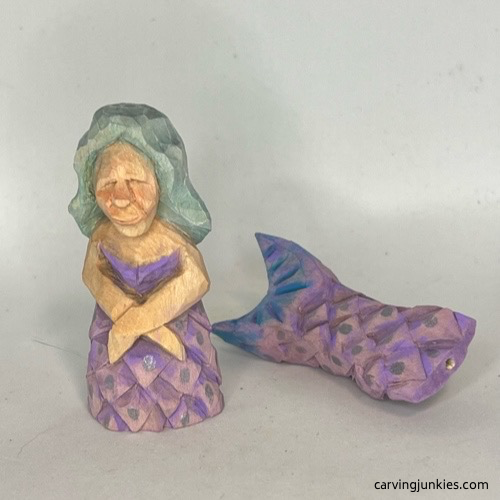 38. Front view of painted carving
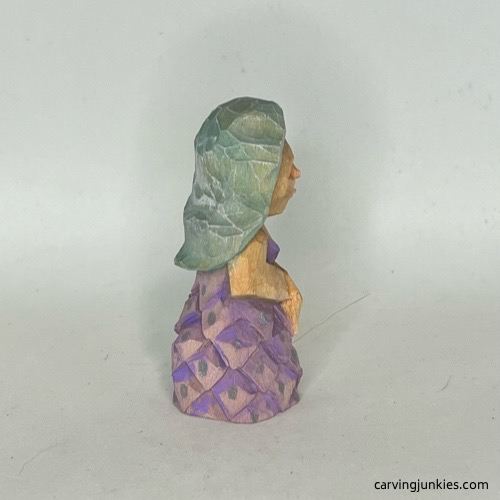 39. Right view of painted carving
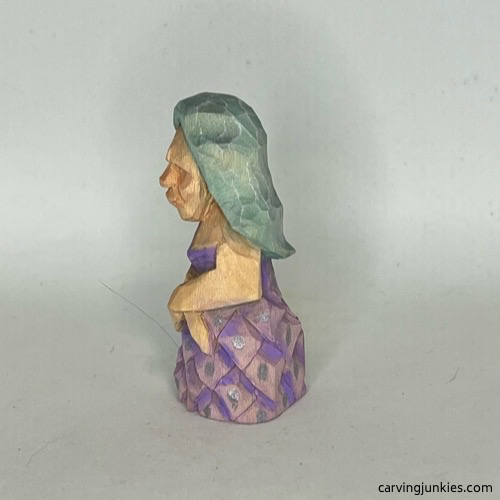 40. Left view of painted mermaid
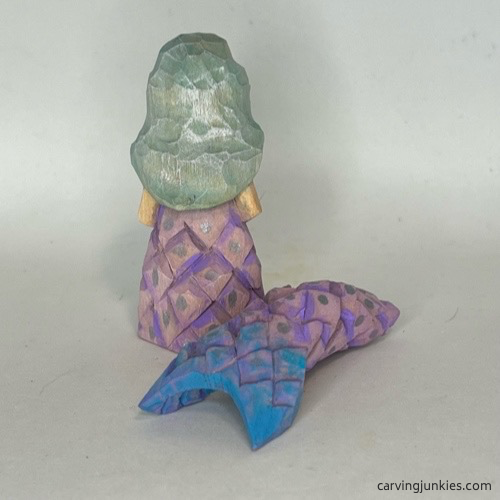 41. Back view of mermaid wood carving
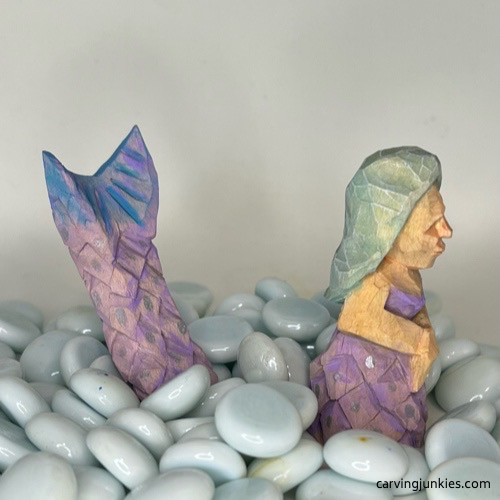 42. Mermaid with colored stones
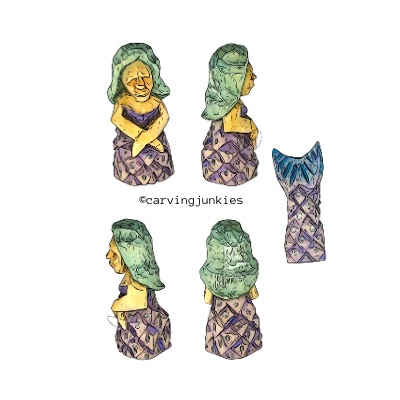
Free mermaid wood carving pattern
If you prefer to carve your mermaid wood carving from a pattern, photocopy this to size to fit your wood block.
Get 50 Wood Carving & Painting Tips when you join our FREE Covered in Chips club.
Share this page
carvingjunkies.com never sells your personal information.
This site uses cookies for its operation and to enhance your experience. As an Amazon Associate and Focuser Carving affiliate we earn from qualifying purchases.
Home | About Us | Privacy Policy | Terms of Use | Contact | Sitemap
