- Home
- Things to carve
- Whittling a fish
Whittling a fish with character
A catch that's pure fun!
LEVEL: EASY
Welcome to one of the most delightfully silly projects we’ve done yet—a funky, flat fish! This whittling a fish caricature carving tutorial is perfect when you’re looking for something easy, fast, and full of personality.
With oversized teeth, googly eyes, and polka-dot fins, this fish is a guaranteed smile-maker. Because it’s carved from a simple flat piece of wood, it’s a great choice for beginners or seasoned carvers who want to kick back and have some fun. No fancy wood blanks or deep cuts required—just a little time, a few tools, and a good sense of humor.

In this step-by-step tutorial, I’ll show you exactly how to bring your fish to life—from the first outline to the final splash of paint.
This guy is super customizable, too! Whether you make him bright and bubbly, or dark and mysterious, the charm shines through. Heck, make a school of fish while you're at it.
If you would rather carve from a vertical block of wood, try this carving a fish tutorial that I created when I was first learning how to carve.
What you need
- I used a basswood block that is 3.5 inches (8.9 cm) by 3.5 inches (8.9 cm) long and a depth of 0.75 inches (1.9 cm) so I could stand my fish up on its own without any wobbling. If you prefer to mount your fish, and hang it, I recommend a wood block that has a depth of only 0.5 inches (1.2 cm). You will avoid having to carve off so much wood, which I often had to remove in layers.
- I used a roughout knife with a large blade to create my roughout. I switched to a smaller detail knife for the teeth and eyes. But you can probably just use one knife for everything if you don't have both types of knives.
- Before you cut, don a good pair of carving gloves for safety. It's a must!
- If you are a lap carver, please always protect your legs with something flat and hard.
- Use a pencil or pen to sketch your guidelines.
- A free painting guide is at the end (as always).
- Prefer to use a bandsaw? Use the free pattern at the end of the page.
Video overview
This quick video has all the steps in one place and may be helpful to watch before you start this step-by-step whittling a fish tutorial.
Start your whittled fish wood carving
Sketch the guidelines on your wood block (photo 1). Tip: You can photocopy the pattern at the end of the page to match the size of your wood block and easily trace your guidelines with a knife or even pen or pencil (press firmly to leave a mark on the wood).
I used a roughout knife to remove wood and shape the fish (photo 2). The wood on the end grain may be a little pesky to remove. I worked in layers (photo 3).
I used a V-cut to start to remove wood around the mouth (photo 4). Tip: You may need to rock your knife back and forth to get a deep cut.
 1. Guidelines are sketched
 2. Removing wood
 3. Removing more wood
 4. Making a V-cut
Continue to whittle your fish
Continue around the wood block in the same fashion, removing wood.
Under the eyes, I made several layers of V-cuts to get to the bottom (photo 5). On larger areas, I first made stop cuts along the guidelines (photo 6) and removed wood up to my cuts.
Continue to remove the rest of the wood around your fish (photos 7 and 8). Your fish roughout should look something like photo 9.
 5. Cutting through layers
 6. Making stop cut
 7. Removing more wood
 8. Finishing roughout
 9. Completed roughout
Whittling a fish: Carve the details
Note: I experimented with a soft V-tool to carve the outline of the eyes (photo 10), and used a detail knife to carve up to my cuts. But I stopped and switched to my detail knife, holding it like a pencil to cut along the guidelines. If you prefer to use a V-tool, use one that is much narrower.
I used stop cuts around the outline of the eyes and made a second slicing cut (photo 11) to remove wood around the eyes. Remove a few layers of wood so the eyes really stand out.
 10. Carving along guideline
 11. Carving the eyes
Carve the mouth and teeth
After completing the eyes, I ran my detail knife along the guideline for the mouth (photo 12). I held my knife like a pencil. I also used narrow V-cuts to separate the teeth (photo 13).
Finally, I used pyramid cuts (photo 14) to remove the wood in between the teeth.
 12. Making a cut
 13. Separating teeth
 14. Starting pyramid cut
Refine your whittled fish
Use your knife to deepen or clean up your cuts on your whittled fish. I used sandpaper to smooth the surface. Tip: Do not use your knife again after using sandpaper to avoid damaging your knife.
 15. Unpainted fish (front)
 16. Back view
Whittling a fish: Painting
Here are the paint colors I used, if you want a similar look for your whittled fish caricature. All acrylic paints are used in a wash, unless otherwise noted. Read this page for some guidance on painting a wood carving.
- Eye whites and teeth: Apple Barrel dolphin gray 100%.
- Eyes: Ceramcoat black 100% paint applied with a mandala dot. Let dry completely and use Ceramcoat white 100% paint applied with round end of a toothpick.
- Body: Wash mixed with dolphin gray plus Ceramcoat turquoise and a tiny bit of Ceramcoat black.
- Mouth: Ceramcoat black 100%.
- Fins: Apple Barrel jack O’ lantern wash mixed with Americana santa red.
- Dots: Ceramcoat white 100% applied with a toothpick.
- Finish (optional): Brush with walnut oil.
Of course, you can use your imagination and paint a whole school of fish for yourself. If you are looking for ideas, check out this page of images.
 17. Painted front
 18. Painted back
Whittling fish pattern
Photocopy this pattern to size to fit your wood block.

Whittling a fish tutorial summary
- This easy project is fun to carve and doesn't require super-complicated cuts.
- You can paint your fish like a classic clownfish, deep-sea moody, or let your wild side go neon.
- Whether you're brand new to carving, or just need a break from detail-heavy projects, this project is for you!
- If you prefer to use a vertical wood block, check out my other fish carving tutorial.
You might like these
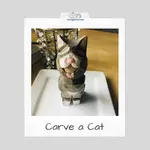
Carving a Cat Using Just a Knife Tutorial
Carving a cat is easy with our step by step tutorial with tons of photos from every angle
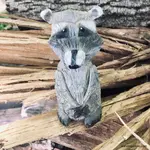
Raccoon Wood Carving With a Knife Tutorial From A Block of Wood
Raccoon wood carving tutorial carved from a block of wood with just a knife and no bandsaw.
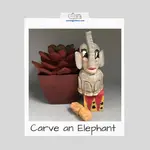
How to Carve an Elephant With Just a Knife
How to carve an elephant with only a knife is easy with this tutorial.
Get 50 Wood Carving & Painting Tips when you join our FREE Covered in Chips club.
Share this page
carvingjunkies.com never sells your personal information.
This site uses cookies for its operation and to enhance your experience. As an Amazon Associate and Focuser Carving affiliate we earn from qualifying purchases.
Home | About Us | Privacy Policy | Terms of Use | Contact | Sitemap