- Home
- Wood carving caricatures
- Earworm wood carving
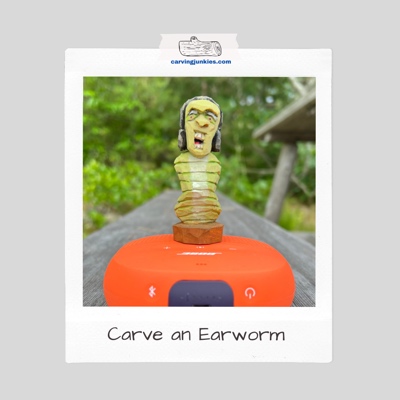
Eclectic earworm wood carving tutorial
Carve yourself a funny earworm listening to his headphones.
LEVEL: SOME CHALLENGES
Every morning, the hubby and I wake up—and share—our daily earworms (sections of awful songs that get stuck in a loop in our brains).
So I wondered… what would an earworm wood carving look like?
This mischief-making earworm rocks with style while wearing his beloved headphones and singing aloud.
Get ready to carve, groove, and let your earworm music play!
Supplies needed for your earworm wood carving
Start with a wood block that is 1 x 1 x 3 inches (2.5 x 2.5 x 7.3 cm). You really only need one knife to carve this earworm wood carving. I used a micro-U gouge to carve the nostrils, but you can use a knife if you do not have this tool.
You will also need something to sketch your guidelines with and a ruler (if you want to follow the exact measurements). Of course, you can simply wing it, if you prefer.
A painting guide is included at the end. Use whatever acrylic paints and brushes you like.
If you want a larger earworm wood carving, simply increase the measurements.
Please be safe and carve with a glove. If you carve over your lap, protect your legs with a large piece of flat wood or a cutting board.
Earworm wood carving tutorial at-a-glance
You can watch this short video that outlines the key steps for this tutorial.
Set up your earworm wood carving
You will carve off the corner for this earworm wood carving.
First, draw a guideline all around that is 1.25 inches (3.2 cm) from the top to mark the bottom of the head (photo 1).
Draw a second guideline all around that is 2 inches (5.1 cm) from the top (photos 1,2).
Mark the front with an ”F” (photo 1) and the back with a “B” (photo 2) as it’s easy to forget which side is the front. You can also mark the right and left sides.
On the back, use a colored triangle (photo 2) to mark where you will cut into the worm’s body. For those who like exact measurements, the triangle starts about 1.75 inches (4.4 cm) from the top, extends to a little less than 3/4 of an inch (1.9 cm) from the bottom, and extends about 1/2 inch (1.3 cm) wide on each side.
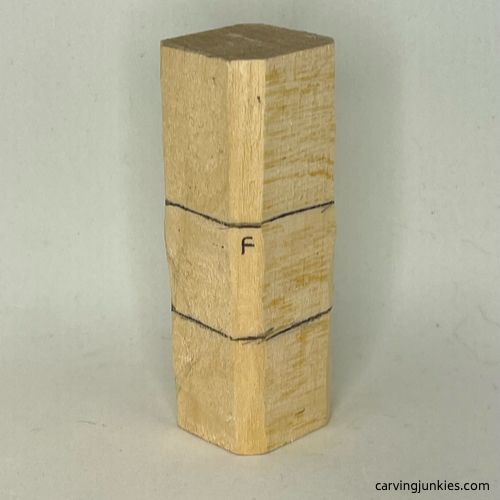 1. Guidelines are sketched all around
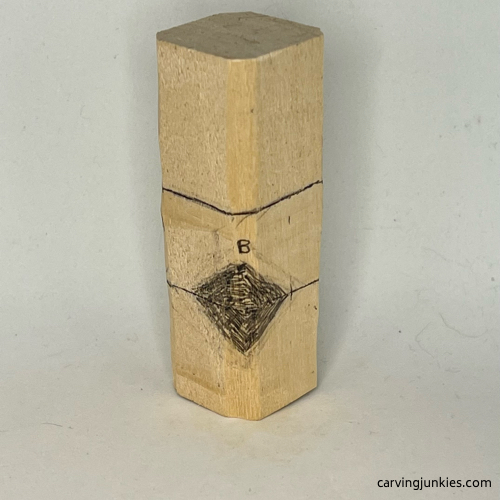 2. Back guidelines
Roughout the shape of your earworm wood carving
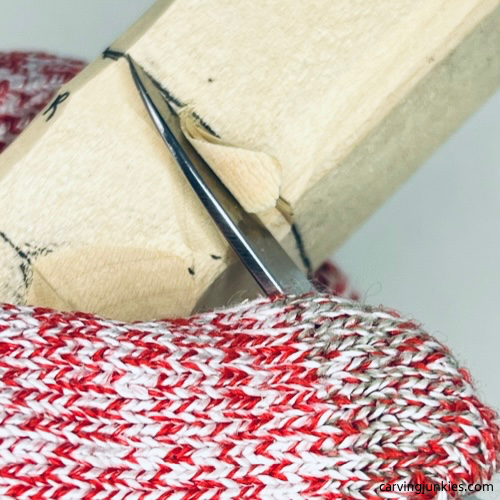
Use a stop cut, and remove the marked wood underneath the head on the back (photo 3). It will take you several passes. You could also make a very wide V-cut if you have powerful hands and a sturdy knife.
Use stop cuts to separate the head all around (photo 4).
Mark the wood on the front (photo 5) and the sides (photos 6,7) where you will remove more wood (photo 8) to shape the rest of the body of your earworm wood carving. On the front, the widest part of the colored triangles extend about 1/2 an inch (1.3 cm) on each side (photo 5).
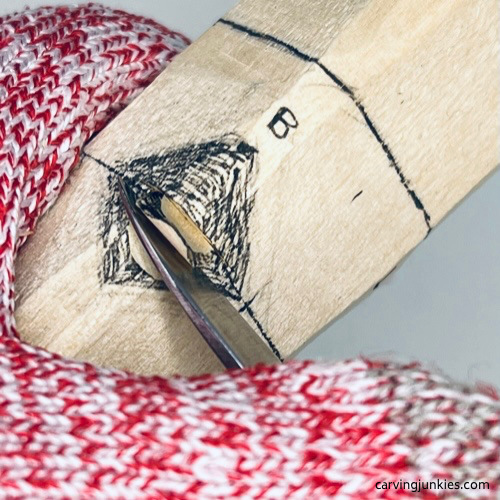 3. Using a stop cut
 4. Separating head
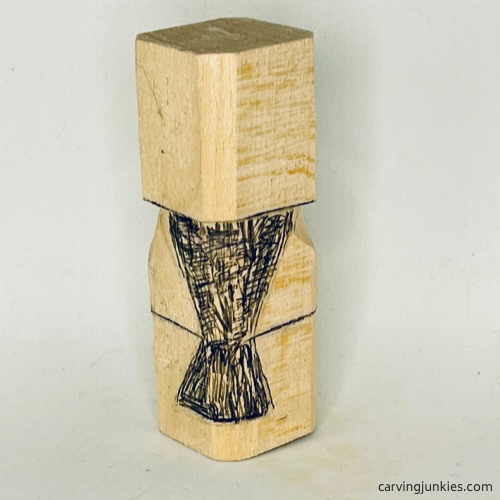 5. Wood marked for removal on the front
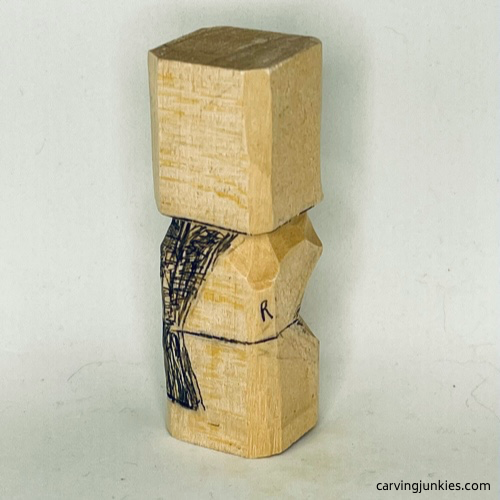 6. Right view of wood to remove
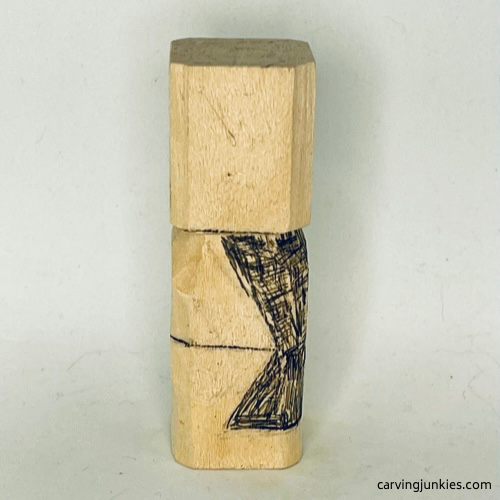 7. Left view of wood to remove
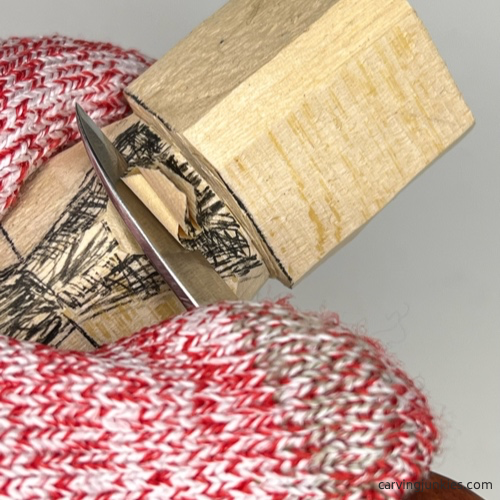 8. Removing wood from the center
Shape the head of your earworm wood carving
Round the top of the head on your earworm wood carving (completed in photo 9), removing the end grain from the top. Take your time here as the end grain may be tough to carve off.
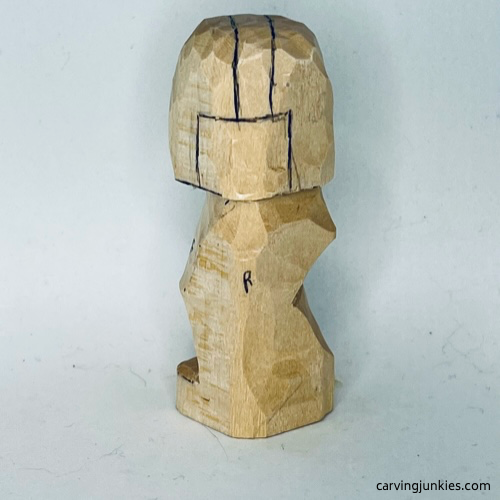
Sketch the headphone ear boxes on each side (photos 9-12). You want to reserve about 3/4 of an inch (1.9 cm) on each side. Also, sketch the top of the headphones across the head. Be sure to give yourself enough wood to work with (about 1/4 inch or 0.64 cm in width).
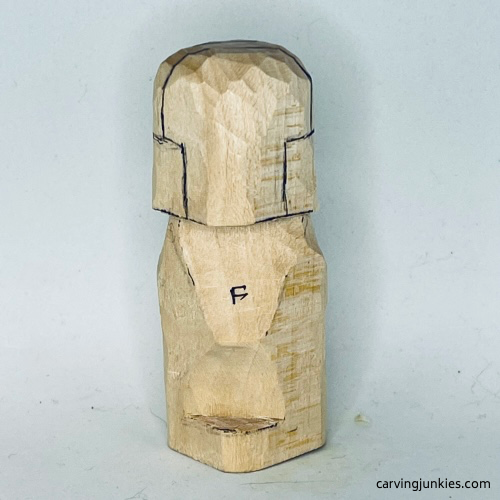 9. Front view of sketched headphones
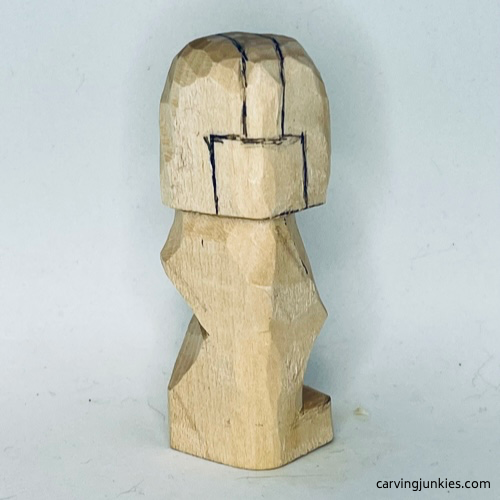 10. Right view of headphones
 11. Left view of headphones
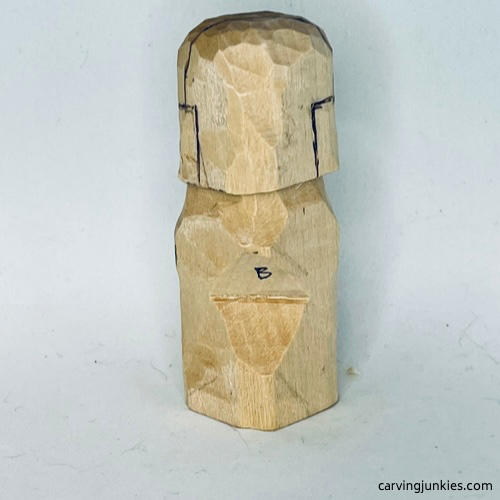 12. Back view
Carve the headphones on your earworm wood carving
Make a stop cut along one side of the top band of the headphones (photo 13), removing wood from underneath. Tip: Rock your knife back and forth to make a deep stop cut.
Make another cut on the earpiece of the headphones and remove wood in a similar fashion (photo 14).
Repeat of the other side of the headphones (completed in photos 15,16).
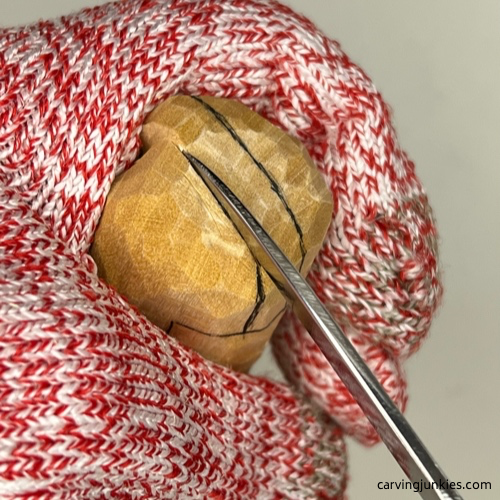 13. Making a stop cut
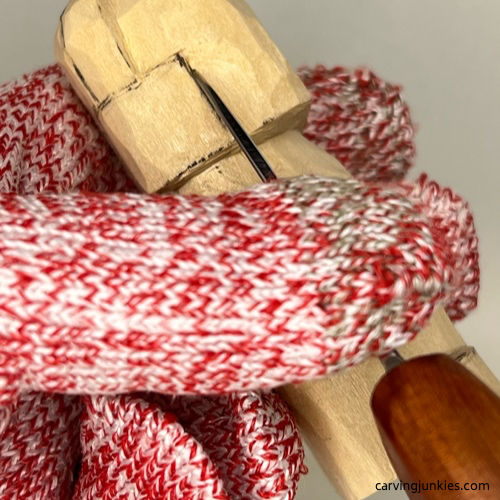 14. Separating the ear piece
Refine the headphones on your earworm wood carving
After the headphones are separated, use something small and round to sketch the shape of each ear piece of the sides of the headphones (photos 15,16). I used a plastic stencil with a width of about 1/2 inch (1.3 cm).
Remove the marked wood on each side (photo 17) to round the earpieces (completed in photos 18,19).
Narrow the shape of the face (photo 18) and the back of the head (photo 19).
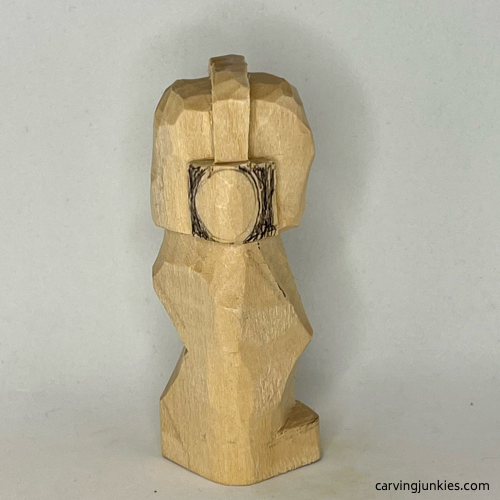 15. Right view of sketched ear piece
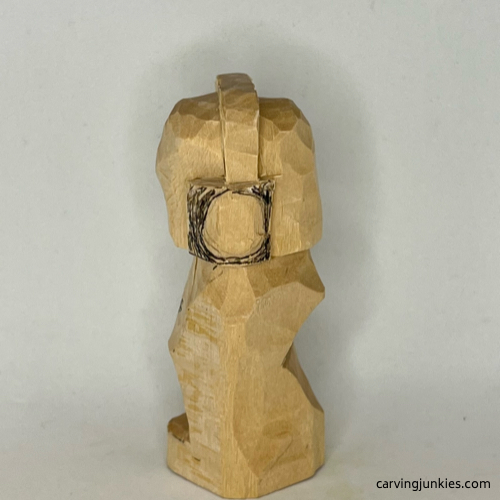 16. Left view of ear piece
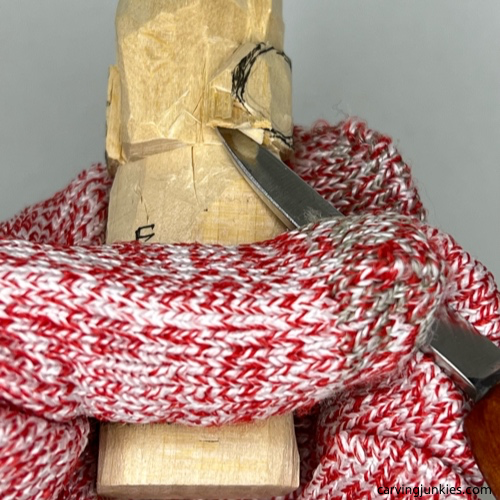 17. Shaping the ear piece
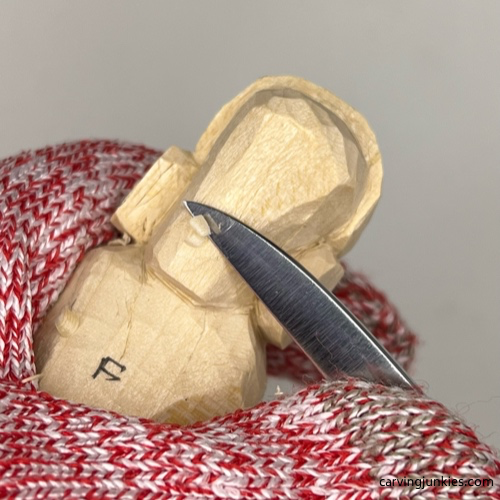 18. Setting up the face
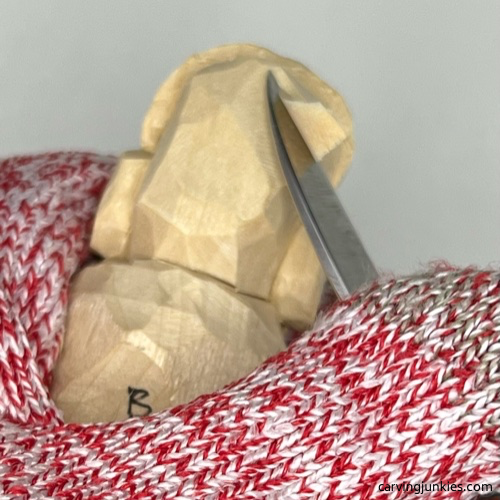 19. Removing wood on the back of the head
Start the face on your earworm wood carving
Sketch the top of the eye socket and the bottom of the wide nose (photo 20). The guideline under the nose is about 1/2 inch (1.3 cm) at the widest point. The eye socket guideline is about 3/4 inch (1.9 cm) at the widest point. Don’t worry if your guidelines are not exactly the same. Just be sure to leave enough wood for the long, open mouth (visible in photos 22,23).
Use stop cuts under the nose, removing wood from underneath your cuts (photo 21).
Add a colored triangle on each side that you will remove to shape the nose (photo 22). Also, add guidelines for carving the open mouth (photo 22) . The top of the mouth is about 1/2 wide (1.3 cm) and is slightly angled (visible in photo 23).
Use pyramid cuts to remove the marked wood (completed in photo 23). Now that you have more access you can shape the nose, cheeks, and eyes (completed in photo 23). Tip: Sketch the bottom of the eyes before you carve them (visible in photo 23).
Use a stop cut to carve the top of the mouth, removing wood from underneath. You can hold your knife like a pencil (photo 23) to make your first cut on each side of the mouth, and make a second slicing cut to remove wood.
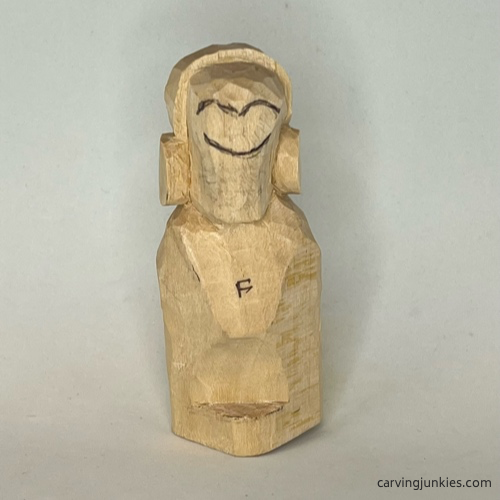 20. Facial details are sketched
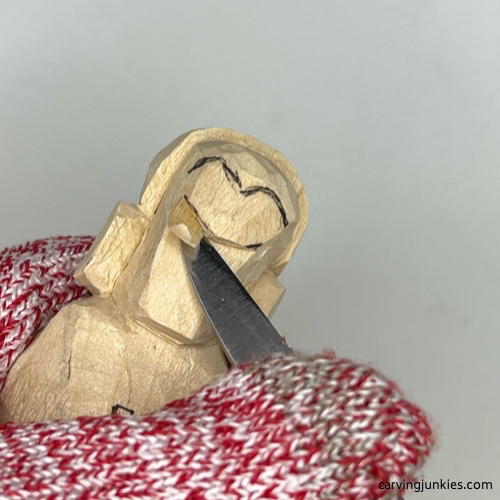 21. Removing wood under nose
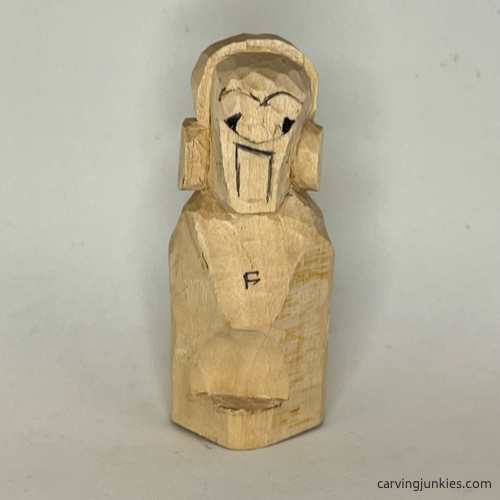 22. Additional wood is marked
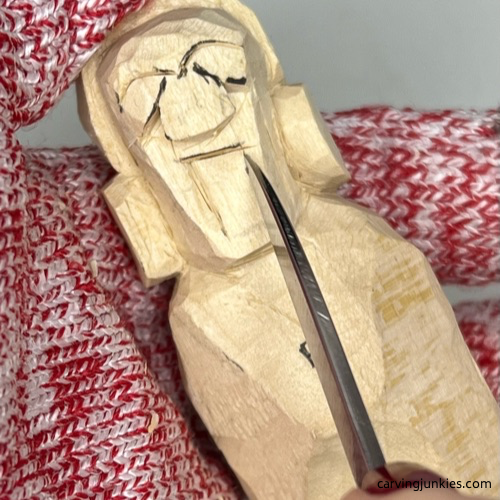 23. Carving the mouth
Refine some details on your earworm wood carving
Refine the shape of the eyes, eyebrows, and nose (completed in photo 25). I used a 4mm micro U-gouge to carve the nostrils and the upper eye (photo 24).
Draw a line for the bottom of the top teeth (photo 25). Use a stop cut to separate the top teeth, removing wood from the surface of the teeth so they appear to be set back from the mouth.
Sketch the bottom of the mouth and the top of the bottom teeth (photo 26). Use stop cuts to separate these areas along the guidelines (completed in photo 27).
Carve a small mound above the bottom teeth for the tongue, and remove the rest of the wood between the top and bottom teeth (completed in photo 27). Very carefully use shallow V-cuts to separate the teeth (completed in photo 27).
Be careful here because the wood may crumble.
Mark additional wood that you will remove on the front and back to further shape the body of your earworm wood carving (photos 27,28). You can use V-cuts, stop cuts, or slice the wood off.
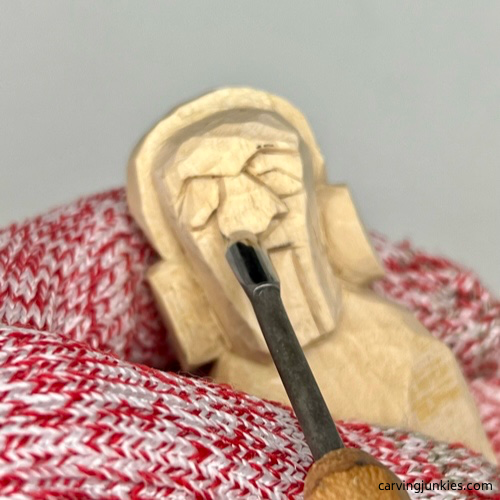 24. Carving the nostril
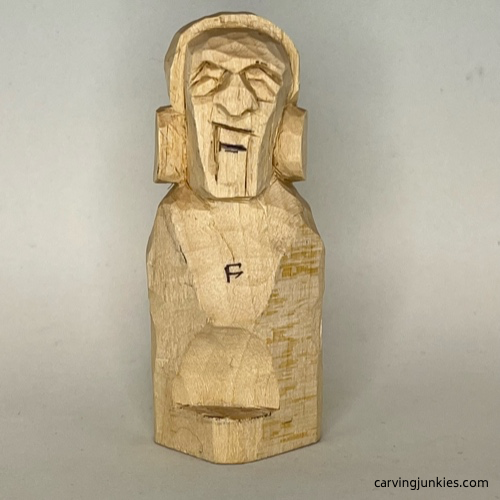 25. Top teeth are sketched
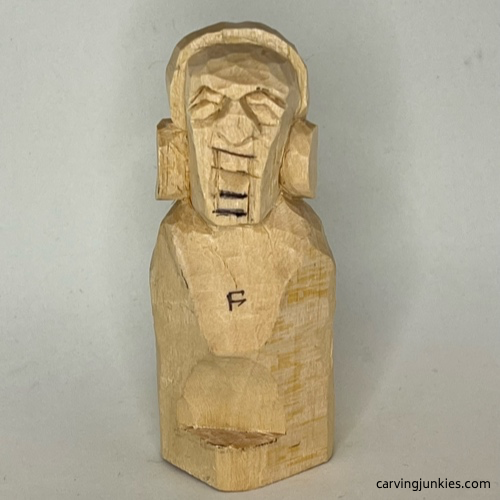 26. Guidelines are sketched for mouth bottom
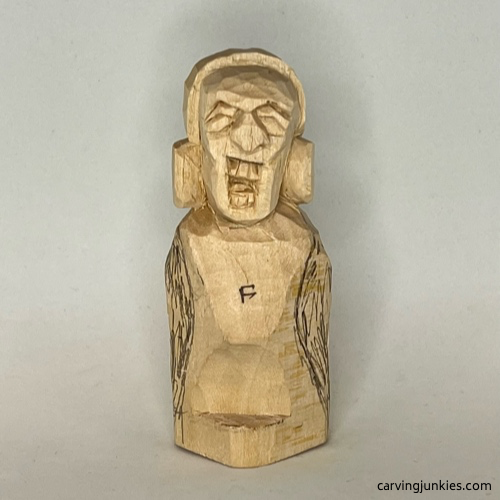 27. Front view of marked wood
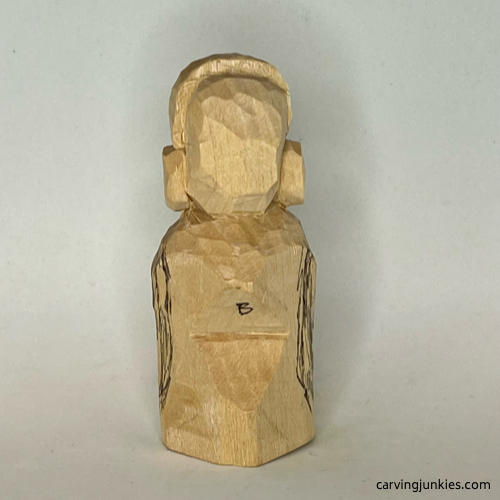 28. Back view of marked wood
Add final details to your earworm wood carving
Use stop cuts to separate the base all around (completed in photos 29-32).
Sketch evenly spaced lines around the body and the back of the head (photos 29-32).
Use something round to trace the earpiece circles (photos 30,31).
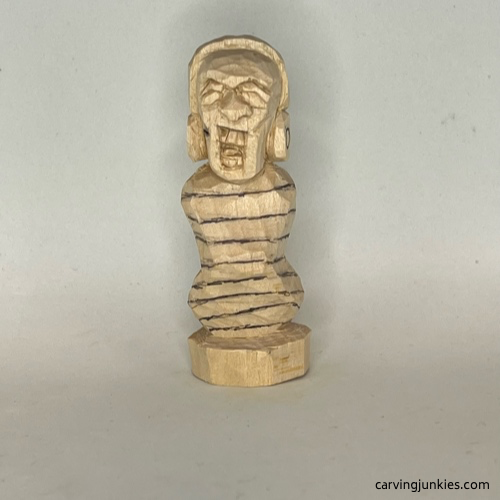 29. Front view of sketched details
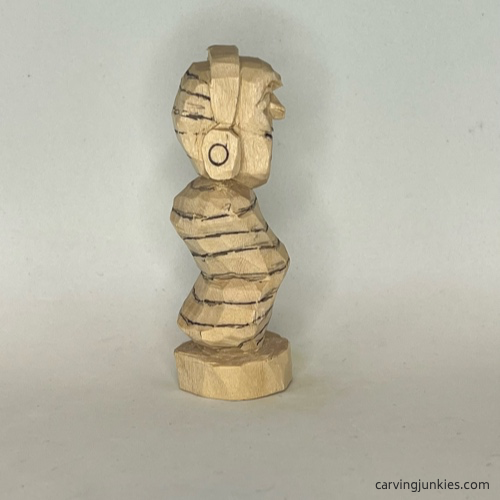 30. RIght view of sketched details
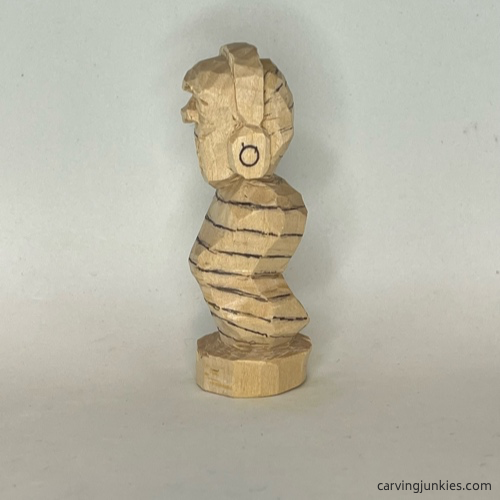 31. Left view of sketched details
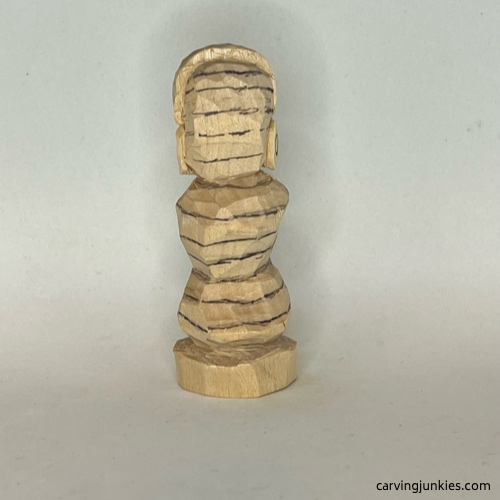 32. Back view of sketched details
Finish your earworm wood carving
Use stop cuts to separate the lines all around (completed in photos 33-36).
Clean up your cuts and refine the final shape of your earworm wood carving.
Optional: Separate the small round circle on each earpiece with a U-gouge. Or, leave them alone (they will be visible through paint if you use a magic marker).
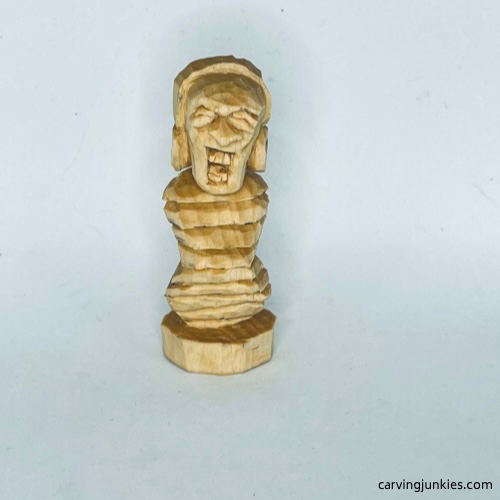 33. Front of unpainted earworm
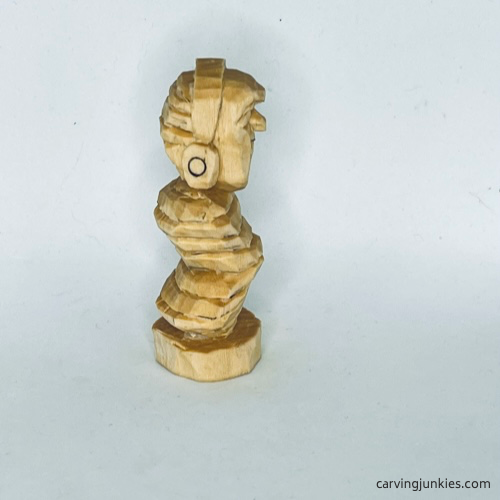 34. Right view of unpainted earworm
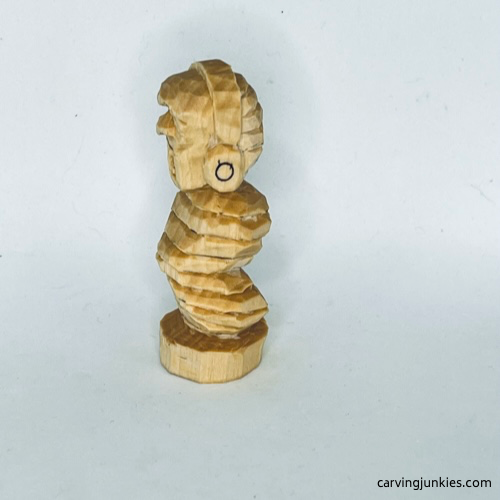 35. Left view of unpainted earworm
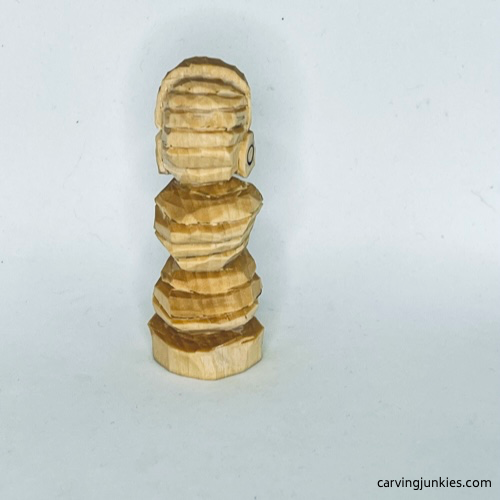 36. Back of unpainted earworm
Paint your earworm wood carving
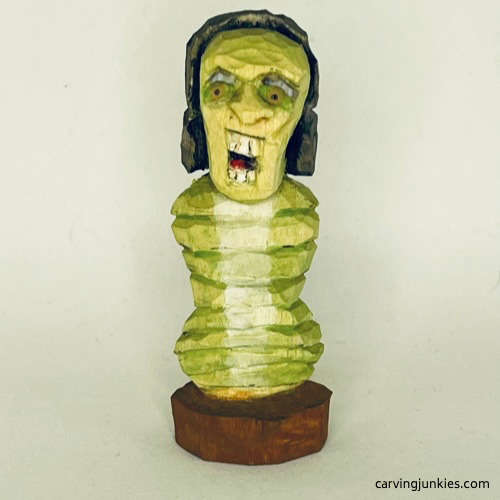 37. Front of painted earworm wood carving
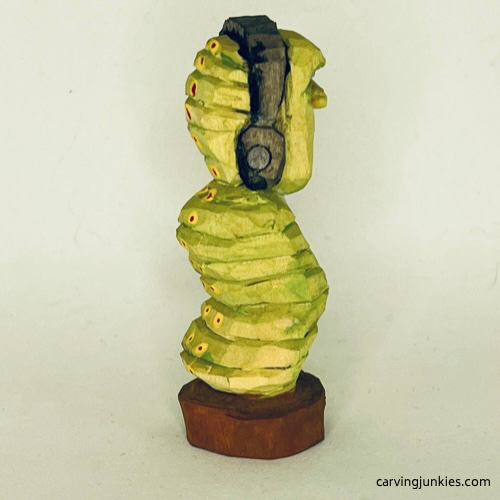 38. Right view
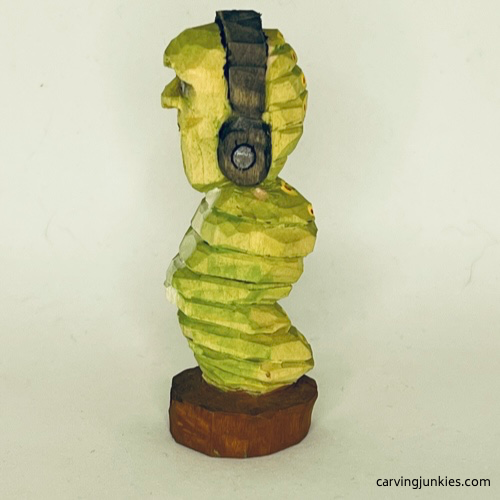 39. Left view
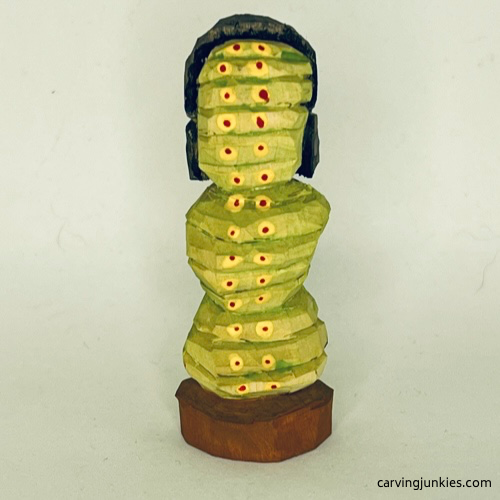 40. Back view
For great painting tips, read this page. To get this same look:
- Worm line shadows: 1 drop Ceramcoat leaf green and 1 drop DecoArt burnt umber wash.
- Teeth: 100% CraftSmart vanilla.
- Body: Leaf green wash.
- Headphones: Ceramcoat black wash.
- Tongue: FolkArt lipstick red 100%.
- Stripe on front: Vanilla wash.
- Back dots: Ceramcoat yellow 100% and lipstick red 100%. Tip: Use a mandala dot tool, toothpick, or top of a pencil eraser.
- Eyebrows: Black wash—and after drying—use Apple Barrel dolphin gray 100%.
- Shadows: Leaf green wash.
- Eyes: Leaf green 100%.
- Pupils: Apple Barrel classic caramel 100%.
- Base: CraftSmart chocolate brown 100%.
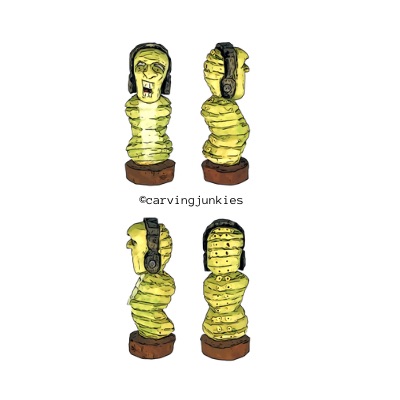
Free earworm wood carving pattern
If you prefer to carve your earworm with a pattern, photocopy this to size to fit your wood block.
Get 50 Wood Carving & Painting Tips when you join our FREE Covered in Chips club.
Share this page
carvingjunkies.com never sells your personal information.
This site uses cookies for its operation and to enhance your experience. As an Amazon Associate and Focuser Carving affiliate we earn from qualifying purchases.
Home | About Us | Privacy Policy | Terms of Use | Contact | Sitemap
