- Home
- Carving wood animals
- Mouse carving pattern
Marvelous mouse carving pattern
Carve yourself a mouse caricature full of character.
LEVEL: SOME CHALLENGES
This mouse carving pattern is another little whittle that is big on personality. He is Marvin, a pint-sized mouse that is living large with his very own ascot around his neck.
We imagine Marvin sitting in his mouse library, enjoying a block of cheese and a good book.
Marvin is fun to carve and paint (use our painting guide at the end).

What you need for our mouse carving pattern
We use a block that is 1 x 1 x 3-inches (2.5 x 2.5 x 7.5 cm). To create a larger mouse carving, double or triple our guideline measurements and your wood block size (or go even larger).
We use a flat-edge knife, which helps prevent chipping and crumbling on small blocks of wood. We also use a laminated U-gouge for the inner ears and nostrils.
Adding wire for the whiskers and tail is optional, but it is an addition that really adds a lot to this mouse wood carving.
Stay safe by using a good carving glove whenever you pick up a knife. Even expert carvers slip every now and then. It’s also hard to remove blood once it stains wood!
A pencil, pen, or magic marker can be used to draw the guidelines on the wood. Use paint brushes and acrylic paints of your choice.
Tutorial at a glance
Watch this short video to see the key steps for this mouse carving pattern and tutorial.
Starting the mouse carving pattern
For this mouse carving pattern, you will carve off the corner. Start by rounding all the corners with your knife.
Draw your guidelines, including:
- A line that is 1/4 inch (0.6 cm) from the bottom all around to mark the top of the feet (photos 1-4).
- A second line about 1-1/2 inches (3.8 cm) from the bottom to mark the bottom of the head on the back side only (photo 4). Tip: You can extend this line in pencil around the front to give you a starting place for your next guidelines.
- On the front side, draw two lines that meet at a point 1-1/4 inches (3.2 cm) from the bottom (photo 1) to mark the shaped bottom of the head.
Draw ear boxes that are about 3/4 (1.9 cm) of an inch high and 3/4 (1.9 cm) of an inch wide. Place them about 1/4 inch (0.6 cm) down from the top. The ears will extend from the front to the side (photos 1-4) and will be oversized.
Also draw an oversized nose (photo 1). You can always remove wood from a nose, but never add it. This will give you a lot of wood to play with.
 1. Front guidelines are drawn
 2. Right view of the mouse guidelines
 3. Left view of the mouse guidelines
 4. Back view of the mouse
Mouse carving pattern: Separate the feet and head
Using your knife, make stop cuts at each corner (photo 5), and remove wood from underneath. This allows you to start to separate the feet from the lower body.
Continue with stop cuts between the corners (photo 6), removing wood to separate the head from the body all around.
 5. Making corner stop cut to separate feet
 6. Separating feet between corners
Mouse carving pattern: Separate the head
Continue the same process of making stop cuts at the corners (and removing wood from underneath), to separate the head. Then, make stop cuts between the corners to separate the wood all around (visible in photos 7,8).
To separate the ears, use stop cuts along the ear box guideline (photo 7). To remove wood from the sides, we switch to a slicing cut from the bottom up (photo 8).
 7. Stop cut on top of ear
 8. Slicing cut up the ear
Mouse carving pattern: Start the nose
For the nose, we use a stop cut above the nose (photo 9), and remove wood from above. Repeat on the bottom of the nose, but you will remove wood from underneath.
For the rest of the nose, you may need to slice around the curve, removing wood from the sides (photo 10).
You want a large nose for this mouse carving pattern. For now, simply separate the nose all around. Later, when you shape the face, you will deepen the depth of the nose.
 9. Stop cut at top of nose
 10. Making cuts around the nose
When you are finished, your mouse should look like our progress photos below (photos 11-14).
 11. Nose and ears are separated
 12. Right view of the mouse carving
 13. Left view of separated ear and nose
 14. Back view of the mouse carving
Mouse carving pattern: Shape the head
Draw a circle on the top of the head and use your knife to remove wood toward it (photo 15), which is a little bit like sharpening a pencil.
Flatten the ears slightly on the front (photo 16) and back. We like to keep our ears a little thick to avoid breaking them.
Mark the front of the head to guide where you will carve a point on the top of the head (photo 17).
Narrow the neck slightly on the back (photo 18).
Mark the ears for further shaping (photo 19). Hold off cutting them until the end to avoid breaking them.
Also mark wood to remove on the face (photo 19).
 15. Angling head back
 17. Head is marked for shaping
 16. Narrowing the ear
 18. Narrowing back of the neck
 19. Head is shaped and ears are marked
Shape the bottom of the head
Make a stop cut along the top of the colored wood (photo 20) and remove wood from underneath (photo 22). This will create a collar around the neck. Repeat the process all around under the collar (easier to see in photo 23).
 20. Making a stop cut under the face
 22. Removing wood underneath
Mouse carving pattern: Round the lower body
Round the lower body of the mouse carving all around. Carve wood off from the middle of the body up to the neck (turn your wrist as you cut, curving the knife up) to create the pot belly. Do the same on the back side (photos 23-26).
Draw on the arms and circles that you will carve for the claws (photos 23-26). Carve off the front and back corners of the feet to create a flat surface to draw the bottom claws (photos 23-26).
Draw on the facial details, including the eyes, mouth, and smile lines (photos 23-26).
 23. Arms and claws are drawn
 24. Right view of mouse carving
 25. Left view of mouse carving
 26. Right view of mouse carving
Mouse carving pattern: Refine more details
Make a stop cut under the arm and remove wood from underneath. Make a small pyramid cut on the inside of each arm to create a crook in the arm (photo 27).
Use a V-cut in the front (photo 28) and back to split the feet. Make a small pyramid cut under the belly on the front and back (visible in photo 28).
Shape the feet to make them more rounded (visible in photo 29).
Draw on guidelines for the five claws on each hand and foot (photo 29).
To carve the hands, make a stop cut at the end of the hands, removing wood from around the hands (photo 29). Use small V-cuts to slightly separate the claws on the hands and feet. Be careful here. It’s easy for the wood to crumble.
 27. Cutting the arms
 28. Splitting the feet
 29. Carving the hands and claws
Mouse carving pattern: Adding more details
Using your knife, outline the eyes, including the eyeball (photo 30). Bring your knife directly below your cuts and take off a sliver of wood to create a bolder line (visible in photo 31).
Round the eyes by carefully shaving wood off from the center of the eyeball down toward each eyelid. Tip: Make sure your knife is very sharp. Be very careful to avoid crumbling the eyeball. After you define the eyeballs, make a tiny pyramid cut in the inner and outer corner of each eye to create shadow (more visible in photo 35).
Use a similar technique (draw the outline first and shave wood off from the center of the teeth toward the lips) to carve the mouth and teeth (photo 31).
For the ears, we use a laminated U-gouge (one of our favorite tools for scooping out wood in the ears) to remove wood, working from the outside in (photo 32). If you do not have a U gouge, you can use a small detail knife. Start at the bottom of the ear and turn your wrist as you come up, shaving wood off (rather than cutting it). Tip: You may want to practice this technique on a scrap piece of wood first.
 30. Carving the eyes
 31. Carving the mouth
 32. Carving the inner ear
Mouse carving pattern: Refine the nose
Use a U-gouge to create a indentation for the nostril on each side (photo 33). If you do not have a U-gouge, turn the carving upside down and carefully carve the nostrils under the nose.
Using your knife, cut the top of the nose at an angle downward (photo 34).
Refine the claws on the feet so they are more triangular in shape (as in photos 35-37). If the wood splits (like ours did), simply add a little wood glue and a rubber band (photo 33) to secure the piece in place. Wait 24 hours for it to dry before carving near it.
 33. Refining the nostrils
 34. Finishing the nose
Perfection before painting
Check your carving to be sure you’ve cleaned up and/or deepened your cuts. A great way to do that is by wetting your carving with water and taking a few photos from all angles, like the ones below.
Wood fuzzies and other imperfections are much easier to see in photos than just using your naked eye.
 35. Cuts look clean and sharp
 36. Left view of mouse carving pattern
 37. Right view pre-painting
 38. Back view of finished mouse carving
Paint your mouse carving
Unless noted, the acrylic paints we use are Delta Ceramcoat paints. We put a drop of two of paint in a plastic palette, dip our brush into a mason jar with water, then pull a little paint into the side of the palette to create a wash. We like both flat and round brushes for painting our wood carvings.
- Eye whites and teeth: Artist’s Loft titanium white.
- Nose, inner ears, and claws: Apple Barrel cameo pink. Dry brush with Ceramcoat black after completely dry.
- Top of nose: FolkArt lipstick red (very diluted).
- Neck ascot: titanium white.
- Eyes: Ceramcoat black, applied with a toothpick.
- Mouse body first wash: FolkArt steel gray. Let fully dry.
- Mouse body second wash: Extremely diluted wash of Academy burnt sienna.
- Optional for the tail: We used 12-gauge wire and shaped it into a swirl. We hand-drilled a hole in the back and secured it with Crazy Glue. It is painted with 100% cameo pink.
- Optional for the whiskers: We used 20-gauge wire that was cut into 6 pieces. We drilled holes on each side of the nose and used Crazy Glue to secure them. We decided not to paint them white (typical for mouse whiskers) so they would stand out more.


Free mouse wood carving pattern
If you prefer to carve your mouse wood carving from a pattern, photocopy this to size to fit your wood block.

Mouse carving pattern summary
- This caricature mouse carving pattern is fun to make and carves up fairly quick.
- You could add a jacket to the mouse, but we decided to keep him simple.
- This is a great carving to practice your caricature eye carving skills.
- Another option is to carve a piece of Swiss cheese to expand this mouse carving pattern.
Get 50 Wood Carving & Painting Tips when you join our FREE Covered in Chips club.
You might like these
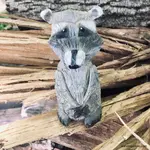
Raccoon Wood Carving With a Knife Tutorial From A Block of Wood
Raccoon wood carving tutorial carved from a block of wood with just a knife and no bandsaw.
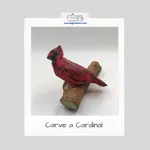
Free Cardinal Wood Carving Pattern
Free cardinal wood carving pattern, step-by-step tutorial, and painting guide are all right here to carve this beauty.
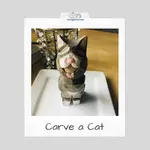
Carving a Cat Using Just a Knife Tutorial
Carving a cat is easy with our step by step tutorial with tons of photos from every angle
Share this page
carvingjunkies.com never sells your personal information.
This site uses cookies for its operation and to enhance your experience. As an Amazon Associate and Focuser Carving affiliate we earn from qualifying purchases.
Home | About Us | Privacy Policy | Terms of Use | Contact | Sitemap