- Home
- Carving wood animals
- Owl wood carving
Outlandish owl wood carving tutorial
Carve yourself a parliament of owls.
LEVEL: SOME CHALLENGES
Here is a super, fun owl wood carving tutorial that features a trio of owls (also known as a parliament of owls) on top of one another.
The only challenging part of the tutorial is carving the owl’s talons. But if you take your time, you should be able to successfully carve those talons.
Let’s get carving!

Tools needed for this owl wood carving tutorial
I used a basswood block that is 1.25 x 1.25 x 4 inches (3.8 x 3.8 x 10.2 cm). As always, feel free to increase the dimensions to go larger. If you do, I suggest printing out this tutorial and changing the dimensions on your paper version to avoid making any mistakes.
You will need a ruler and a writing tool to make your guidelines. While pencil has a tendency to smudge, it is easy to erase your lines and sketches.
Use your knife (or knives) of choice. A micro U-gouge was used to create the texture on the belly of each owl. If you do not have this tool, you can use a knife instead (I’ll explain later).
Always use a good carving glove for safety. If you carve over your lap, always cover it with a carving board or a square piece of wood. You want to protect your precious blood arteries!
I used my Colwood detailer to wood burn the carved lines on the owl wood carving. If you don’t have a wood burner, you can substitute brown paint or simply not add any highlights.
A full painting guide is included at the end of this page—if you want the same look. You can also use colors that are more traditional for owls, such as tan, gray, or reddish to deep brown.
Owl wood carving tutorial at-a-glance
You may find it helpful to check out this short video that gives you a summary of the key steps for this owl wood carving tutorial.
1. Setting up your owl wood carving
Round off all the corners on your wood block. Draw a guideline all around that is about 1.5 inches (3.8 cm) from the bottom.
Draw a second guideline all around that is 2.75 inches (7 cm) from the bottom.
Add a total of 6 boxes to reserve wood for the talons. They should be about 1/2 inch (1.3 cm) square. Don’t worry if they are not all alike. A little variation will make your owl wood carving more interesting.
 1. Front guidelines are drawn
 2. Back guidelines are drawn
2. Starting your owl wood carving
Use stop cuts to separate each of the guidelines (completed in photos 3,4) that mark the bottom of each owl. Tip: Be careful to skip over the boxes you reserved for the talons. You may want to start in the corners and work your way toward the middle.
Separate the bottoms of the talon boxes (photo 5). You can use a stop cut—or hold your knife like a pencil and move it along the guideline—removing wood around the boxes. Once you gain more access, continue to separate the wood around—and between—the talon boxes (completed in photo 6). Tip: Make 2 stop cuts that overlap each other (extend slightly) in the corners to make it easier to remove wood around your stop cuts.
Work your way up the block to separate the other talon boxes. You can also start to round down the head and belly of each owl (completed in photo 7). Again, your owls do not need to match perfectly.
Once you get the desired shape, sketch on the face, eyebrow, and wing details (photo 7).
 3. Stop cuts are made
 5. Separating talon box
 4. Back view of separated guidelines
 6. First talon box is fully separated
 7. Details are added
3. Carve the details on your owl wood carving
Use your knife–or a V-tool—to separate the details you just drew on your owl wood carving (started in photo 8). I push my knife along the guideline and make a second slicing cut, but you can use wha
After all the details are separated, sketch the talons and mark the wood that you will remove (photo 9).
 8. Starting to carve details
 9. Wood is marked for removal
4. Carve more details on your owl wood carving
I carefully sliced wood off both sides of the talon. Then, I used a series of pyramid cuts to remove wood in between the talons (photo 10). In hindsight, make your pyramid cuts first to maintain wood stability. Tip: you may need to reduce the height on the talons before starting your pyramid cuts. If you do not, it is easy to crack the wood. Another trick to avoid breaking the wood is to make a series of shallow pyramid cuts, removing thinner chips (layers) of wood of wood at a time. If the wood breaks, simply break out some wood glue and give it 24 hours to dry thoroughly.
Use a micro U-gouge (I used a 3 mm micro U-gouge from Dockyard Tools) to create texture on the belly of each owl (photo 11). Tip: Sharpen the gouge before you start. If you do not have a U-gouge, you can make a series of sweeping cuts across the belly (rotate your wrist as you shave wood off with your knife).
Draw the main feather lines on the back of your owl wood carving (photo 12). Use a knife or a V-tool to carve the lines on the back. You can use stop cuts, paring cuts, or make an initial cut—holding your knife like a pencil—and a secondary slicing cut.
 10. Carving the talons
 11. Adding belly texture
 12. Back feather lines are drawn
 13. Cutting the back
5. Finish your owl wood carving
Before painting your owl wood carving, use a wood burner to outline the key areas (photo 14). This helps make the painted colors pop. If you do not have a wood burner, you can use brown or gray paint instead.
If you want great painting tips, read this helpful page. To get the same look as my owl wood carving, use these acrylic paints:
- Beak and eyebrows: 100% DecoArt antique gold.
- Eye whites: 100% Craft Smart vanilla.
- Top owl: Folk Art apple orchard wash (all washes here are 2 drops of paint diluted with 15 drops of water).
- Middle owl: Ceramcoat Tahiti blue wash.
- Bottom owl: Ceramcoat tawny medium wash.
- Eye pupils: 100% Craft Smart deep grey applied with a stylus dot tool. Allow to thoroughly dry and use a toothpick to add specks of Craft Smart vanilla.
 14. Wood burning the key lines
 15. Painted front of owl wood carving
 16. Painted right view of owl wood carving
 17. Left view of painted owl wood carving
 18. Back of painted owl wood carving
Owl wood carving tutorial summary
- This parliament of owls is fun to carve.
- The only real challenge is carving the talons and using a series of shallow pyramid cuts can help avoid breakage.
- Using a wood burner helps make the bright colors pop more.
- You can use a longer wood block to add more owls.
- Feel free to change up the colors!
You might like these
Fun Things to Carve With A Knife From a Block of Wood
Fun things to carve from wood with free tutorials and pictures from all angles so you can get great results.
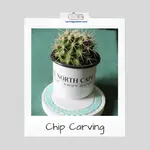
Chip Carving Tutorial For Beginners
This chip carving tutorial for maritime coasters is perfect to make a gift or add to your home.
Easy Low Relief Carving Tutorial With Wood Found in Nature
Our low relief carving tutorial is fun and easy for everyone.

Get 50 Wood Carving & Painting Tips when you join our FREE Covered in Chips club.
Share this page
carvingjunkies.com never sells your personal information.
This site uses cookies for its operation and to enhance your experience. As an Amazon Associate and Focuser Carving affiliate we earn from qualifying purchases.
Home | About Us | Privacy Policy | Terms of Use | Contact | Sitemap