- Home
- Carving wood animals
- Penguin wood carving
Happy penguin wood carving tutorial
A little whittle that is big on charm.
LEVEL: EASY
This penguin wood carving is simple to make, super easy to paint, and will brighten anyone’s day.
Simply follow our step-by-step tutorial and you will have this little caricature carving finished in one or two days.

What you will need for this penguin wood carving
For this penguin wood carving, you will need a wood block that is 1 x 1 x 3 inches (2.5 x 2.5 x 7.6 cm). If you want a much bigger penguin simply increase the dimensions.
You will also want a pencil to sketch your design (magic marker was used to help you see the pattern better).
There isn’t a lot of wood to remove, but a roughout knife is handy for the areas of wood that you want to remove. You will also want a smaller, detail knife for the facial details.
As always, a painting guide is at the end of the page and you can use whatever paint brushes and acrylic paints that you want. The completed carving was finished with boiled linseed oil, but you can use whatever finish you personally like.
That’s all you need. A super simple tutorial for creating a carving grinner!
Penguin wood carving tutorial at-a-glance
What this video to see the key steps to make our raincoat-clad penguin wood carving.
Set up guidelines on your penguin wood carving
Draw a line about an inch (2.5 cm) from the top all around the wood block (we lightly penciled the line on the front to avoid getting magic marker on the face). The face of the penguin wood carving will be inside a triangle on the front. The total width of the triangle (at the widest point) will be 3/4 of an inch or 1.9 cm (photo 1).
Add a little box that is a 1/2-inch (1.3 cm) wide and a 1/4-inch (0.6 cm) long to reserve wood for the beak (photo 1) for your penguin wood carving.
Draw another line that is 2.25 inches (5.7 cm) from the top all around to mark the top of the boots. Draw a final line all around that is a 1/2-inch (1.3 cm) from the last line to mark the top of the feet that are hidden inside the rain boots (photos 1-4).
Add an arm on each side, that extends from the side to the front, that is about 1/2-inch (1.3 cm) wide. The end of each flipper will extend from the arms of the raincoat (photos 2,3).
 1. Front guidelines on the penguin
 2. Right guidelines on the penguin
 3. Left guidelines on the penguin
 4. Back guidelines on the penguin
Penguin wood carving: Carve the rain hat
You will give your penguin a fisherman’s cap that has a brim that is folded back. First, carve off the corners all around (photo 5). Then, sketch the hat on the wood block (photo 6).
Separate the head from the hat on the front (photo 7). Use stop cuts along the guideline, removing wood from underneath.
Then, separate the bottom of the face, skipping the top of the box that you reserved. Remove some wood on both sides of the face (and above the beak) to create a slight mound for the beak, which will extend out from the face (photo 8).
 5. Rounding corners for the hat
 6. Hat is drawn
 7. Making a stop cut
 8. Creating a mound
Cut the beak on your penguin wood carving
Sketch the eyes on the face (photo 9). Make a stop cut on each side of the face to angle the beak (photo 9). Remove wood from underneath (photo 10). Gently slice wood off to remove the remaining outline of the reserved beak box.
Once the beak is cut, carve wood at an angle toward the head to make the beak more prominent (photo 11). Tip: Be careful how you hold the carving from this point further so you do not press too hard and break the beak.
Shape and round the top of the hat. When you are finished, your penguin should look like photo 12. Now, separate the middle brim of the hat all round using stop cuts, removing wood from above (completed in photo 13).
 9. Stop cut to angle beak
 10. Removing wood below the beak
 11. Cutting beak back at an angle
 12. Progress photo of completed beak
Start the rain boots on your penguin wood carving
Separate the top of the feet all around. You can use stop cuts or V-cuts. Also separate the top of the rubber boots all around (photo 13).
On the front (photo 14) and back (photo 15), mark wood to remove to shape the rubber boots (photos 14,15).
Narrow the boots in the front and back. Keep a little extra thickness so you can make the boots a little wider than the legs. Once you have the desired width, draw a line to mark the top of the boots. Use stop cuts to separate the boots from the legs all around (photo 16) on the penguin wood carving.
 13. Separating the boots
 14. Marked wood for removal (front)
 15. Marked wood for removal (back)
 16. Separating the top of the boots around
 17. Progress photo of completed boots
Carve the arms on your penguin wood carving
Cut the back of the arms using a stop cut (photo 18). Make a slicing cut underneath your first cut to cleanly remove wood in one piece (completed in photo 19).
Draw the coat with the collar and the pockets on the front of the penguin wood carving (photo 20).
 18. Stop cut on back arm
 19. Arm is separated
 20. Details are drawn
Carve the rest of the details on your penguin wood carving
Carve the inside of the arms on the front of the penguin. You can use a pyramid cut (photo 21) to remove the wood in one piece.
Carve along the guidelines for the rest of the details. You can use stop cuts or pull cuts (photo 22) and either remove wood from above or make a second slicing cut. Try to minimize your cuts or the wood may splinter.
Once all the details are carved, use V-cuts to add wrinkles to the hat and rain coat (photos 23-26).
Clean up your cuts and deepen them, if needed, to enhance the painting on your penguin wood carving. This will prevent bleeding during painting and will give your piece a clean, finished look (photos 23-26).
You can also use a piece of sandpaper to smooth any wood fuzzes.
 21. Making a pyramid cut
 22. Carving the detaials
 23. Front details are carved
 25. Left view of penguin
 24. Right side view of penguin
 26. Back view of penguin
Paint your penguin wood carving
For this penguin wood carving, using most paint colors at full (100%) strength worked better for the design (photos 27-30). Here are the colors and brands that were used. Feel free to use whatever paint brushes you want.
- Head, legs, and flippers: 100% Ceramcoat black.
- Beak: Ceramcoat pumpkin wash. Second coat: Ceramcoat tangerine wash.
- Hat, coat, and boots: 100% Ceramcoat bright yellow.
- Eye pupils and coat accents: 100% Ceramcoat black.
- Once completely dry, finish with boiled linseed oil, applied with an old brush (always properly dispose of combustible cloths or paper towels).
To learn more about painting wood carvings, click here.
 27. Painted front of penguin
 29. Painted left side of penguin
 28. Painted right side of penguin
 30. Painted back of penguin
Penguin wood carving tutorial summary
- This penguin wood carving is adorable and carves up fast.
- Take your time carving the front details to get a clean look.
- You can easily increase the size to make a larger penguin wood carving.
- You can change up the colors of the raincoat but the yellow is bright and colorful.
Get 50 Wood Carving & Painting Tips when you join our FREE Covered in Chips club.
You might like these
Carving An Owl Tutorial With Just a Knife
Carving an owl is super easy with this step by step tutorial with photos from all angles.
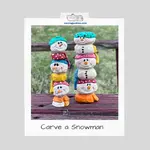
Snowman Wood Carving With A Knife Tutorial
Adorable snowman wood carving with just a knife tutorial with step by step instructions.
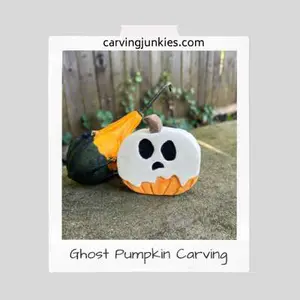
Halloween Pumpkin Wood Carving Tutorial
Easy step-by-step Halloween pumpkin wood carving tutorial—make yourself an awesome ghost pumpkin!

Share this page
carvingjunkies.com never sells your personal information.
This site uses cookies for its operation and to enhance your experience. As an Amazon Associate and Focuser Carving affiliate we earn from qualifying purchases.
Home | About Us | Privacy Policy | Terms of Use | Contact | Sitemap