- Home
- Carving wood animals
- Rabbit wood carving
A whimsical rabbit wood carving you
can easily make
This tutorial will show you how to get great results, step by step.
LEVEL: SOME CHALLENGES
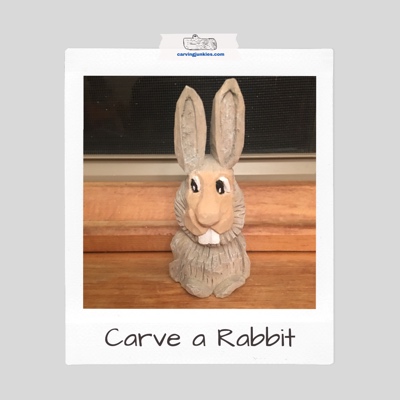
Everyone loves a good rabbit wood carving, especially around the time of Easter. This little guy would make a great addition to any holiday basket.
Adding a few buck teeth gives this rabbit some whimsy, or you can leave the teeth off if you want something a bit more serious.
What you will need for your rabbit wood carving
- Carving gloves.
- 1.5 x 1.5 x 4-inch (3.81 x 3.81 x 10.16 cm) basswood block.
- Pencil.
- Magic marker (optional) to go over your pencil marks.
- Knife of choice (we used a roughout knife for removing the larger areas of wood and a detail knife for shaping the ears, face, and legs).
- Acrylic paints and paint brushes of your choice.
- Water (to create paint washes).
Rabbit wood carving tutorial at a glance
Carving off the corner
For this project, you will carve off the corner, which gives you some ready-made depth for the nose and face.
Draw the rabbit in pencil
You can use our free pattern (at the bottom) to outline the rabbit. Simply reduce or increase the size to fit your block. The pattern can also be used to create a roughout on a wider block of wood, if you use a band saw.
- Draw the outline of the front of the rabbit in the corner of the block.
- Also draw the tail on the back.
- You do not have to worry about the sides for now as we will shape them later.
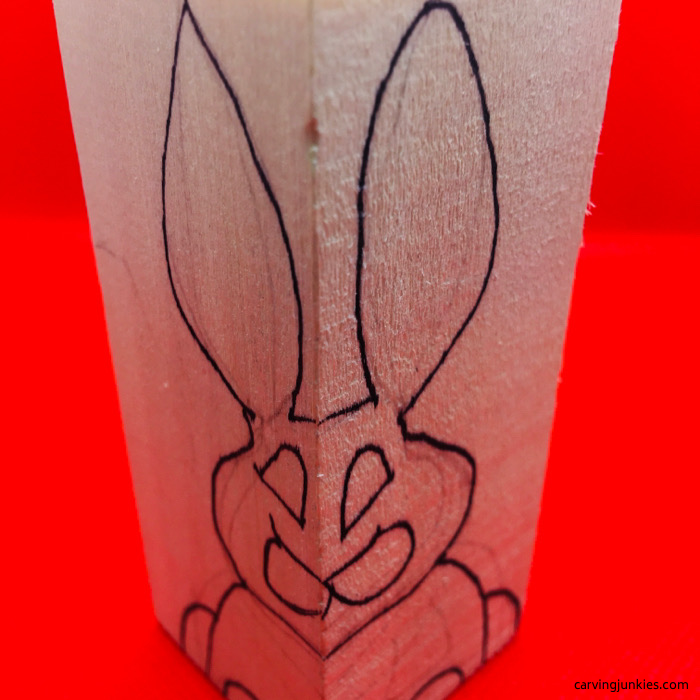 Front of pattern
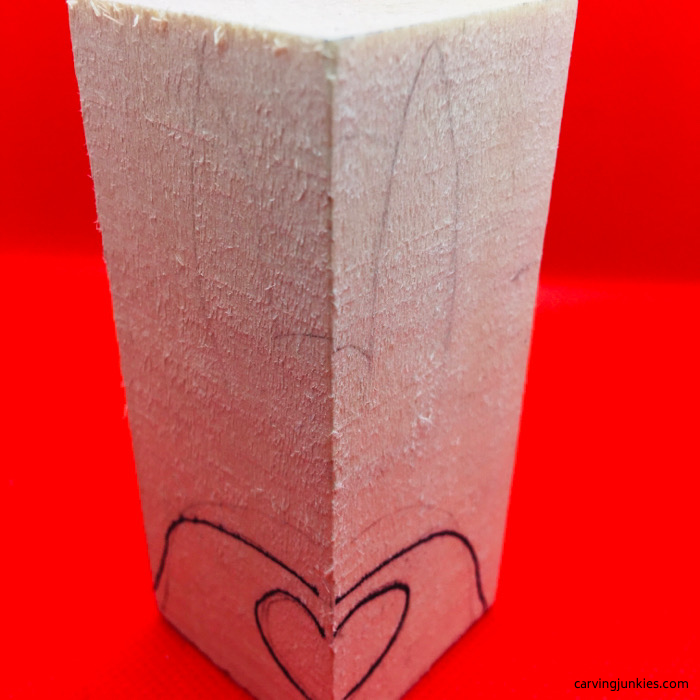 Back tail
Round the corners of your rabbit wood carving
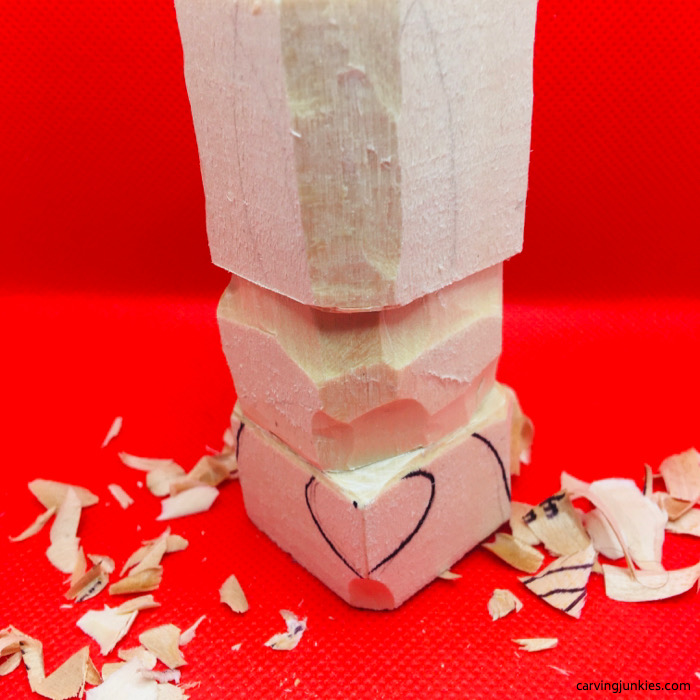
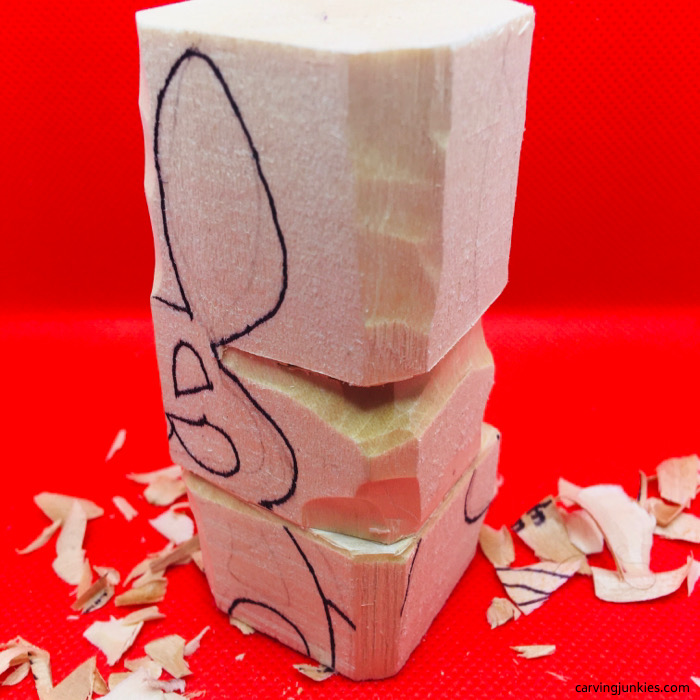
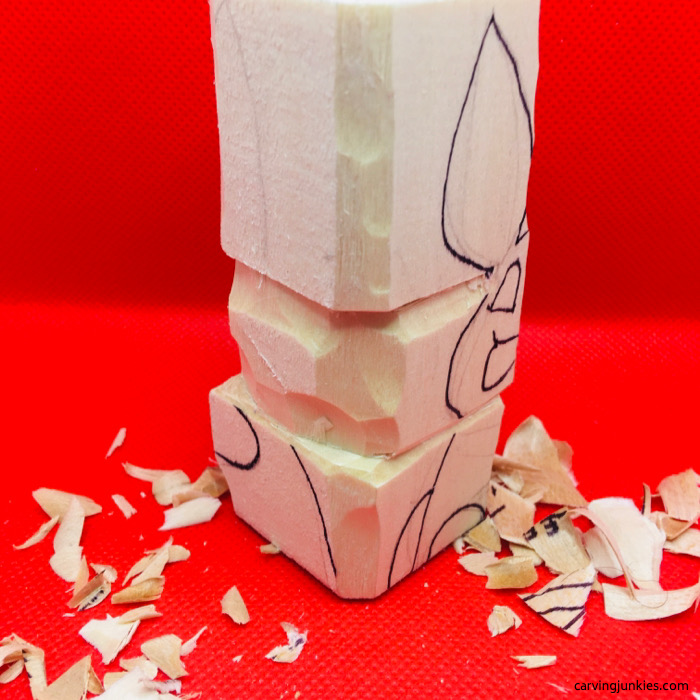
- Round all the corners and separate the top of the head from the bottom of the ears (photos 1-4). You can use a stop cut and remove the wood below it.
- Also separate the bottom of the head from the body (photos 1-4).
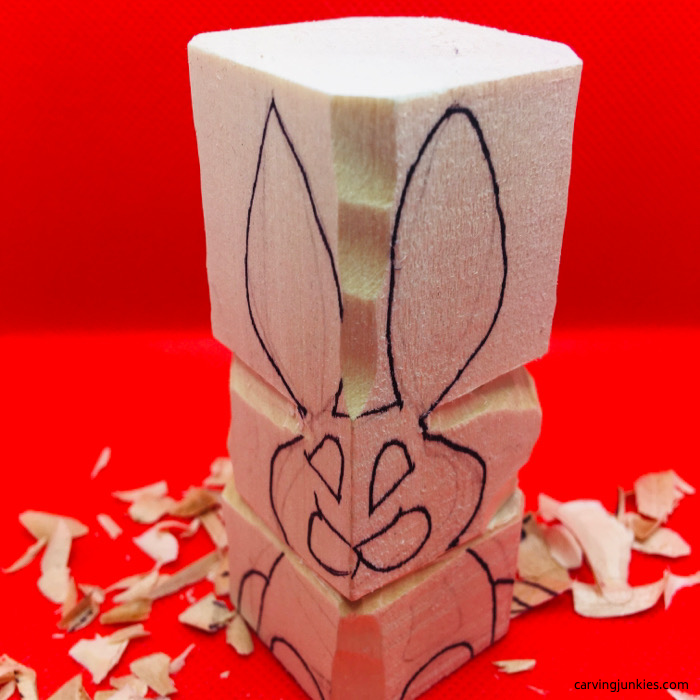 1. Front rounded
 2. Back rounded
 3. Separating the top from the bottom of the head will make shaping easier
 4. Left view
Tip: Check out our wood carving cuts page for instructions on each cut.
Starting to shape the ears
- Since the ears are set back, carve inward with sweep cuts (photos 5-8). It is kind of like sharpening a pencil.
- After you get to the midway point, you can redraw the ears to guide you (photo 9).
- Make the ears bigger than you intend so you will have a lot of wood to work with. You can always shave wood away but you can never add it back.
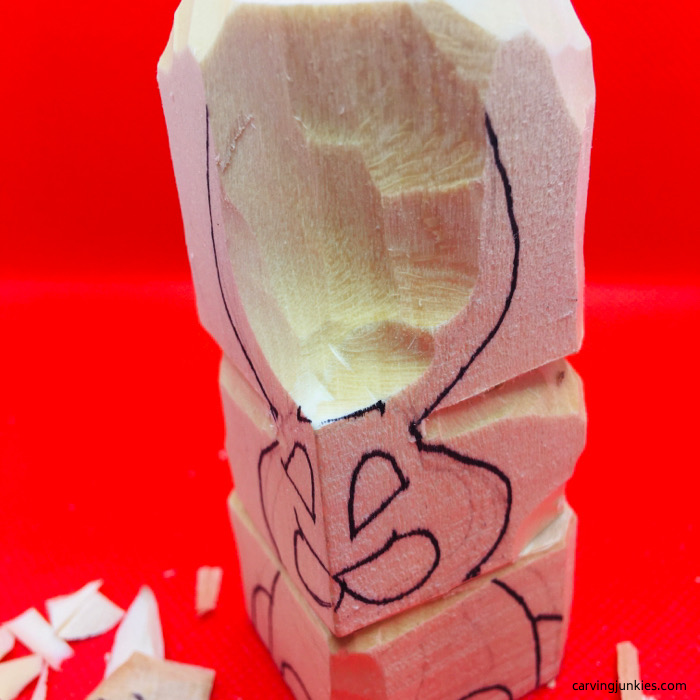 5. Carving inward on front ears.
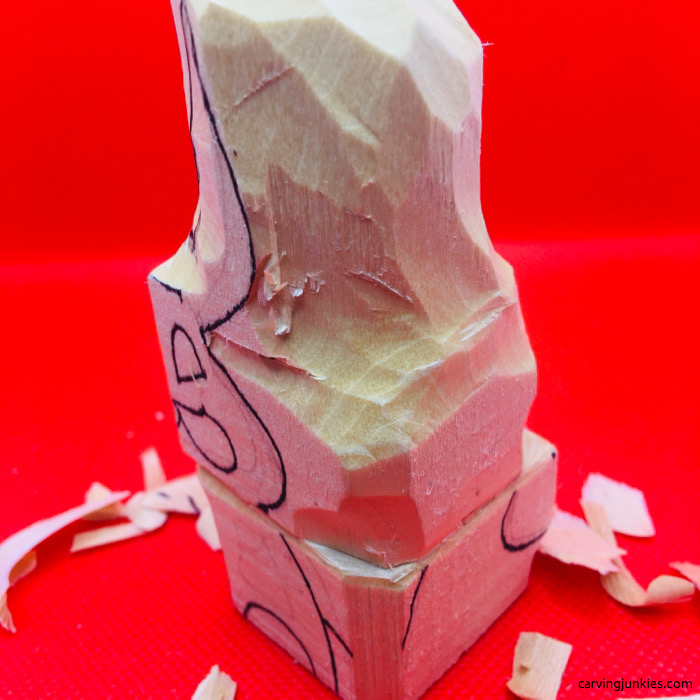 7. Left side view
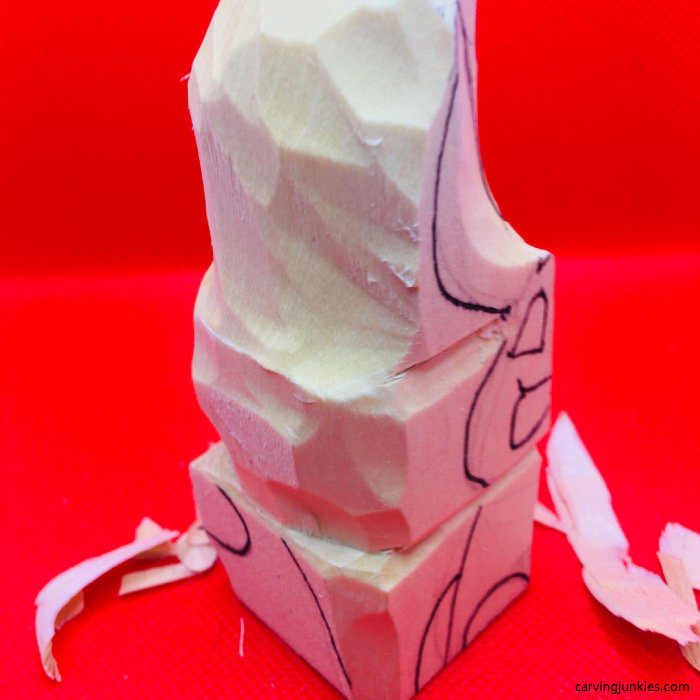 6. Right side view
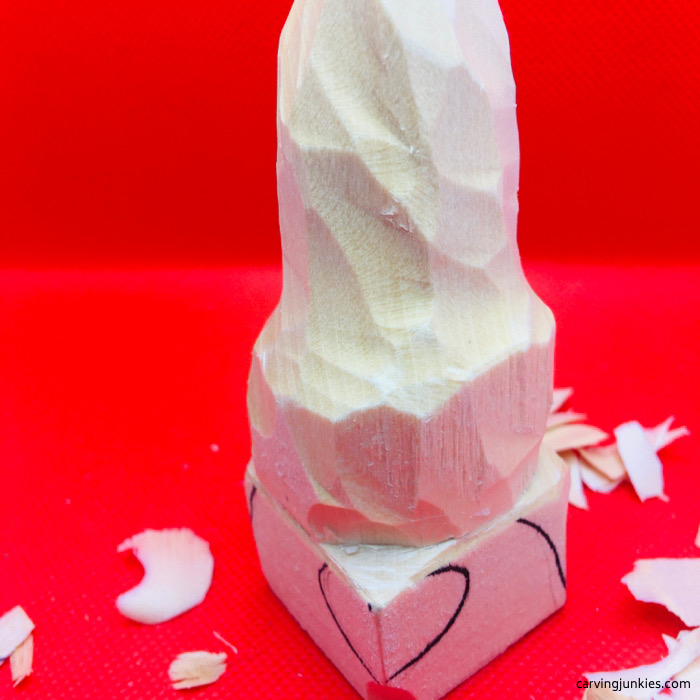 8. Carve inward on back of ears too
Continue to shape the ears
- Keep the ears thick in width for now to avoid breaking them as you carve (photos 10,11).
- We always save delicate details for the end of a project.
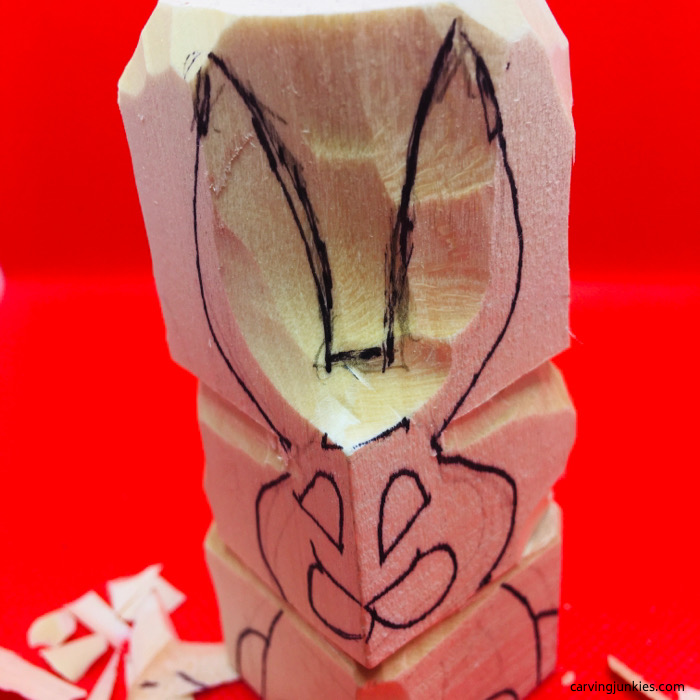 9. Ears redrawn
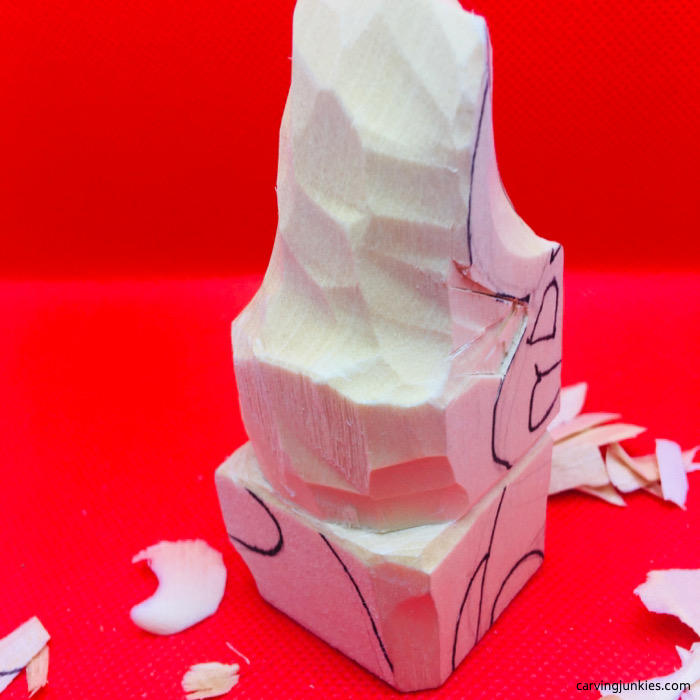 10. Right side view
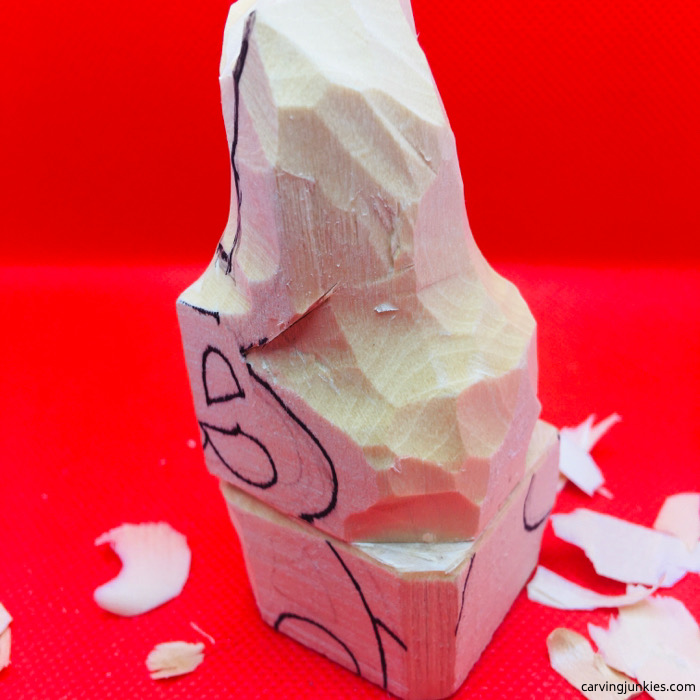 11. Left side view
 12. Back view
Tip: take some time to examine your carving periodically to be sure you are achieving the shape you want.
Start shaping the lower part of the head and body
- Remove wood around the lower part of the head to make it easier to thin the upper head (photos 13-16).
- Begin to shape the lower part of the rabbit’s body (photos 14-16).
- Also start removing wood to create the tail (photos 14-16).
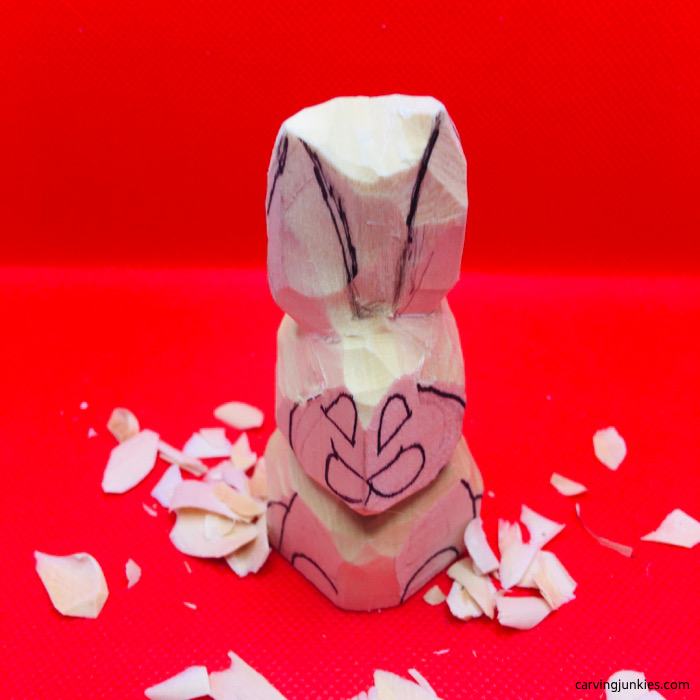 13. Shaping the ears further
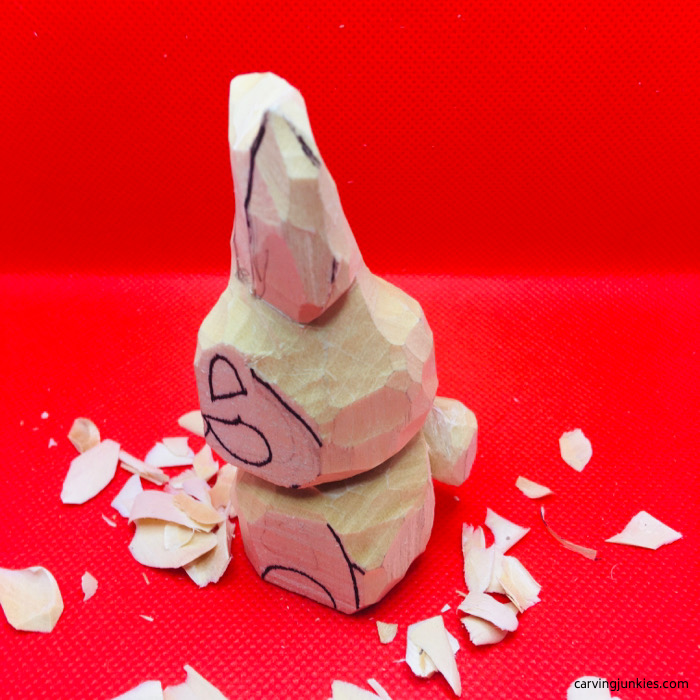 14. Left view of body shaped
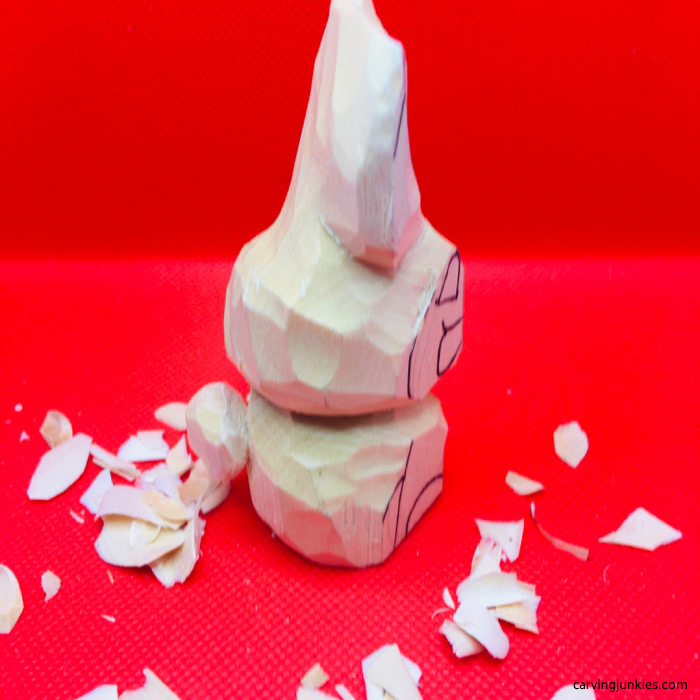 15. Right view
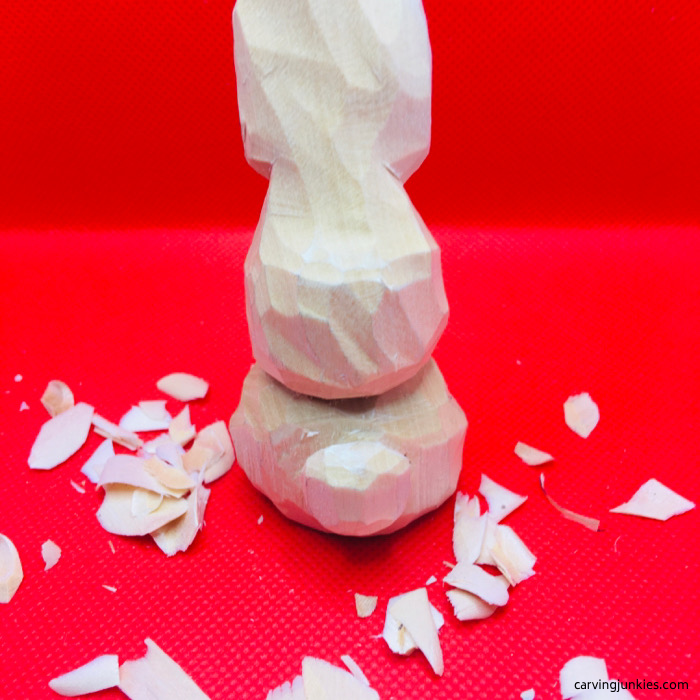 16. Back and tail carved
Split the ears and start the face
- Use a V cut to start to split the ears down the center (photo 17). Continue evenly on each side until they are separated (thin them more last).
- Make a stop cut under the nose and cut wood away around it. Also thin the bridge of the nose (photo 17).
- Use a sweep cut to create the socket area for the eyes, which are carved later (photo 17).
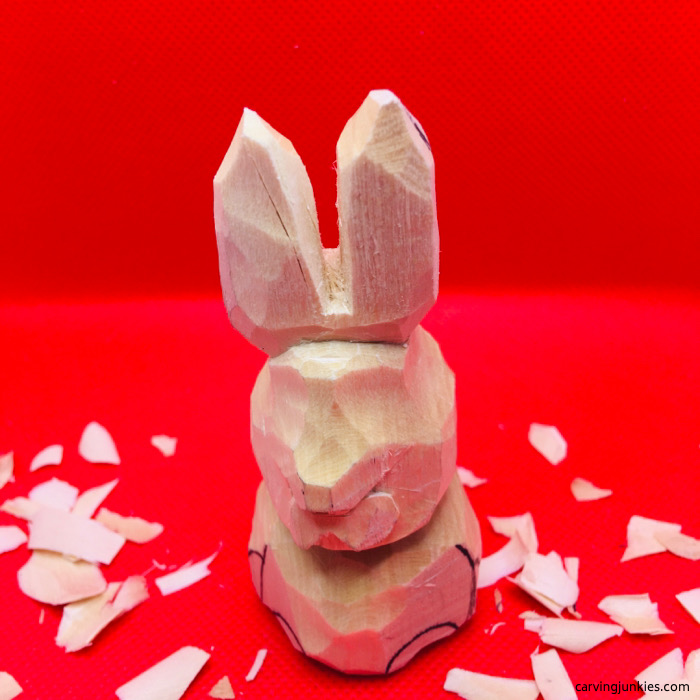 17. The ears are split and nose is started
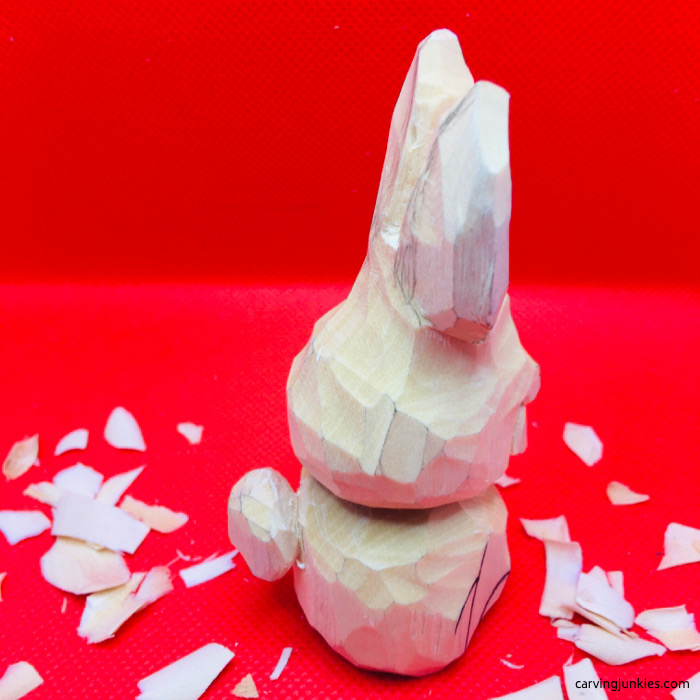 18. Right side view
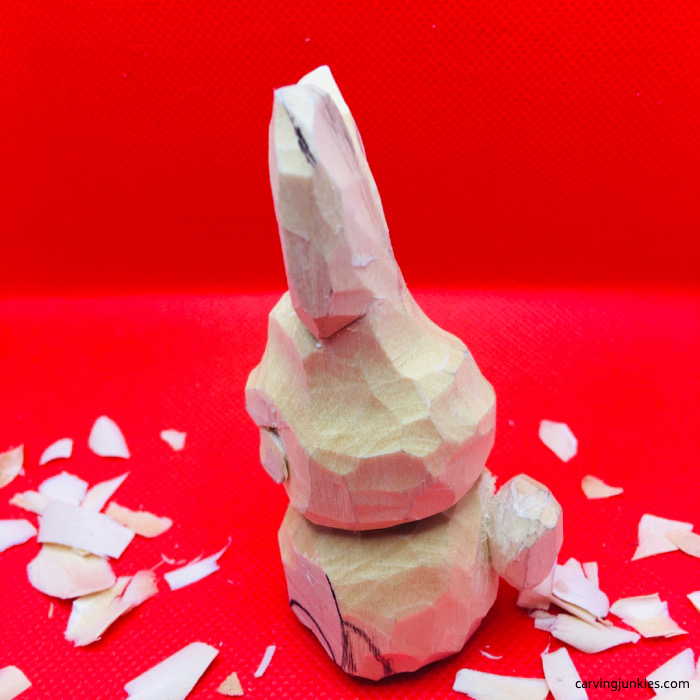 19. Left side view
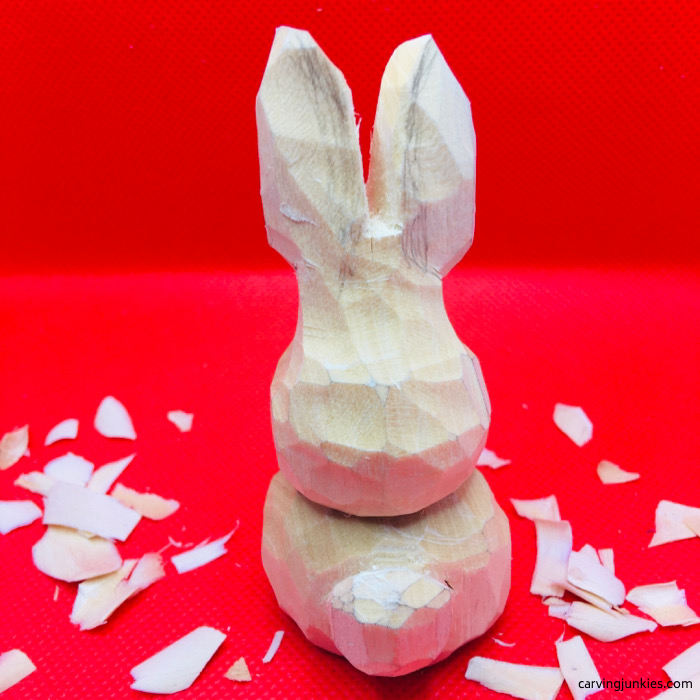 20. Back view
Define the jowls and teeth and separate the legs
- Use V-cuts or stop cuts to separate the legs and front feet on the body of your rabbit wood carving (photos 21,22).
- We decided to make the rabbit’s jowls a bit bigger (photo 21). That’s the beauty of wood. You can always shave off what you don’t like and redo it. We used a line cut to start to remove the wood (photo 22).
- We also added two buck teeth to give the rabbit wood carving some whimsy (photo 22). Draw them on with a pencil before carving them.
- Add pencil lines where you want to carve the fur. Vary them in length to create texture (photos 23,24).
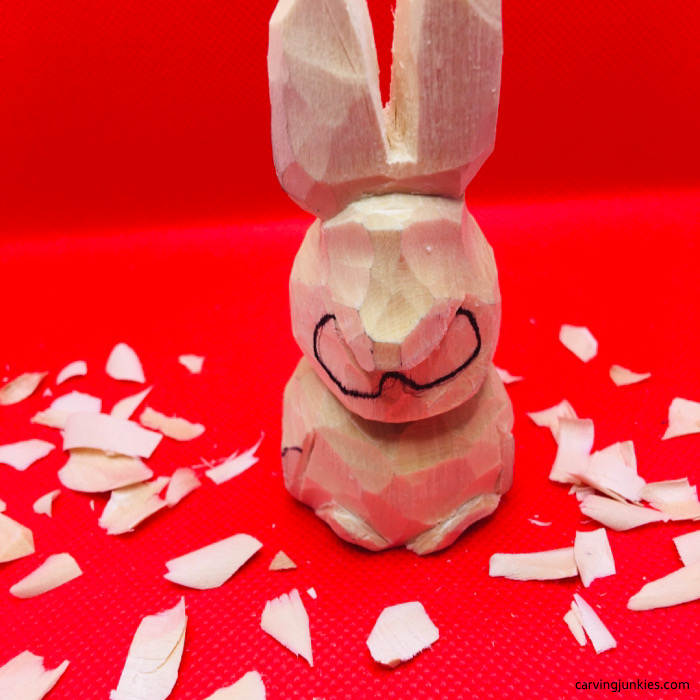 21. Jowls are redrawn
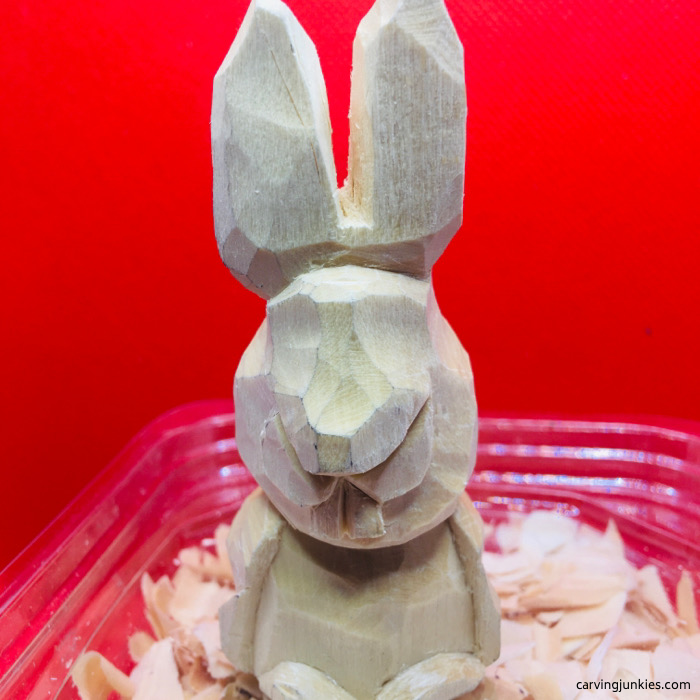 22. Buck teeth are added
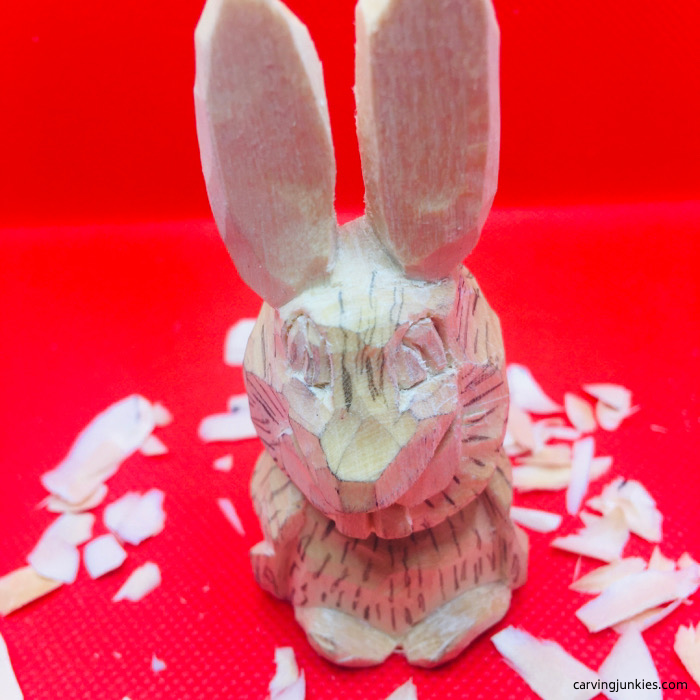 23. Fur lines are penciled in on front
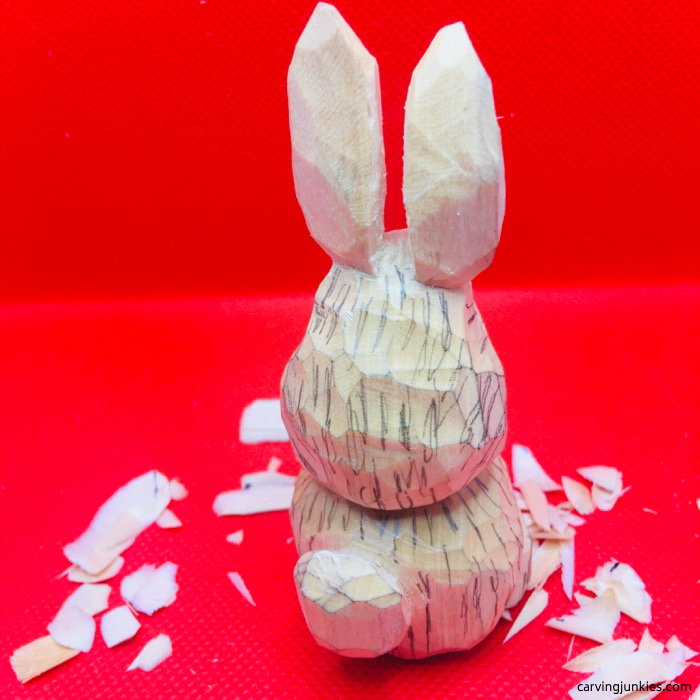 24. Back view
Adding the details
- Use a detail knife to carve in the eyes (photo 25).
- Also thin the ears and shape the inner ears using stop cuts on the side of each ear (photo 25).
- For the fur, use a detail knife to make a series of narrow V-cuts (or you can use a small gouge if you own one). Also make little stab marks in between the cut lines to create interest (photos 25-28).
- After looking the piece over, we decided to cut off more wood around each side of the nose (photo 25). It is not uncommon to noodle a bit at the end to get the exact shape you want. Enjoy the creative process.
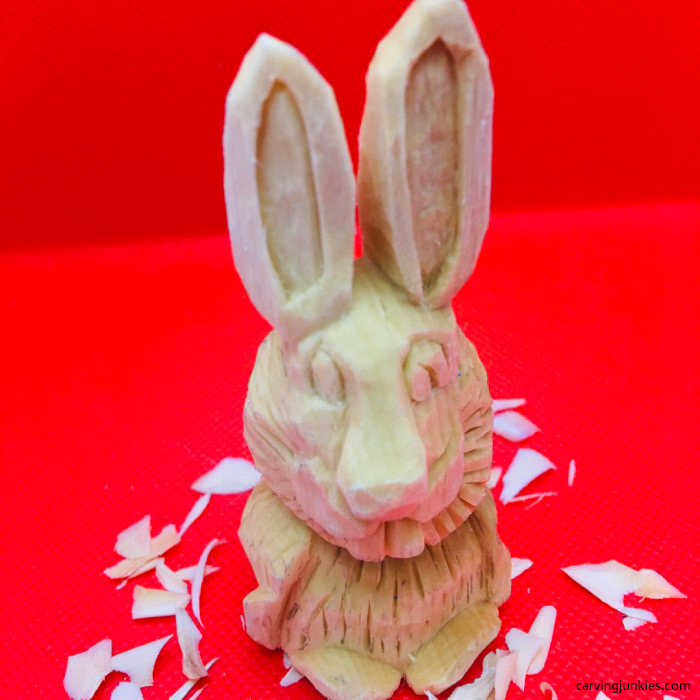 25. Face and ears are refined
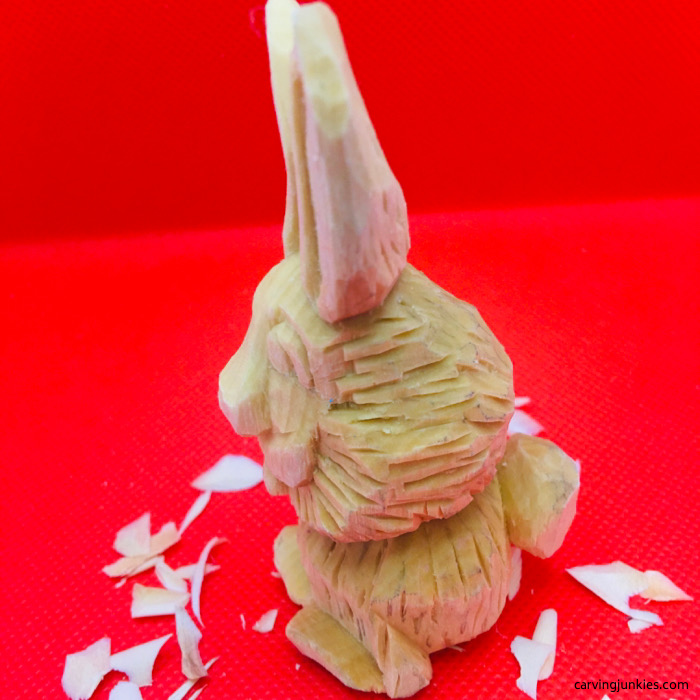 26. Left side view of fur cuts
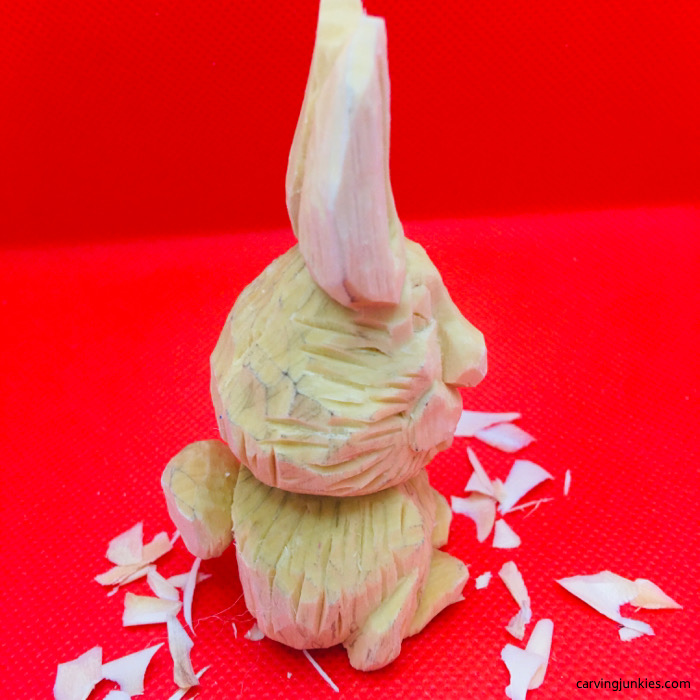 27. Right side view of fur cuts
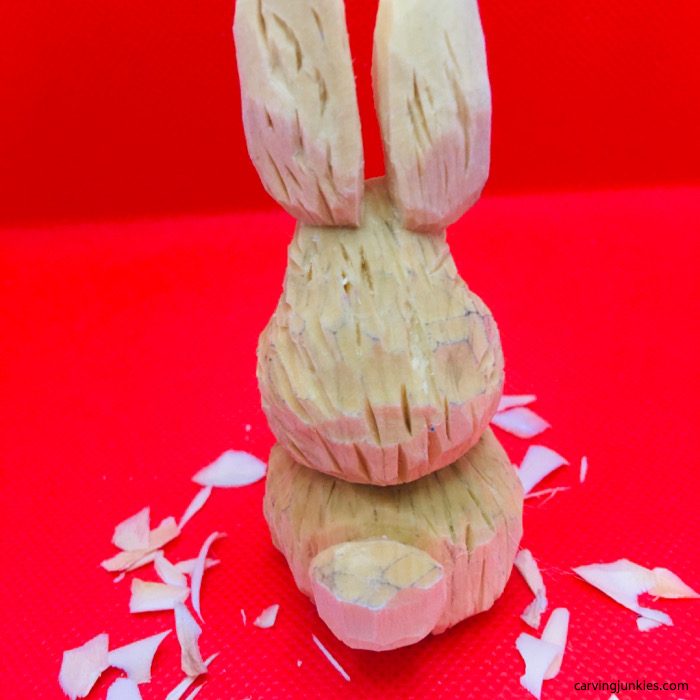 28. Back view
Get ready for painting
Clean up any fuzzies and wash your carving with soap and water to remove any pencil marks or soil prior to painting.
Some carvers like to paint their wood while it is wet to avoid the colors running together. You can try this on a scrap piece of wood first to see if you like the outcome. We let our rabbit dry overnight before painting.
Painting the rabbit
The trick to painting your rabbit wood carving is to allow each application of paint to dry thoroughly. If you’re impatient (like we are) you can use a hair dryer.
We like to make a wash of our paints by diluting them with water (except for areas like teeth and eyes where we may not dilute paint).
Here are the paint colors and brands we used if you want to get the same look. This is the order we used the paint as well:
- Teeth: 100% titanium white (Artists Loft).
- Body: dark grey (Craftsmart) one drop paint/25 drops of water for first coat and 1 drop paint/10 drops water for second coat.
- Face and jowls: Burnt sienna (Academy) 1 drop paint/50 drops water.
- Eyes: 100% black (ArtSkills).
- Nose: 1 drop red (Crafsmart) mixed with 3 drops of white/50 drops water.
- Tail: 100% titanium white (Artists Loft).
The last step for this rabbit wood carving was to use a technique called dry brushing where you dip the brush into the tube of titanium white and blot the brush on a paper towel until it is dry. Then apply little strokes to areas of the body to create visual interest.
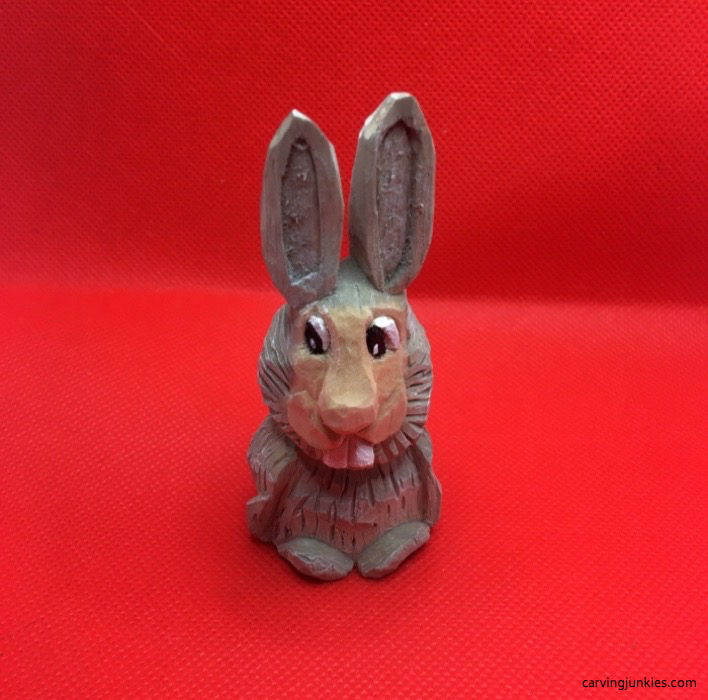 29. Painted rabbit from the front
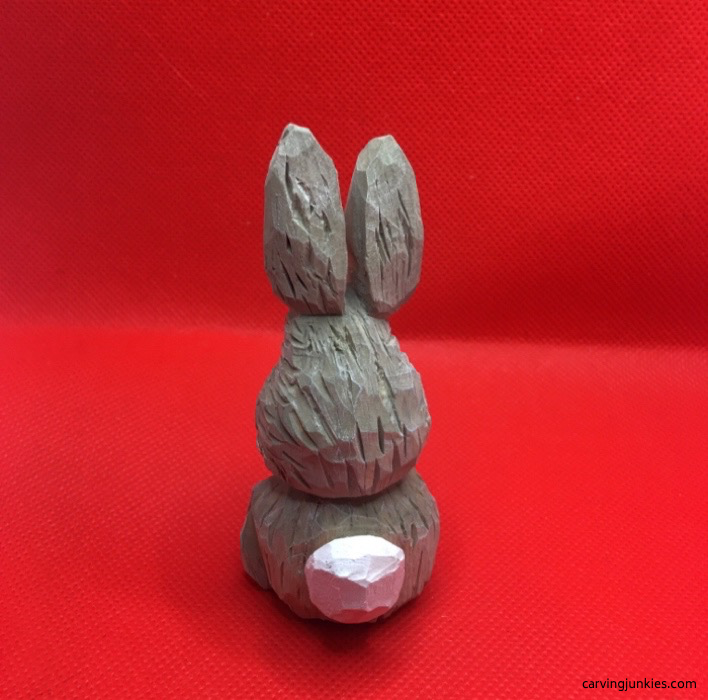 30. Back view
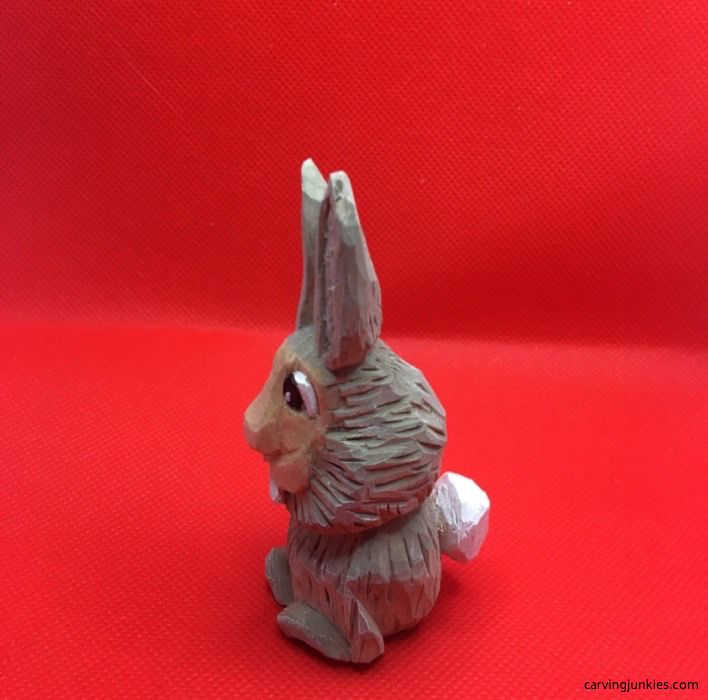 31. Left side view
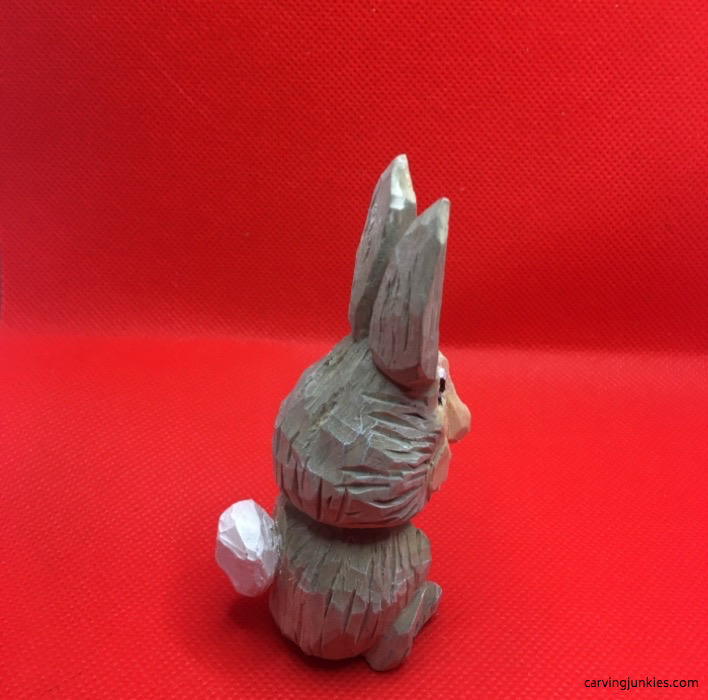 32. Right side view
Summary
- This rabbit wood carving is fun to do and makes a great little decoration for Easter (click here for Easter basket ideas).
- We would love to see how your rabbit wood carving comes out. Please share it with us!
Get 50 Wood Carving & Painting Tips when you join our FREE Covered in Chips club.
Share this page
carvingjunkies.com never sells your personal information.
This site uses cookies for its operation and to enhance your experience. As an Amazon Associate and Focuser Carving affiliate we earn from qualifying purchases.
Home | About Us | Privacy Policy | Terms of Use | Contact | Sitemap
