- Home
- Carving wood animals
- Seal wood carving
Simple seal wood carving tutorial
Carve yourself an adorable gray seal.
LEVEL: EASY
This seal wood carving tutorial was inspired by a week at one of my favorite places on earth—Cape Cod, Massachusetts. Over the years, more and more seals show up. One day, we saw 10 seals at one time! They were all swimming together and it was a glorious thing to see.
This design is simple and fun to carve. You will end up with a seal that is cute as a button and sure to bring a smile to your face.
Let’s carve it together!

Supplies needed for your seal wood carving
Use a basswood block that is 1 x 1 x 4 inches (2.5 x 2.5 x 10 cm). If you want to carve a bigger seal, simply double or triple the measurements.
Grab a pencil or pen and a ruler to sketch your seal wood carving. Or, you can use the pattern at the end of this page to guide your carving. Simply attach the front and back of the pattern to your wood block with glue or tape.
As always, wear a carving glove whenever you carve. Also, place a flat piece of wood—or a cutting board across the top of your legs—if you carve over your lap. One little slip can sever a major leg artery!
A painting guide is included at the end (this one’s easy)> Use whatever paint brands and brushes you prefer.
Seal wood carving tutorial at-a-glance
It may help to view this short video to see the key steps to this seal wood carving tutorial before you start carving.
Set up your seal wood carving
Draw a line about 3/4 of an inch (1.9 cm) from the top (all around) to mark the bottom of the head of your seal wood carving (photo 1).
Add a second line 2.25 inches (5.7 cm) from the top (all around) to mark the beginning of the tail (photo 1).
Draw a third guideline (all around) in the middle of the last section of your wood block (photo 1) to mark where you will split the tail (photo 1).
Photo 1A illustrates the proper orientation for your seal, which will be laying on its side.
 1. Guidelines are drawn
 1A. Block is turned
Roughout the head and tail of your seal wood carving
Remove wood from the top (photo 2) and bottom of the head (photo 3).
Narrow the tail by turning your wrist as you make your cuts, creating a curve as you shave wood off (photo 4). Continue removing wood until your tail looks similar to photo 5. You will split and refine the tail later (to avoid breaking it as you carve your seal wood carving).
 2. Rounding head top
 4. Narrowing and curving the tail
 3. Rounding head bottom
 5. Progress on curved tail
Set up the body of your seal wood carving
Roughly sketch the body of your seal wood carving (photo 6). I’ve colored the wood that you will remove to roughout the body.
Hold your wood looking down from the top (photo 7) and add little “tick” marks on the top (photo 7), which should roughly line up to where you will make your cuts on the front . Use the tick marks to roughly sketch your guidelines on the back side (photo 8).
Please don’t worry about your back guidelines being exactly the same as your front guidelines. Once you carve the front, it will be easy to match up the back. Tip: Turn your piece frequently as you carve to check your symmetry.
 6. Body is fully sketched
 7. Tick marks on top
 8. Back guidelines are added
Carve the head and body of your seal wood carving
Make V-cuts to remove all the marked wood and shape the body of your seal wood carving (photo 9). When you are done, your wood carved seal should look like photo 10. Also, add a center line on the front of the head (photo 10).
Start to carve off wood on each side of your centerline to form the seal’s protruding snout (visible from the side in photo 11).
On the front, draw a small box to reserve wood for the nose on the end of the seal’s snout (photo 12).
 9. Making V-cut to removed marked wood
 10. Progress shot with centerline
 11. View of snout from the side
 12. Reserving wood on snout front
Finish the snout on your seal wood carving
Carve wood off the top (photo 13) and bottom of the snout (photo 14). Also, create a flat surface for the eyes (visible in photos 13,16). Turn your wrist as you carve, which will help you create the snout. If you run into grain problems, try turning your piece around, or carve from side to side.
Continue to shape the head, snout, and body of your seal wood carving. When you are done, your seal snout should look like photos 15 and 16 (side view).
Sketch the facial details, flippers, and mark wood to remove to split and shape the tail (photo 15).
 13. Shaping the top of the snout
 15. Details are drawn
 14. Shaping the bottom of the snout
 16. Slide view of seal
Refine your seal wood carving
Mark where you will remove wood to reduce the size of the nose on the snout (photo 17). Carve off the marked wood and separate the smile lines (photo 18). You can use stop cuts here, or hold your knife like a pencil to carve the guideline—and make a second slicing cut. Or you can use a V-tool. Choose whatever method works best for you.
Continue separating the sketched features all around (photo 19), including the eyes (completed in photo 22).
Use a V-cut to split the tail (photo 20). Be very careful here not to break the tail (or your knife). You may want to make more than one pass to split the tail and safely remove wood. Tip: Rock your knife back and forth to deepen your cuts.
 17. Snout is marked for shaping
 18. Separating the details
 19. Separating the flippers
 20. Splitting the tail
Refine the tail of your seal wood carving
Narrow the thickness—and curve the tail—by shaving wood off the front and back (photo 21).
Sketch the tail lines (photo 22).
Use shallow V cuts to separate the tail lines (photo 23). Do not use too much pressure or you risk cracking your tail. Also, make small V-cuts to slightly notch the end of each cut (visible in the top of photo 23).
Sketch similar guidelines on the back of the tail (photo 24) and carve them in the same fashion.
 21. Shaping the tail
 22. Front tail lines are drawn
 23. Carving tail details
 24. Back tail lines are drawn
Prepare your seal wood carving for painting
Inspect your seal wood carving and make any final adjustments. Be sure to clean up your cuts (remove visible wood fuzzies), which will make your painting much cleaner.
 25. Front of unpainted seal wood carving
 26. Back view
 27. Right view
 28. Left view
Paint your seal wood carving
 29. Front of painted seal
 30. Right view of painted seal
 31. Left view of painted seal
 32. Back view of painted seal
Check out our page on painting a wood carving for great tips. Use whatever paint brushes you prefer. To get the same look, use these acrylic paints:
- Body: Apple Barrel dolphin gray wash and reserve extra paint.
- Flippers, nose, and tail: Add one drop of Ceramcoat black to reserved gray wash. While slightly wet, add 100% dolphin gray to half of the face, belly, and the beginning of the tail. Blend paint with your brush.
- Eyes, dots, and nose: 100% black. You can use a toothpick for small dots.
- Whiskers: Black magic marker.
- Eye whites: Dolphin gray 100%.
- Dry brush with CraftSmart vanilla.
- Use your finish of choice (I used Howard’s Feed-N-Wax).
Get 50 Wood Carving & Painting Tips when you join our FREE Covered in Chips club.
You might like these
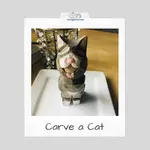
Carving a Cat Using Just a Knife Tutorial
Carving a cat is easy with our step by step tutorial with tons of photos from every angle
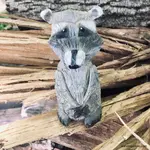
Raccoon Wood Carving With a Knife Tutorial From A Block of Wood
Raccoon wood carving tutorial carved from a block of wood with just a knife and no bandsaw.
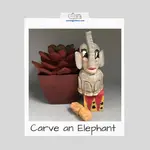
How to Carve an Elephant With Just a Knife
How to carve an elephant with only a knife is easy with this tutorial.
Share this page
carvingjunkies.com never sells your personal information.
This site uses cookies for its operation and to enhance your experience. As an Amazon Associate and Focuser Carving affiliate we earn from qualifying purchases.
Home | About Us | Privacy Policy | Terms of Use | Contact | Sitemap