- Home
- Wood carving gnomes
- Small wood carving
Small wood carving caricature tutorial
Carve a little guy with a big nose.
LEVEL: SOME CHALLENGES
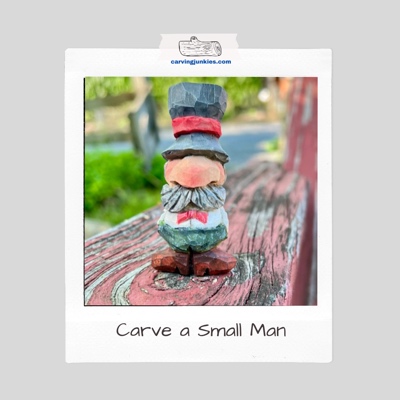
It’s time for a small wood carving caricature! This little guy reminds me of character you would see at a bar in an old time saloon in the West.
He’s got an oversize caricature nose and beard, a wide bottom, and is wearing a bow-tie.
He’s a really fun, little whittle—and a design that has just enough details to make him interesting, but not overly challenging. He also does not have carved eyes to draw more attention to his big nose.
Have fun with this one!
What you will need for your small wood carving caricature
Use a wood block that is 1 x 1 x 3 inches (2.5 x 2.5 x 7.6 cm).
You will need a ruler and writing instrument to sketch your guidelines.
I always advise wearing a safety glove (and protecting your lap with something flat and hard) no matter how experienced a carver you are. Accidents do happen and we rarely see them coming!
You can carve this entire caricature with just a knife, or use a U-gouge to carve the nostrils (a great tool to have on hand if you continue carving faces).
As always, a painting guide is included at the end to help you get a similar look.
Small wood carving caricature tutorial at-a-glance
You may want to watch this short video that provides an overview of the key steps to this tutorial before you start this small wood carving tutorial.
Set up your small wood carving caricature
You will carve off the corner for this wood carving.
Draw a guideline all around that is about 1/4 inch (0.64 cm) from the bottom (photos 1,2). Draw a second guideline all around that is 1.5 inches (3.8 cm) from the bottom. Draw a third guideline above the second one to mark the top of the nose, which is about 1/2 inch (1.3 cm) higher and is 1/2 inch (1.3 cm) wide on each side of the front corner—and angles down to 1/4 inch (0.64 cm) above the guideline below it— extending all around (photos 1,2).
Note: Ignore the word ”robe” in photo 1. This carving went in a different direction than initially planned. Sometimes the wood ”speak” and I must obey!
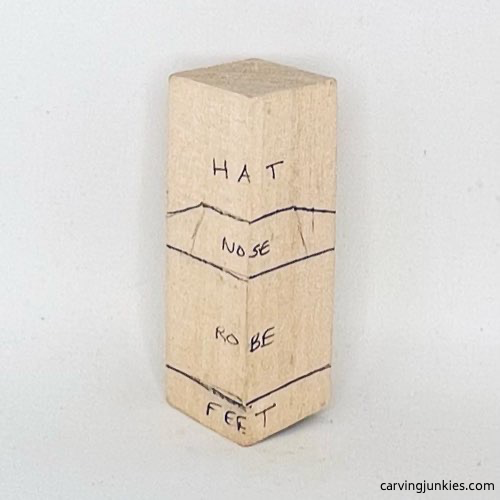 1. Front guidelines
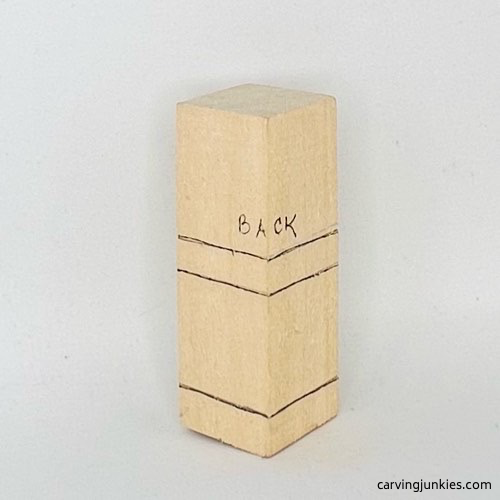 2. Back guidelines
Roughout your small wood carving caricature
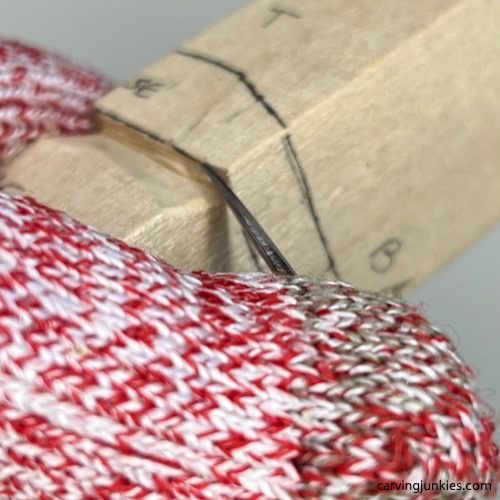
Use stop cuts (photo 3) to separate the guideline for the feet all around, removing wood from underneath. Continue in this same fashion to separate the next two guidelines (photo 4).
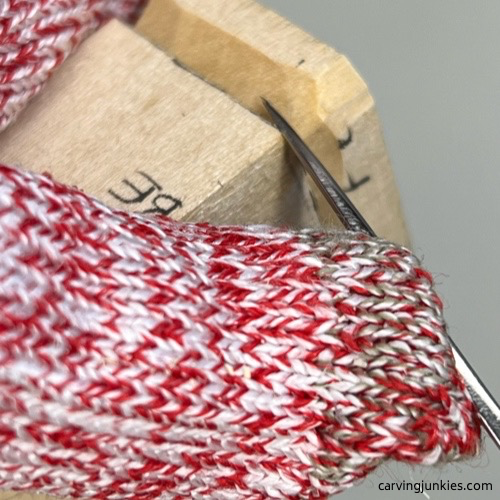 3. Stop cut to separate guideline
 4. Using stop cuts on the second guideline
Sketch some details on your small wood carving caricature
Sketch the hat, and color the wood to remove on the front and back (photos 5,6). You will remove about a 1/4 inch (0.64 cm) ) on each side.
Sketch the wide nose and cheeks (photo 5). The nose extends about 3/4 inch (1.9 cm) on each side. Sketch the mustache. The mustache extends about 3/4 inch (1.9 cm) on each side and almost 1/2 inch (1.3 cm) high.
Draw the top of the pant line, which is about 3/4 inches (1.9 cm) below the bottom of the nose (photos 5,6).
Also, mark where you will split the legs (photos 5,6). The width is less than 1/4 inch (0.64 cm).
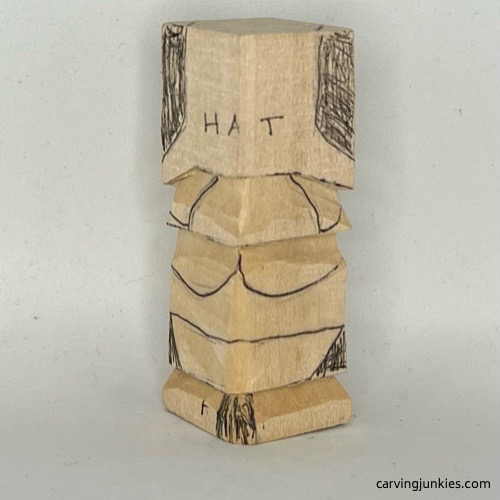 5. Front details
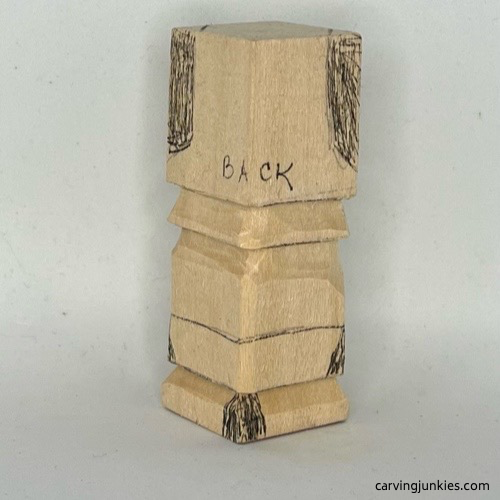 6. Back details
Carve the hat on your small wood carving caricature
Make a wide V-cut to start the hat (photos 7,8). Once you have access, you can slice the remaining wood off.
After removing wood from the other side of the hat, add a brim line all around that is a little more than a 1/4 inch (0.64 cm) wide (photo 9).
Make stop cuts along the hat brim line and remove wood from above (photo 10). Keep the brim thick for now. You will refine the hat later (to avoid breaking the brim).
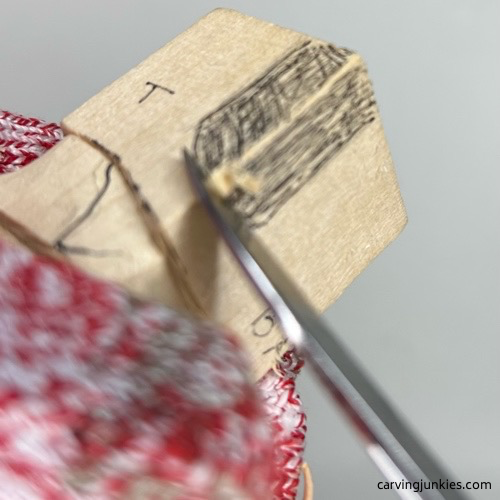 7. Making a V-cut
 8. Progress on hat
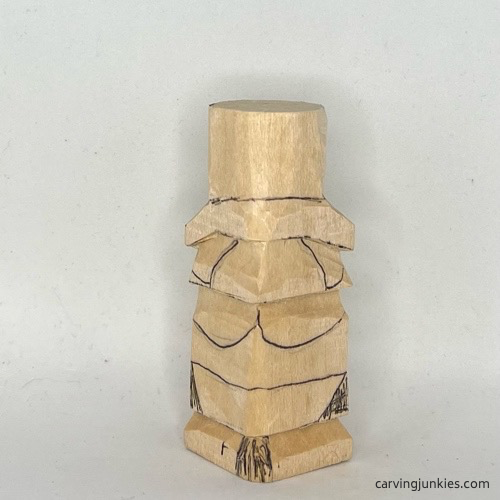 9. Brim on hat is drawn
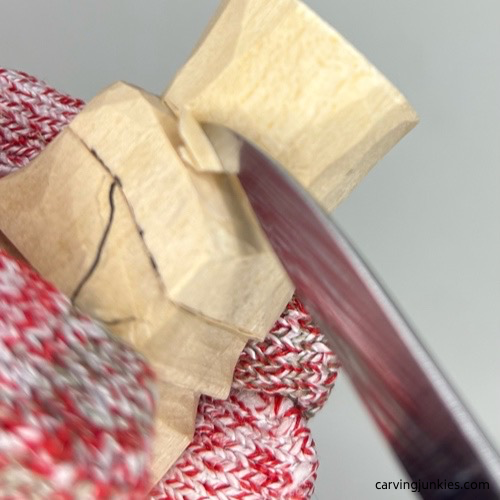 10. Carving the brim
Carve the nose on your small wood carving caricature
You can hold your knife like a pencil and move it along the nose guideline (photo 11) and make a second slicing cut to remove wood. Or, you can use stop cuts to separate the nose.
Shape each side of the nose and each cheek (photo 12). Tip: Carve at a downward angle up to the eye sockets (photo 13) to shape the top of the cheeks.
Sketch on the nostrils (photo 15). Use your knife (or a U-gouge) to carve the nostrils.
Use stop cuts to separate the mustache (photo 14). Once you have access on top of the mustache, you can further refine the cheeks.
 11. Separating the nose
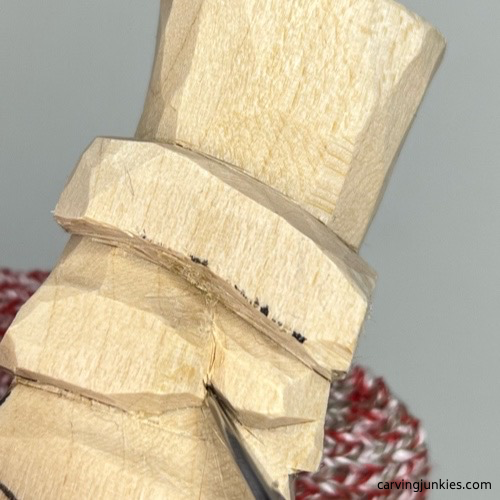 12. Shaping the nose
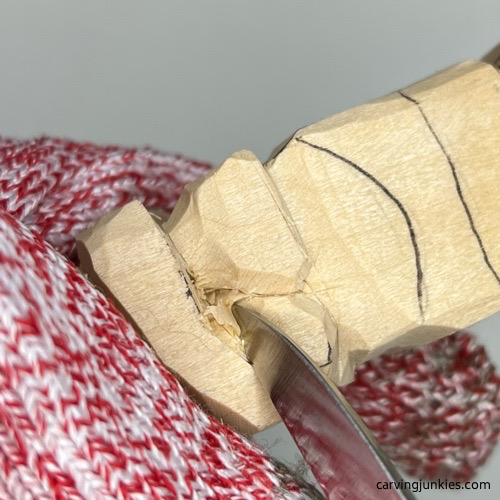 13. Carving up to the eye sockets
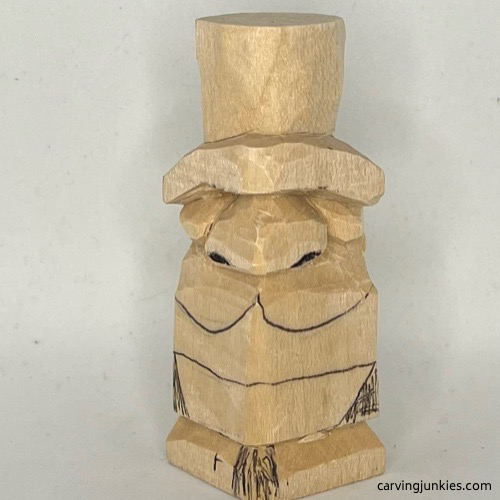 14. Nostrils are drawn
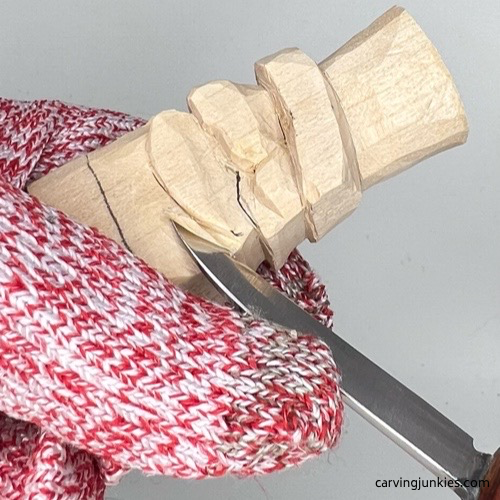 15. Separating the mustache
Add the arms to your small wood carving
Sketch the right arm (photo 16) and the left arm (photo 17). The arms are about 1/2 inch (1.3 cm) wide. Tip: you can draw a center line to help guide your sketch.
Use stop cuts to separate the arms (photo 18), removing wood around your cuts. Make a pyramid cut to carve the inside crook of each arm (photo 19).
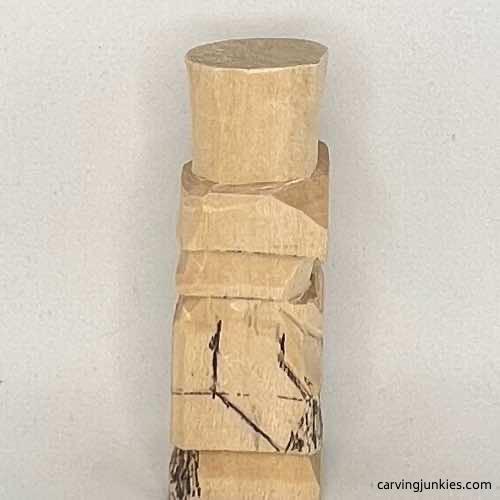 16. Right arm is drawn
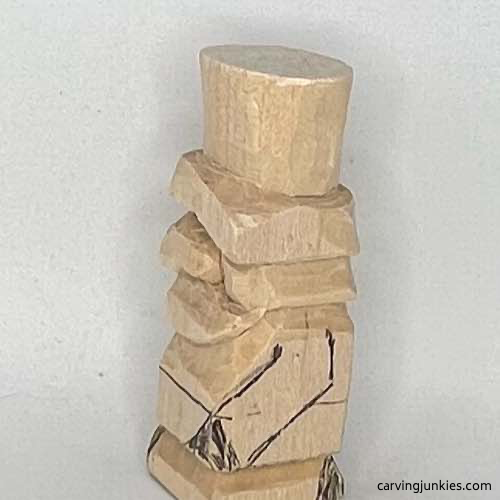 17. Left arm is drawn
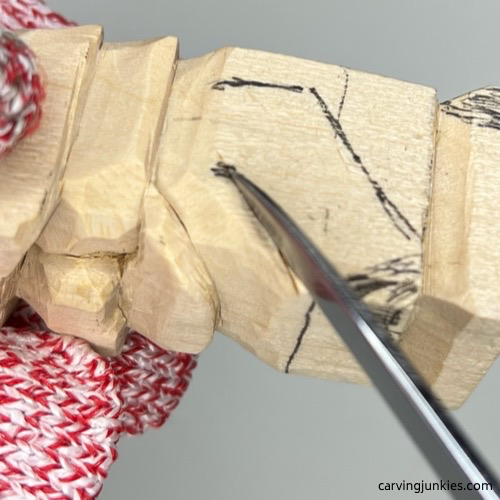 18. Making a stop cut
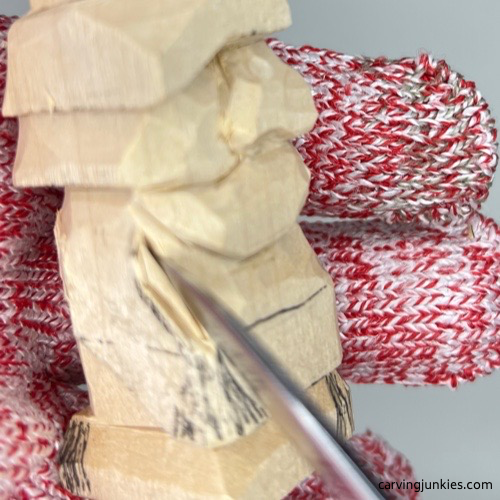 19. Making a pyramid cut
Refine some details on your small wood carving
Make stop cuts to separate the waist all around (photo 20), removing wood from above your cuts. Also, shape the stomach and inner arms.
Use a V-cut to split the feet and the legs (photo 21). Carve the shape of the shoes (completed in photos 22,23). Note: You will sketch the heels in the next section before carving them.
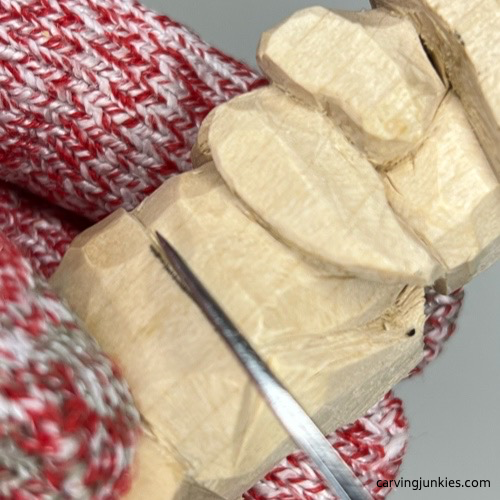 20. Separating the waist
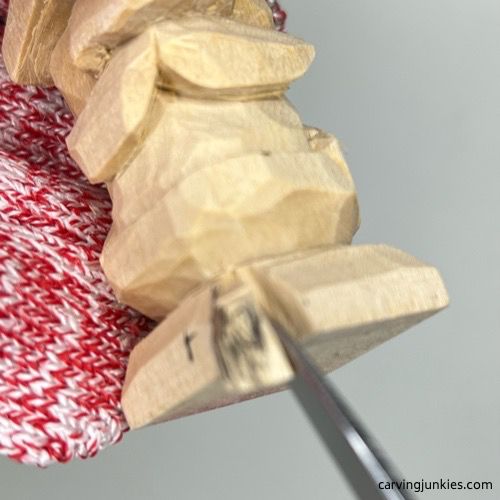 21. Splitting the feet
Add final details to your small wood carving
Sketch the bow-tie, shirt front, and where you will make V-cuts to carve the front heels on your small wood carving (photo 22). On the back, sketch the little Y for the tush and the back heels (photo 23).
Carve these details and shape the brim of the hat all around. I used a micro U-gouge to deepen the nostrils further (completed in photo 24), but you can achieve the same look by carefully shaving wood off with your knife. Just take your time and be careful not to break the nose.
Use small stop cuts to separate the bow tie, carefully removing wood from around your cuts. Or you can make one cut holding your knife like a pencil—and make a second slicing cut—to remove the wood.
Remove some wood from under the pockets so it appears that his hands are bulging slightly from inside his pockets (completed in photo 22).
Also, shape the mustache, and refine the cheek, to accentuate the mustache (photo 22). Sketch some S-shaped lines on the mustache (photo 24) that you will carve in the next section.
 22. Final front details are drawn
 23. Back details are drawn
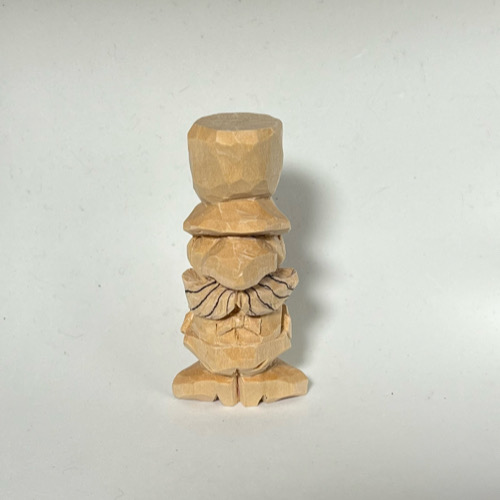 24. Mustache lines are drawn
Clean up your small wood carving
Add a few wrinkles to the inner arm, pants, and the hat (completed in photos 25-28). Make a slicing cut on each side of the cheek to separate the hairline (visible in photos 25-27).
Clean up your cuts and check for symmetry (I had to slightly reduce the width of the right arm, which is visible in photo 26). Make stop cuts all around the hat, to create the bottom of the band (photos 25-28), removing wood from underneath. Make another top cut on the top of the band, removing wood from above. The width of the band is about 1/4 inch (0.6 cm). Tip: Sketch the band before you carve it.
Narrow the wood above the band all around a bit to further accentuate the big nose of your small wood carving caricature (photos 25-28). Carefully reduce the thickness of the brim under the band. Tip: Turn your wrist as you make your cuts. Take your time here.
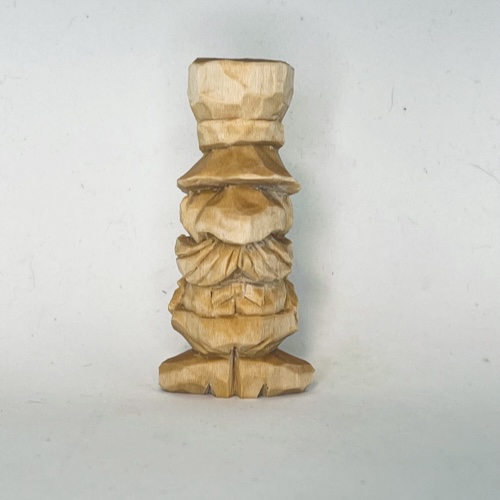 25. Front view prior to painting
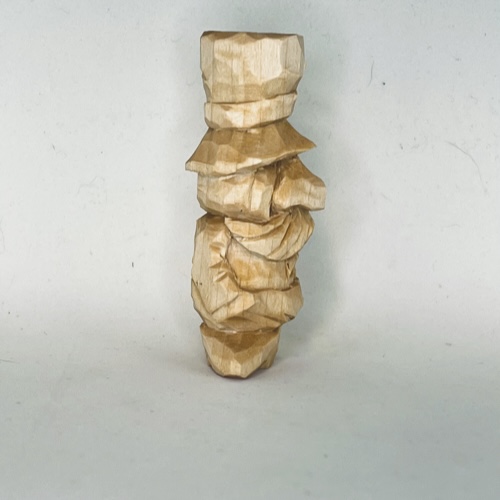 26. Right view prior to painting
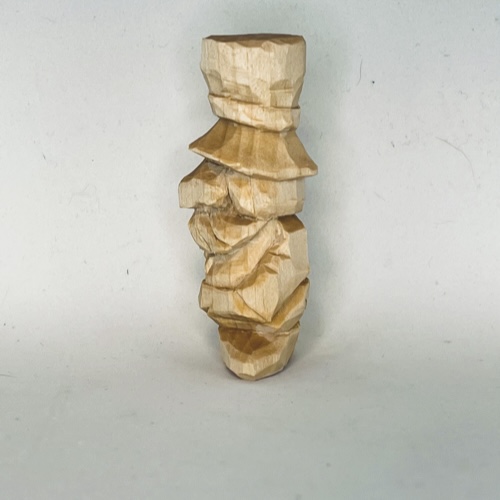 27. Left view prior to painting
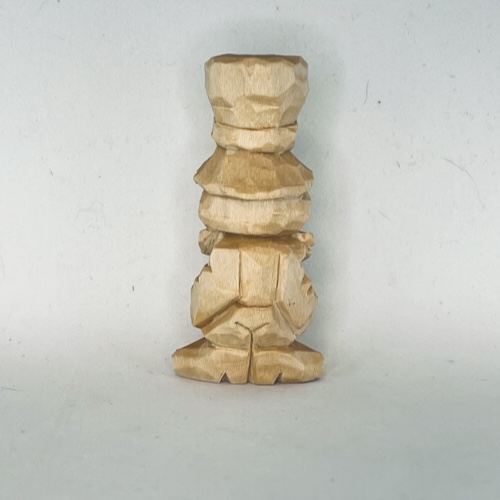 28. Back view prior to painting
Add color to your small wood carving
For great painting tips, read this page. All paints listed below are mixed with drops of water to create a milky wash (unless otherwise noted).
Start with light washes and build your colors in layers. To get a similar look, here are the paints/brands to use:
- Face: Ceramcoat tawny medium wash with 1 drop of Academy burnt sienna.
- Shirt: Craftsmart vanilla wash. Shadow around shirt cuts: add 1 drop Ceramcoat black. Save reserved paint.
- Hat and shoes: Add 1 more drop of black to reserve of white paint wash. Add water as needed.
- Hat band and bow tie: Wash of DecoArt calico red.
- Pants: Apply Ceramcoat leaf green wash and reserve extra paint. Add 1 drop of black to wash and more water (as needed) to darken the green paint.
- Beard and hair: Apple Barrel dolphin gray wash. Let dry completely and dry brush beard, hair, and nostrils with 100% Ceramcoat black. Dry completely and dry brush with 100% vanilla.
- Shoes: Winsor & Newton burnt sienna wash.
- Cheeks and nose tip: very diluted wash of calico red.
- To highlight nostrils: wash of Ceramcoat terra cotta.
- Pants: Dry brush with white and let dry. Then dry brush with black.
- Shoes: Dry brush with burnt sienna.
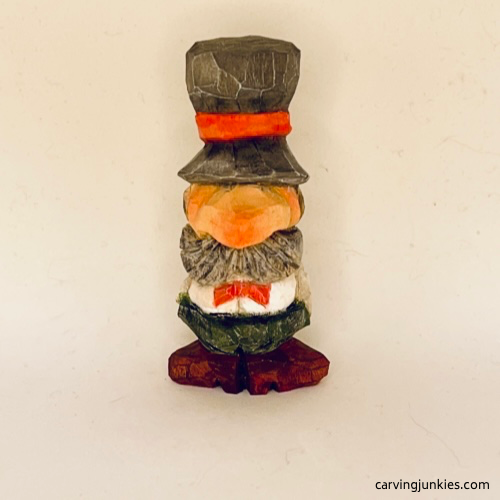 29. Painted front of small wood carving
 30. Right side of small wood carving
 31. Left side of small wood carving
 32. Back of small wood carving
Get 50 Wood Carving & Painting Tips when you join our FREE Covered in Chips club.
Share this page
carvingjunkies.com never sells your personal information.
This site uses cookies for its operation and to enhance your experience. As an Amazon Associate and Focuser Carving affiliate we earn from qualifying purchases.
Home | About Us | Privacy Policy | Terms of Use | Contact | Sitemap
