- Home
- Things to carve
- Snowman wood carving
Simple snowman wood carving tutorial
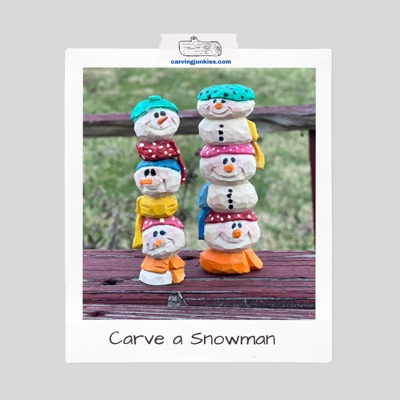
Carve yourself a cute stacked snowman.
LEVEL: EASY
Ready to make an adorable snowman wood carving? This step-by-step tutorial is your guide to crafting a charming stack of 3 little snowman faces, each adorned with a cozy scarf around the neck.
This is a super fun carve and these delightful stacked snowmen add a touch of winter warmth to your home.
Let your carving adventure begin!
What you need for your snowman wood carving
- Use a wood block that is 1 x 1 x 4 inches (2.5 x 2.5 x 10 cm). You can easily double or triple the measurements throughout this tutorial if you want to make a larger snowman wood carving.
- You will need a ruler and a pencil, pen, or magic marker to sketch your guidelines.
- Use your carving knife of choice. You may want to use a larger bladed knife to remove wood, and a smaller bladed detail knife to carve the mouth.
- A micro U-gouge is optional if you want to carve a little top on the first hat on your snowman wood carving. Or, you can simply leave it un-carved (like the one on the right in the picture above).
- You also have the option to use a micro U-gouge to carve out each nose, and securely attach a carved wooden toothpick with Crazy glue. Or, you can simply paint on the noses. If you are making a larger snowman wood carving, you can use a knife to carve a protruding nose.
- Please always wear a good carving glove for safety when you carve. If you plan to carve over your lap, be sure to protect your thighs with something hard like a cutting board or a flat piece of wood.
- A free painting guide is included at the end.
Snowman wood carving tutorial at-a-glance
View this quick video to see the key steps for making your snowman wood carving before you get started.
Setup your snowman wood carving
Sketch a guideline that is 1 inch (2.5 cm) from the top. Add a second guideline that is 1/4-inch (0.6 cm) below it. Repeat the same set of measurements until you get to the bottom of the wood block (photos 1-4).
Reserve wood for each snowman’s scarf on the corners (photos 1-4). Vary their placement for added interest. Note: For the bottom scarf, just reserve a box (visible in photos 1,3) as you will sketch the final scarf later.
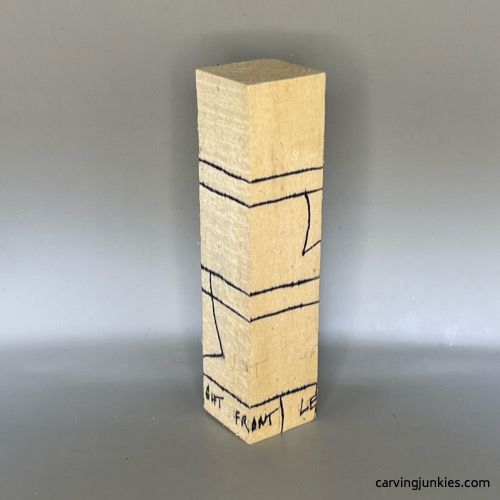 1. Front guidelines are drawn
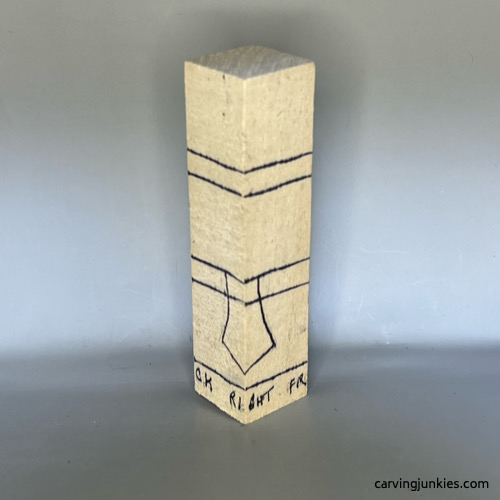 2. Right view of guidelines
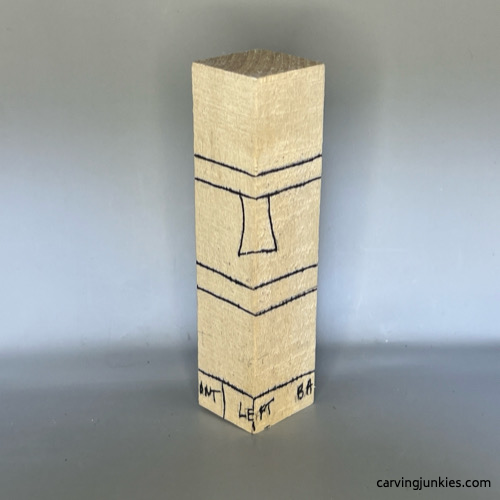 3. Left view of guidelines
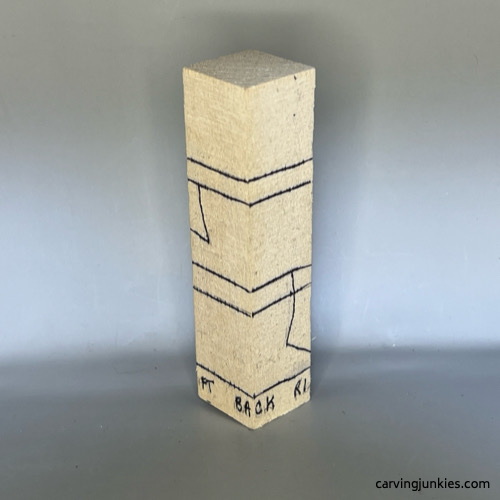 4. Back view of guidelines
Start your snowman wood carving
Use stop cuts to separate the guidelines all around (photo 5), removing wood from underneath. Or, you could use long V-cuts.
Also, separate the scarves (photo 6). You can use a paring cut and make a second slicing cut. Or, hold your knife like a pencil to make your first cut.
Round the heads of the bottom 2 snowmen (photo 7). Optional: Before rounding the top head, use a micro U-gouge to reserve wood for the top of the snowman’s hat (photo 8). Twist the gouge around to make a deep circle (photo 8). Tip: You might have to make a few passes to achieve your desired depth.
Use your knife to slice off wood around the circle (photo 9).
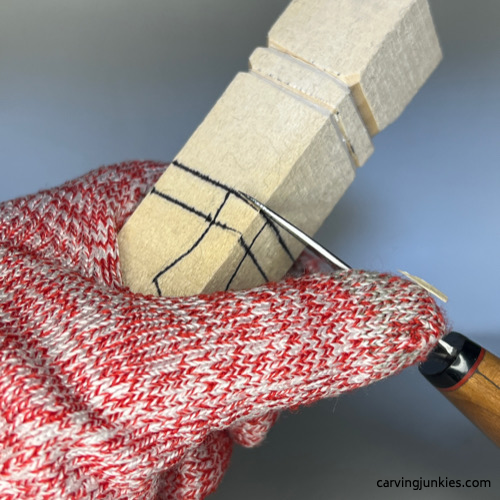 5. Using stop cut to separate guidelines
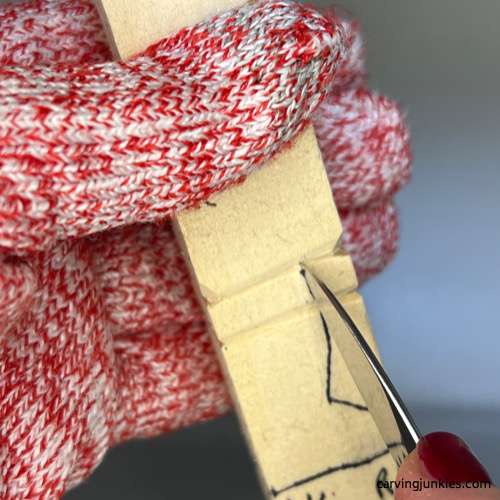 6. Separating a scarf
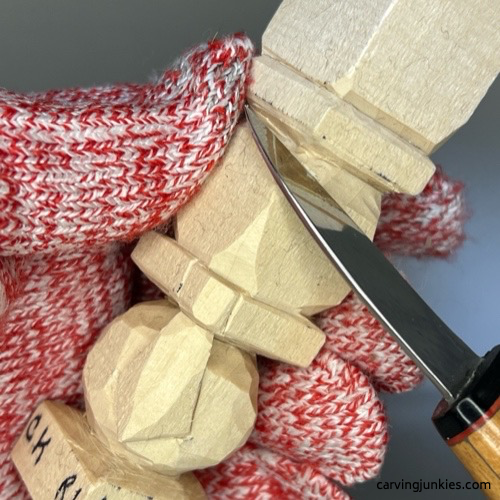 7. Rounding the heads
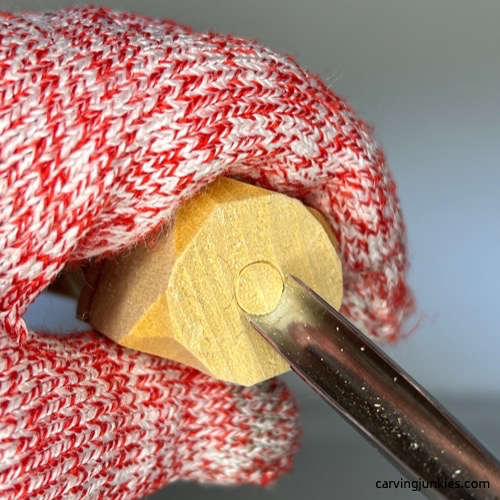 8. Twisting the micro U-gouge
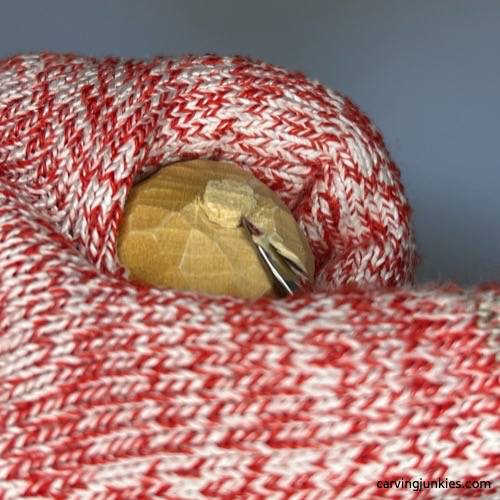 9. Removing wood to shape the top
Sketch some details on your snowman wood carving
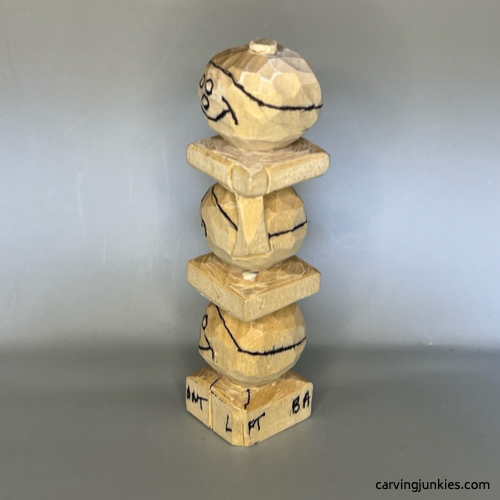
Sketch the noses on the front of your snowman wood carving (photo 10). Also, sketch the smile lines, mouths, eyes, and the bottom of the hats all around (photo 10). Note: The eyes are just for placement and will be painted later.
Vary the placement of your faces to create visual interest.
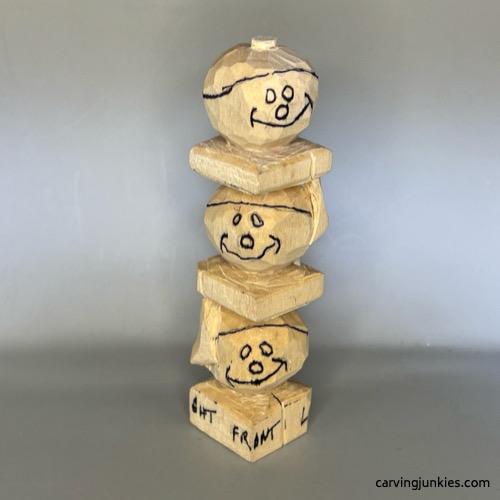 10. Details are sketched on front
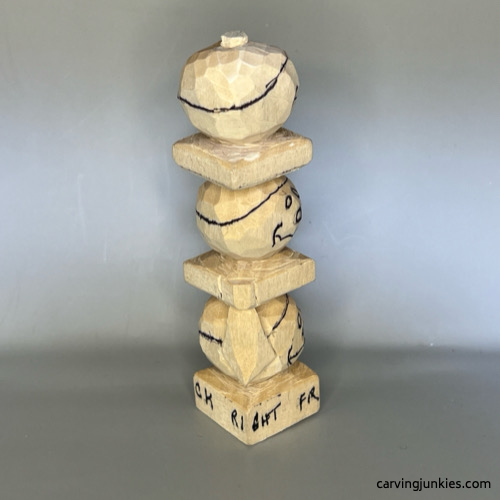 11. Right side details
 12. Left side details
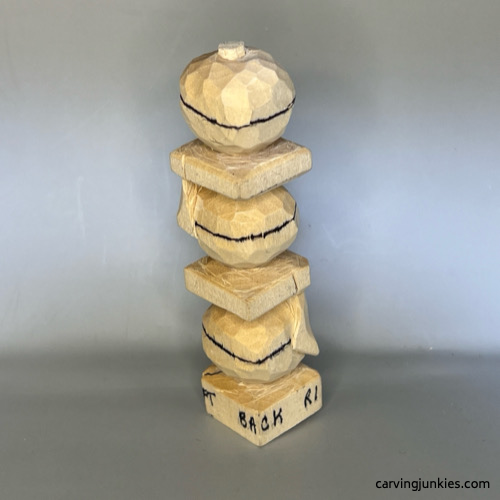 13. Back details
Carve the details on your snowman wood carving
Remove excess wood to carve and shape the scarves all around (photo 14), rounding the corners. Add a few random V-cuts on the scarves (competed in photos 16,17).
After rounding the bottom section of your snowman wood carving, sketch the bottom of the scarf all around (photo 15) and separate it. Tip: Measure the width of the top 2 scarves to be sure your third scarf is about as wide.
Use stop cuts or V-cuts to separate the hats all around, removing wood from underneath (photo 16).
Optional: Use a micro U-gouge to twirl and remove a clean circle of wood for each nose (photo 17). Later, you will glue on a pre-painted, carved toothpick for each nose. Or, you can skip this step and simply paint a round nose.
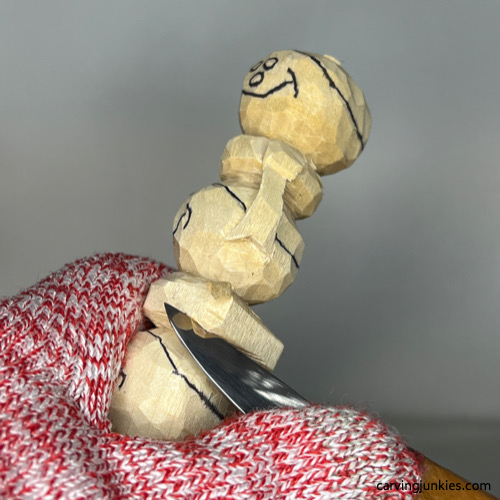 14. Shaping the scarf
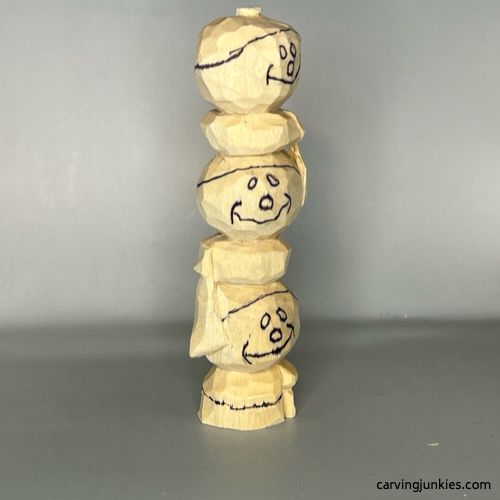 15. Third scarf is sketched
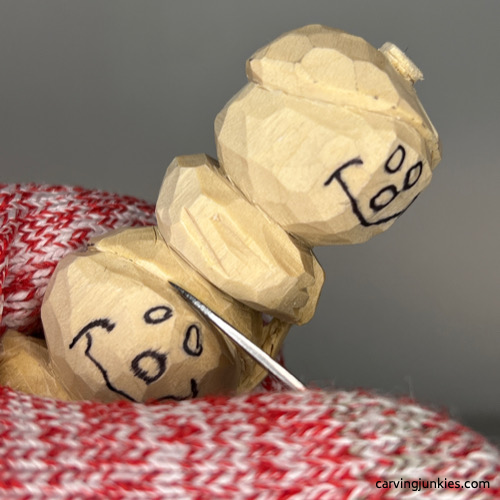 16. Separating the hat
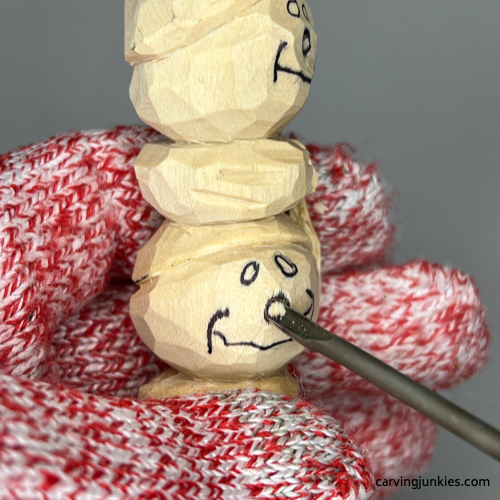 17. Removing small circle
Finish your snowman wood carving
Use your knife to separate the smile lines and mouths on each snowman (completed in photos 18-21). You can hold your knife like a pencil, or use a paring cut, or a stop cut. Make a second slicing cut to cleanly remove a sliver of wood (completed in photo 18).
Tip: Turn your snowman wood carving periodically to check for symmetry. Clean up your cuts prior to painting.
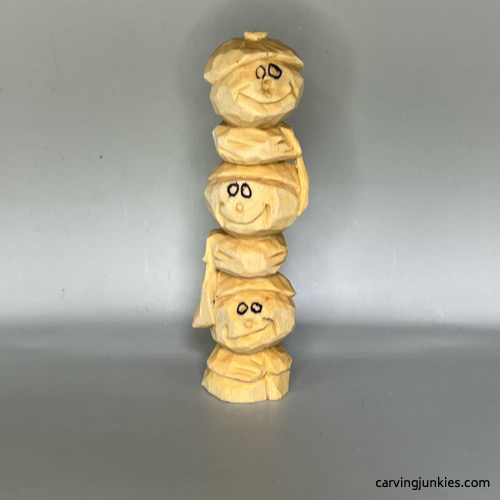 18. Front of snowman wood carving
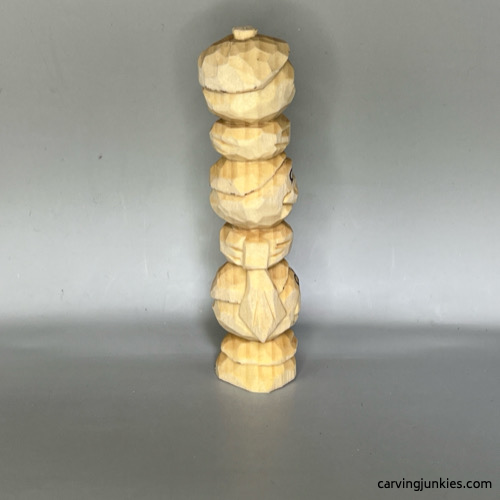 19. Right view
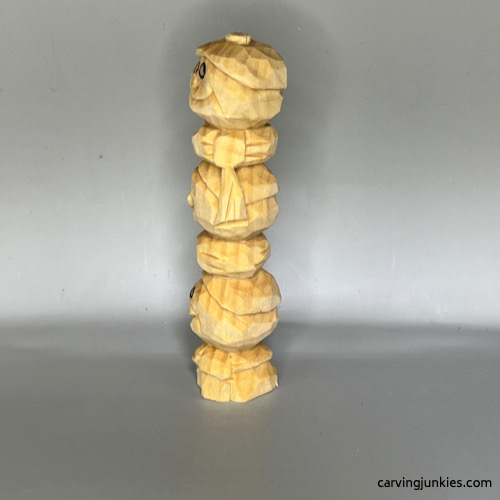 20. Left view
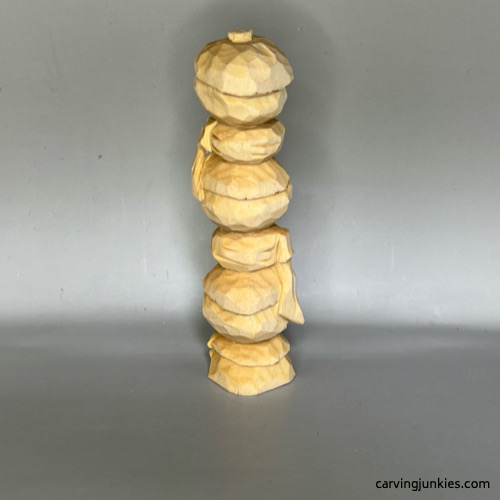 21. Back of carving
Paint your snowman wood carving
To get this same look, use the following acrylic paints. For general painting tips, including how to make an acrylic paint wash, read this page.
- Faces: Apple barrel antique parchment wash.
- Cheeks: Apple Barrel red (extremely diluted and dab with finger or paper towel after applying).
- Eyes: Use either black paint, a black paint pen, or a magic marker.
- Top hat: CraftSmart green teal wash; middle hat: CraftSmart bright blue wash; bottom hat: Ceramcoat fuchsia wash.
- Top scarf: Apple Barrel red wash; middle scarf: Ceramcoat yellow wash; bottom scarf: Ceramcoat pumpkin wash.
- Polka dots on hat and scarf: 100% CraftSmart ivory applied with a toothpick.
- Toothpick noses: 100% Ceramcoat pumpkin. Tip: carve the shape to fit, and allow paint to fully dry, before adhering with Crazy glue.
- Finish with your sealer of choice (I used walnut oil medium).
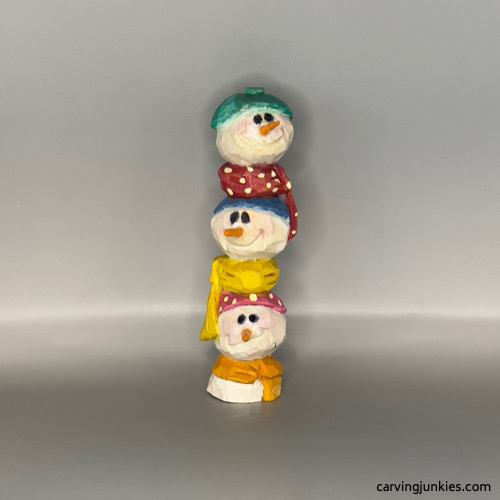 22. Front of painted snowmen
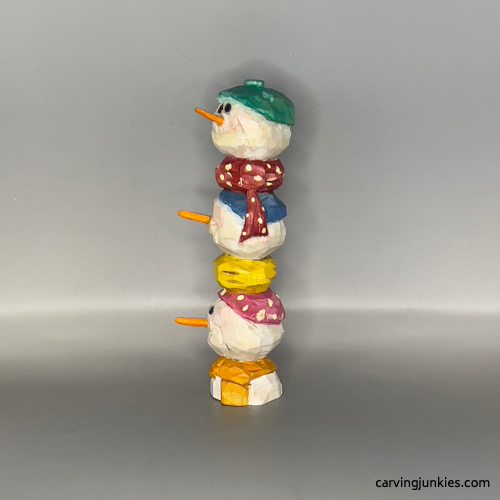 24. Left view of painted snowmen
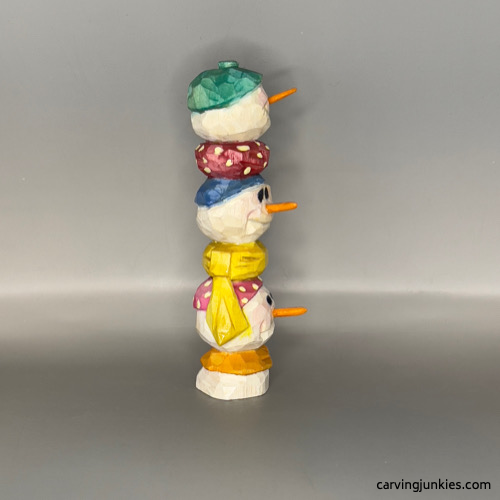 23. Right view of painted snowmen
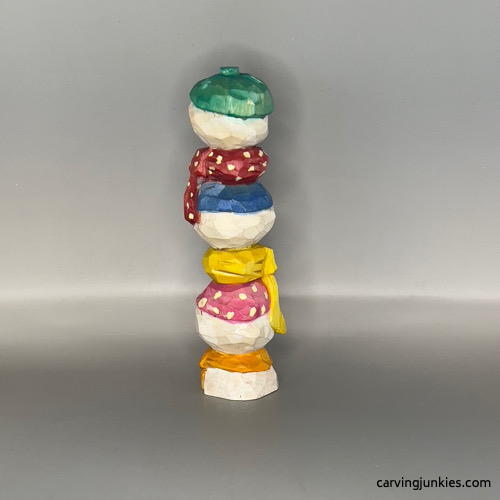 25. Back view of painted snowmen
Summary of snowman wood carving tutorial
- This adorable, stacked snowman wood carving is easy to carve and paint.
- Vary the position of the faces and scarves for added visual interest.
- If you are making a small carving, use carved and painted wooden toothpicks for the noses that can be applied with Crazy glue.
- Add a few polka dots for added whimsy.
Get 50 Wood Carving & Painting Tips when you join our FREE Covered in Chips club.
Share this page
carvingjunkies.com never sells your personal information.
This site uses cookies for its operation and to enhance your experience. As an Amazon Associate and Focuser Carving affiliate we earn from qualifying purchases.
Home | About Us | Privacy Policy | Terms of Use | Contact | Sitemap
