- Home
- Things to carve
- Troll carving
Tessie troll carving tutorial
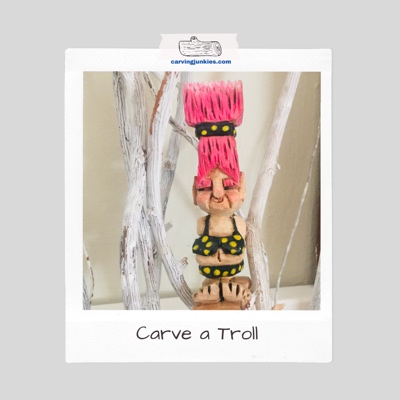
Carve yourself a pink-haired troll in a polka dot bikini.
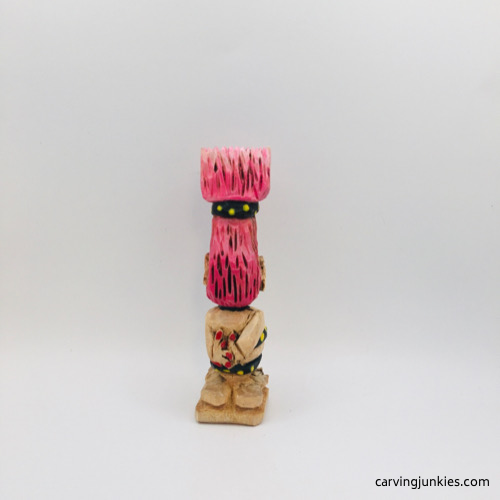
A girl troll carving! After our Atticus troll wood carving tutorial, we thought it would be fun to create a female troll. Meet Tessie, who is also from the Yashkin clan of trolls.
Tessie stores her cookware in her stone oven, and forgets they are there when she lights a cooking fire. This often results in a smoke-filled cave. She is not much of a cook anyway (or a housekeeper). She much prefers sunbathing.
This tutorial has fun details to carve, including big hair, oversized feet, a polka-dot bathing suit, and a matching hair band.
Our at-a-glance video below gives you a quick overview of the process. We do use some gouges, but if you do not have them, you can use a sharp detail knife instead. Just take your time.
Because of all the details, this tutorial includes lots of photos to guide your cuts along the way. Female wood carvings are tricky to get right!
Tessie troll carving tutorial at a glance
Supplies needed for our troll carving tutorial
You will need one block of wood for this troll carving tutorial. We use a basswood block that is 1 x 1 x 4 inches (2.5 cm x 2.5 cm x 10.1 cm). For tools, we use a sturdy roughout knife, a V-tool, and a 3 mm #47 gouge.
Keep a pencil or pen handy for drawing guidelines and details.
We always use a good safety glove and you should, too. Slips can (and do) happen!
Our free painting guide is at the end.
1. Draw guidelines for your troll carving
Draw your first guideline 1/2-inch (1.3 cm) from the bottom to mark the top of the feet (photo 1). The second guideline is 1.5 inches (3.8 cm) from the bottom to mark the bottom of the head (photos 1-4). Your third is 2.5 inches (6.3) from the bottom to mark the top of the head/hairline (photo 1). The final guideline is 3 (7.6) inches from the bottom to mark where the hairband will go (photo 1).
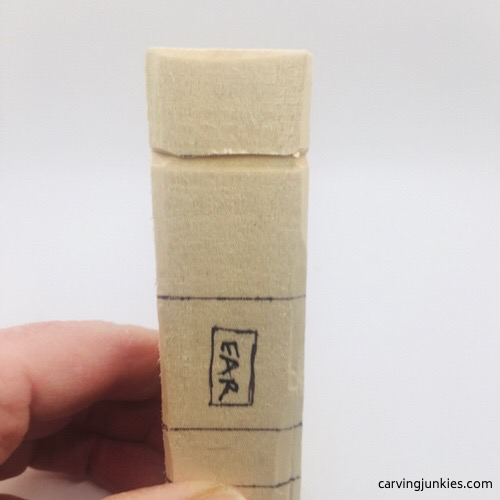
Also reserve a small box (1/4-inch wide [1.9 cm] and 1/2-inch [1.3 cm] tall) for each ear (photos 2,3).
Unlike many of our tutorials, we will not carve off the corner for this troll carving. We wanted to see if our easy nose carving technique would work just as well with a non-corner carving.
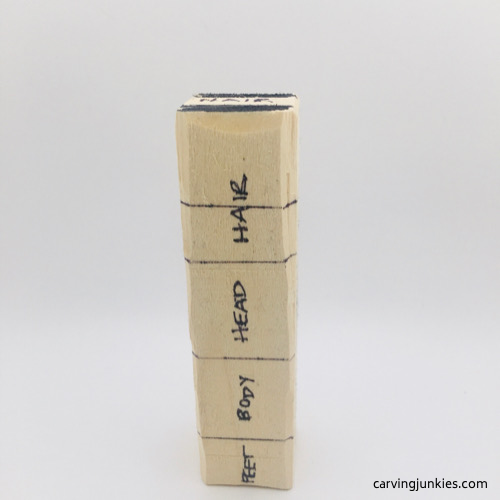 1. Troll wood carving guidelines
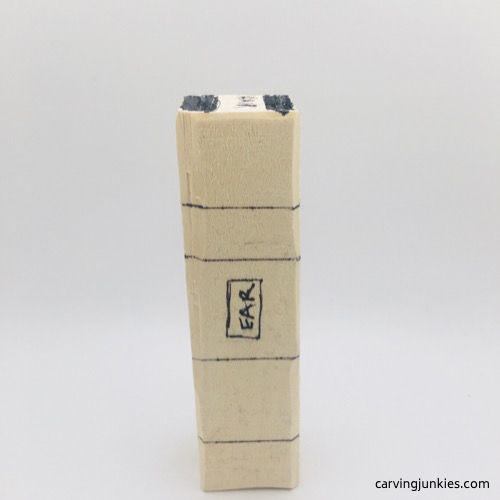 3. Left view with ear box
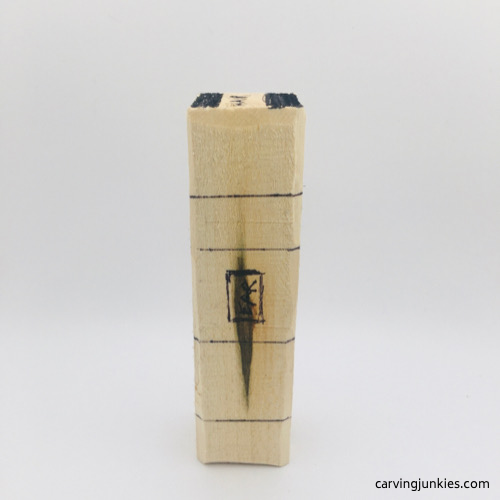 2. Right view with ear box
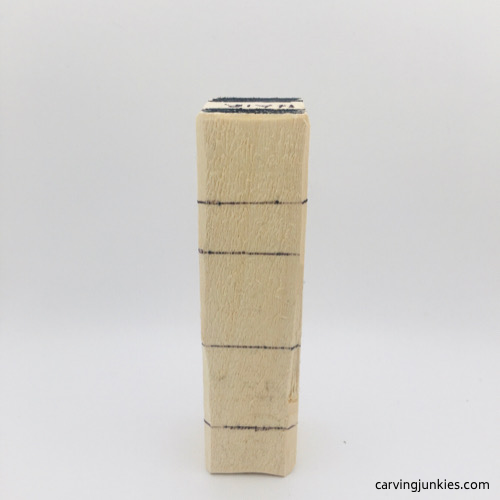 4. Back view of guidelines
2. Start cutting your troll carving
Using your knife, make stop cuts at the corners of each troll carving guideline (photo 5). It may help to rock your knife back and forth to make a cut as deep as it needs to be.
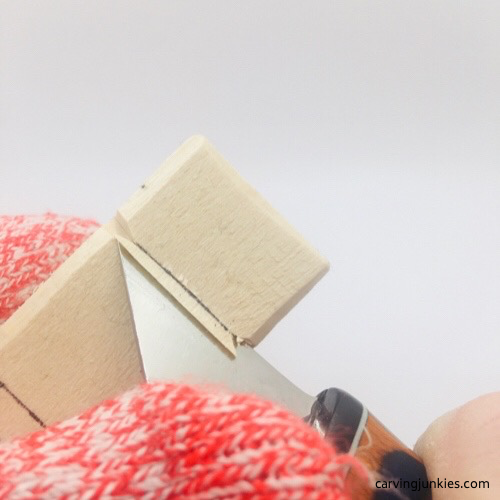
Remove wood from underneath your cut (photo 6). Then deeply drag your knife (carefully push it along with your thumb so it will not slide off the other side and risk cutting you) across the rest of the guideline (photo 7). Remove wood from underneath your cut (photo 8).
Your cut should look like photo 9. Now, repeat this process to separate every guideline all around the basswood block for the troll carving (photo 10).
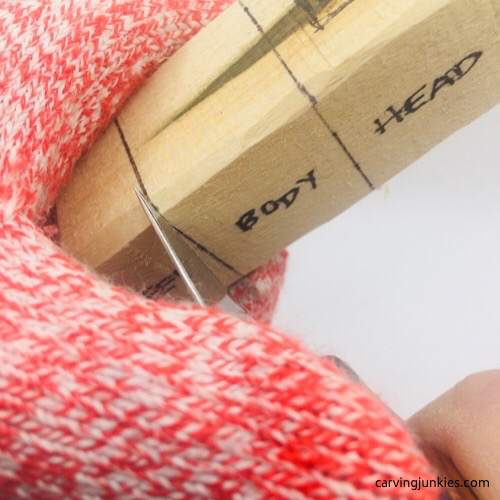 5. Making a stop cut in the corner
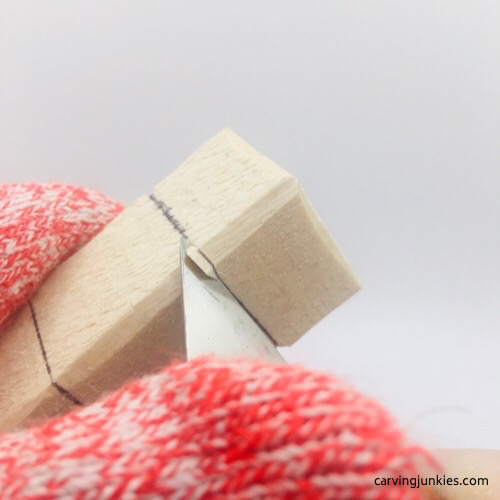 6. Removing wood under the stop cut
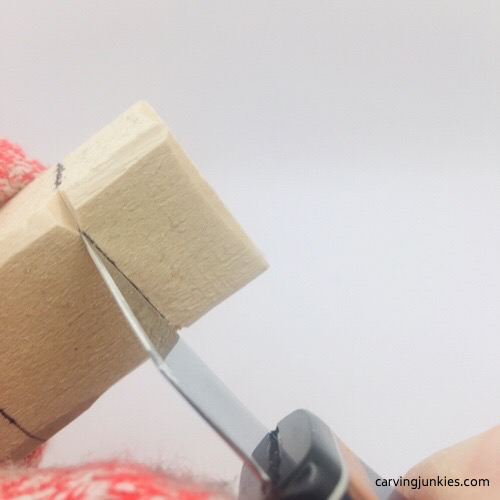 7. Drag the knife along the guideline between each corner
 8. Removing wood from underneath
 9. Cut is completed
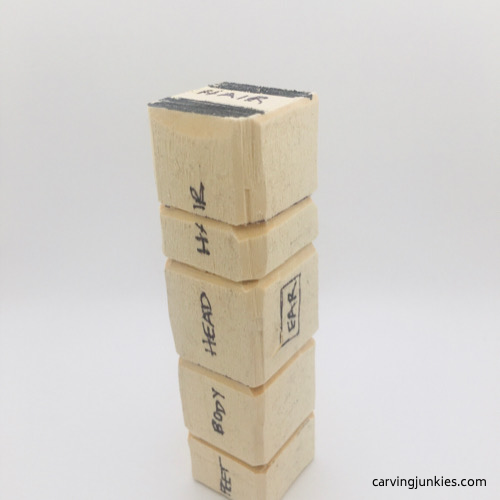 10. Guidelines are separated all around
3. Start the hair on your troll carving
Use your knife to start to angle back the hair from the top of the headband line upward on the troll carving (photo 11). When you are finished it will look like a square that gets thinner toward the top in the front (photo 12), and the top of a crayon from the side (photo 13).
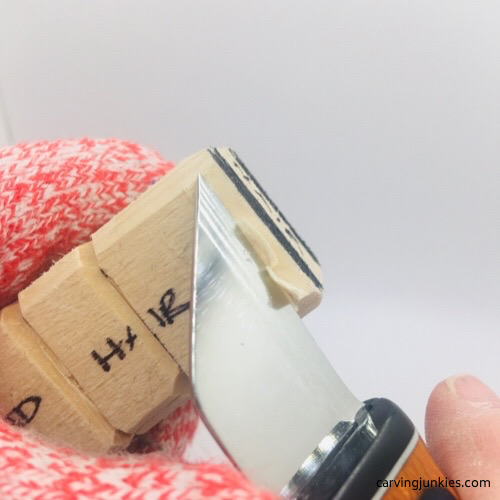 11. Cutting troll hair back
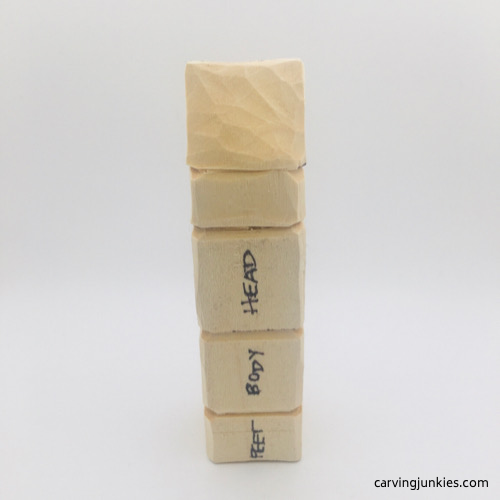 12. Front view of troll hair
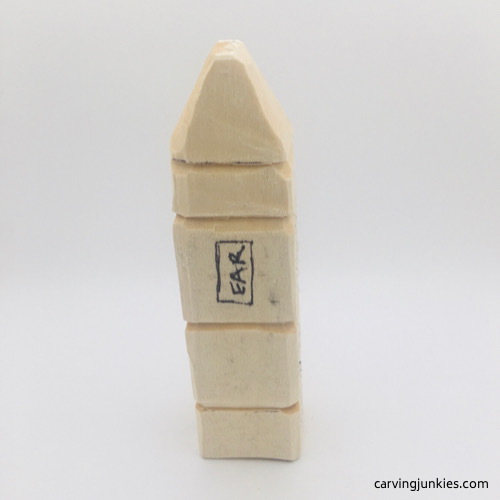 13. Side view of troll hair
4. Shape the hair of your troll carving
Starting at each corner, make an angled cut above and below the corner (photo 14). Make a second set of angled cuts between the corners on the front and back of the troll wood carving (photo 15).
You can see how the troll carving should look in progress photos 16 and 17.
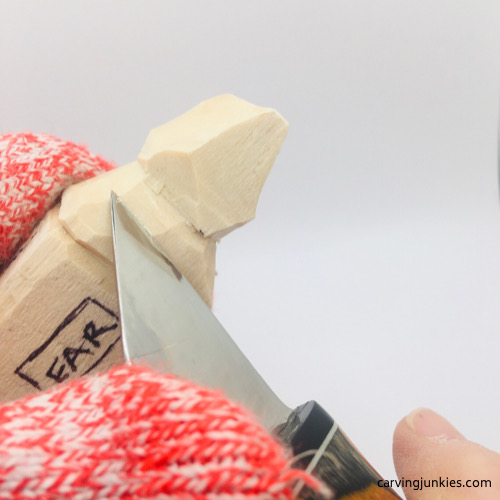 14. Making two angled cuts
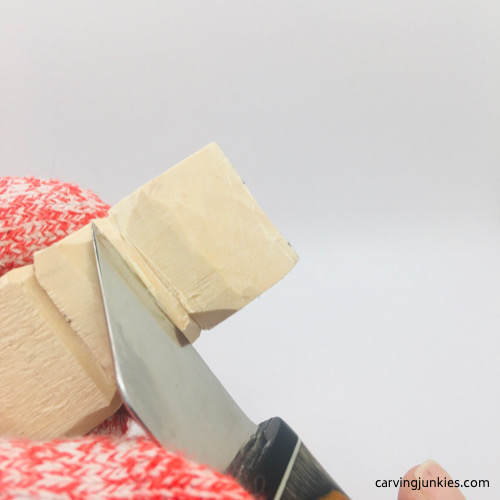 15. Second set of angled cuts
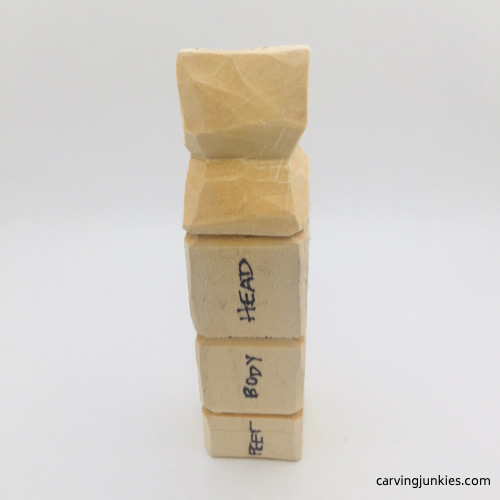 16. Progress with troll hair (front)
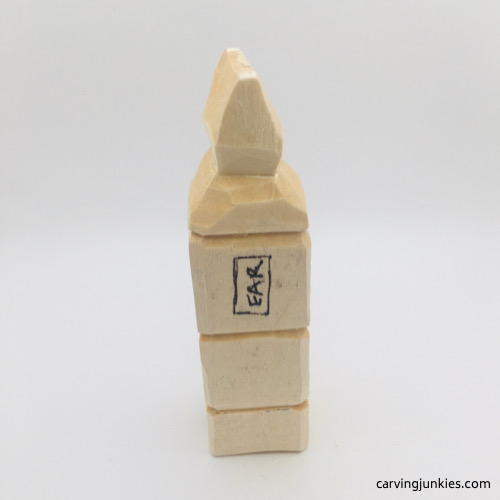 17. Progress with troll hair (side)
5. Separate the ears on your troll carving
Use a V-tool to outline the ear box and your knife to remove wood from around it on the troll carving (photo 18). If you do not have a V-tool, use stop cuts with a knife.
Once the outline is made, you can easily remove wood around the ear with your knife (photo 19).
Continue to remove wood until the ears stick out. Also mark wood on the front and back of the troll carving that you will remove to round the face (photos 20,21). As you carve off those sections of wood, you will be able to get your knife closer to the ears to increase their depth.
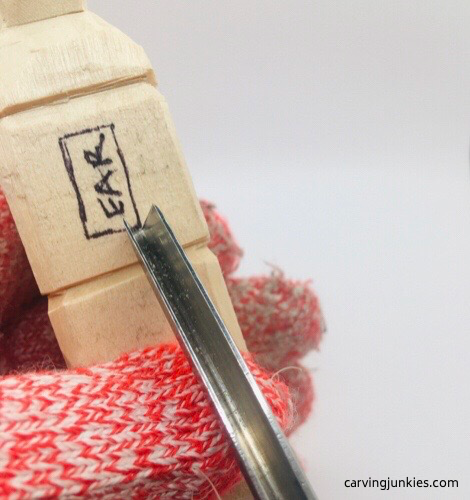 18. Outlining the troll ear
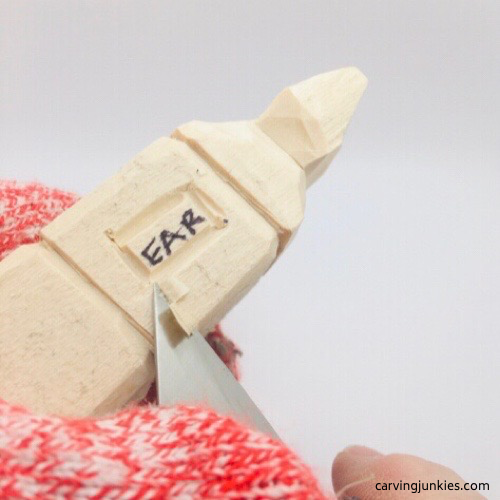 19. Slicing wood off
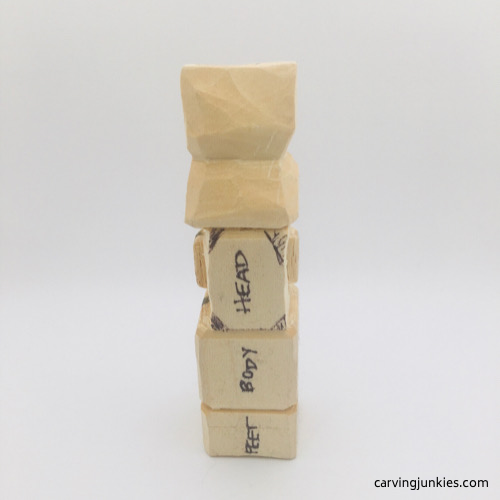 20. Ears separated (front view)
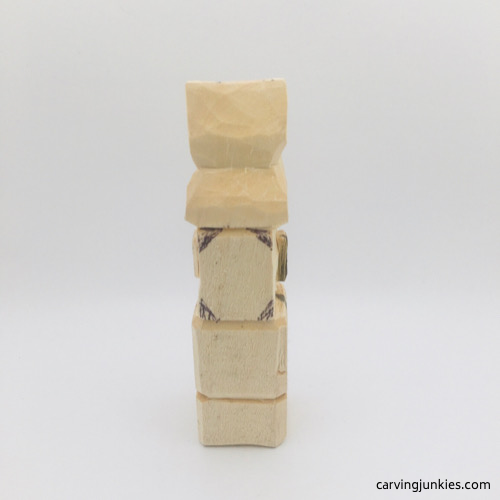 21. Back view of troll carving
6. Finalize the shape of the hair on your troll carving
One of the things about designing and carving is that you have to be flexible, adapting as you go. We decided to make the hair more more uniform in shape by shaving down the bottom section (photo 22) .
You can see then end result (looks much taller) in progress photos 23-26.
Now, draw the part in the hair on the front (photo 23), which marks where you separate the head from the hair. Also draw the hands, which will clasp behind the troll carving (photos 24-26).
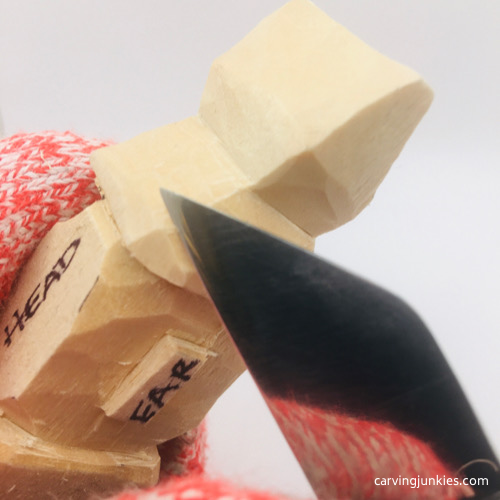 22. Narrow the bottom section of the hair
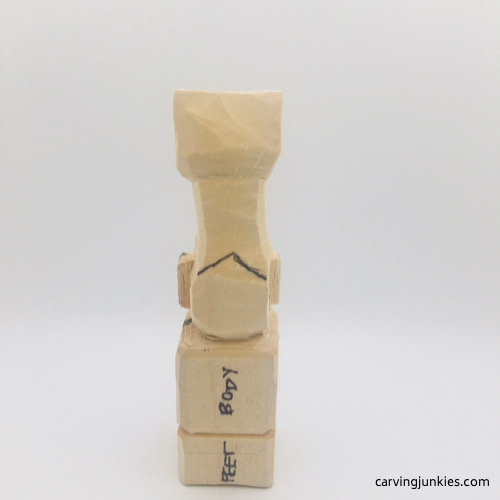 23. Troll hair is shaped and part is added
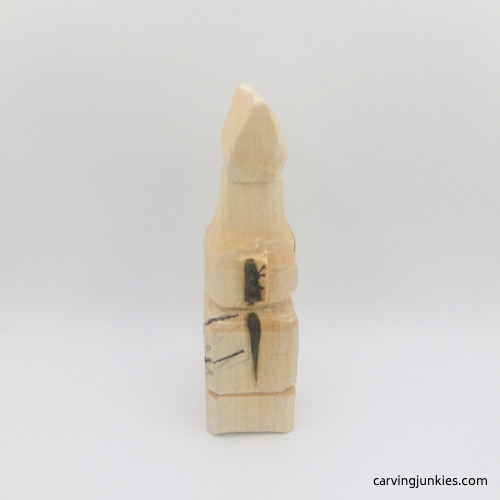 24. Right view of troll hair
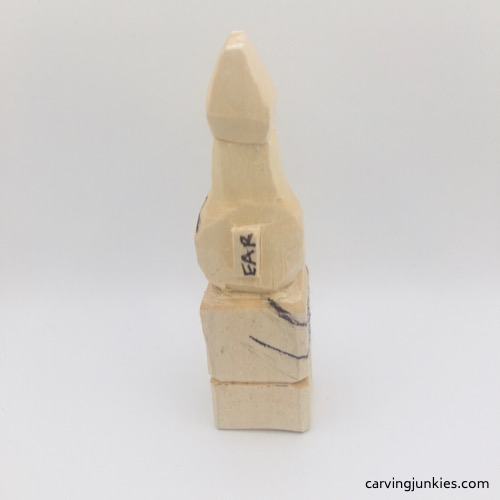 25. Left view of troll hair
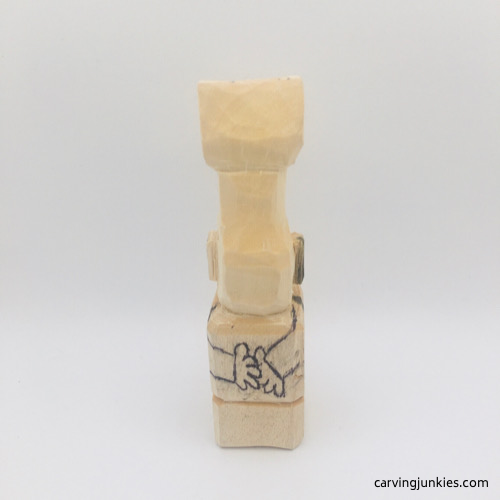 26. Back view of troll hair
7. Carve the lower body on your troll carving
Shape the front so your troll carving has a pot belly. Start by removing wood from the top corners on the front (photos 27,28).
Now, you can carve the chest back and shape underneath the belly (photo 29). Also start to narrow the neck all around by removing wood.
Draw a guideline around the bottom of the troll carving (about 1/4-inch [0.6 cm), which you will separate to create a pedestal. Also draw the toes on the front (photo 30).
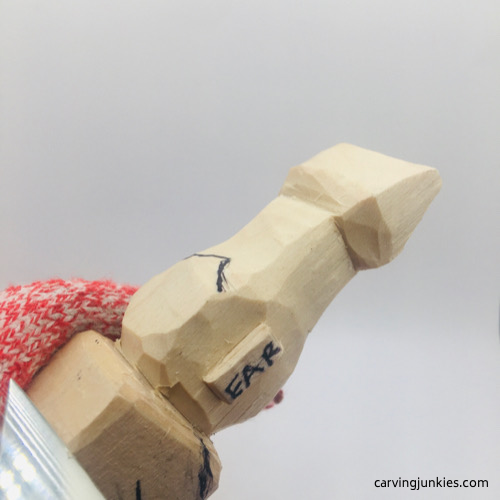 27. Carving wood off the first front corner
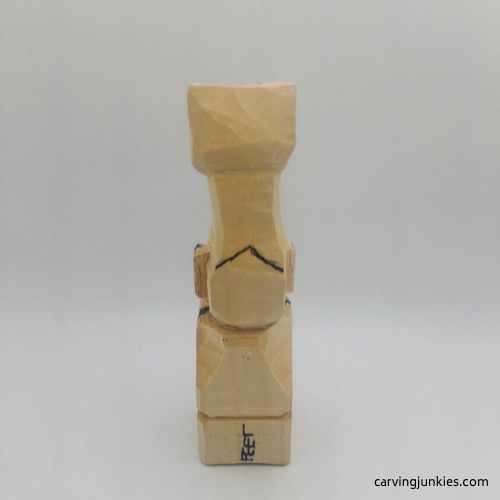 28. Both corners have been started
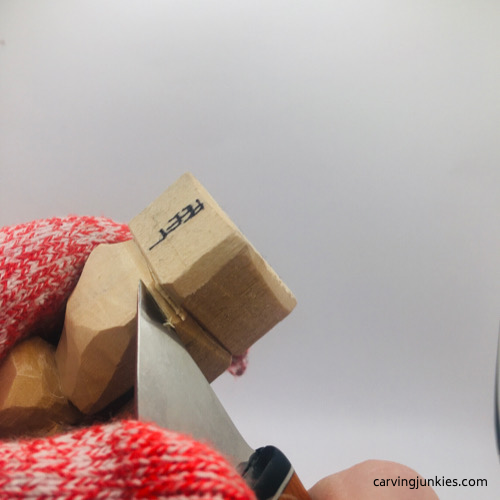 29. Shaping the corners of the belly
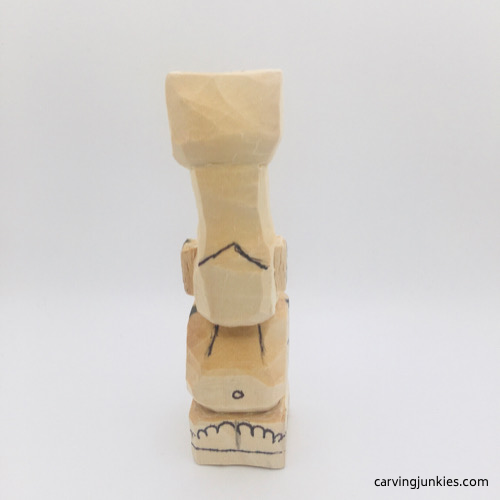 30. Details are drawn on
Using your knife, make a stop cut along the guideline you just added to create the pedestal, removing wood from underneath (photo 31).
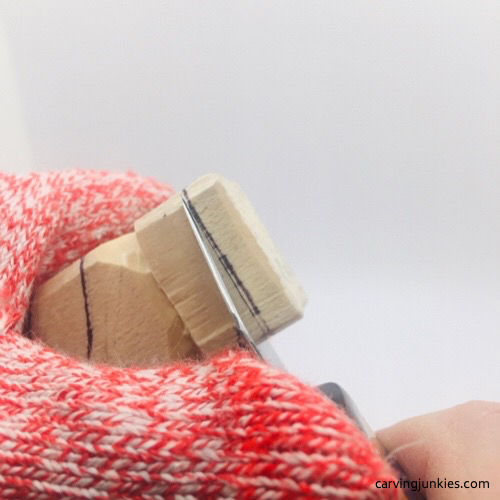 31. Carving the pedestal
8. Draw the details on your troll carving
Draw the bikini top and bottom onto the troll carving (photos 32-35). Also extend the lines for the hair on the sides (photos 33,34).
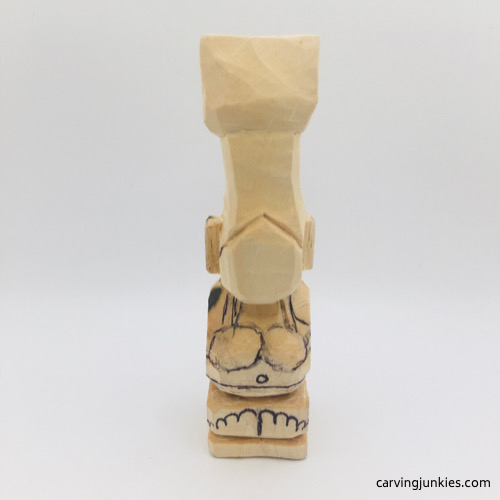 32. Bikini is drawn (front)
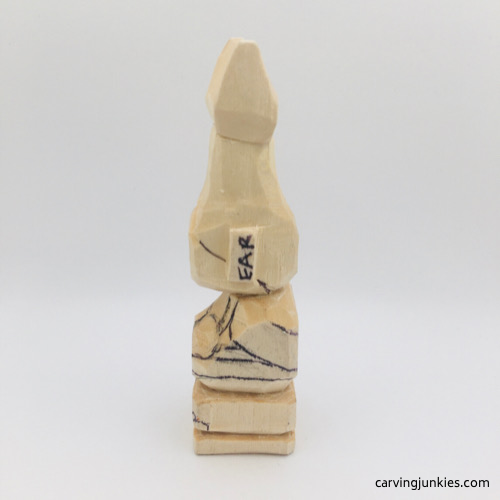 34. Left view of details
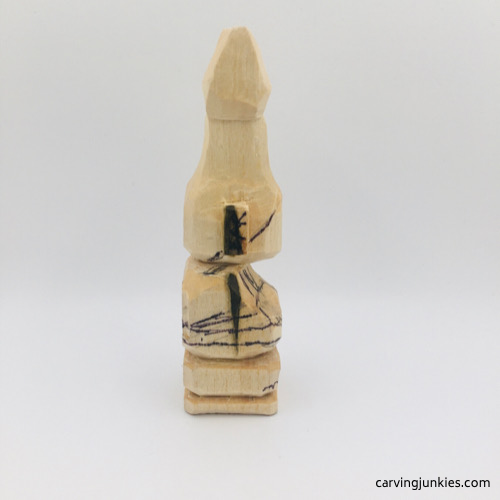 33. Right view of details
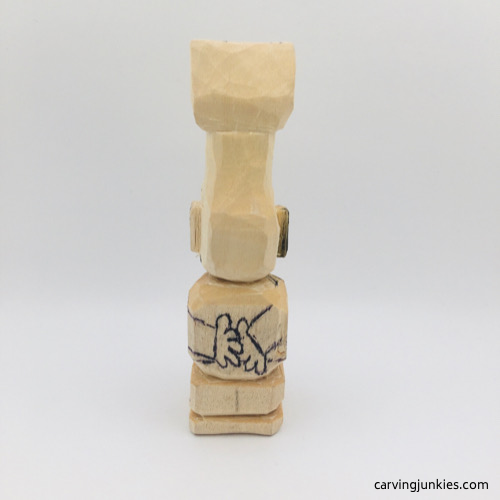 35. Back view of details
9. Carve the details on your troll carving
Use stop cuts to separate the hairline on the sides and carve the top and bottom of the bikini. Another option is to push your knife along the guidelines (control it with your thumb) and slice wood off under your cuts (photo 36). Then remove wood to shape the neck (photo 36).
Use a V-cut to separate the top of the bikini bottom. Also use stop cuts to separate the arms, hands, and fingers. Take your time and carefully remove wood from around your cuts (it may crumble).
Shape the shoulders on the front and back (photos 37,38). We use a combination of stop cuts, line cuts, and sometimes pyramid cuts.
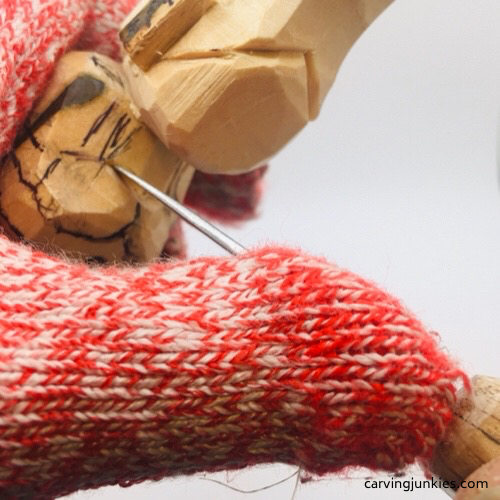 35. Moving the knife along the guideline
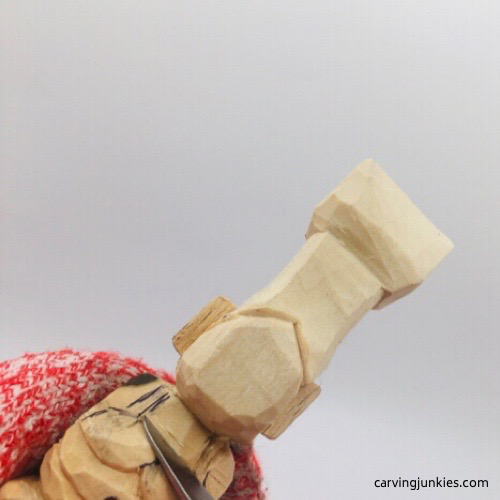 36. Shaving down the chest and neck
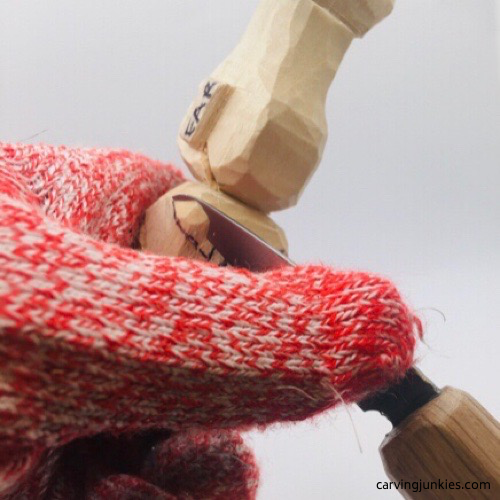 37. Cut the back of the shoulder
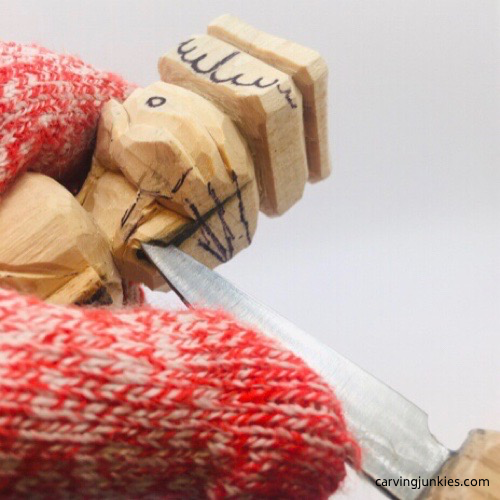 38. Slice off wood to shape the front of the arm
10. Refine the lower body of your troll carving
Using your knife, shave wood off both sides to narrow the troll carving below the top of the bikini (photo 39). You may have to re-separate the belly from the bikini bottom, and the bikini bottom from the top of the feet.
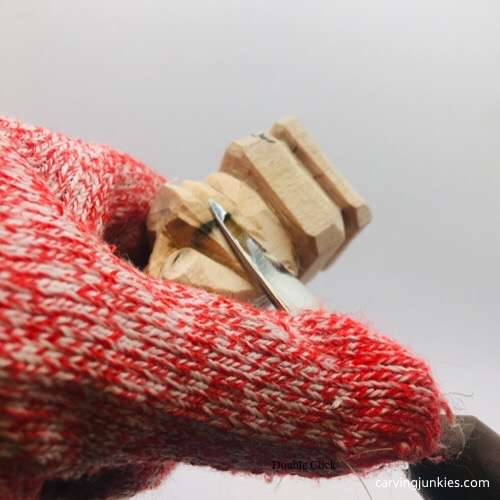 39. Narrowing the sides
11. Carve the feet on your troll carving
Make a V-cut in the front and back to split the feet. Then use short stab cuts (or V-cuts) to start to separate the toes, and remove wood to shape them (photo 40).
Remove wood from the sides to shape the feet on the troll carving (photos 41-43).
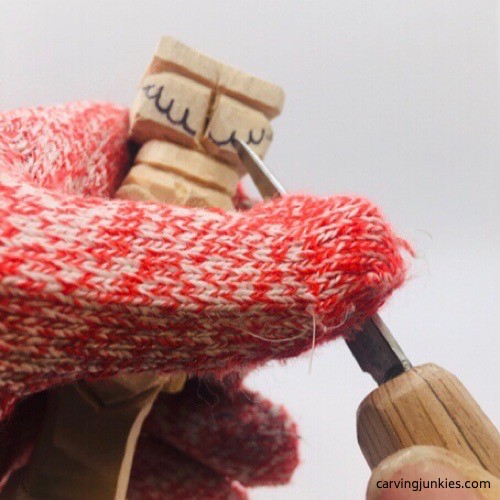 40. Carving the toes of the troll carving
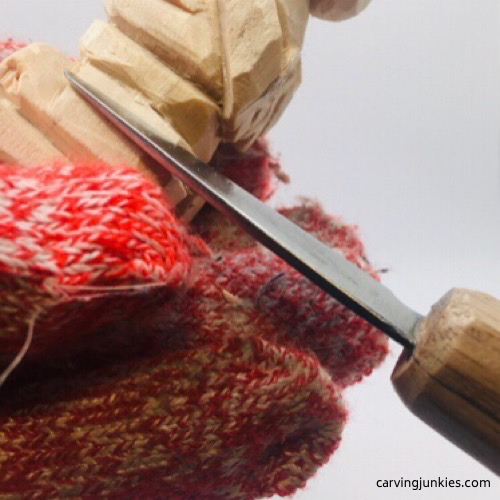 41. Shaping the feet
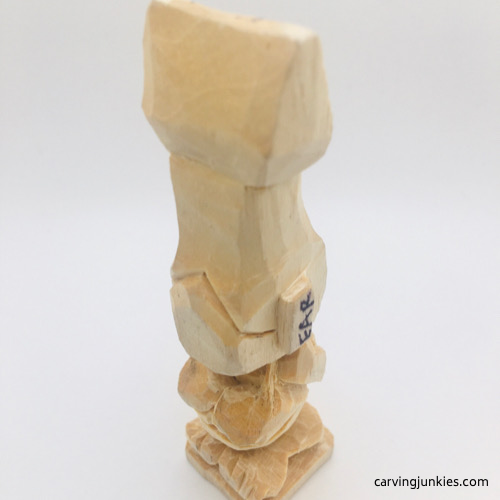 42. Feet are shaped
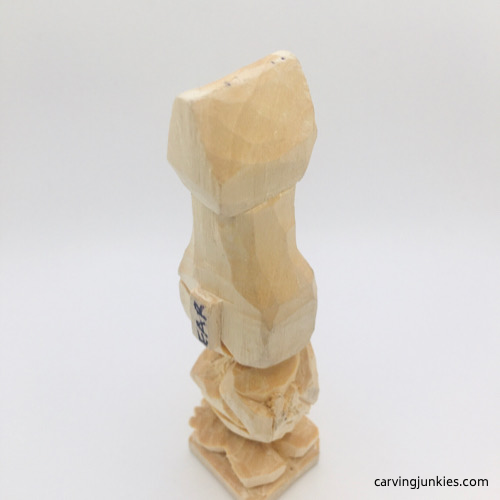 43. Back view of feet
12. Carve the nose on your troll carving
Set up the nose by drawing our geometric pattern on the face (photo 44 ). You will be using our triangle-by-triangle nose carving technique that helps you get a perfect nose every time. To learn more about it, click here.
First, you will make a stop cut under the nose and remove wood from underneath (photo 45).
Then remove each colored triangle with a pyramid cut (photos 46,47). Make your deep cuts on each side of the triangle at an angle toward the center of the triangle. This makes it easy to remove the pyramid-shaped chip.
If you are not able to make a smooth first cut, use your knife to clean it up.
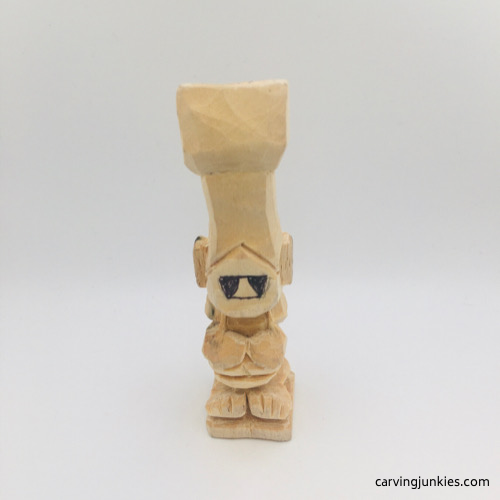 44. Nose set up is drawn
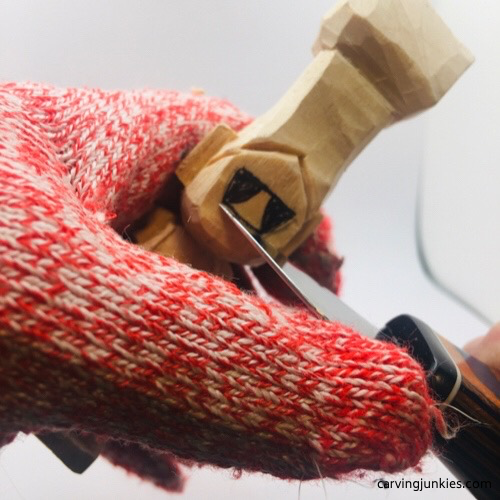 45. Making stop cut underneath
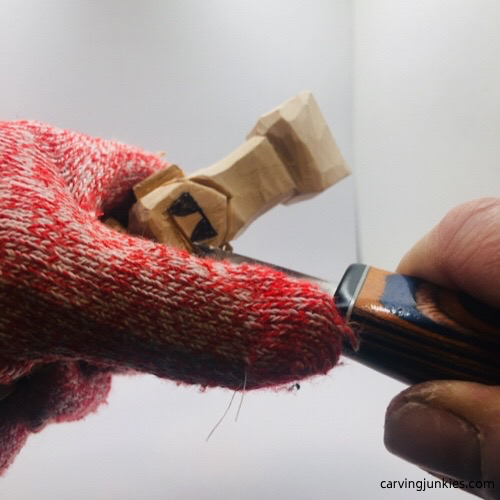 46. Making first pyramid cut
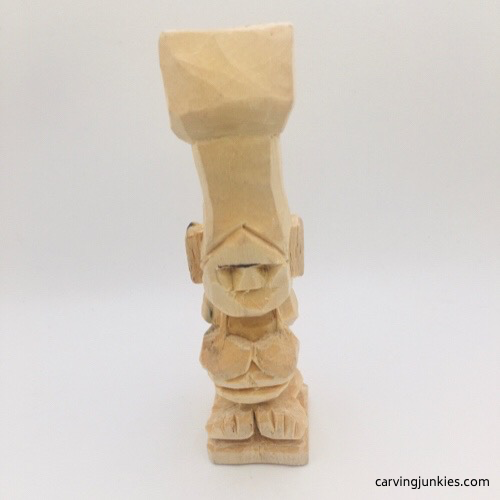 47. Both pyramid cuts are completed
13. Carve the details on the face of your troll carving
To create the cheek, we make a cut at an angle midway on the cheek to the top of the eye socket (photos 48,49). Now, further shape the nose and round the cheeks. (Note: Ignore the eyebrows and mouth, which we ended up changing).
Using your knife, make a push cut on each side of the chin to create facets (photo 50). Shave some wood underneath the head to create a curved under-chin.
We had to adapt our eyebrow design because the forehead was too thick. We shaved the wood back to create a smoother surface, and used a gouge to create texture for the eyebrows (photo 51).
For the mouth, we shaved off the circle and used a 3 mm U gouge, twirling it halfway to create a perfect, happy troll smile (photo 51). We stopped there because the wood started to crumble.
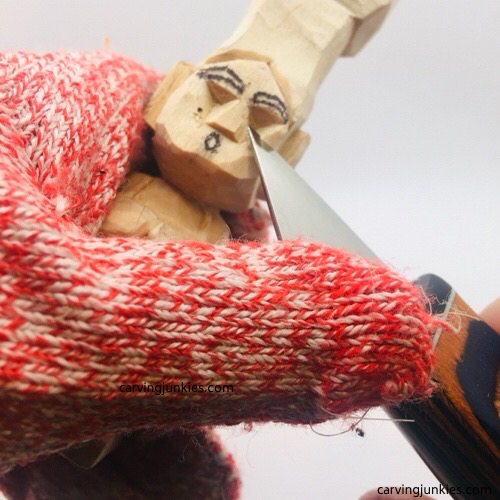 48. Details are drawn and cheek is started
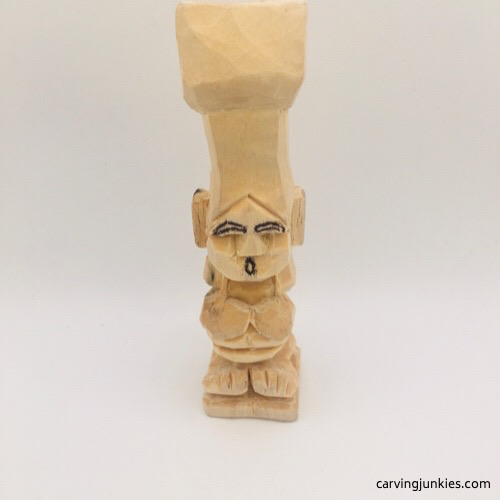 49. Cheeks are now defined
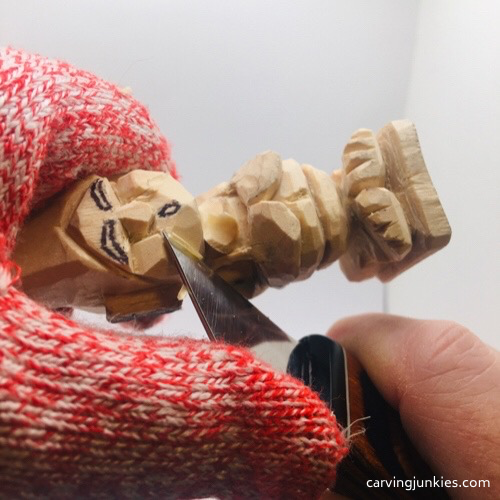 50. Carving the chin
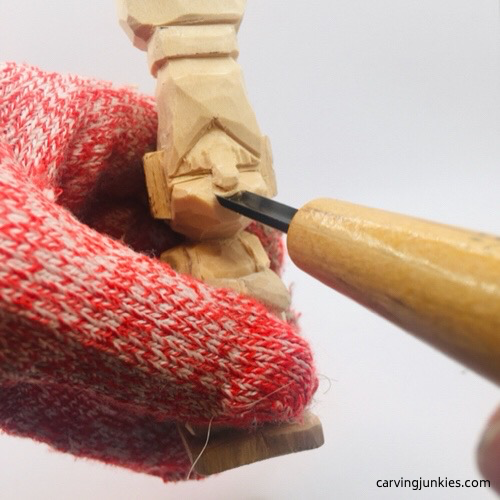 51. Adding the mouth with a U gouge
14. Continue carving the details on your troll carving
Make a series of small V-cuts across the top of the hair on the troll carving to created a jagged effect. Also use stop cuts to create a headband around the hair (photo 53).
We used a 3mm #47 gouge to carve the hair. Make short cuts on the top and bottom, then in the middle (photos 52, 53).
Draw on smile lines and carve them (photo 53). We attempted to curve the ears with the U gouge, however, the wood split, and you may be better off shaping them with a knife.
Finally, separate the bottom of the bikini bottom from the legs. Also split the legs in front with a deep cut (photo 55).
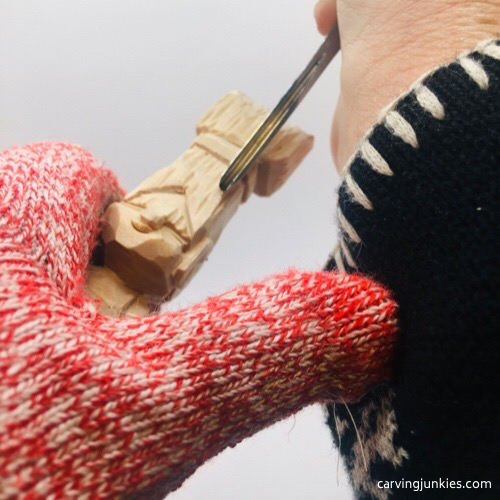 52. Carving hair lines
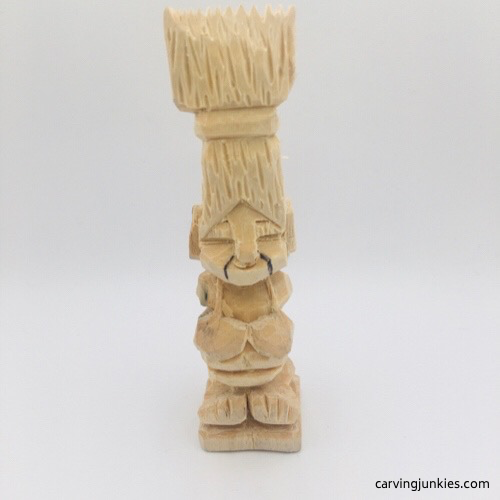 53. Smiles lines are drawn
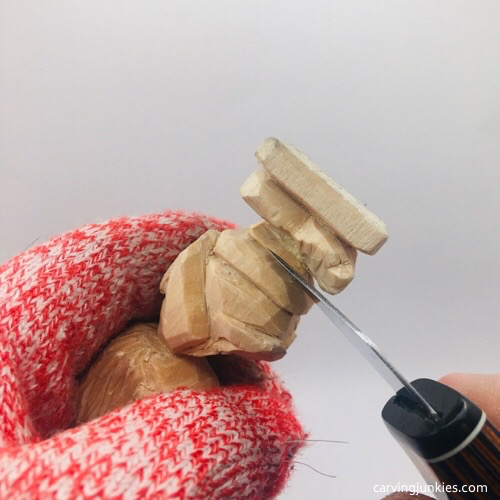 54. Separating bathing suit bottom
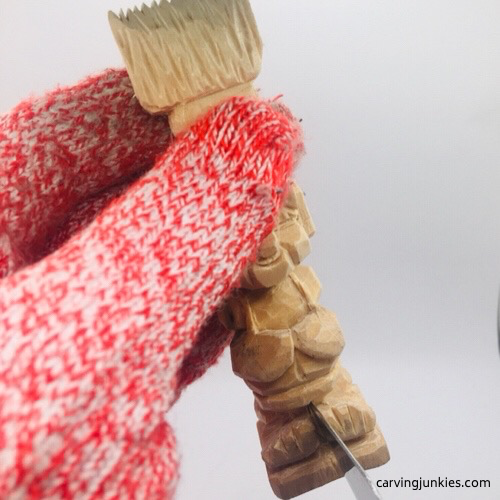 55. Splitting the legs of the troll carving
15. Clean up your cuts on your troll carving
Make sure there are no visible fuzzies (tip: take a photo to find them or use a magnifying glass). Deepen cuts between sections to help prevent paint from bleeding.
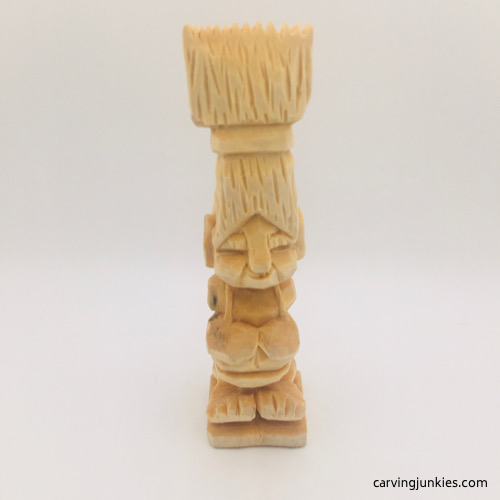 Front of troll carving prior to painting
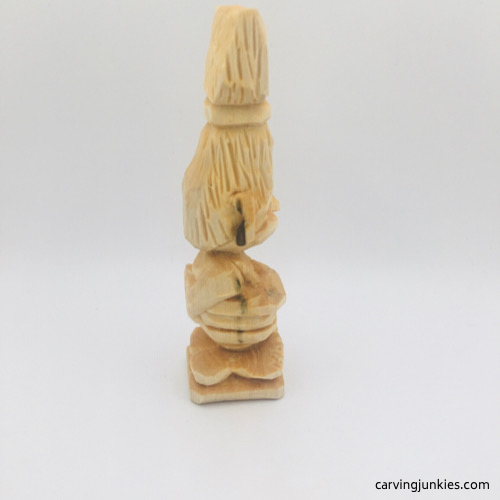 Right view
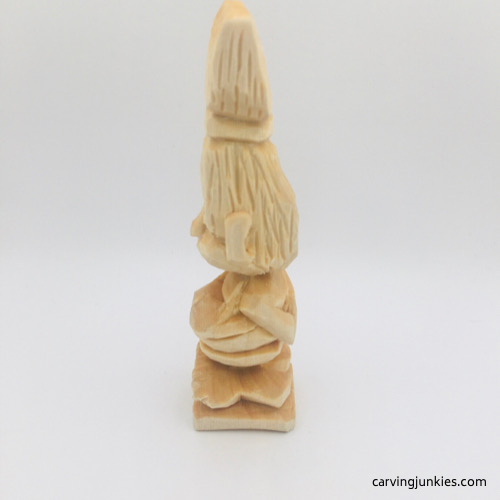 Left view
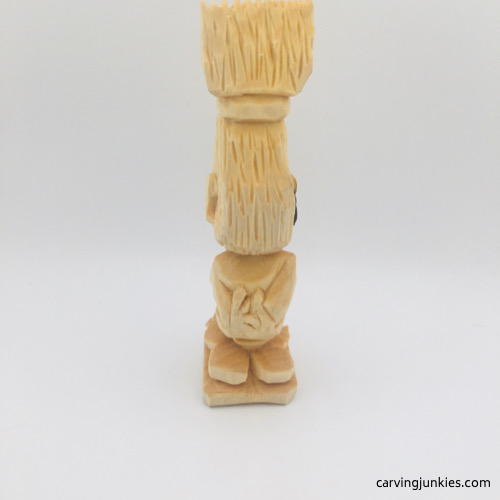 Back view
16. Time to paint your troll carving
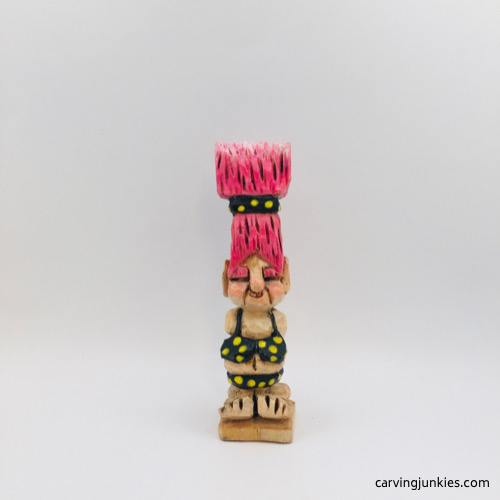
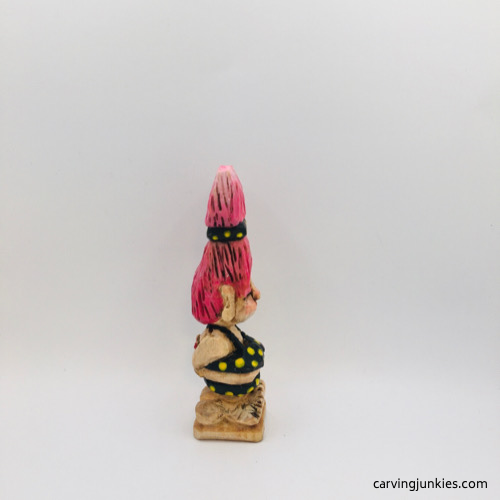
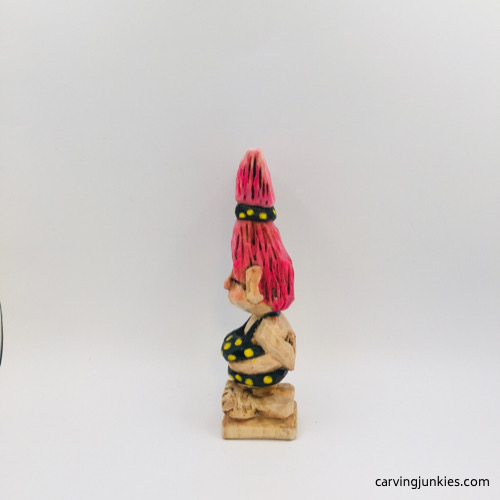
All paints are Ceramcoat by Delta Creative, except where noted. We place a drop or two of paint into an easy-to-clean, multi-well, plastic paint paletes. Use paint brushes that are most comfortable for you (we prefer flat brushes).
We dip our brush into a mason jar filled with water and dilute a little bit of paint at a time to create a wash. This allows the wood grain to show through the paint. If you make a mistake (and we do!), simply wait for the paint to dry, and cut it off with a knife reserved for this purpose.
To get our look:
- We first brushed the troll carving with boiled linseed oil and painted it while wet (optional).
- Face, hands, toes, and body: Tawny light.
- Hair: Add a drop of fuchsia to one well, Apple Barrel cameo pink to another well, white to another well, and bright red to another. We blend the paints from dark to light. Start with a super thin wash of red on the bottom third of the hair (and reserve this paint). Add fuchsia and paint over the bottom third of the hair, then quickly dip the brush in water and mix a little with cameo pink and paint the second third of the hair. Repeat with white on the top part of the hair.
- Cheeks, nose top, and top of ears: Use reserve of red wash to gently blot each area.
- Bikini and headband: 100% black paint with 100% bright yellow paint for the polka dots (tip: use the round end of your brush). We made a halter top to the bikini by extending the straps around the neck with paint.
- Fingernails: 100% FolkArt lipstick red applied with a toothpick.
- Optional finish: Seal the carving with at least 2 coats of Minwax polycyclic polyurethane spray. Brush on a mixture caricaturist Chris Hammack calls “turd polish,” which is 3 parts Minwax aged oak gel stain with 1 part mineral spirits. Apply with a toothbrush in the toes, belly button, hair, ears, fingers, and eyes. Wipe off quickly with a paper towel (dispose properly outside). We wear rubber gloves. If you do not seal the carving well enough, the stain can ruin your carving. If you do not want to use this method, add a little brown paint and dry brush these sections instead.
Summary of our troll carving tutorial
- Tessie of the Yashkin troll clan is a fun character and can be carved in just a few sessions.
- You can make this troll carving your own by changing up her hair and bikini colors.
- Use the round end of your paint brush to make perfect polka dots.
- We found we prefer to carve off the corner because it provides instant depth we like for carving a nose easily.
- The key with using “turd polish” as a finish is to properly protect your carving and test out a little at a time.
- Looking back, we would avoid a block of wood that had the dark blemishes our piece had, especially if you are not using stain.
Get 50 Wood Carving & Painting Tips when you join our FREE Covered in Chips club.
Share this page
carvingjunkies.com never sells your personal information.
This site uses cookies for its operation and to enhance your experience. As an Amazon Associate and Focuser Carving affiliate we earn from qualifying purchases.
Home | About Us | Privacy Policy | Terms of Use | Contact | Sitemap
