- Home
- Wood carving gnomes
- Valentine wood carving
Valentine wood carving tutorial
The perfect handmade gift.
LEVEL: EASY
This valentine wood carving is a unique and special gift idea for Valentine's Day that will be loved and cherished for many years to come. Unlike expensive flowers that fade after only a few days, your loved one can display these beautiful valentine hearts every day of the year.

This step-by-step tutorial walks you through the process of creating three enchanting stacked hearts with a flower pot base. It's a great project for practicing and perfecting curves in wood. You can also easily adapt these instructions to carve only two hearts, or change the size of your three stacked hearts, like those pictured below.
So, grab your wood carving knife of choice and let the magic of wood carving unfold as you embark on this heartfelt endeavor to create a one-of-a-kind Valentine's Day gift.
What you'll need for your valentine wood carving
- For this tutorial, I used a basswood block that is 1 x 1 x 3 inches (2.5 x 2.5 x 7.6 cm). You can easily double or triple the measurements if you want to make a larger valentine wood carving.
- You only need one carving knife of choice for this tutorial. If you're looking for a great wood carving knife, check these out.
- Whenever you carve, always use a good carving glove for safety and place a hard piece of wood, or a kitchen cutting board, over your lap if you're a lap carver.
- Use a pencil or pen to draw your guidelines and sketch the hearts.
- A small piece of sandpaper (or a metal file) is helpful to smooth the hearts prior to painting.
- A painting guide is included at the end if you want to get the same look with acrylic paints. Use your paint brushes of choice.
Valentine wood carving tutorial at-a-glance
Take a look at this video for a quick overview of the steps to this fun, fast, and easy valentine wood carving tutorial.
Set up your valentine wood carving
Draw a guideline that is 1 inch (2.5 cm) from the bottom all around to mark the top of the flower pot (photo 1). Draw another guideline all around that is 1/4 inch (0.6 cm) below your first guideline to mark the bottom lip of the flower pot (photo 1).
Use something round (like a water bottle cap) to sketch a circle on the bottom of the block (photo 2). Mark the corners where you will remove wood to shape the round bottom of the flower pot (photo 2).
 1. Sketch guidelines all around
 2. Sketch circle on the bottom
Separate and shape the flower pot base
Use stop cuts to separate the top guideline all around. Start at the corners and work your way toward the middle. Remove wood from the top down (or from underneath if you turn your piece upside down like I did in photo 3). Tip: For reference, see the how the flower pot rim is separated in photos 4 and 6.
Separate the bottom guideline all around, removing wood from underneath, and round the corners down to shape the flower pot (photo 4).
Round down the rim of the flower pot all around (photo 5).
 3. Meeting a stop cut
 4. Rounding the flower pot corners
 5. Rounding the flower pot rim
Sketch some details on your valentine wood carving
Round down the front and back corners and sketch three hearts on the front (photo 6). Tip: Use a pencil to draw a light center line first (slightly visible in photo 6), which will help you sketch more symmetrical hearts.
Sketch the hearts on the back side (photo 7). Don't worry if your back sketch is not 100% perfect. Once you start carving you can easily line up your hearts. Tip: Sketch a light guideline that extends from the bottom of each heart on the front (across the side to the back) to help line up your hearts on the back.
Mark wood that you will remove on the front (photo 6) and back (photo 7), and the left (photo 8) and right sides (photo 9).
 6. Front sketched hearts
 7. Back view of hearts
 8. Right view of hearts
 9. Left view
Carve the hearts on your valentine wood carving
Use wide V-cuts on each side to rough out the shape of the hearts on your valentine wood carving (started in photo 10 and completed in photo 11). You may need to make more than one pass here.
Now that you have greater access with your knife, refine the shape of the top heart and separate it from the middle heart (photo 12). Also, remove some wood across the front and back of each heart to reduce the thickness (photo 13).
Separate and thin the remaining hearts in the same manner (photo 14). Also, remove wood under the bottom heart (photo 15).
 10. Making wide V-cut
 11. Both sides are roughed out
 12. Separating top heart
 13. Narrowing the top heart
 14. Carving second heart
 15. Shaping the hearts
Refine the hearts on your valentine wood carving
Refine the curves of the hearts (photos 16-19). Tip: Be very careful as you narrow and shape the tip of the bottom heart (completed in photo 16) to prevent snapping it off from the base.
When you have the desired shape you can use a little sandpaper to smooth your piece. Tip: Don’t use your knife after using sandpaper as unseen grit can damage your blade.
 16. Front of shaped heart wood carving
 17. Right view of heart wood carving
 18. Left view of heart wood carving
 19. Back view of heart wood carving
Paint your valentine wood carving
For some excellent general painting tips, read this page. I used an angled brush that easily slips in between cuts. To get a similar look use these paint colors:
- Top heart: Apple Barrel cameo pink wash. After drying completely use Ceramcoat black for the polka dots. Apply with a toothpick or a mandala dot. Try to vary the size of the polka dots for interest.
- Middle heart: Apple Barrel pink parfait wash. Let dry completely and use Ceramcoat bright red for the polka dots.
- Bottom heart: Ceramcoat bright red wash. Let dry completely and use Ceramcoat white for the polka dots.
- Flower pot base: Craftsmart vanilla wash. Allow to dry completely and dry brush with Ceramcoat black.
- Dry brush red heart with 100% Craftsmart vanilla.
- Finish with a sealer of choice (I didn't add walnut oil medium yet).
 20. Painted front of valentine hearts
 22. Left view of valentine hearts
 21. Right view of valentine hearts
 23. Back view of valentine hearts
Valentine wood carving summary
- While flowers quickly fade this valentine wood carving is a special gift that will last a lifetime.
- This valentine wood carving project is fun and can be easily carved in one sitting.
- You can vary up the pattern to create a cute trio of hearts that look beautiful on a windowsill.
- Instead of polka dots, you can use a plaid pattern or stripes, using paint and/or magic markers.
- You could also use wood stain rather than acrylic paint if you want a more rustic valentine wood carving.
- You can easily carve a much larger valentine wood carving by doubling or tripling the size of your wood block and the tutorial measurements.
You might like these
Whimsical Wooden Ring Holder You Can Easily Carve With A Knife
Carve a funny wooden ring holder with our step by step tutorial with tons of progress photos using just a knife.
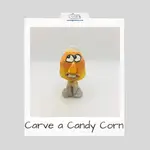
Candy Corn Halloween Wood Carving With a Knife Tutorial
This Halloween wood carving of a candy corn is super fun and easy to make as a decoration or gift.
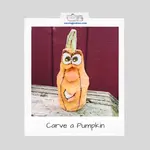
Pumpkin Wood Carving With a Knife Tutorial From a Block of Wood
Expressive pumpkin wood carving that is easy to carve for a quick Halloween decoration.

Get 50 Wood Carving & Painting Tips when you join our FREE Covered in Chips club.
Share this page
carvingjunkies.com never sells your personal information.
This site uses cookies for its operation and to enhance your experience. As an Amazon Associate and Focuser Carving affiliate we earn from qualifying purchases.
Home | About Us | Privacy Policy | Terms of Use | Contact | Sitemap