- Home
- Easy wood carving ideas
- Wooden ring holder
Whimsical wooden ring holder caricatures
You will love carving these expressive little whittles.
Carving a wooden ring holder with our step-by-step tutorial is easy, fun, and makes a wonderful gift for women, men, and even kids and teens.
The creative possibilities for carving facial expressions are endless (as are the painting color combinations).
This tutorial provides all the instructions you need for a caricature with ears (sorry, rings are not included). Don’t feel like adding ears? Carve something similar to the earless caricatures in the picture below.

This is also a wonderful tutorial to practice carving caricature faces. Just for fun, you can vary the noses, eyes, and mouths without making a huge time commitment.
It should only take you an hour or so to carve one of these wacky, wooden ring holders.
It makes the perfect gift, especially if you add a ring!
Supplies for this wooden ring holder tutorial
For this wooden ring holder tutorial, you will need a wood block (I used basswood) that is 1 x 1 x 3 inches (2.5 x 2.5 x 7.6 cm). As always, if you want to go bigger simply increase the size of your wood block and increase the guideline dimensions in this tutorial.
I used a long whittling knife from Focuser Carving, which is great for removing wood. I also used their FC016 chip carving knife (love it for making clean pyramid cuts) and their FC001 wood carving knife.
Since this piece is small, you can probably get away with just using a detail knife. But I prefer a longer blade for roughing out wood (less work for your hands). A U-gouge and V-tool are helpful, but you can substitute a sharp detail knife if you don’t have them.
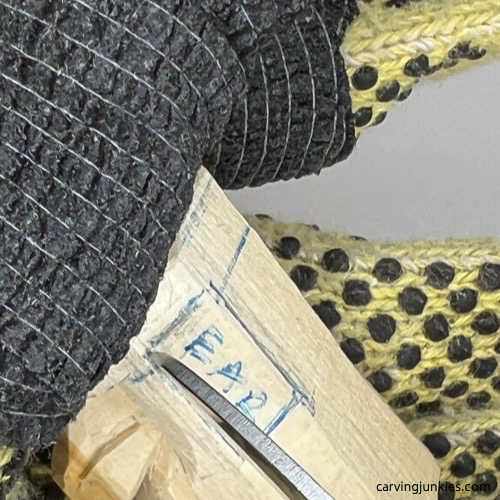
As always, remember to use safety gloves and protect your lap with something flat and hard. A thin magic marker and a ruler will also be helpful for creating your guidelines.
A painting guide is provided at the end of this page.
Wooden ring holder tutorial at-a-glance
Watch the key steps to carve your wooden ring holder in this video before you get started.
Begin your wooden ring holder
You will carve off the corner for your wooden ring holder, which gives you instant depth for carving a large nose. You can use the carvingjunkies’ triangle-by-triangle nose carving technique, which helps you carve a perfect nose every time. Or use a nose-carving method of your choice.
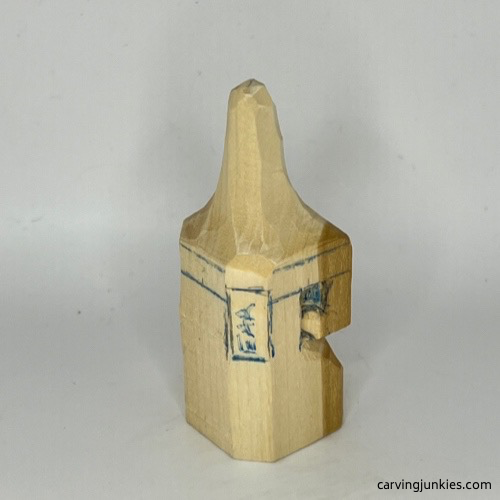
First, draw a guideline across the middle of your wood block all around. Below the guideline, add a nose box that is about 1/2-inch (2.3 cm) square on each side.
Mark the two triangles that you will remove on either side of the nose (photo 1). At the widest point, each triangle is about 1/4-inch (0.6 cm).
Note: My wood block had a darker band on the front (photo 1). If you are going to paint the block, an imperfection like this may be fine. If you want a natural finish, however, avoid a wood block with color variations.
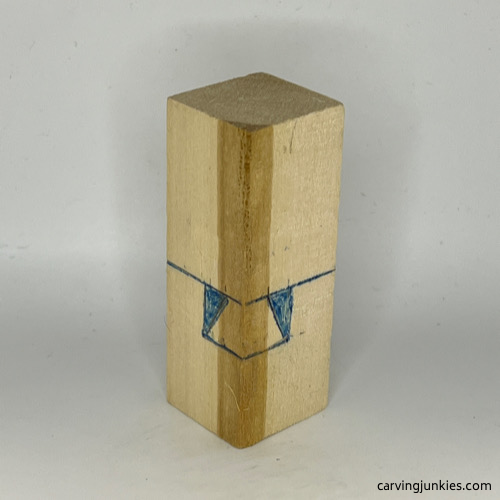 1. Nose box is added
Start the nose on your wooden ring holder
Make a stop cut under the nose, starting in the middle (photo 2). Work your way across each side.
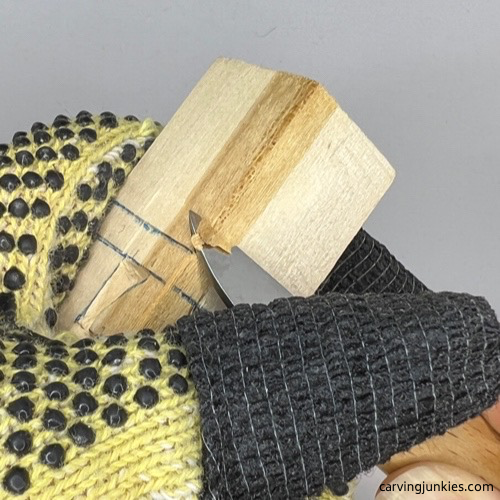
Then, make a pyramid cut on each side of the nose (photos 3-5) and remove each chip.
Draw a circle on the top of the block and a guideline all around the block that is 1/4-inch (0.6 cm) above the nose (photo 5). I’ll explain why in the next section.
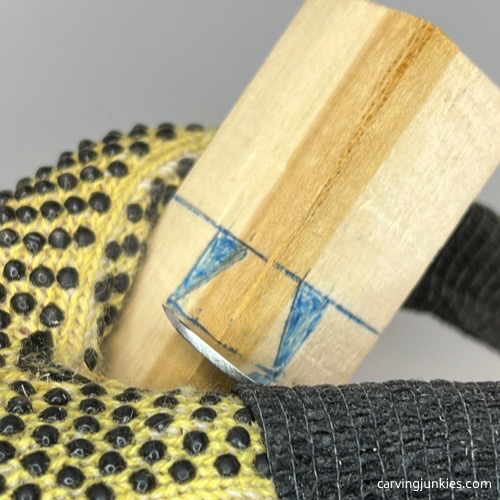 2. Making the first stop cut
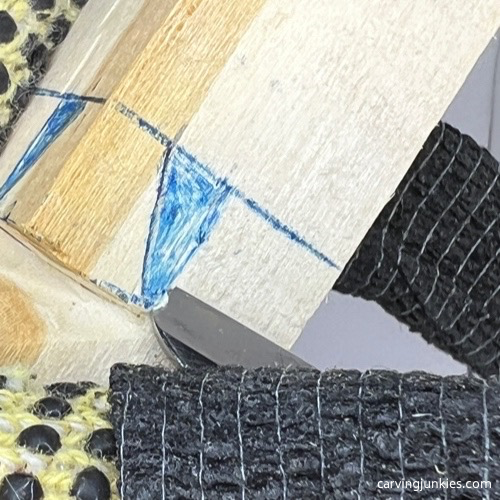 3. Starting the first pyramid cut
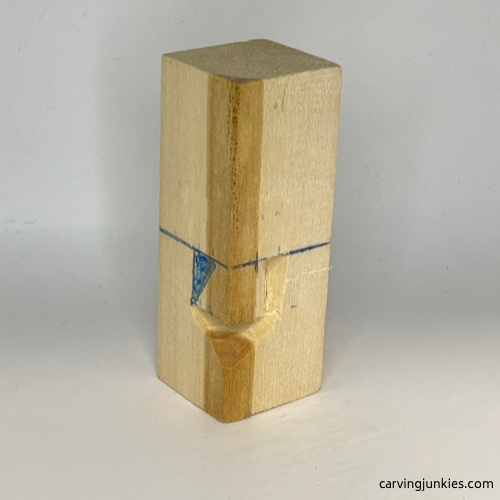 4. First pyramid cut is completed
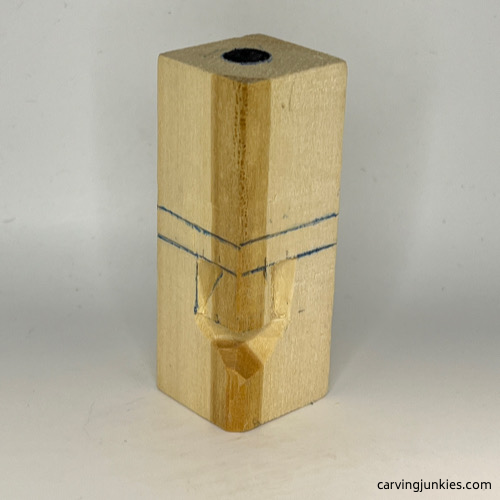 5. New guidelines are added
Carve the top of the wooden ring holder
Use a push cut to remove wood from the top guideline up, creating a cone-like shape to hold a ring (photos 6,7). Tip: Start in each corner and work your way toward the middle of the corners.
Place a ring on the cone to be sure it is narrow enough to hold a ring securely (photo 7).
Once you have the desired shape, round all the corners to remove excess wood and narrow the sides (photo 8).
 6. Narrowing top of the ring holder
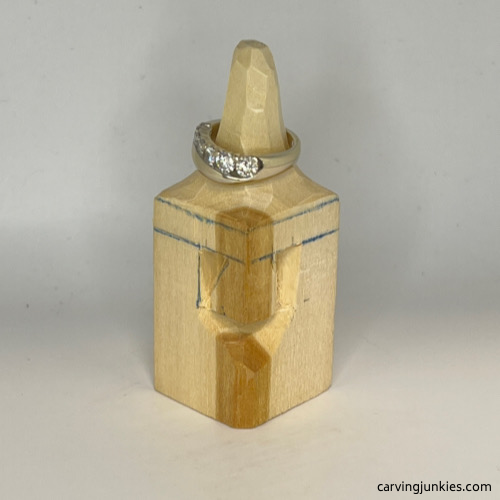 7. Sizing the ring holder
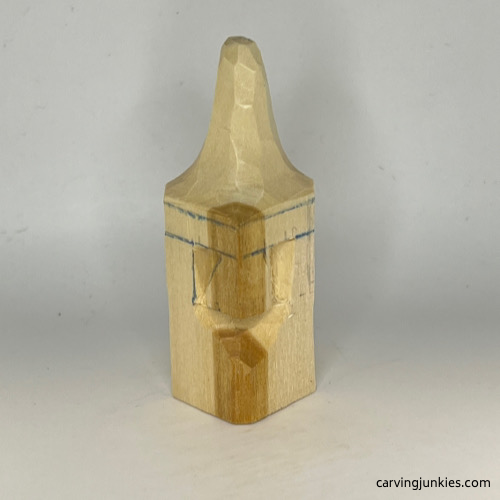 8. Sides are narrowed
Add more guidelines to your wooden ring holder
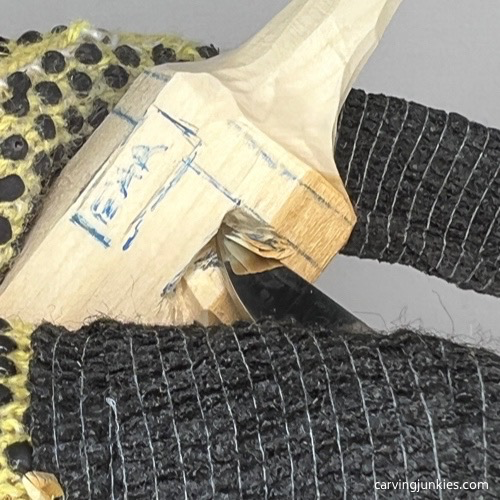
Mark the areas around the nose where you will remove wood to shape the nose (photos 9,10).
Add an ear box on each side (photos 9,10) of the nose that is about 1/4-inch wide (0.6 cm) and 1/2-inch tall (1.3 cm). Tip: The top of the ears are slightly higher than the top of the nose. They are also lower than the tip of the nose.
 9. Right guidelines are added
 10. Left guidelines are added
Refine the nose on your wooden ring holder
Narrow the nose above each nostril by making a stop cut across the top and removing wood from beneath (photo 11). Tip: Carve several layers at once (photo 11) and make one clean cut across the top to remove the multiple layers.
To carve the nostril, make a V-cut (photo 12) to remove a little wood (visible in photo 13). You can use a push (or pull) cut to remove some wood from the bridge of the nose (photo 13). Tip: turn your wrist as you make this cut (kind of like you would scoop out melon balls) to create a curve in the wood.
Now, draw some smile lines (photo 14). Tip: Align your smile lines with the top of the nostril where you made your V-cut.
 11. Removing layers under a stop cut
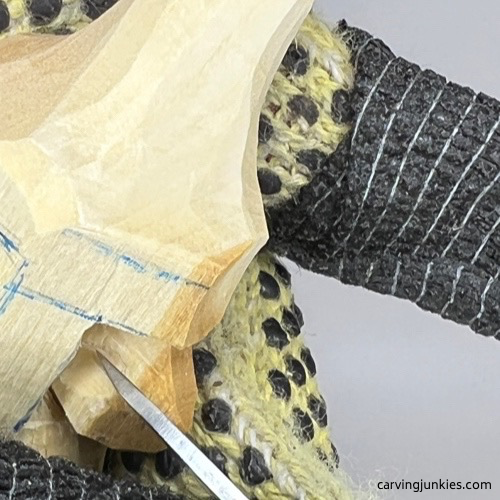 12. Making a V-cut
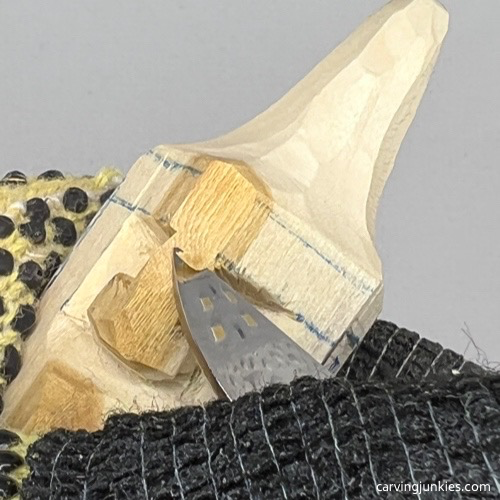 13. Making a swoop cut to shape the bridge
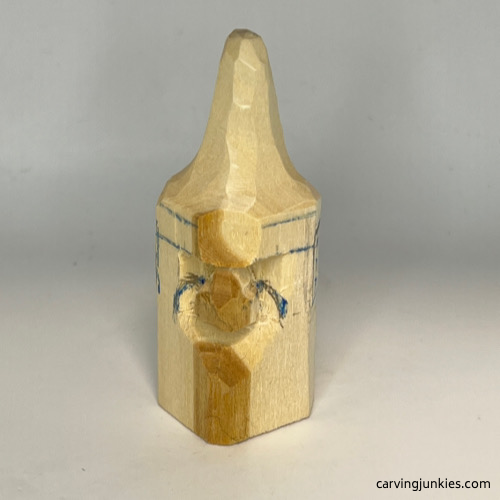 14. Smile lines are added
Carve the ears on your wooden ring holder
Use your knife to separate the ear boxes (photo 15). You can use a stop cut, or hold your knife like a pencil and run it along the guideline.
Then, make a second slicing cut underneath your first cut to remove the wood. You may have to make more than one cut to get the depth you want. When you are done, the ears should look like photo 16. You will refine them later to avoid breaking them as you carve.
Now, use a stop cut to carve along the smile guideline (photo 16). Starting in the middle of the mouth area, make a second slicing cut—to meet your stop cut—to cleanly remove wood.
Draw on the curvy mouth (photo 17). Hold your knife like a pencil for added control and follow the guideline from the side of the mouth to the middle. Repeat on the other side. Make second slicing cuts in the same manner to finish the mouth (photo 18).
Sketch the chin line under the mouth and draw on the eyebrows (photo 18). Also, mark the wood that you will remove to separate the eyebrows (photo 18).
 15. Separating the ear
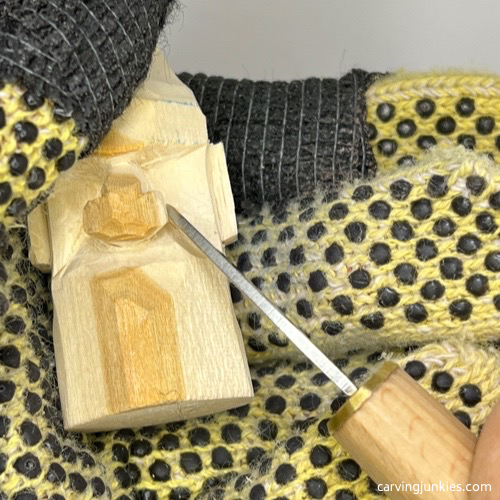 16. Carving the smile line
 17. The mouth is drawn
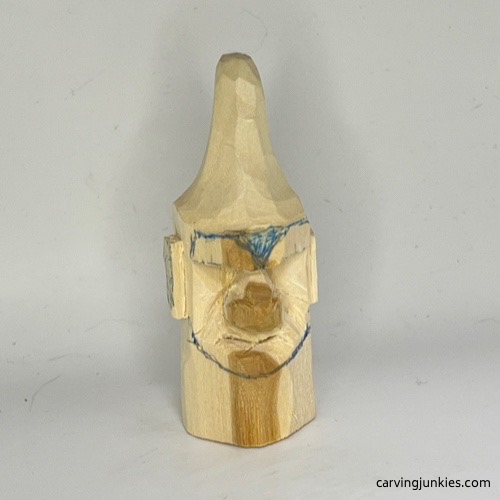 18. Chin line is drawn
Carve details on your wooden ring holder
Use your knife to remove wood and shape the chin (photo 19). Tip: Like you did with the nose, use a sweeping motion as you cut to curve the wood under the chin. I prefer using a push cut here.
Add guidelines for the cheeks (photo 20). Separate them with your knife and round them down a bit (completed in photo 23).
Then, make a stop cut across the top of the eyebrow (photo 21). Make a wide V-cut to separate the brow. You may need to slice off some excess wood on the eyebrows if they are too thick.
Use a V-tool to carefully add texture to the eyebrows (photo 22). If you do not have a V-tool you can use a sharp detail knife and make a series of V-cuts. Tip: Give your cuts some curve (photo 22).
 19. Shaping the chin
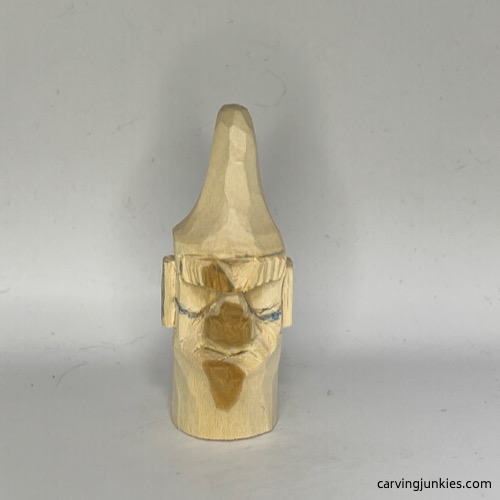 20. The cheeks are drawn
 21. Making a stop cut to separate the brow line
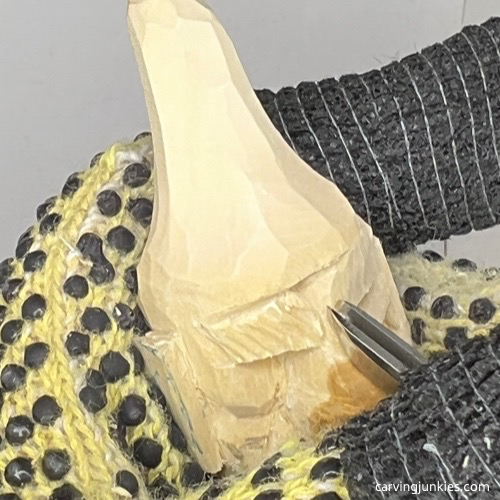 22. Adding texture to the eyebrows
Add more details to your wooden ring holder
Use a U-gouge to carefully cut/shape the nostrils under the nose (photo 23). Tip: If you don’t have a U-gouge, you can carefully remove wood with your knife. Take your time here.
Then, mark the wood that you will remove to shape the right ear (photo 24) and the left ear (photo 25).
Use the U-gouge to gently scoop out wood from the inner ear (photos 26,27). Tip: Work from the outer side toward the nose (unless grain is an issue). Then, turn your piece and work the other side. If you do not have a U-gouge, try making a V-cut with a small detail knife or scooping off wood with a knife that has some flex to it.
Finally, make a plunge cut on each corner of the eye sockets to suggest the eyes (photo 28).
 23. Shaping the nostrils
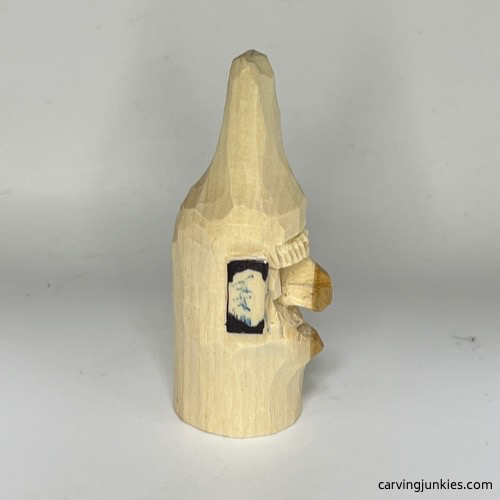 24. Wood is marked to remove on right ear
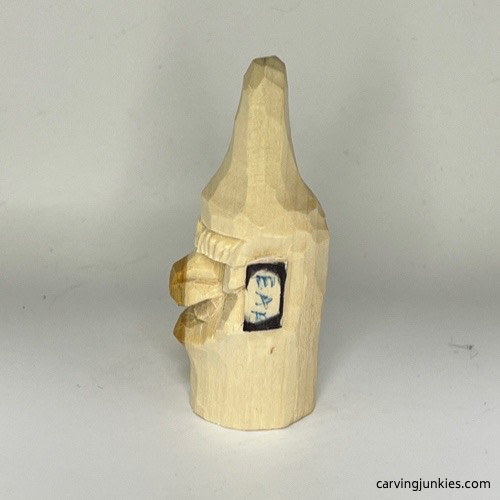 25. Left ear is marked
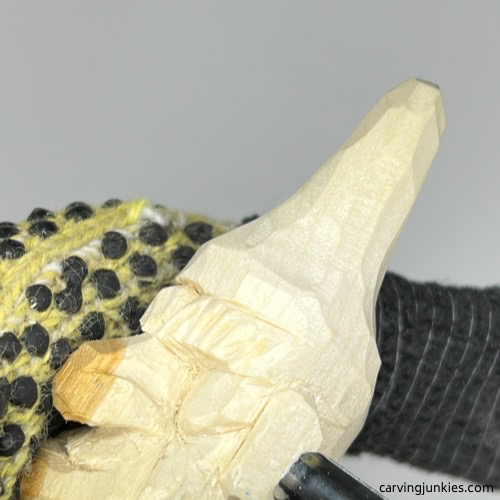 26. Shaping the inner ear
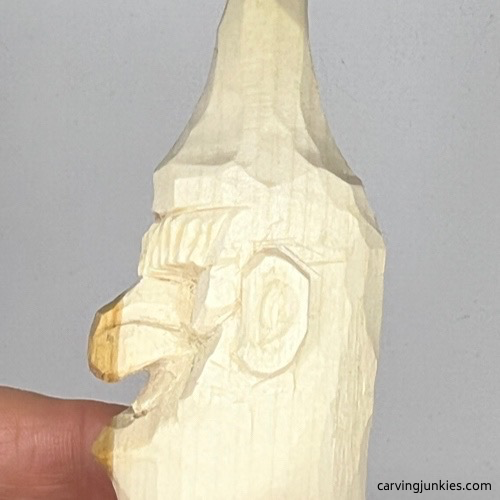 27. Ear is shaped
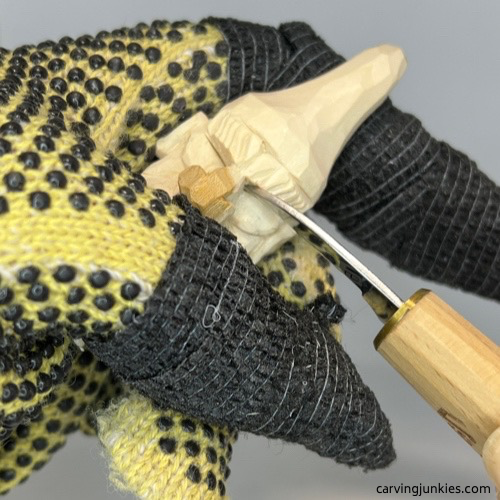 28. Plunge cut to suggest eyes
Clean up your wooden ring holder
Remove any wood fuzzies and deepen cuts to enhance the painting of your wooden ring holder.
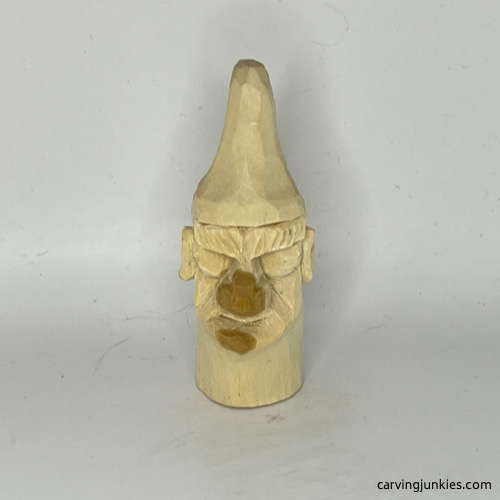 30. Front of wooden ring holder
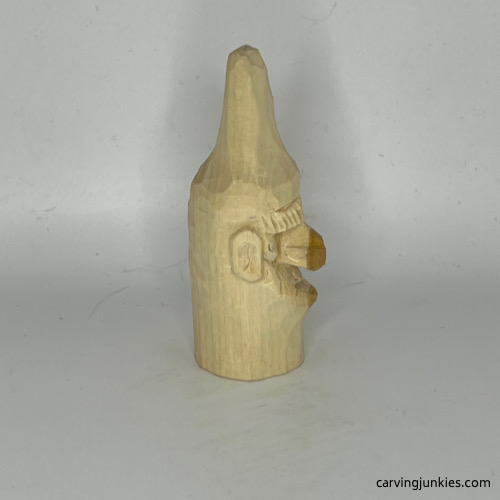 31. Right view of wooden ring holder
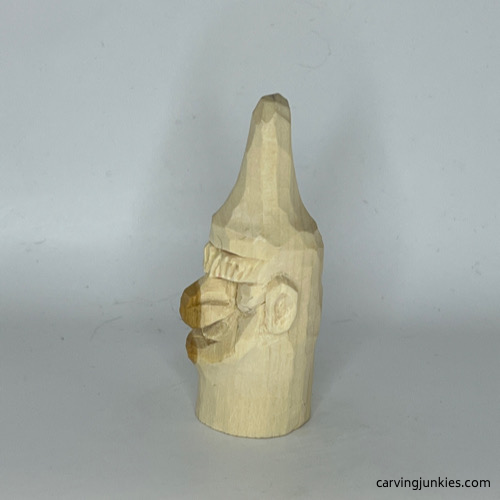 32. Left view of wooden ring holder
 33. Back of wooden ring holder
Finish your wooden ring holder
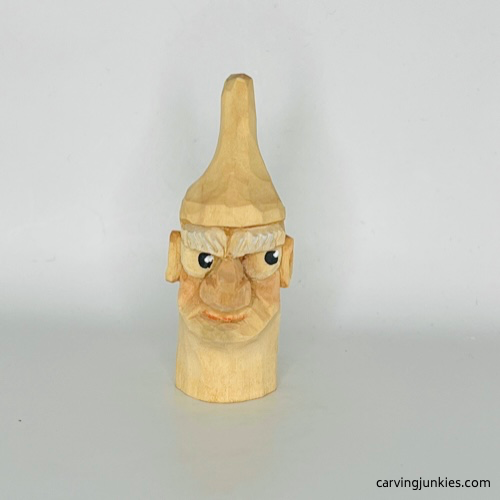 34. Front of painted wooden ring holder
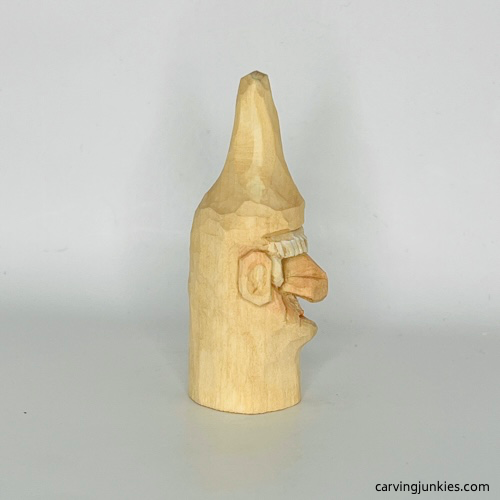 35. Right view of painted wooden ring holder
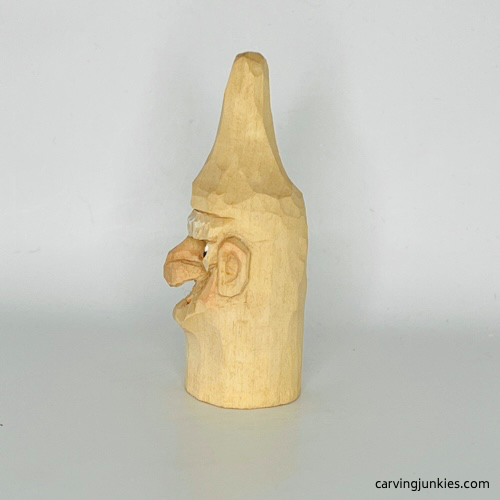 36. Left view of painted wooden ring holder
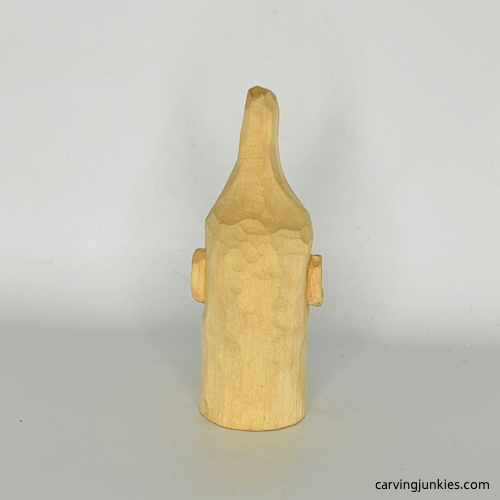 37. Back view of painted wooden ring holder
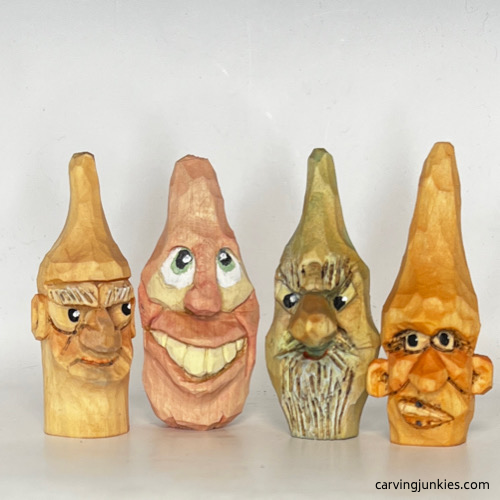 38. Let your imagination run wild!
Use whatever paint and paint brushes you want on your wooden ring holder. To get this look, use these acrylic paints:
- Base coat (on entire piece): Light base wash of Academy burnt sienna paint that is heavily diluted with water.
- Second coat: Ceramcoat tawny light wash.
- Highlights on nose, cheeks, and lips: One drop of Winsor & Newton Cadmium red light that is heavily diluted with water. Dab with a clean finger after applying.
- Eyes: 100% Craftsmart ivory paint for the eye sockets. 100% Ceramcoat black paint (applied on end of a pencil) for the pupils. When completely dry, use a toothpick to add a spec on each side of the pupils with 100% Craftsmart ivory paint.
- Eyebrows: Dry brush with Apple Barrel dolphin gray.
- Wood burning (optional): Highlight key areas like the eyebrows, eye sockets, inner ears, lips, and around the nose.
- Finish: Apply Howard’s Feed ‘N Wax polish with paper towels and let your wooden ring holder sit for 20 minutes. Polish with a stiff shoe brush. Properly dispose of flammable paper towels.
- Tip: If you plan to store your wooden ring holder in a bathroom, consider using a spray finish (like polyurethane) to seal and waterproof the carving.
- Note: If your ring holder does not securely hold a ring, you can carve a hole in the bottom and glue in a steel, metal, or tungsten weight (search for “Pinewood derby weights”). Or add a stick-on craft weight to the bottom.
Full-color, wooden ring holder pattern
If you want to make a larger carving—and use a bandsaw to create your roughtout—simply photocopy this pattern to fit your wood block.

Wooden ring holder tutorial summary
- A wooden ring holder caricature is fun and fast to carve.
- These wonderful characters make awesome gifts for anyone who wears a ring.
- Experiment with different facial expressions to enhance your face-carving skills.
- Paint, stain, or leave your wooden ring holders unfinished (but seal them if you plan to store it in a damp bathroom).
Get 50 Wood Carving & Painting Tips when you join our FREE Covered in Chips club.
You might also like these
Fun Things to Carve With A Knife From a Block of Wood
Fun things to carve from wood with free tutorials and pictures from all angles so you can get great results.
Chip Carving Tutorial For Beginners
This chip carving tutorial for maritime coasters is perfect to make a gift or add to your home.
Easy Low Relief Carving Tutorial With Wood Found in Nature
Our low relief carving tutorial is fun and easy for everyone.


Share this page
carvingjunkies.com never sells your personal information.
This site uses cookies for its operation and to enhance your experience. As an Amazon Associate and Focuser Carving affiliate we earn from qualifying purchases.
Home | About Us | Privacy Policy | Terms of Use | Contact | Sitemap