- Home
- Things to carve
- Woman wood carving
Wonderful woman wood carving
Up your skills with carved hands and movement.
LEVEL: SOME CHALLENGES
Our woman wood carving tutorial offers a few challenges to help raise your carving game.
First off, the woman’s head tilts up and leans back. The right boot is slightly raised and she looks like she is stepping forward.
You will also carve little hands that hold a balloon (sturdy wire keeps it airborn).
Finally, you will carve an attached base for added stability.
As usual, we offer photos from all angles to help you every step of the way. You can watch our tutorial-at-a-glance video first (below) to get an overview of the progression of our woman wood carving tutorial.
Supplies needed for your woman wood carving
You will need a piece of wood. We use a basswood block that is 1 x 1 x 4 inches (2.5 x 2.5 x 10 cm). You will also need your knives of choice (we use a sturdy roughout knife and a straight-edged detail knife).
A pencil or pen will help to draw on guidelines and details.
Safety gloves are always a must. We never carve without one on our noncarving hand. Also remember to protect your lap. There are life-giving body parts called femoral arteries in your legs that you don’t want to mess up!
We provide a free painting guide at the end (use paints and paint brushes of your own choice).
Woman wood carving tutorial at-a-glance
Starting the woman wood carving
Using your roughout knife, round all 4 corners on the block all around (photo 1). Draw a line that is 1/4-inch (0.63 cm) from the bottom to mark the top of the carved-in base (photo 1).
Draw another line that is 1 1/4-inches higher (3.1 cm) than your first guideline to mark the bottom of the woman’s dress (photo 1).
Draw a third line that is 2 1/2-inches (6.4 cm) from the bottom to mark the bottom of the woman’s head (photo 1).
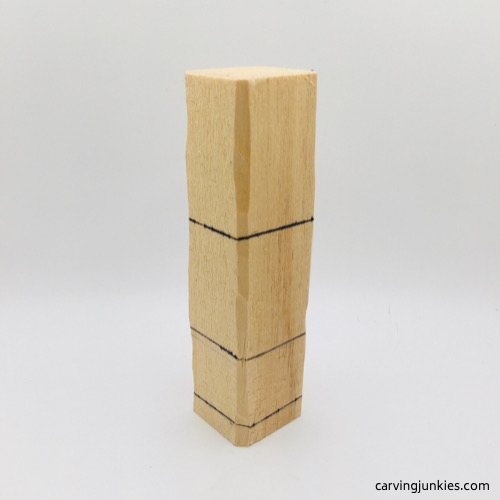 1. Guidelines are drawn and corners are rounded
Separate the first two guidelines
Use a stop cut (or a V-cut) to separate the first two guidelines all around your wood block (photos 2, 4,5) for this woman wood carving. Then, round off the top of the block, which will be the woman’s head (photo 3).
 2. Using a stop cut to separate the bock all around
 3. Rounding off the head
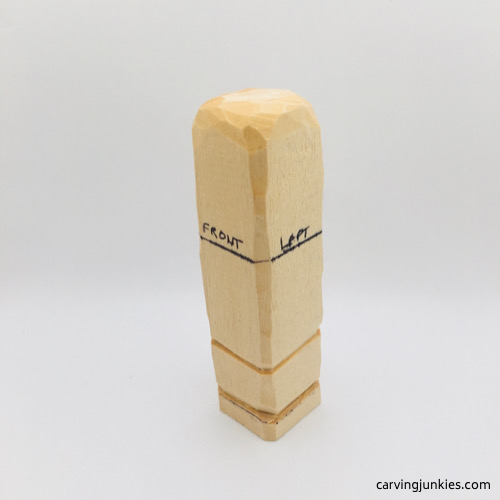 4. Front view of guidelines
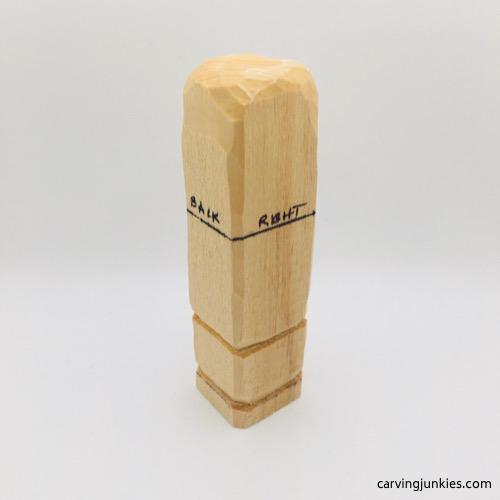 5. Back view of guidelines
Start the head of the woman wood carving
Set up the head by reserving wood for the nose (photo 6) and ears (photos 7,8). We use our triangle-by-triangle nose carving technique—which makes it easy to carve a well-proportioned nose—on your woman wood carving.
Also, mark where you will separate wood for the woman’s head scarf on the back (photo 9).
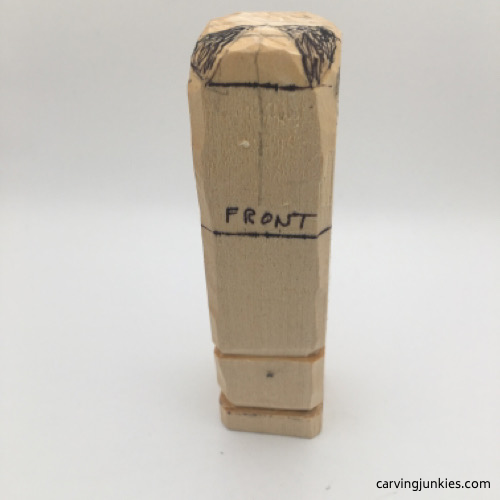 6. Wood for nose is marked
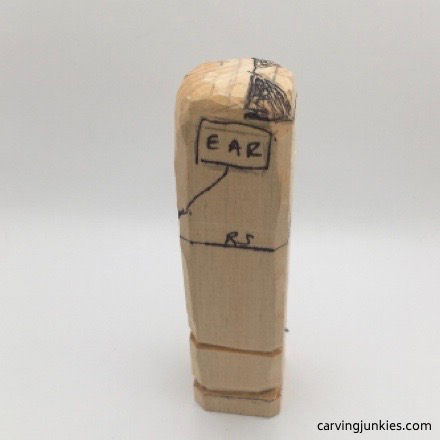 7. Wood is reserved for right ear
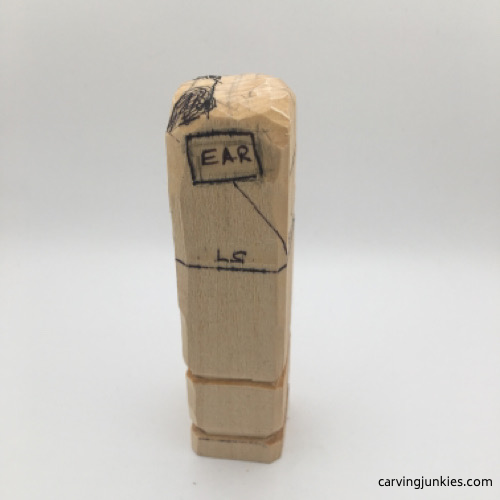 8. Other ear is reserved
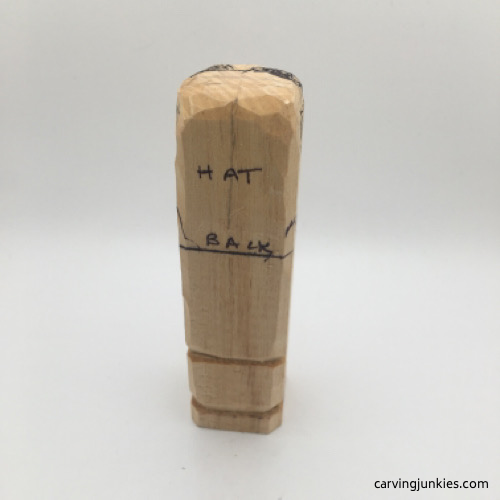 9. Back view of head scarf
Start the nose on the woman wood carving
Make a stop cut under the nose and remove wood from underneath (photo 10). Now, start the first pyramid cut on the right side. You may have to dig (or rock) your knife in deep because it is the end grain of the wood (photo 11).
Cut the other two sides of your pyramid and remove the triangular chip (photo 12).
Make another pyramid cut on the left side of the nose (photo 13). Keep the nose wide and thick for now. You will refine it later (photo 13).
If you have trouble making clean pyramid cuts, use a smaller detail knife to clean up your initial cuts.
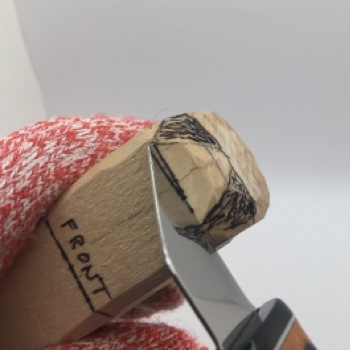 10. Making a stop cut under the nose
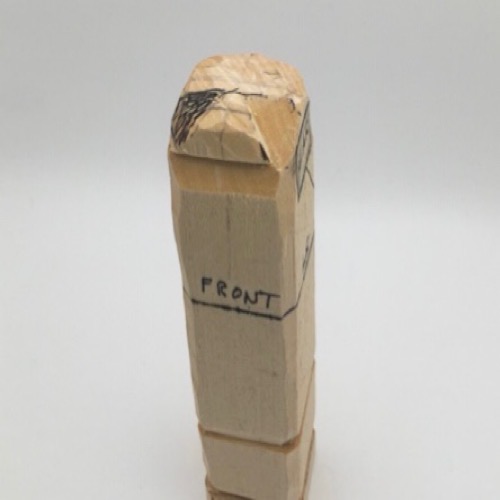 12. First pyramid cut is completed
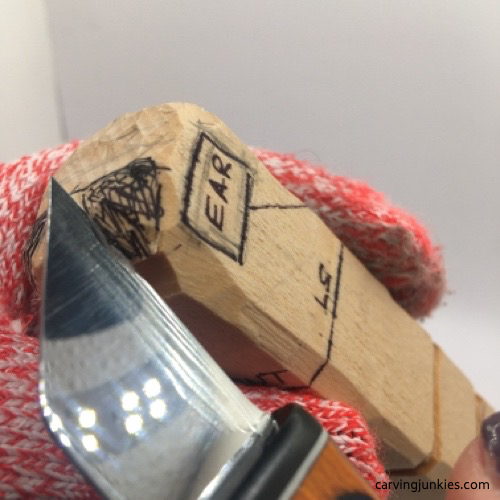 11. Starting a pyramid cut
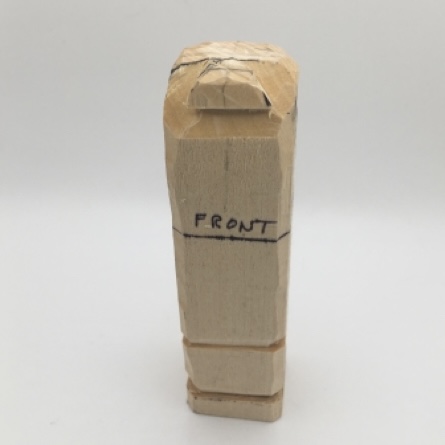 13. Second pyramid cut is completed
Separate the ears on the woman wood carving
Using a stop cut, separate the ear on one side and remove wood from underneath (photo 14). Work your way around the ear, removing wood as you go. You may have to remove several layers of wood to get the desired depth (photos 15-18).
Once both ears are separated, loosely draw on the bottom of the head, arms, hands, and feet (photos 15-18).
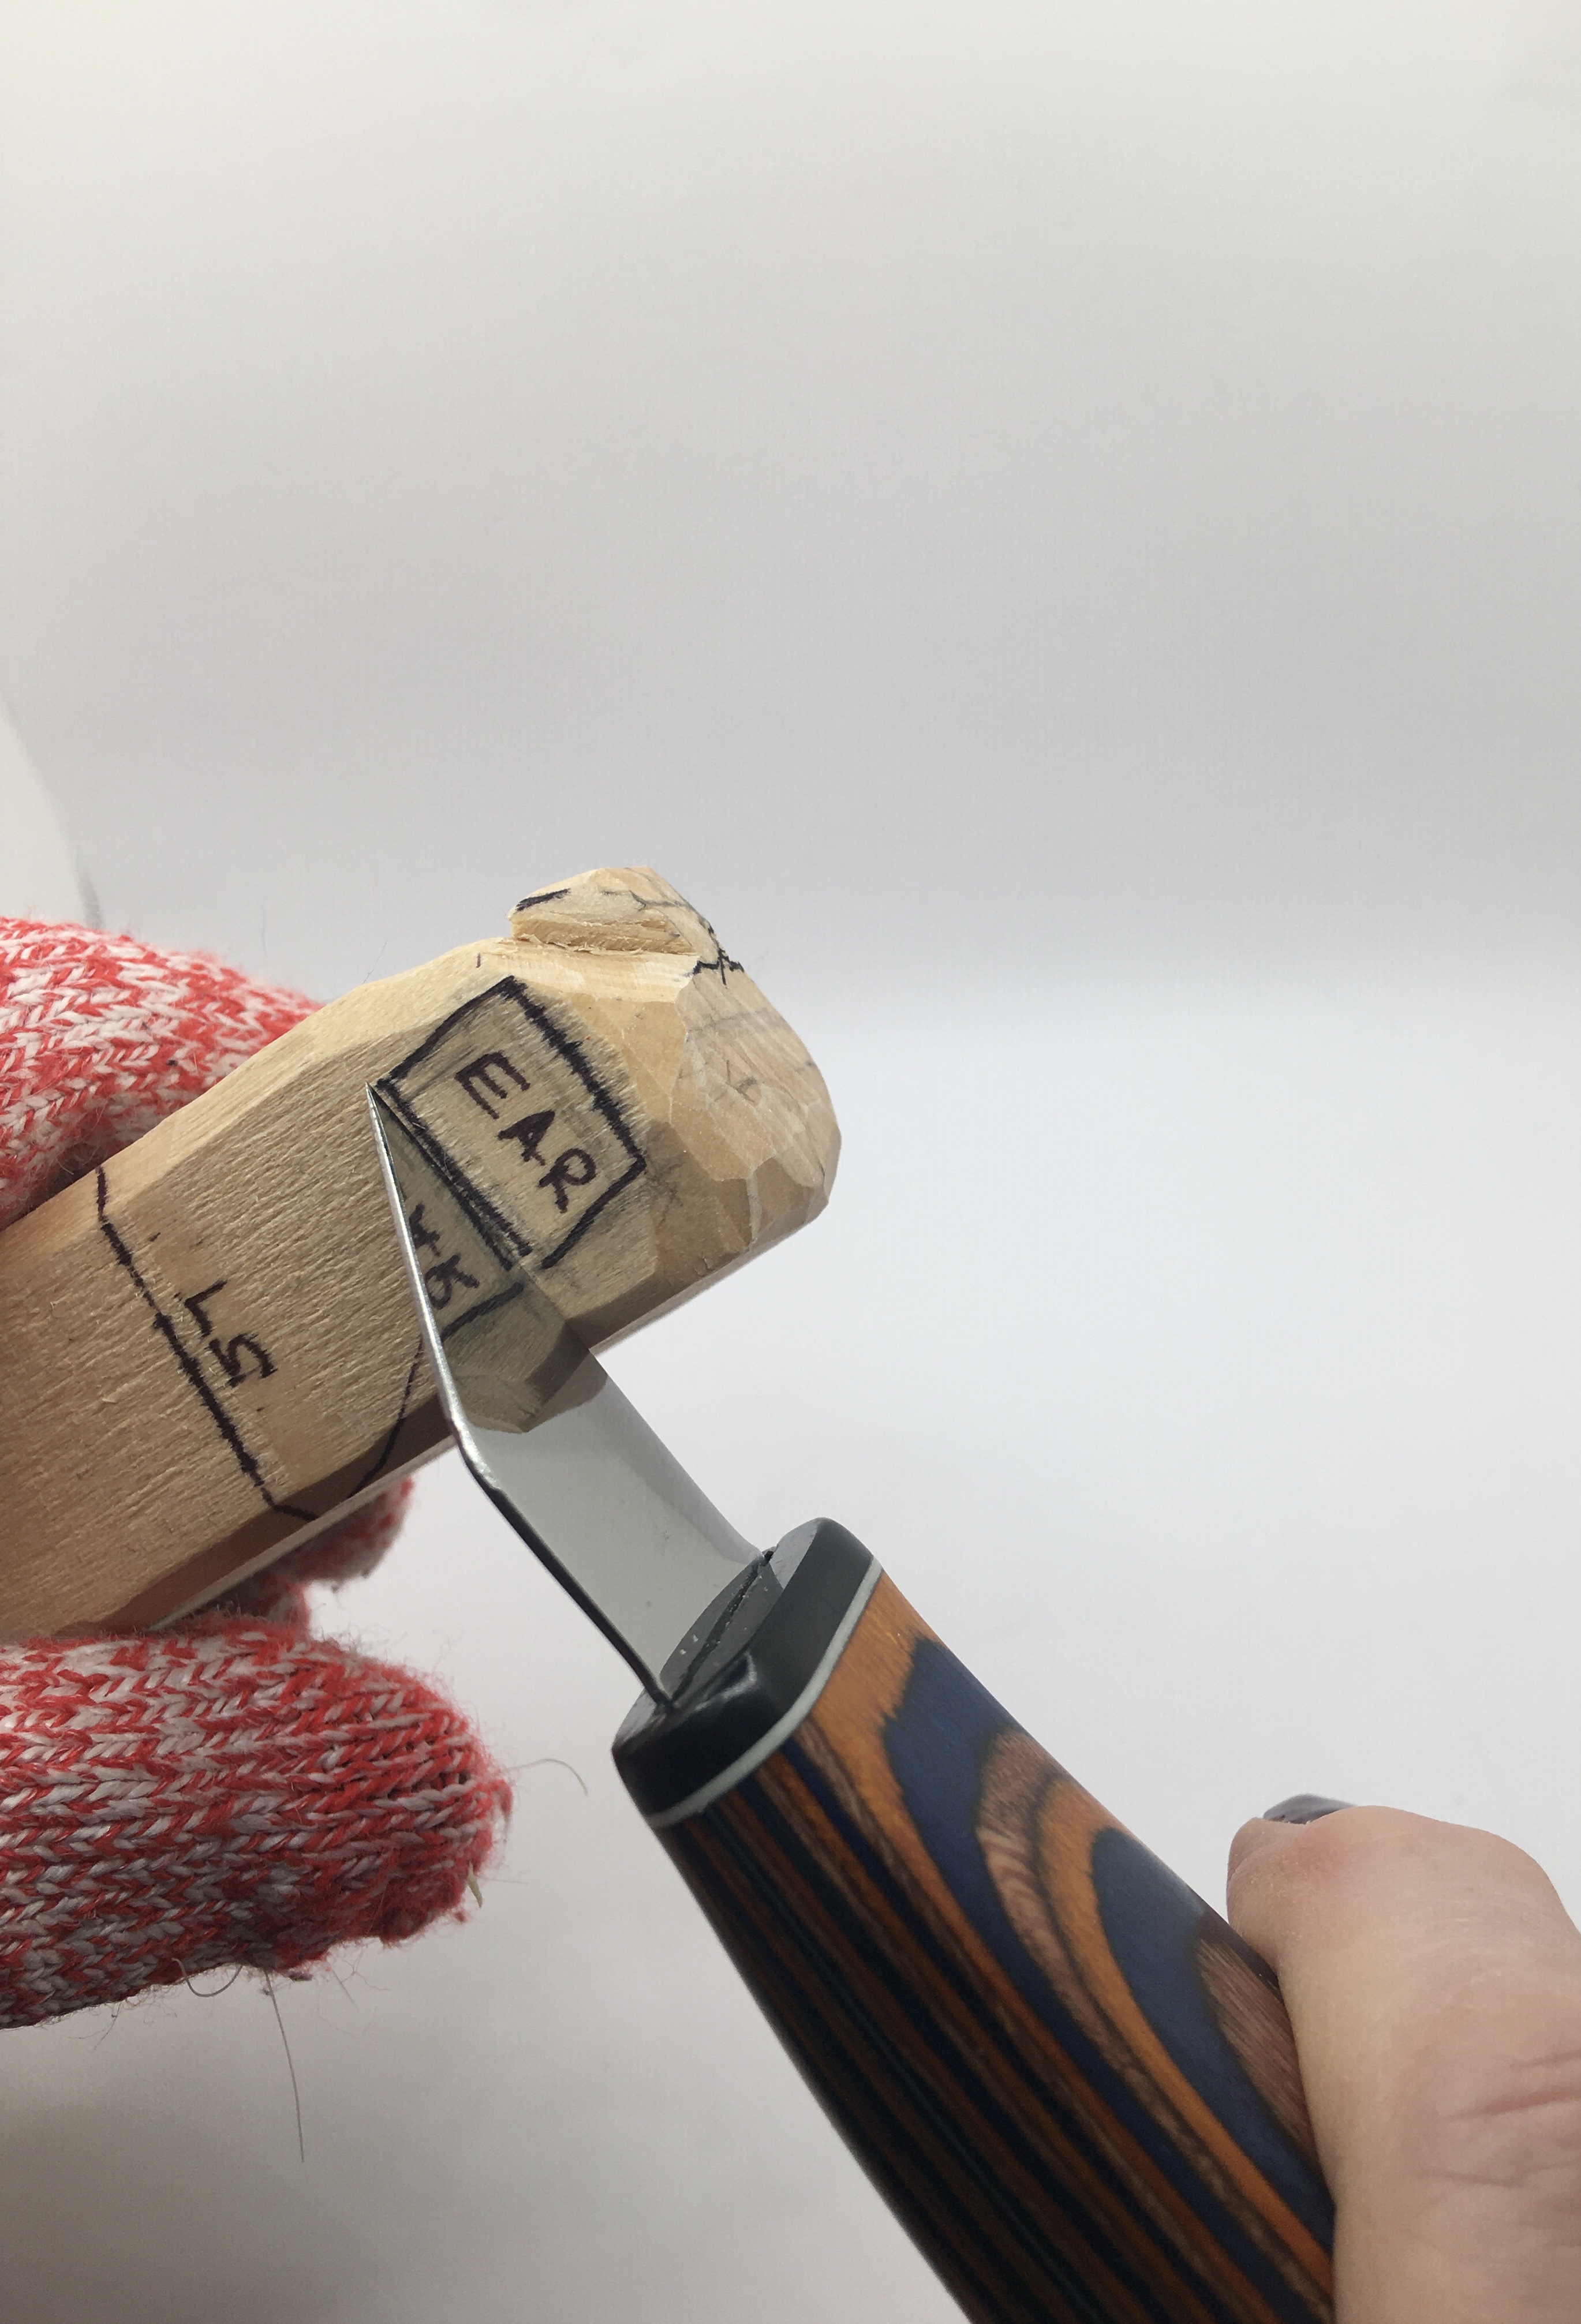 14. Separating the ear
 15. Ears are separated, details are drawn
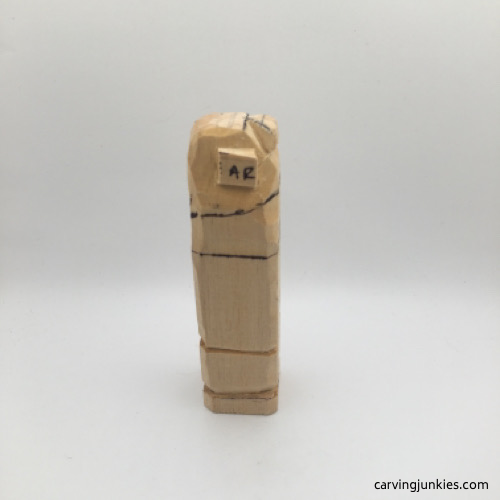 16. Right separated ear and head guideline
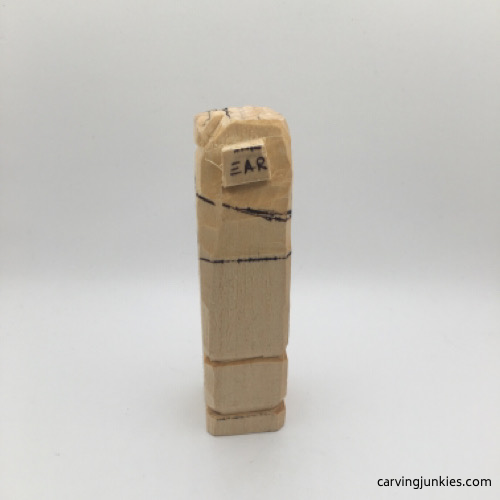 17. Left separated ear and head guideline
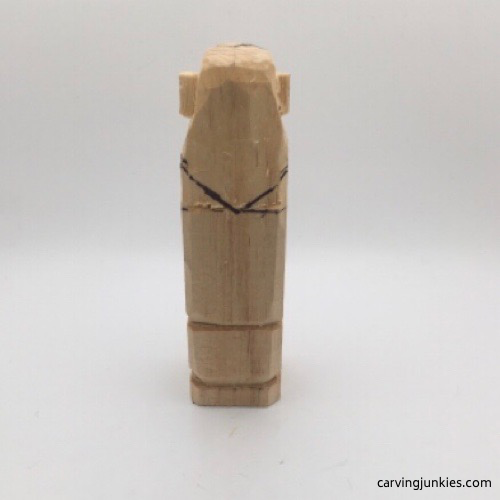 18. Back view of woman wood carving
Separate the head on the woman wood carving
Using your roughout knife, make stop cuts across your new guideline that marks the bottom of the head, and remove wood from underneath.
Keep removing wood (we sometimes switch to using V-cuts) until you shape the neck proportionately (photos 19-22).
Draw new leg guidelines on the left side of the woman wood carving (photo 21).
Add a thin guideline where you will split the legs on the front (photo 19) and the back of the woman wood carving (photo 22).
 19. Head is separated, neck is shaped
 21. Left view with new guidelines
 20. Right view of separated head
 22. Back view of leg-split guideline
Refine the nose on your woman wood carving
Draw a triangle on each the side of the nose (photo 23) that you will slice off with your knife (photo 24).
Draw your smile lines (photo 24). Using your detail knife, cut along each smile line, and remove wood from between the smile lines (photo 25).
Now, draw on the mouth and add short lines to mark where you will place the eyes (photo 25).
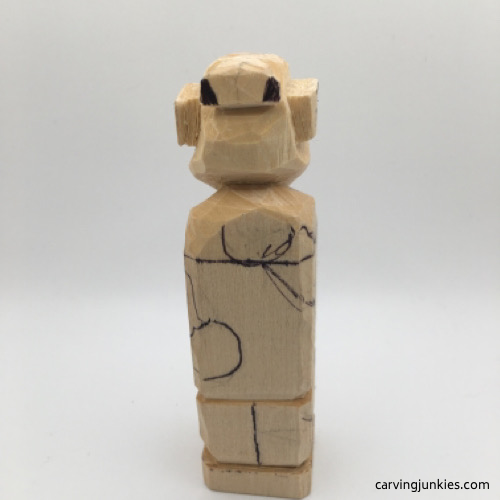 23. Nose wood to remove is marked
 24. Shaped nose, smile lines are added
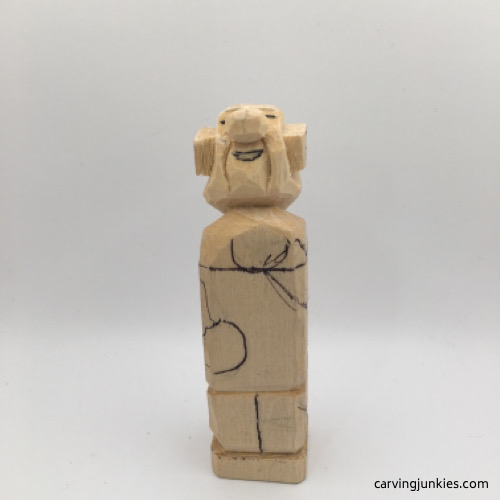 25. Smile lines are cut, mouth and eyes are added
Set up the legs on your woman wood carving
Widen the guidelines where you will split the legs on the woman wood carving (photos 26, 29).
Also, mark the wood to remove on the left leg, which will be slightly bent (photo 28). The right leg will be straight (photo 27).
 26. Front leg guideline is widened for splitting
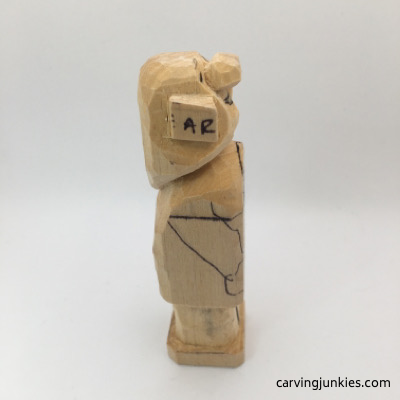 27. View of right straight leg
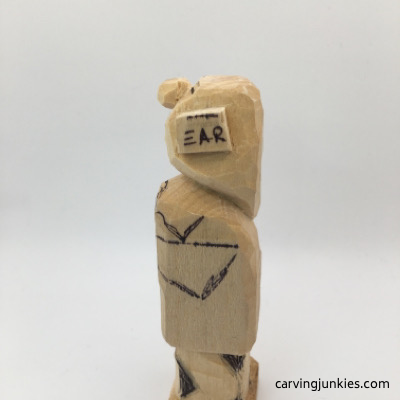 28. Wood to remove is marked on left leg
 29. Back guideline is widened to split the legs
Start the lower body on your woman wood carving
Using a sturdy knife, make a deep V-cut on the front and back to start to carve the legs (you may have to make several passes to get the desired angle).
Using a V-cut, split the legs (photos 32, 35). If the wood splinters, don’t worry too much. You can clean it up later with a file or sandpaper.
Use a wide V-cut to remove the colored wood on the front of the left leg (photo 30). Remove the colored wood on the back of the left leg by making a stop cut, and removing wood from underneath (top cut), or above (bottom cut). When you are done, the leg should look like photo 34.
Start to round and shape the boots (photos 32-35).
Note: Ignore the drawn belt (we decided midway that adding an apron would look better).
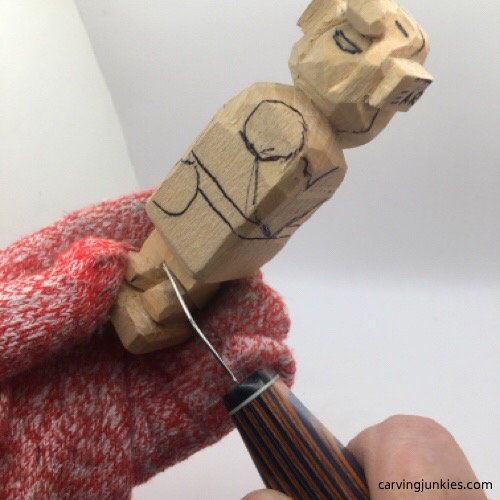 30. Cutting left leg at an angle
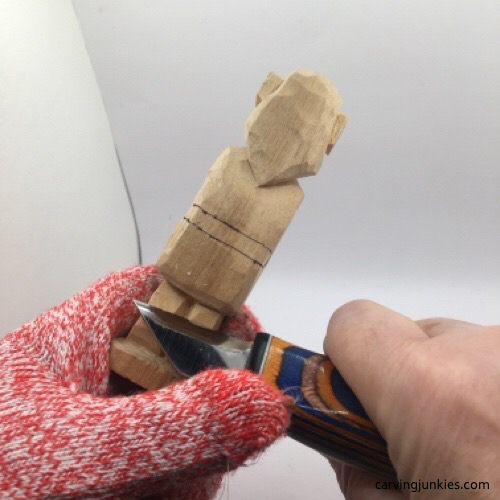 31. Removing the back top of the leg
 32. Bottom of boots are shaped
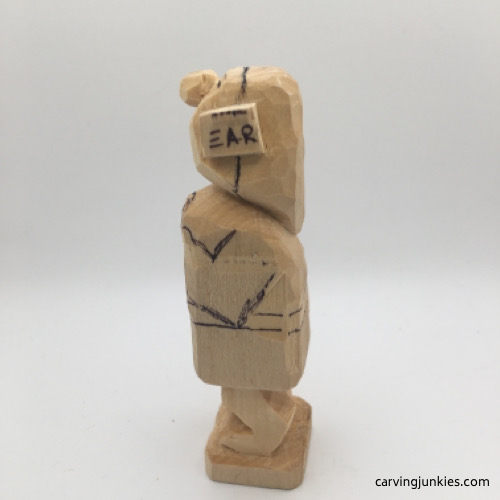 34. Left view of carved leg
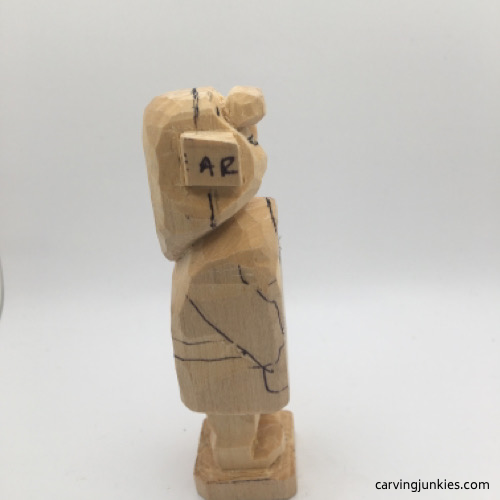 33. Right view of woman wood carving
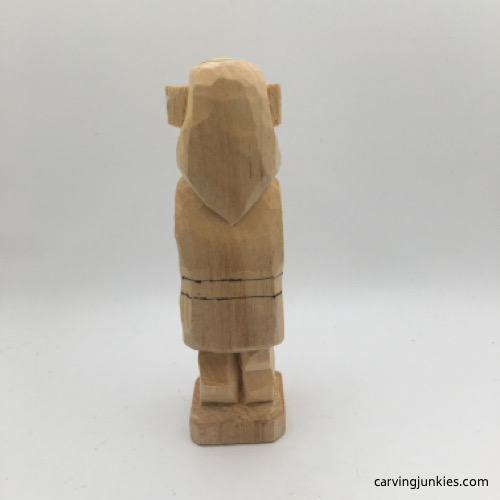 35. Back view of carved boots
Cut the arms and hands on your woman wood carving
Using your knife, cut along the guidelines to separate the arms and hands, removing wood from around them (photos 36-39).
You may have to dig your knife around a little in some places, especially where the arm is close to the neck.
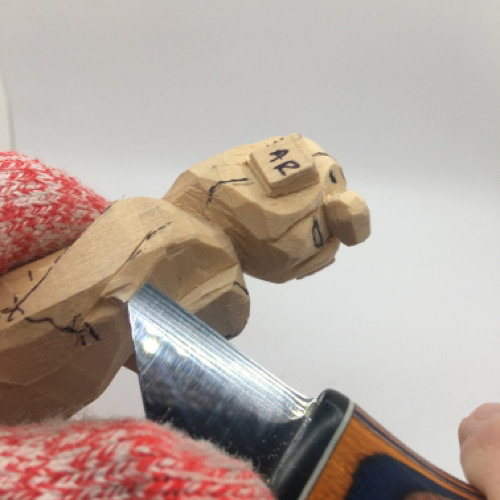 36. Removing wood under the stop cut
 37. Making a deep stop cut around the hands
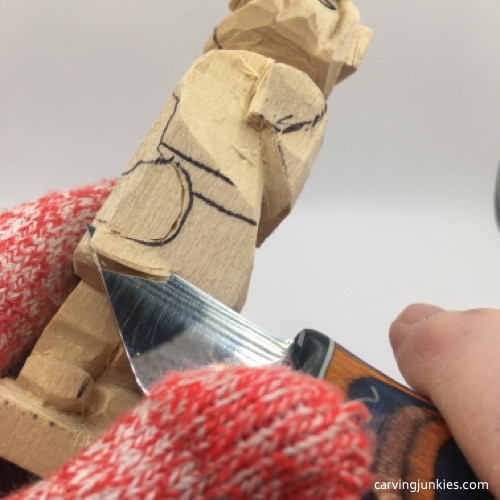 38. Removing wood from underneath the hand
 39. Removing wood from underneath the arm
Refine the arms and shape the hands on your woman wood carving
Shape and round the hands until they are similar in size (photos 40-42). Be sure to separate the hands from the sleeves of the dress by slicing wood at a downward angle, from the sleeve to the hand (as in photo 40).
Check the back to ensure symmetry between the shoulders and the back of the arms (photo 43).
Round the arms as needed, to avoid sharp edges and a boxy look (photos 40-42) on your woman wood carving.
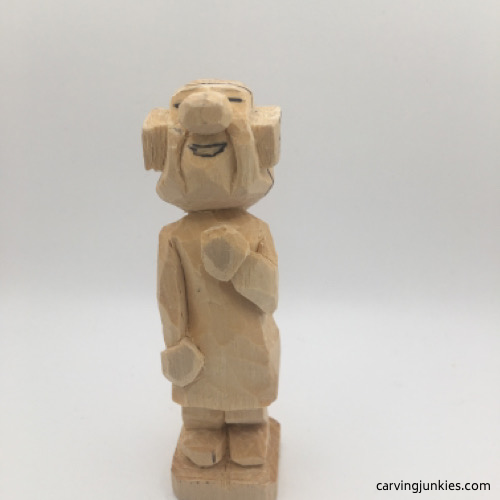 40. Hands and arms are shaped
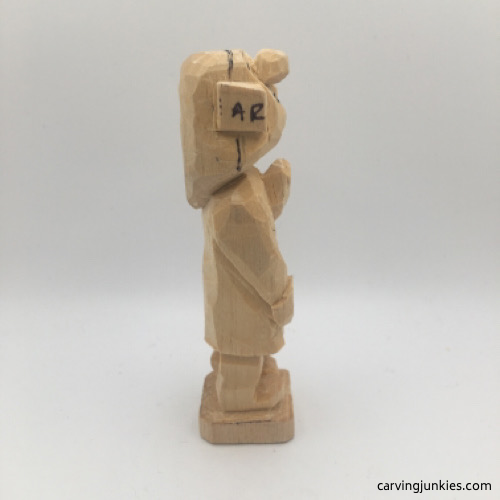 41. Right view of carved arms
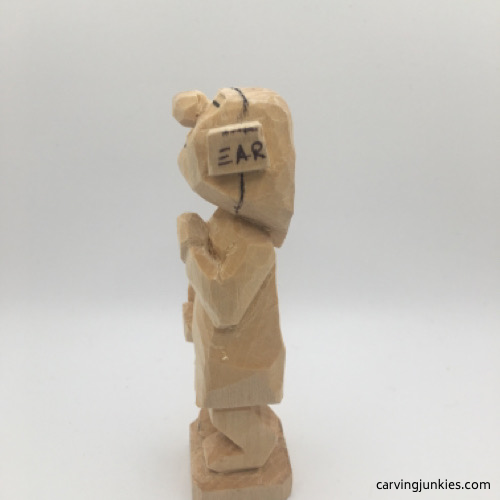 42. Left view of carved arms
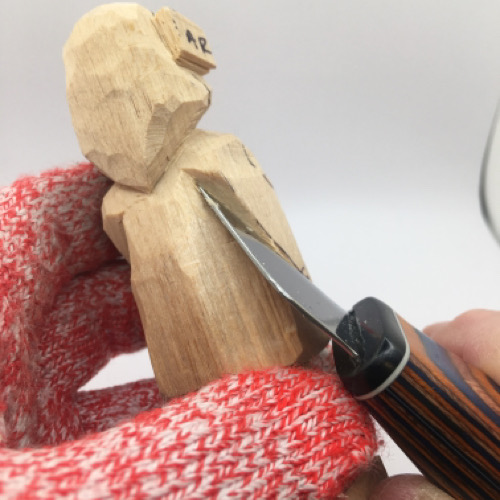 43. Back of the arms should be symmetrical
Carve the eyes and mouth on your woman wood carving
Use a small V-cut to start the eyes on each side of the nose. Cut straight back into the head (photo 44), and cut down from the top (perpendicular) to create the eye socket (easier to see in photo 49).
Outline the mouth with your knife and carefully remove wood from the top half of the mouth.
We find it helpful to turn the piece upside down to shape the lip, gently shaving wood off from under the chin upward (photo 45).
 44. Cut straight back under initial V-cut
 45. Shaping the lip and chin
Add more details to your woman wood carving
Separate the scarf from the head. We use a stop cut and remove wood from the face, moving toward the stop cut (photo 46).
Also draw the final shape of the ear, marking where you will remove wood on the woman wood carving (photos 47, 48).
 46. Stop cut to separate the head scarf
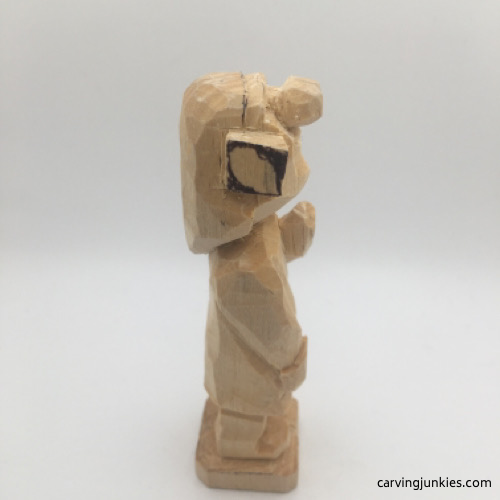 47. Wood on right ear is marked for removal
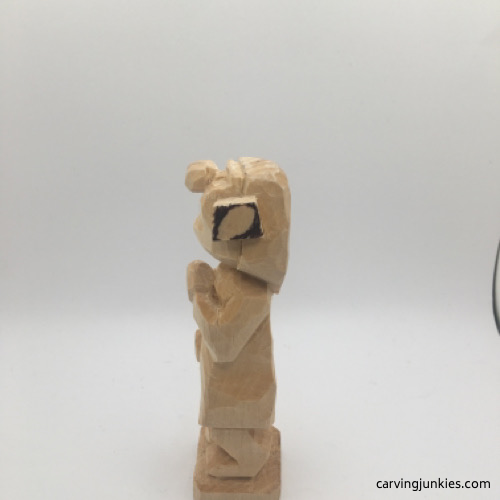 48. Left ear is marked
Refine some details on your woman wood carving
Draw the fingers and carefully use small V-cuts to shape them (photos 49, 50). Tip: Before separating the fingers, make one cut at a downward angle so the fingers will slope down from the knuckles.
In order to add the balloon (optional), you need to create a hole in the left hand. You can use a hand drill or a screw on a dowel to create the hole, but be careful not to crack the wood. If you do crack it, pull out some wood glue!
Use stop cuts to create the top part of the boots, and remove wood underneath to separate them (see progress photos 50-53).
Shape the ears of the woman wood carving (tip: you can use a small V-cut to start the inner ear or a use a gouge, if you prefer).
Draw on the apron (photos 50-53). Also make small V-cuts to add some wrinkles to the dress (photos 51,52).
 49. Starting to cut fingers
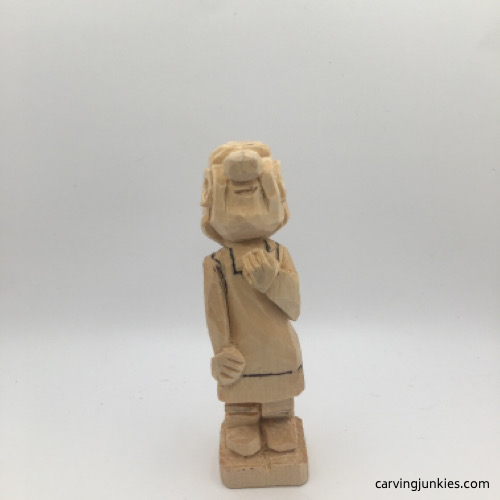 50. Front view with apron added
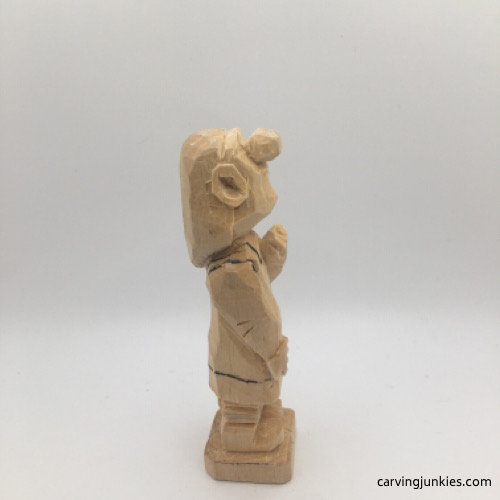 51. Right view of apron
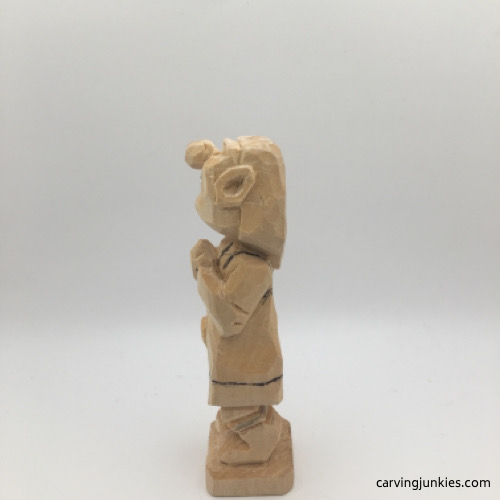 52. Left view of apron
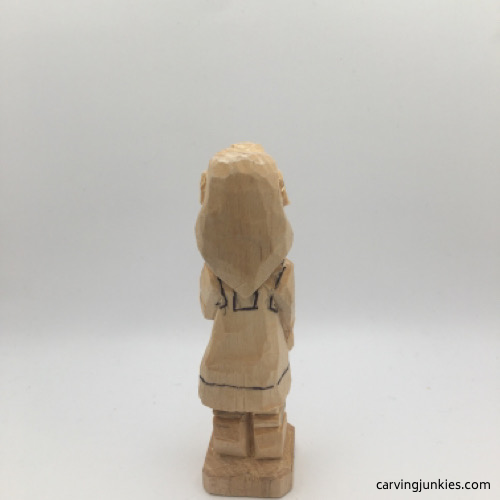 53. Back view of apron
Finish your woman wood carving
Make stop cuts along the apron guideline (removing wood from underneath or from the sides) to separate it on the front and back side of the woman wood carving. Make a few small V-cuts to add more wrinkles to the front and back of the apron (photos 54, 57).
Clean up any fuzzies, especially between the legs, on your woman wood carving (we use a thin metal file, but rolled-up sandpaper will also work).
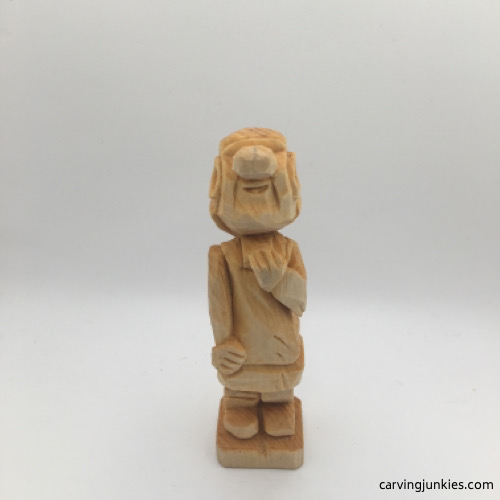 54. Finished front with cut apron and wrinkles
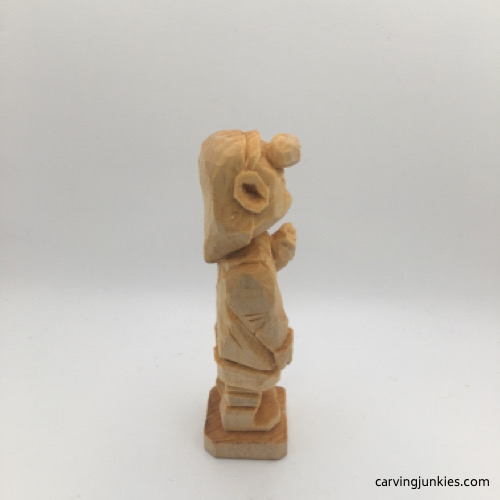 55. Right view of completed woman wood carving
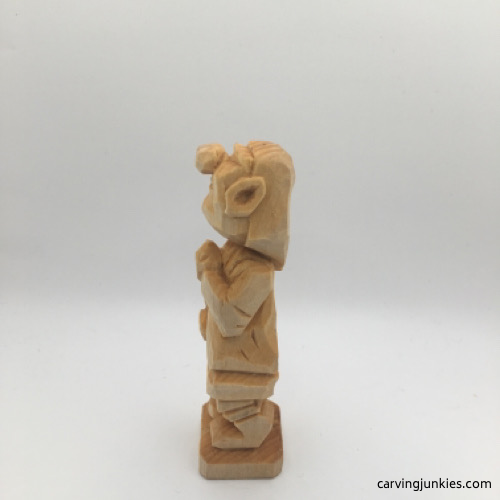 56. Left view of finished carving
 57. Back view of apron and wrinkles
Carve the balloon for the woman wood carving
After seeing how easy it is to make an avocado pit carving, we made a heart-shaped balloon for our woman wood carving. You have to peel the pit first (photo 58).
Unfortunately, we left it to dry in our (full) wood chip container and forgot about it. A few days later, we dumped the contents of the container into our wood-burning stove. Oops. No worries, though. We simply ate another avocado and made another balloon. This one is round.
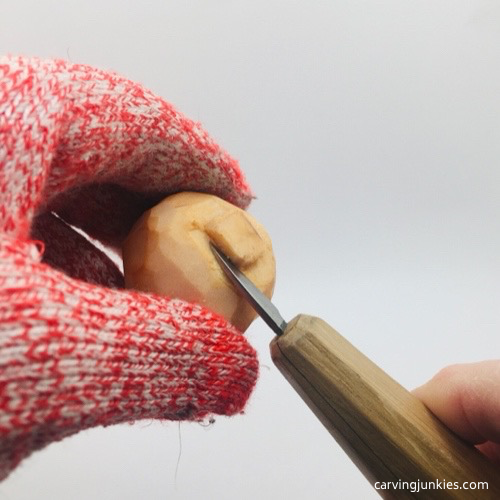
Carving a green avocado pit was easier than carving a small piece of wood (photo 59). Take your time, however, because it’s easy to slice too deep when the pit is wet. I (Dana) have very small hands, so if you decide to use a dry avocado pit (or a piece of wood), please use a vise to protect yourself.
We also didn’t anticipate the pit splitting as it was drying, but adding a little wood glue helped keep the balloon in one piece.
Once the balloon is dry (about 3 days), use a hand drill (or a screw on a dowel) to make a hole for the wire. We use 12-gauge wire, which is strong enough to hold the balloon.
After the carving and balloon are painted, use some wood glue to attach the top of the wire to the bottom of the balloon and let it dry for 24 hours.
Glue the other end of the wire into the hand with wood glue and let dry for 24 hours. For decorative purposes (optional), we added a higher gauge wire (20-gauge), wrapping it around the bottom of the balloon.
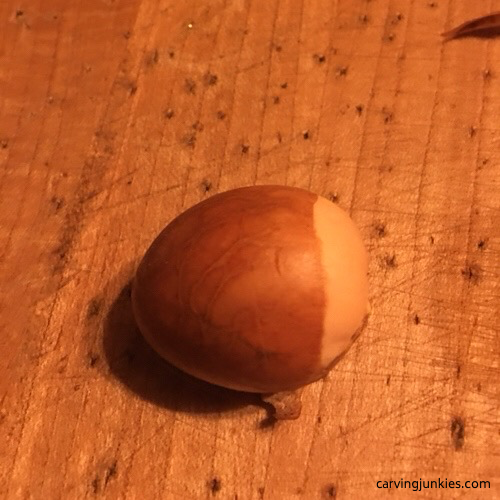 58. Peeling the avocado pit
 59. Carving the pit into a balloon
Paint the woman wood carving
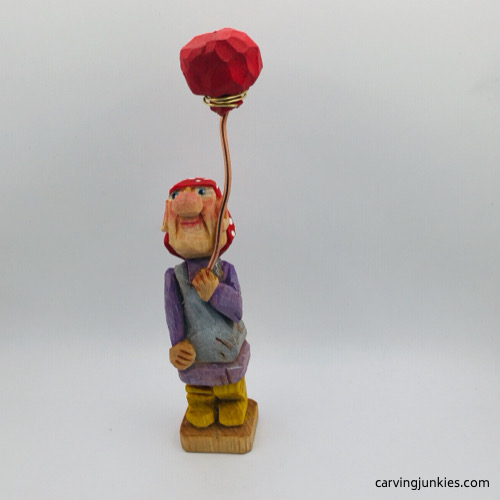
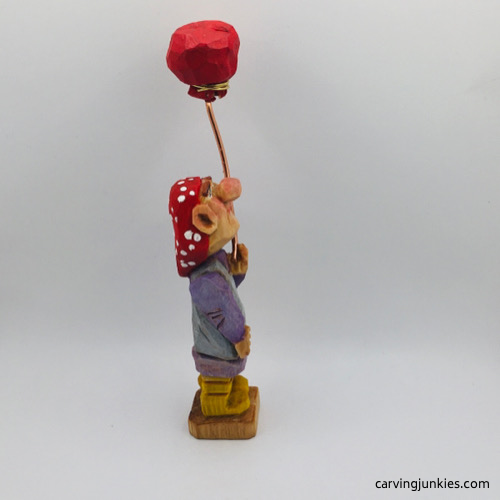

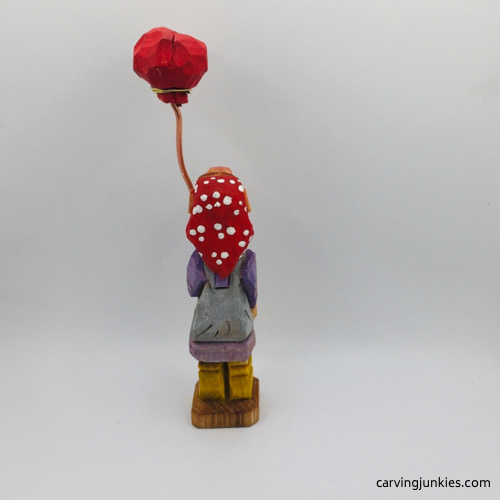
How to get a similar look for your woman wood carving
Use paint brushes of choice (we like flat ones). Here are the acrylic paint colors/brands we use for this woman wood carving:
- Eyes and teeth: One drop of Artist Loft titanium white paint mixed with 5 drops of water.
- Eye iris: 100% CraftSmart Calypso (and speck of black magic marker after drying completely).
- Apron: One drop of Folk Art steel gray paint mixed with 5 drops of water.
- Head scarf: Three drops of CraftSmart bright red paint mixed with 6 drops of water (save reserve). Let dry completely and add 100% titanium white dots with round tip of paint brush.
- Nose, lips, cheeks, tops of ears: Add 10 drops of water to reserved red paint.
- Dress: One drop of Delta Creative Ceramcoat gp purple paint mixed with 3 drops of water.
- Boots: Four drops of Delta Creative Ceramcoat bright yellow paint mixed with 9 drops of water.
- Dry brush titanium white paint on apron and shirt.
- Highlights on creases, wrinkles, fingers, boots, apron, inner ears and eyebrows: tiny bit of burnt umber mixed with wet brush.
- Balloon: 100% Folk Art lipstick red paint.
Summary of our woman wood carving tutorial
- Carving feminine faces can be challenging and it may take some practice.
- The tilted head, raised hand and foot, and suspended balloon give this woman wood carving the perception of movement.
- You can carve the balloon from an avocado pit like we did, or use wood instead.
- A little wire from a craft store (and some wood glue) keeps the balloon secure above the head of the woman wood carving.
Get 50 Wood Carving & Painting Tips when you join our FREE Covered in Chips club.
Share this page
carvingjunkies.com never sells your personal information.
This site uses cookies for its operation and to enhance your experience. As an Amazon Associate and Focuser Carving affiliate we earn from qualifying purchases.
Home | About Us | Privacy Policy | Terms of Use | Contact | Sitemap


