- Home
- Wood carving gnomes
- Halloween gnome wood carving
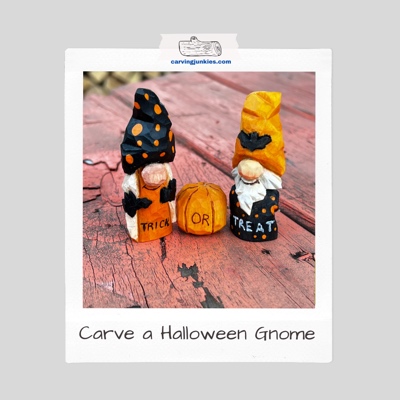
Wooden Halloween gnome carving
Carve an adorable mini trick-or-treat gnome.
Looking for a fun wooden Halloween gnome carving that is small in size, yet big on cuteness? You will love this easy-to-follow tutorial, which also includes painting instructions and design inspiration to make more “boo-tiful” gnomes.
This tutorial provides free step-by-step instructions to carve the gnome with a bat on his hat. You can adapt the design to create additional gnomes.
I’ll be experimenting with a few more Halloween gnomes to include in my first book. Sign up for our free newsletter to be updated when it becomes available!
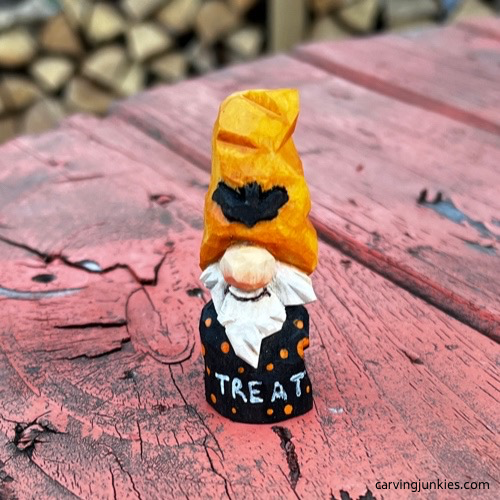
What you need for your wooden Halloween gnome carving
You will need a 1 x 1 x 3-inch (2.5 x 2.5 x 7.6 cm) block of wood for your wooden Halloween gnome carving.
I only needed one knife (my trusty OCC Tools 1-7/8 inch straight knife. Tip: Strop every 30 minutes to make carving a pleasure.
Keep a pen, pencil, or magic marker nearby for sketching details. Tip: If you make a mistake, simply carve your drawing off and start over.
A ruler or measuring tape will also help when you are sketching your guidelines.
Refer to the painting guide at the end of this page to get a similar look. As always, if you want to create a larger wooden Halloween gnome carving, simply get a bigger wood block (and double or triple the measurements in this tutorial).
Accidents do happen to even the best of carvers. Please protect your mitts with a good carving glove. I use Vet tape to reinforce my gloves, which provides a higher level of protection.Remember to protect your lap with someone hard, too (if you’re a lap carver).
That’s enough gabbing… let’s start carving!
Wooden Halloween gnome carving tutorial at-a-glance
Take a look at this short video to see the important steps to successfully carve your Halloween gnome.
Starting your wooden Halloween gnome carving
You will carve off the corner to create your wooden Halloween gnome carving. First, use your knife to slightly round down the corners (completed in photos 1-4).
Draw the curved line for the bottom of the hat on the front (photo 1). Start about 1.5 inches (3.8 cm) down from the top at each corner (photos 2,3). In the middle, the bottom of the hat is about 1.25 inches (3.2 cm) from the top (photo 1).
Make your nose box about 0.75 inches (2 cm) wide by 0.5 inches (1.3 cm) tall at the middle point (photo 1).
Extend the bottom of the hat around the back, about 1.75 inches (4.4 cm) from the top of the block (photo 4).
Sketch the beard (photos 1-3).
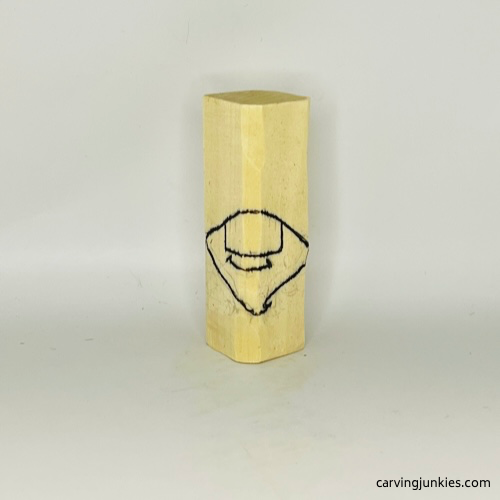 1. Front guidelines are drawn
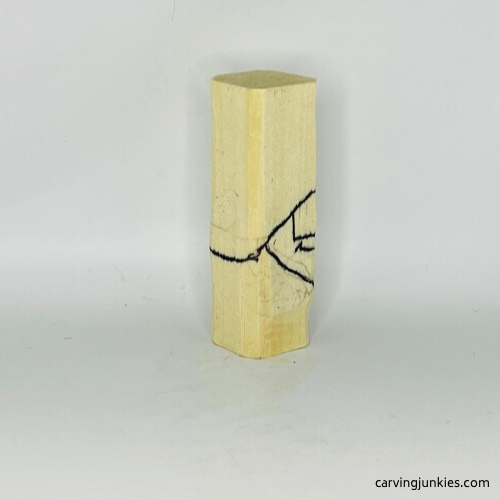 2. Right view of guidelines
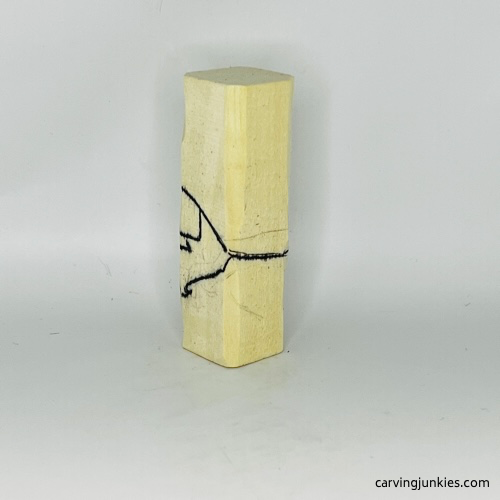 3. Left view of guidelines
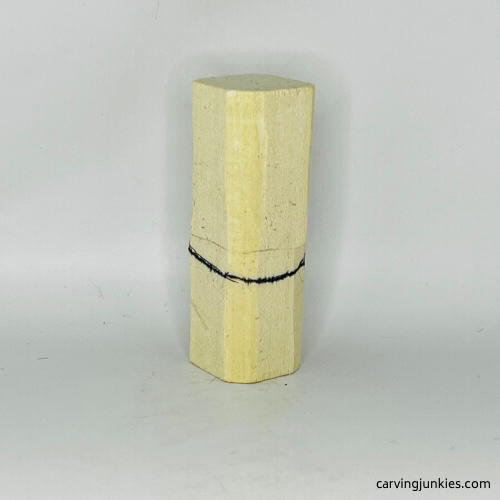 4. Back guidelines are drawn
Separate the bottom of the hat on your wooden Halloween gnome carving
Using stop cuts, separate the brim of the hat all around (photo 5). Tip: Start at each corner and work your way toward the middle.
Then, start to shape the top of the hat (photo 6). Work evenly as you remove wood all around (completed in photos 7,8).
Mark wood that you will carefully remove using a V-cut (photos 7,8) to create a notched hat.
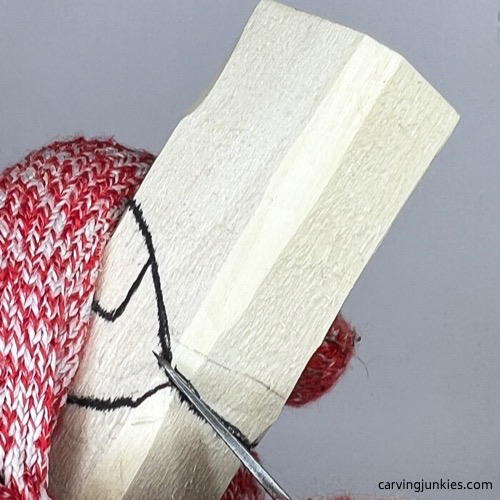 5. Separating the hat brim
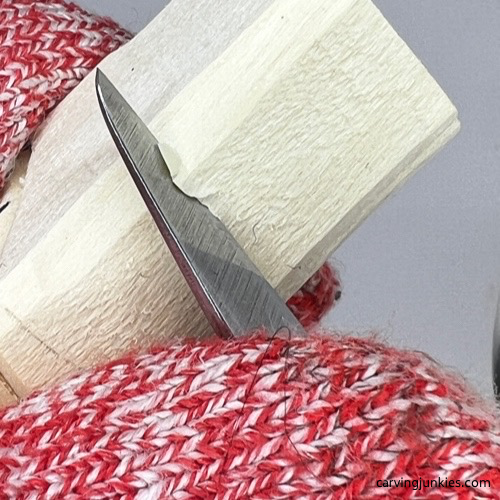 6. Starting to shape the hat
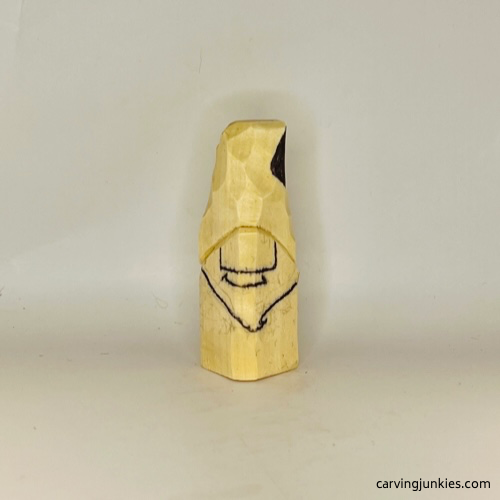 7. Hat is narrowed
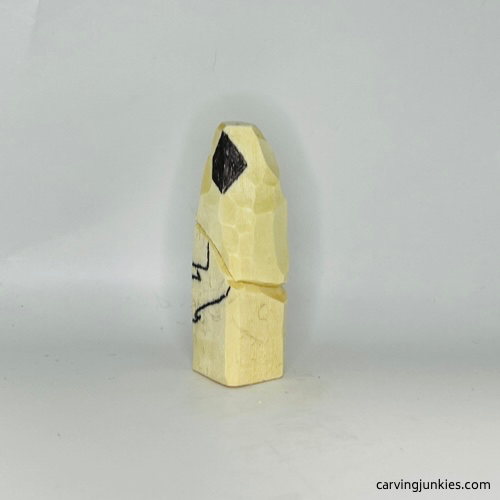 8. Wood is marked for removal
Carve some details on your wooden Halloween gnome carving
Use a wide V-cut to notch the wooden Halloween gnome carving hat (started in photo 9 and completed in photo 10). You may have to make several passes to remove the wood. Tip: Take your time—and keep your notch thick—to prevent cracking the hat.
Draw your knife along the nose box guideline (photo 10) and use a slicing cut to remove wood. Tip: You can make a series of deep stab cuts along the guideline or hold your knife like a pencil. Repeat on the other side.
Then, make a stop cut under the nose (photo 11) and remove wood from underneath. This will give you greater access to remove more wood around the nose box.
Once the nose box is separated, mark further wood to remove (photo 12) to round the nose (photo 13).
Tip: Make small pyramid cuts on each side of the nose (right under the brim of the hat) to add shadow.
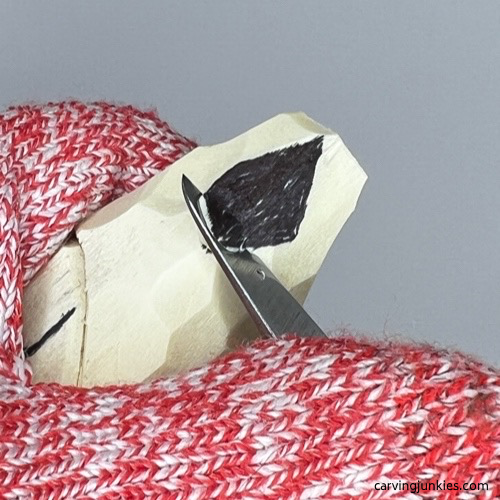 9. Making a V-cut
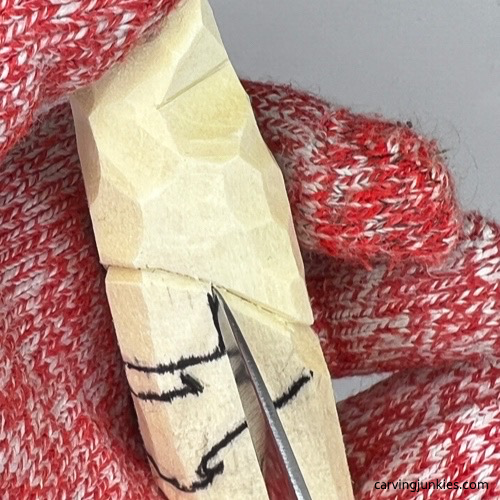 10. Starting to separate the nose
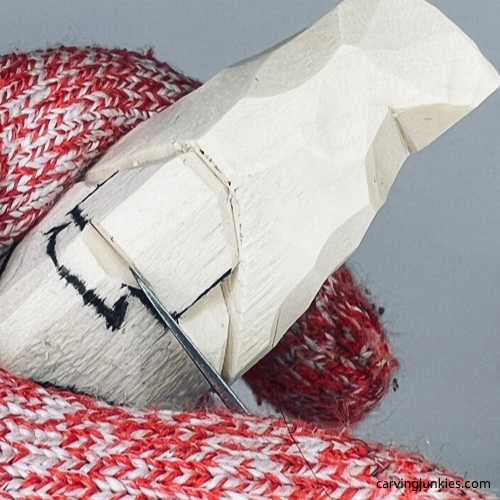 11. Making stop cut
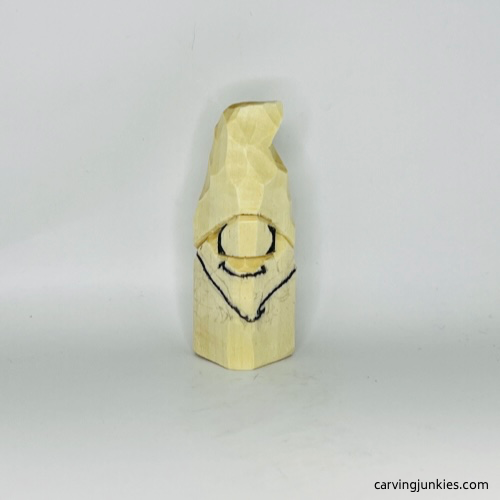 12. Wood is marked for removal
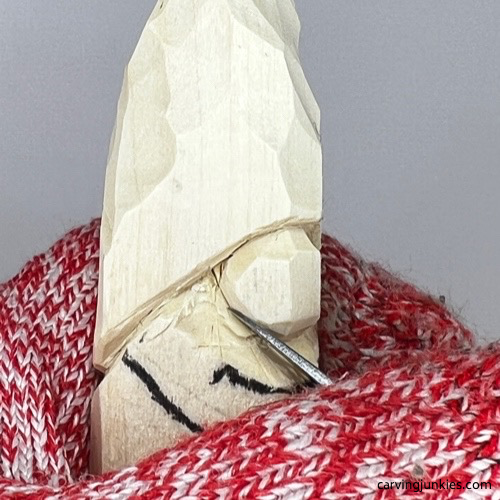 13. Rounding the nose
Carve the beard on your wooden Halloween gnome carving
Make stop cuts along the guideline for the beard (photo 14), removing wood from underneath.
Now, draw several wide triangles along the beard to mark the wood that you will remove (photo 15).
Use a pyramid cut to carefully remove triangular chips of wood (started in photo 16). Tip: Clean up the wood around your pyramid cuts to keep the beard clean. It’s easy to think that you will come back to it—and forget.
Now, use your knife to follow the guideline along the mouth (photo 17) and the smile lines. You can make secondary slicing cuts to remove slivers of wood. I decided to extend the smile lines up under the nose (photo 18).
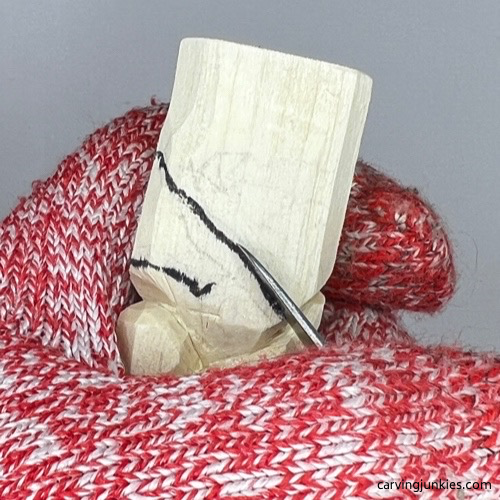 14. Separating the beard
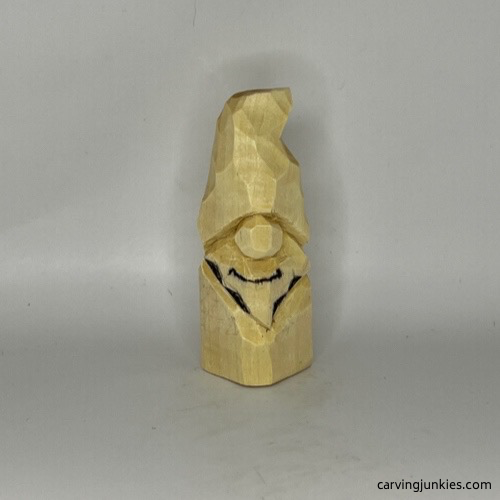 15. Wood is marked for removal
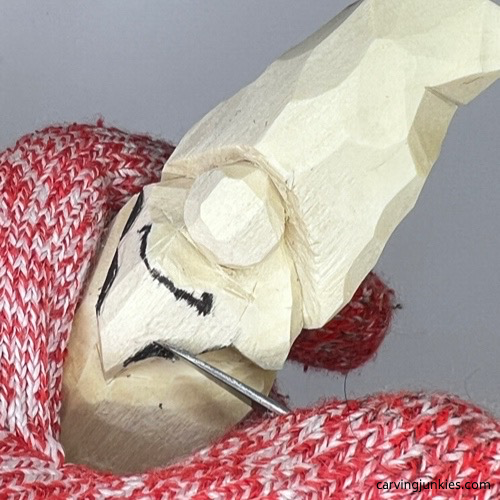 16. Starting a pyramid cut
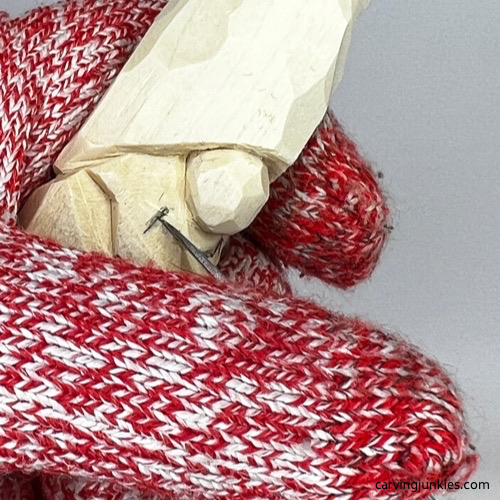 17. Carving the mouth
Add some details to your wooden Halloween gnome carving
Draw the bat on the front of the hat (photo 18). Also, mark the beard where you will carve segments (photo 18).
On the back, sketch on the arms and the mittens (photo 19).
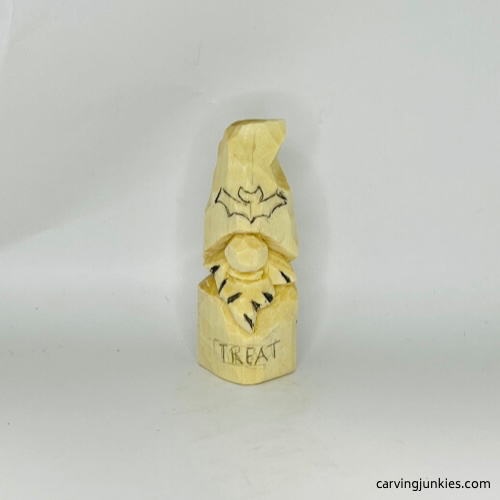 18. Details are drawn
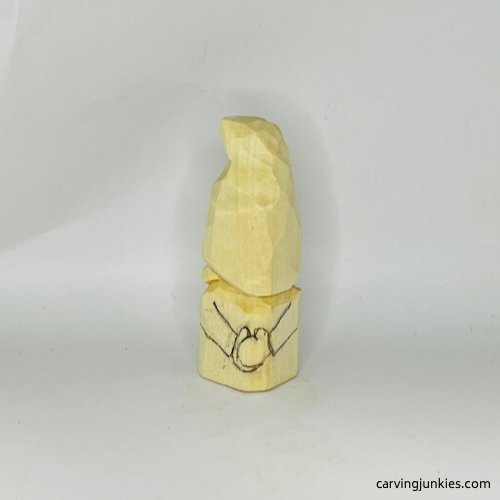 19. Arms are drawn
Carve some details on your wooden Halloween gnome carving
Using your knife, carefully carve along the guideline of the bat and remove wood from around it (photos 20,21). You may have to make several passes to get the desired depth. Tip: If you have a V-tool this is a place to use it.
Also, lightly sketch the lettering (I used pencil) to ensure you will give yourself enough room for it after you paint (partially visible in photo 22).
Make a few wide V-cuts on the hat to add some interest and catch the light (completed in photos 26-29).
Clean up your cuts as you go (remove any wood fuzzies). Tip: If you have a lot of fuzzies, you may need to strop your knife more often.
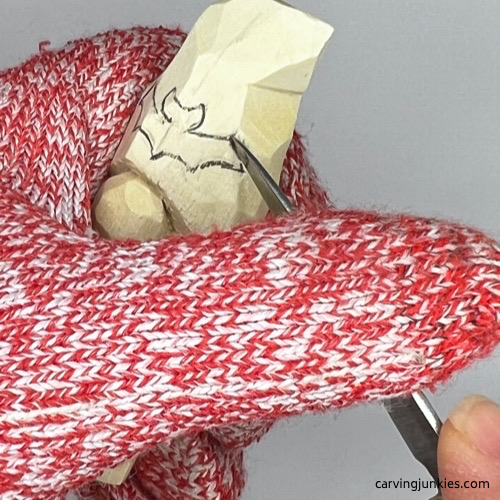 20. Separating the bat
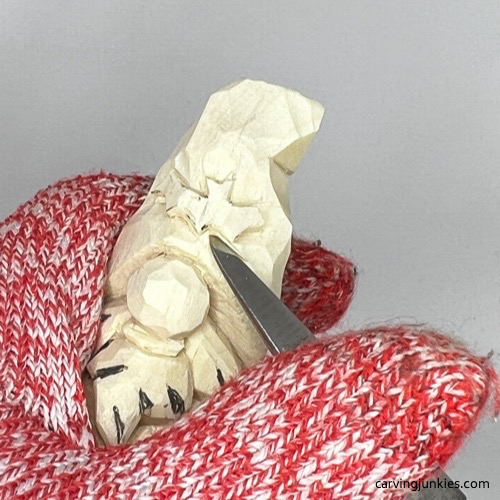 21. Removing wood in layers
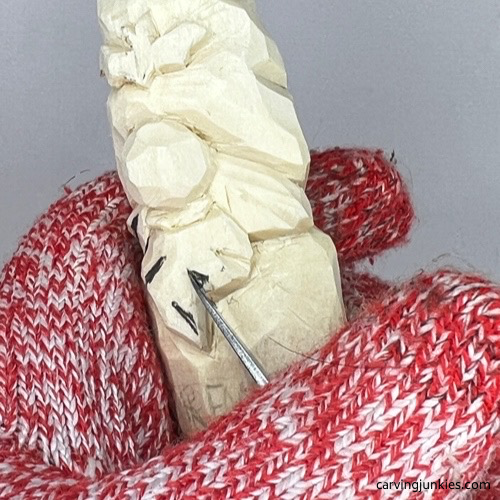 22. Carving beard segments
Separate the arms on your wooden Halloween gnome carving
Using stop cuts, separate the arms on your wooden Halloween gnome carving (photo 23). Once the arms are carved, separate the mittens (photo 24).
Shape the shoulders on the front and back by cutting at an angle against the neck (visible in photos 25-28).
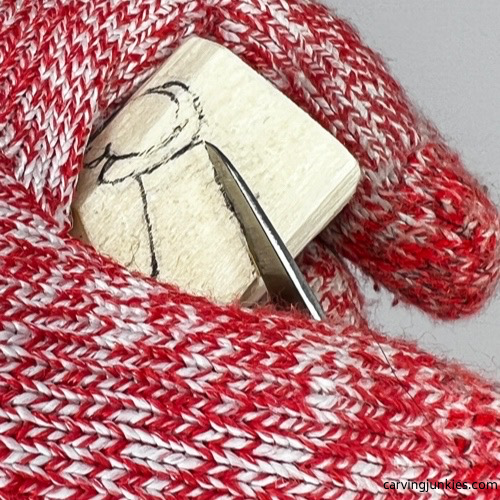 23. Separating the arms
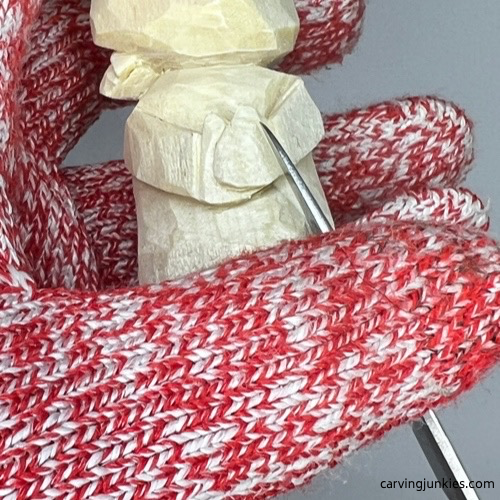 24. Separating the mittens
Refine your wooden Halloween gnome carving
Clean up your cuts and deepen cuts where you plan to use different paint colors.
Also, make sure your wooden Halloween gnome carving is symmetrical (photos 25-28). Tip: You may need to narrow the lower body slightly.
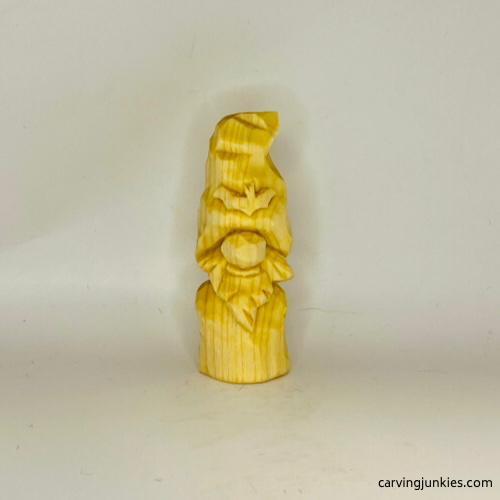 25. Front of wooden Halloween gnome carving
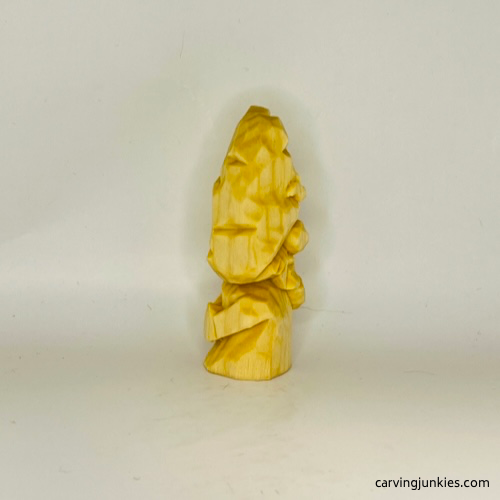 26. Right side of Halloween gnome carving
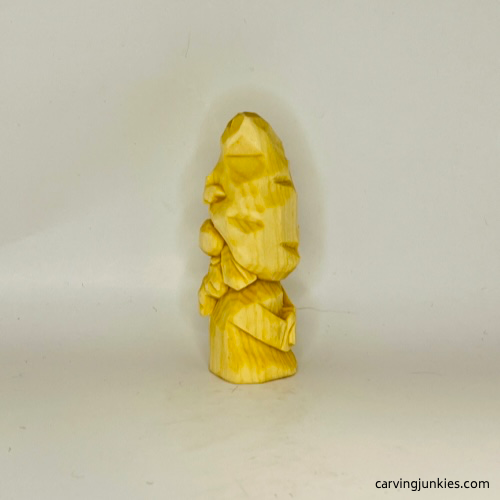 27. Left side of Halloween gnome carving
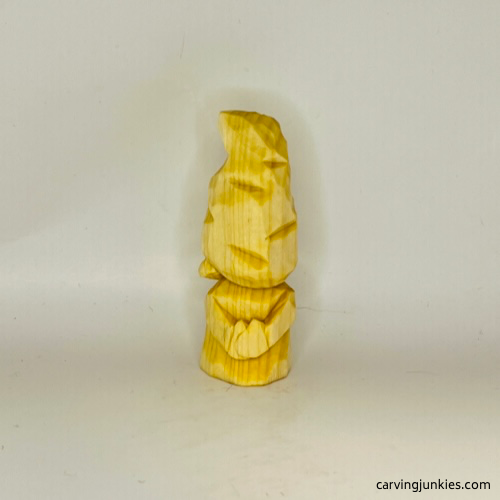 28. Back of Halloween gnome carving
Carve a pumpkin for your wooden Halloween gnome carving
Use a small square shaped wood block to carve the pumpkin (optional), if you want to create 3 “Trick or Treat” wood carvings. Any size will do.
First, round all the corners (photo 29). Sketch the segments that you will separate (photo 30) with V-cuts (photo 31) all around.
Keep the front flat to make it easier to letter “Or” after painting (photo 37). Tip: Lightly sketch the letters (photo 30) to make it easier to draw them after painting (I used a white paint pen).
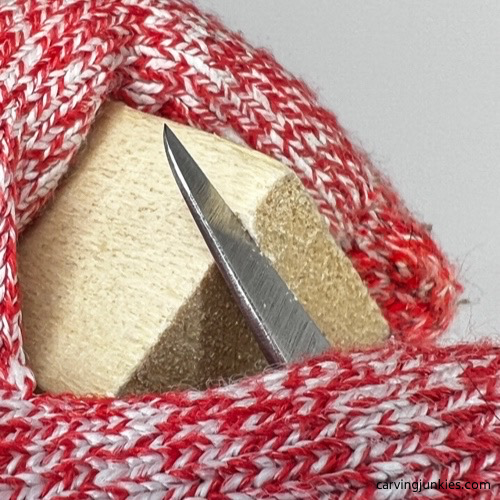 29. Rounding the corners of the pumpkin
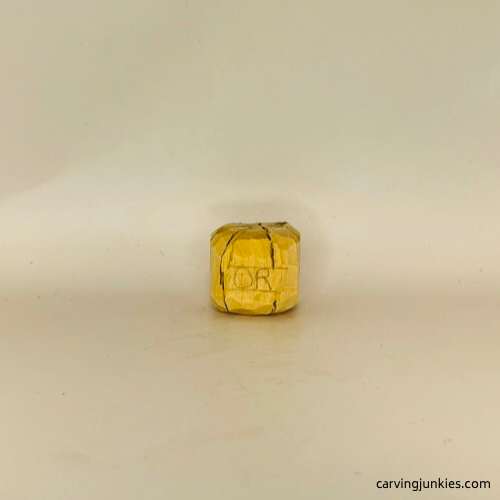 30. Segments are marked
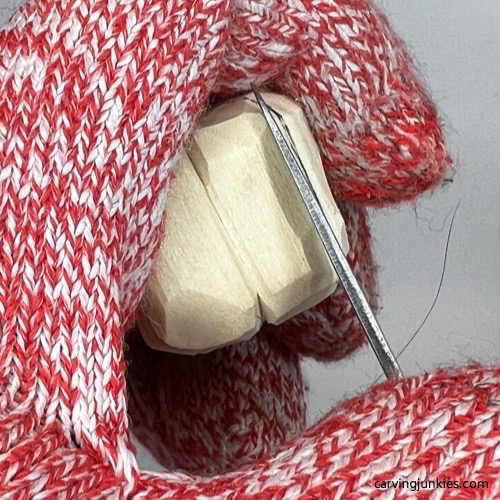 31. Carving the pumpkin segments
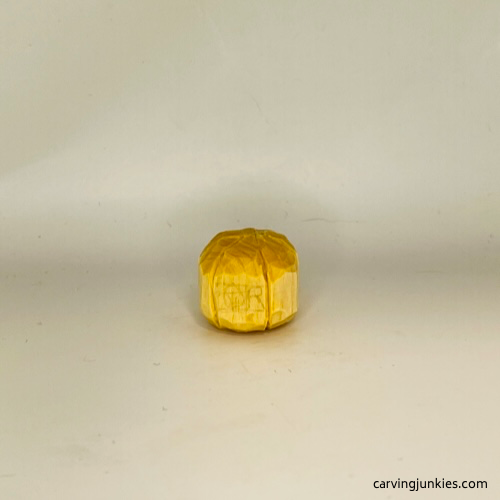 32. Unpainted pumpkin
Decorate your wooden Halloween gnome carving
I like to used watered-down acrylic paints with round and angled brushes (for sharp corners). Make sure you let each coat of paint dry before adding more color.
To get this same look, use these brands and colors:
- Nose: Create a wash with 4 drops of Ceramcoat tawny medium and 1 drop of Academy burnt sienna. Let dry. Then, highlight the bottom of the nose with a very diluted wash of Winsor & Newton cadmium red light.
- Hat: Ceramcoat pumpkin wash. Mix in some Academy burnt sienna to brush highlights in your V-cuts and under the hat brim.
- Mittens: Ceramcoat pumpkin wash (use a little less water than you use for the hat).
- Beard base: CraftSmart ivory wash. Second coat is an Apple Barrel dolphin gray wash. Dry brush with Artist’s Loft titanium white and Apple Barrel dolphin gray.
- Bat and body: Ceramcoat black wash. Outline the bat with fine point black magic marker to make it stand out.
- “Treat” lettering: I used a CraftSmart white paint pen. You could also use 100% white paint.
- Polka dots on the body: 100% Ceramcoat pumpkin applied with various sized dotting tools. You can also use toothpicks and the end of a pencil.
- Pumpkin: Ceramcoat pumpkin wash. A Micron 05 brown magic marker pen was used for lettering and highlights between the segments. You could also use brown paint.
- Finish: Allow carving(s) to dry completely for at least 24 hours. Brush with Howard’s Feed ‘N Wax. After 20 minutes, use stiff brush (like a shoe brush) to buff and polish.
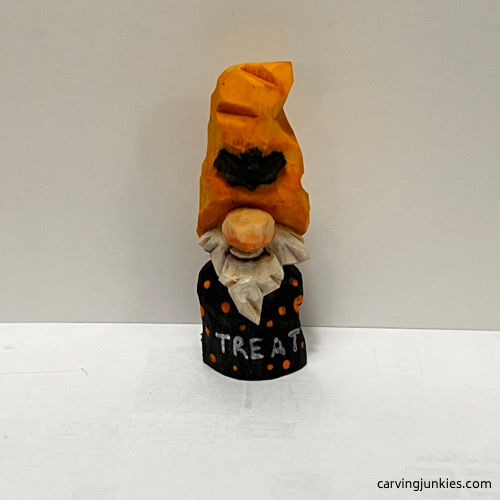 33. Painted front of wooden Halloween gnome
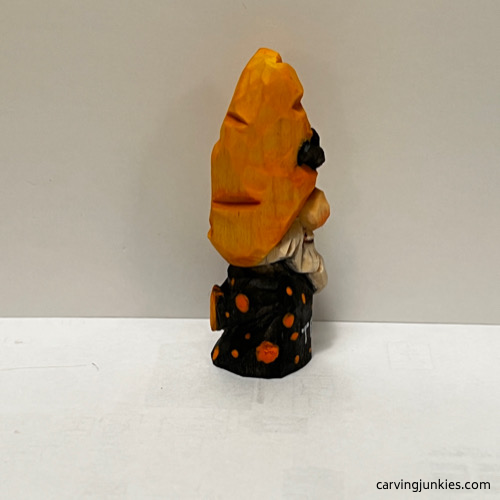 34. Right view of painted wooden Halloween gnome
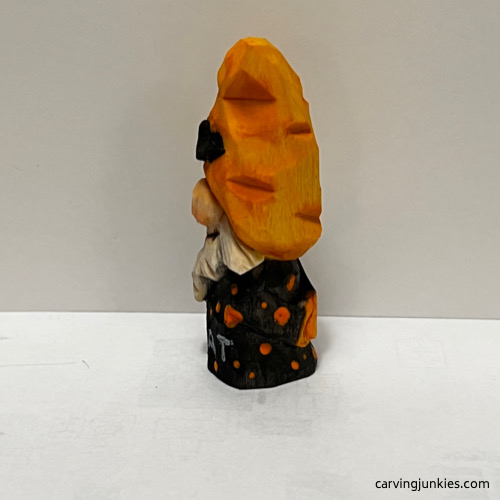 35. Left side of painted wooden Halloween gnome
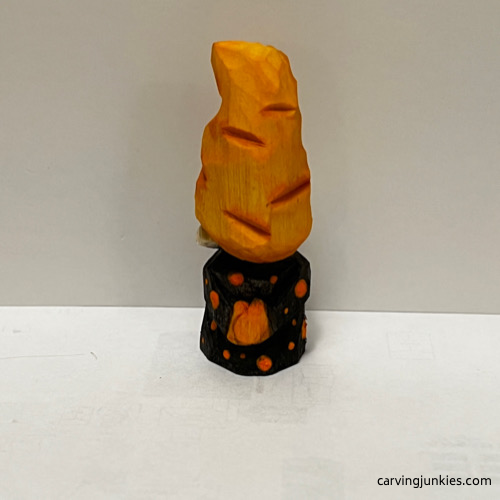 36. Painted back of wooden Halloween gnome
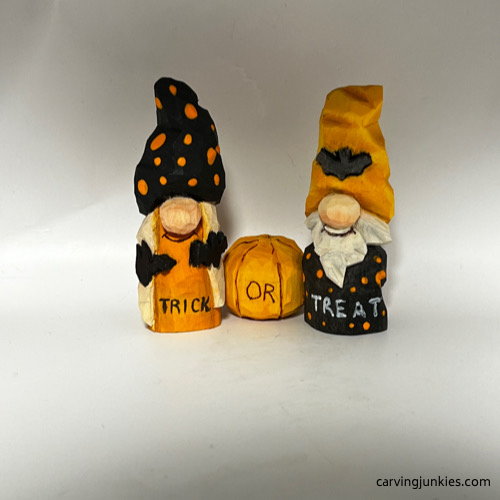 37. Painted pumpkin is visible
Summary of wooden Halloween gnome carving tutorial
- This little wooden Halloween gnome carving is easy to make and carves up fast.
- You can add a Halloween saying (a paint pen or magic marker makes it easier) or leave the body bare.
- You can vary up the colors and designs to add interest to your wooden Halloween gnome carving.
- Group a few gnomes together to create a festive Halloween scene.
Get 50 Wood Carving & Painting Tips when you join our FREE Covered in Chips club.
Share this page
carvingjunkies.com never sells your personal information.
This site uses cookies for its operation and to enhance your experience. As an Amazon Associate and Focuser Carving affiliate we earn from qualifying purchases.
Home | About Us | Privacy Policy | Terms of Use | Contact | Sitemap
