- Home
- Things to carve
- Asparagus wood carving
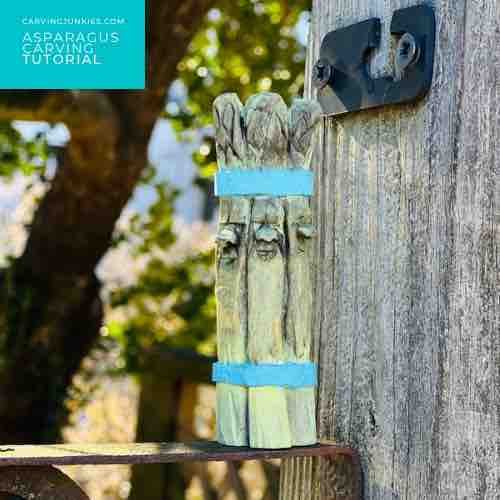
Adorable asparagus wood carving
This silly stalk of caricatures is super fun to carve.
LEVEL: SOME CHALLENGES
This asparagus wood carving is super fun to make and is great for practicing carving faces. It goes perfectly on a kitchen counter with our mushroom wood carving and is guaranteed to make you (or your gift recipient) smile.
Everything you need for your asparagus wood carving
For this wood carving I used a basswood block that is 1 x 1 x 4 inches (2.5 x 2.5 x 10.2 cm). New here? Most of my carvings are little whittles (so I can spend my time designing new ones for you). Want to go bigger? Easy. Just double, triple, or quadruple the dimensions.
I used one very sturdy knife (the FC001 described on this page) for this asparagus wood carving because I wanted its strength for separating the asparagus stalks. I also used a 2 mm micro U-gouge to shape the nostrils, which is a very handy (foolproof) tool for nostrils. If you don’t have this tool, you can carefully shape the nostrils with a detail knife. A 3 mm micro V-tool was also used to create the texture on the tops of the stalks. But you can make V cuts instead with a detail knife if you do not have one.
You will need something to draw with and a ruler. Always use a carving glove and protect your lap with something flat and hard, like a cutting board.
Asparagus wood carving tutorial at-a-glance
Here is a short video that covers the key steps in this tutorial. It may help to watch it before you start.
1. Set up your asparagus wood carving
You will be carving off the corner for this tutorial to give you some extra space on the front.
Draw a guideline that is one inch (2.5 cm) from top of the wood block all around to mark the top of the rubber band that holds the three asparagus stalks together. Add another guideline a quarter inch (0.6 cm) lower to mark the bottom of the rubber band (photos 1,2).
Add another guideline that is 2.5 inches (6.4 cm) from the top to mark bottom of each asparagus caricature face (photos 1,2).
Draw another guideline that is 3 inches (7.6 cm) from the top to mark the top of the second rubber band. Draw your final guideline a quarter inch (0.6 cm) lower to mark the bottom of the second rubber band (photos 1,2).
Write “front” and “back” on each side of the wood block (photos 1,2) if you want. It’s easy to forget!
 1. Front guidelines are drawn
 2. View of back guidelines
2. Make your first cuts on your asparagus wood carving
Carve off the front and back corners (photos 3,4). Roughly sketch (photo 4) where you will make small V cuts on the front and back (photo 5).
Make the V cuts on the front (photo 5) and back (see photo 6 for reference).
Mark additional wood (photo 7) to remove—and separate the top of each asparagus stalk (photo 8)—on the front. Repeat the same process on the back.
 3. Carving off corner
 4. Wood is marked to make V cuts
 5. Making a V cut
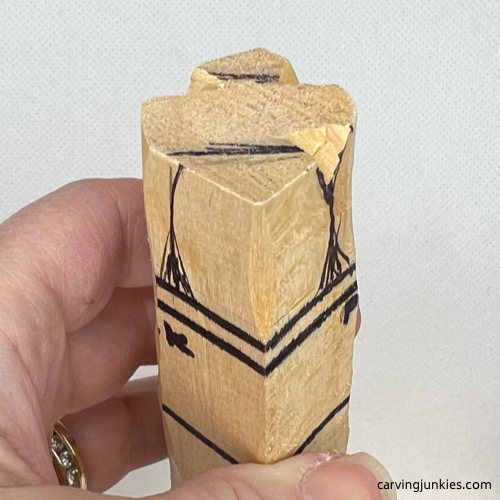 6. Making opposite side V cuts
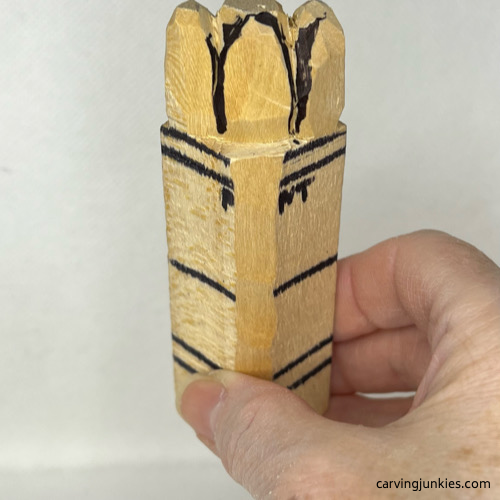 7. Wood is marked for removal
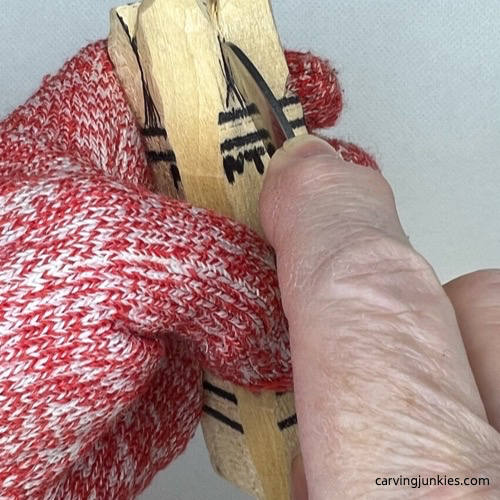 8. Separating top of stalks
3. Shape the top of the stalks and separate the rubber bands on your asparagus wood carving
Refine the tops of the stalks to get the desired shape (photo 9). Tip: Noodle them further later after you separate the entire stalks.
Draw guidelines on the front (photo 9) to mark where you will separate the bottom part of the asparagus stalks.MDraw similar guidelines on the back. Don’t worry if one stalk is wider than another.
Use stop cuts to separate the top rubber band (photo 10). Repeat on the bottom rubber band (photo 11).
Use your knife to separate the stalks. I used a pencil cut and a second slicing cut. You can also use a stop cut or a V-cut.
 9. Guidelines for separating the stalks
 10. Separating top rubber band
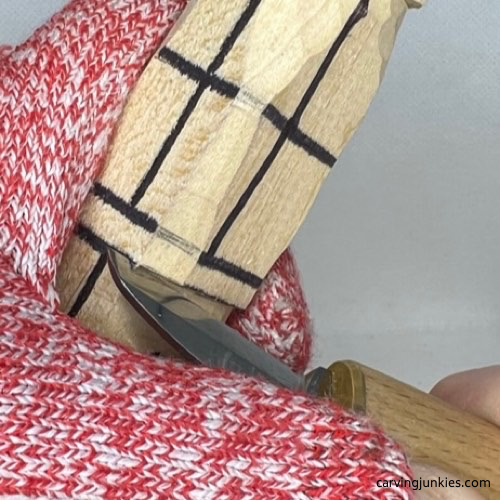 11. Separating bottom rubber band
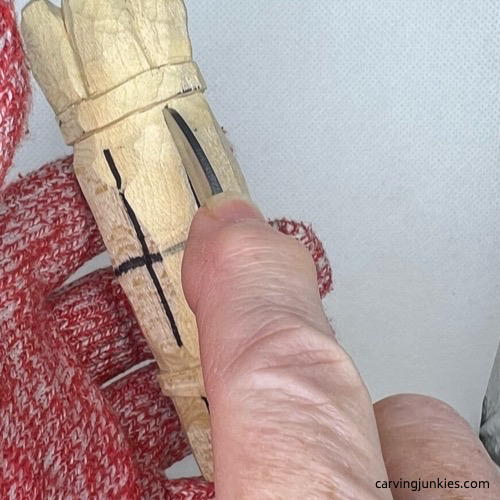 12. Separating the middle of the stalks
4. Round the stalks and start the faces on your asparagus wood carving
Round the sides on each of the asparagus stalks (photo 13). I gently sliced the wood off.
Draw the top of the eye-line and the bottom of the nose for each of the three faces (photo 13). I drew a line about a quarter inch (0.6 cm) down from the rubber band to reserve that space for the forehead (photo 13). The eye-line is about a quarter inch (0.6 cm) lower than that guideline (photo 3). The bottom of the nose is a little less than 3/4 of an inch (2 cm) lower than eye-line (photo 13).
Please don’t stress about getting the exact measurements. It all works out.
Make a stop cut across the eye-line (photo 14), removing some wood from underneath. Make another stop cut at the bottom of the nose, removing wood from underneath (completed in photo 15).
Sketch the shape of the nose (photo 15) and carve the wood off by holding your knife at an angle (photo 15). If you have trouble carving noses, check out my triangle-by-triangle nose carving technique as an alternate method.
Once the nose is shaped, I used a 2 mm micro U-gouge to shape the nostrils (photo 16). If you do not have a micro U-gouge, use a sharp detail knife to carve the curved nostrils.
Draw on the smile lines (see example in photo 19). Carve the smile lines and the mouth (completed in photo 17). I used a pencil cut and a second slicing cut. For the first stalk, I made a stab cut to create the eyes (completed in photo 17). Also, I reduced the height of the forehead (completed in photo 17). You can also use the U-gouge to create a slight indentation on the forehead (between the eyes). Or, use your detail knife and turn your wrist as you cut.
Repeat this same process for carving the faces for the remaining two asparagus stalks. You can vary the eyes (see photo 18 for angled eyes). Or, experiment with different shaped noses and mouths (see photo at top of page). Have some fun with these guys!
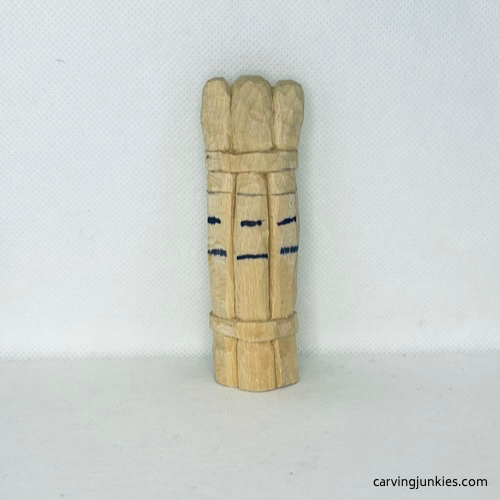 13. Bottom of nose and eyeline are drawn
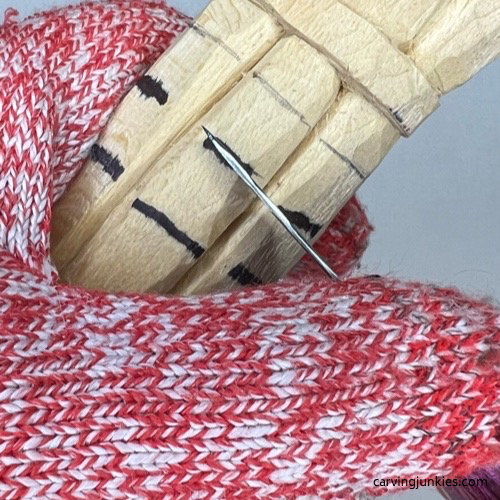 14. Carving the eyeline
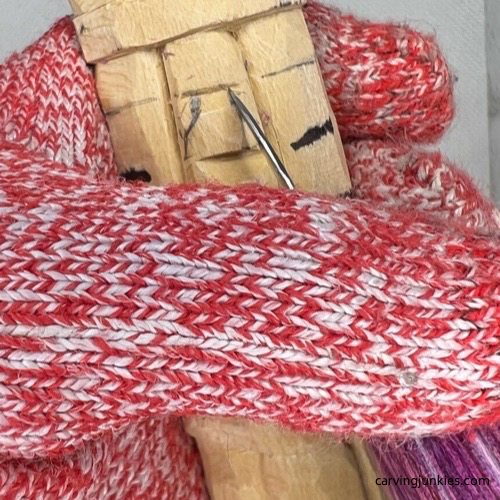 15. Shaping the nose
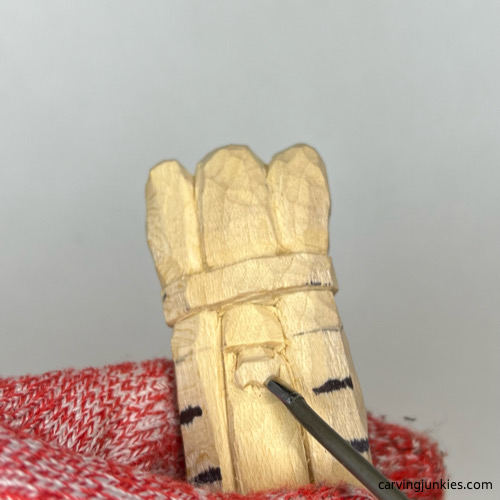 16. Using U-gouge to carve nostril
 17. Smile lines and mouth are carved
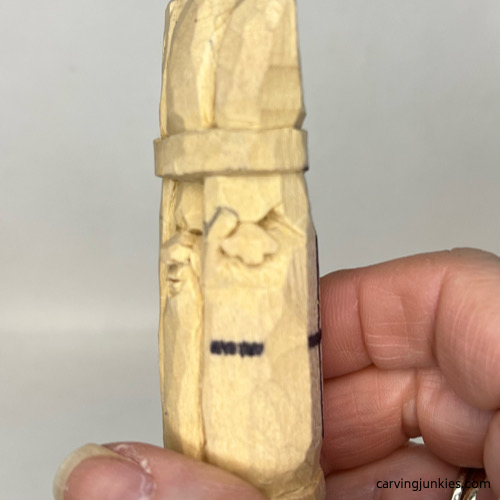 18. Angled eyes are carved
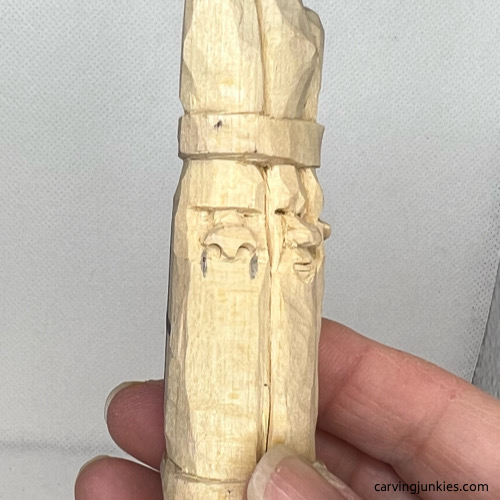 19. Smile lines are added
5. Texture the top of the stalks on your asparagus wood carving
Sketch some rough lines that you will carve to create the texture on the top of your asparagus stalks (photo 20). I used a 3 mm micro V-tool to carve the lines (photo 21). If you do not have one, try V-cuts or stop cuts.
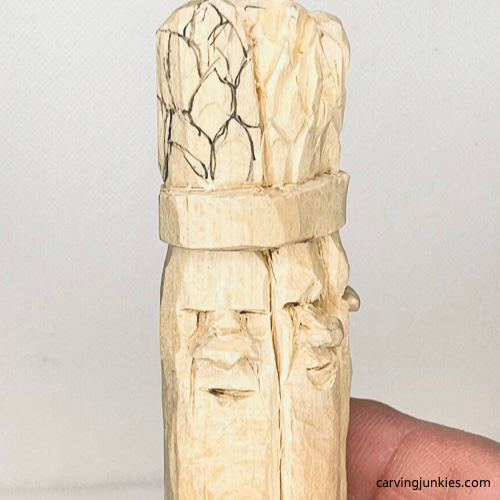 20. Design on tops of stalks
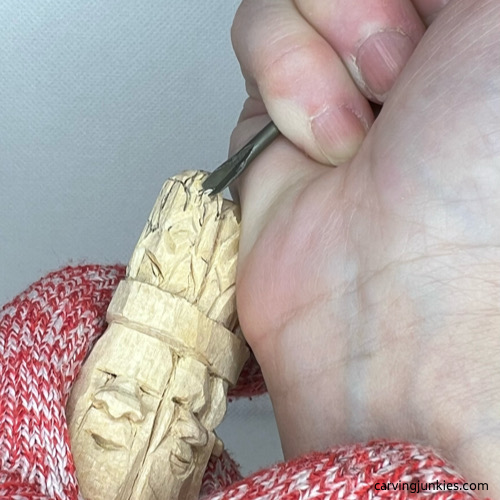 21. Carving tops of stalks
6. Refine your asparagus wood carving
Use your knife to make a few shallow V-cuts to add lines on the bottom of each stalk (photos 22-25). Refine the shape of the stalks (I narrowed the space between them (just below the second rubber band) so the bottoms appear to be a bit wider (photos 22-25).
Clean up any wood fuzzies and deepen cuts around the rubber bands to avoid paint from bleeding.
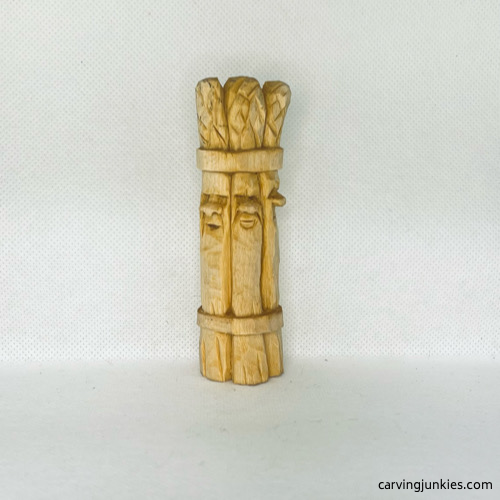 22. Finished front before painting
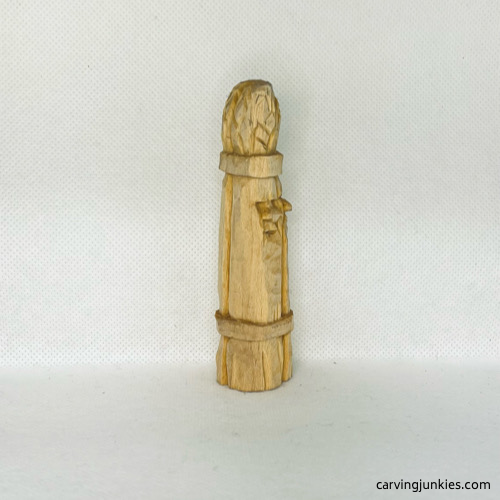 23. Right side before painting
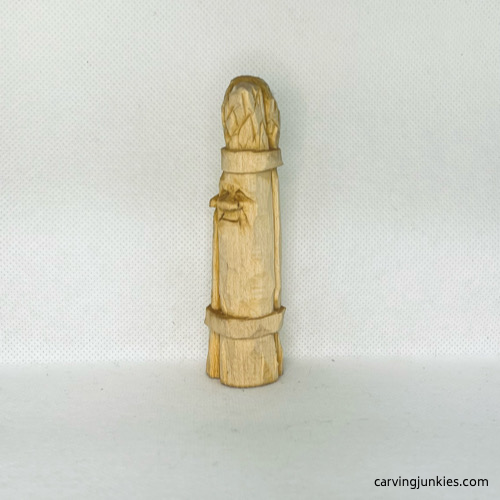 24. Left side before painting
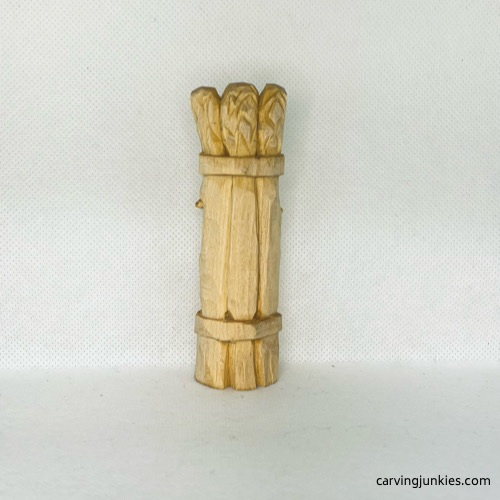 25. Back view
Asparagus wood carving painting guide
Read our page about painting a wood carving for tips and techniques. To get the same look, use the following acrylic paints. All paints are washes (diluted with water) unless noted as 100%.
- Asparagus stalks: Wash of Craftsmart sage mixed with FolkArt apple orchard.
- Between the stalks: Wash of Craftsmart grey mixed with a little sage.
- Rubber bands: Wash of Americana calypso blue mixed with a little grey.
- Tops and middle of stalks: Dry brush highlights with 100% Ceramcoat black paint.
Allow to dry for 24 hours. To get a dirty, antiqued look, I used a mixture that caricaturist Chris Hammack calls “turd polish.” It is suggested that you completely seal the piece first with at least 2 coats of Minwax polycyclic polyurethane spray. Create a blend that is 3 parts Minwax aged oak gel stain with 1 part mineral spirits.
Brush on with an old toothbrush. Wipe off immediately with paper towels. Dispose of towels outside as they are flammable. You may also want to wear rubber gloves (it can get messy).
Note: If you do not seal the carving properly, the stain can ruin your piece. If you do not want to use this method, add a little brown paint and dry brush these sections instead.
Pictures below show painted piece before adding the stain. Large picture at top of this page shows the effect after applying the stain.
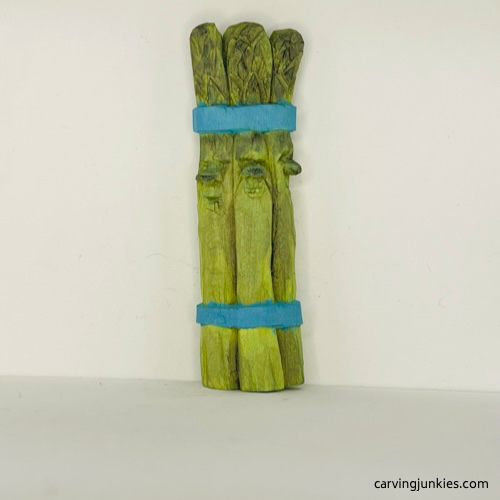 26. Front after painting
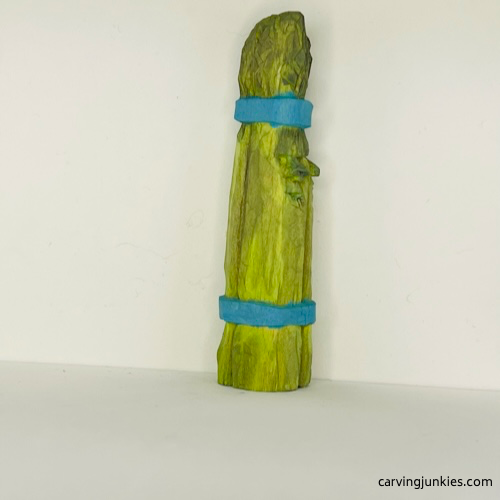 27. Right side after painting
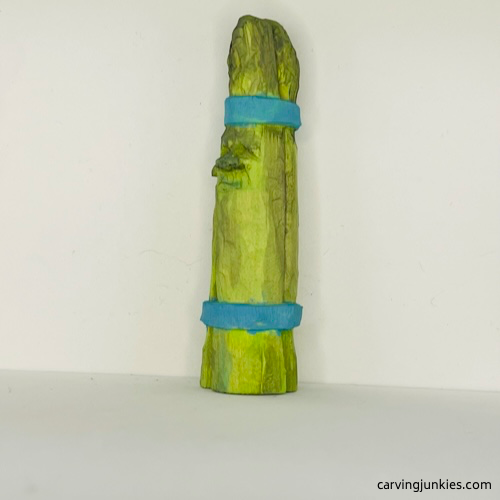 28. Left view after painting
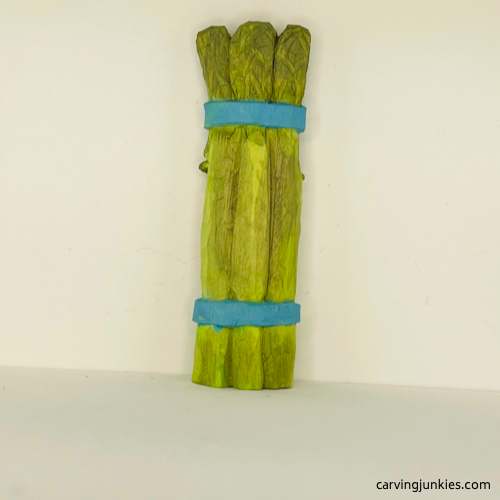 29. Back view after painting
Asparagus wood carving pattern
If you prefer carving your asparagus wood carving with a pattern, photocopy this pattern to size to fit your wood block.

Get 50 Wood Carving & Painting Tips when you join our FREE Covered in Chips club.
Share this page
carvingjunkies.com never sells your personal information.
This site uses cookies for its operation and to enhance your experience. As an Amazon Associate and Focuser Carving affiliate we earn from qualifying purchases.
Home | About Us | Privacy Policy | Terms of Use | Contact | Sitemap
