- Home
- Christmas wood carving ideas
- Christmas tree wood carving
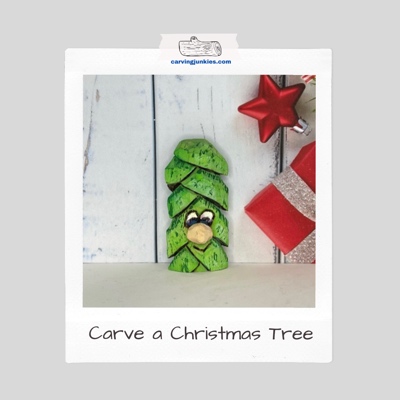
Cute Christmas tree wood carving caricature
Carve yourself a fun ornament or make a larger decoration.
LEVEL: EASY
This Christmas tree wood carving caricature ornament is perfect for the holidays and it carves up really fast.
It is an easy pattern that you can carve up in different ways time after time—to give as gifts—or to decorate your home. For other holiday carving ideas, check out my fun Santa caricature carving and wooden Christmas carolers tutorials.
Happy holiday carving!
What you will need for this Christmas tree wood carving caricature tutorial
If you want to carve an ornament, use a wood block that is 1 x 1 x 3 inches (2.5 x 2.5 x 7.6 cm). I pretty much use basswood for all my caricature carving because it holds details well and is easy to carve.
You can also go much bigger with this pattern if you want to make a tabletop Christmas tree wood carving. Just multiply the dimensions to fit your wood block.
If you’ve carved with me before, you know what’s coming next: Make sure you wear a safety glove and protect your lap if you like to carve over your lap. A piece of wood or cutting board will do the trick.
I only used one knife (the FC016 I describe on this page from Focuser Carving). It‘s really a chip carving knife—and ideal for making pyramid cuts—but I also like using it for some of my caricature carvings.
You’ll need a pen or pencil for sketching your guidelines and a ruler for measuring them. I provide a painting guide at the end. I also used my wood burner to add some definition. No worries if you don’t have one. You can use brown paint or 100% paint of the wash color you are using to highlight key areas.
Christmas tree wood carving caricature at-a-glance
Before you start your Christmas tree wood carving, take a look at this short video that provides an overview of the key steps.
Setting up your Christmas tree wood carving caricature
You will carve off the corner to create your Christmas tree wood carving. First, draw a nose box that is a little less than 2 inches (5.1 cm) down from the top of your wood block (photo 1). It should run about 1/2 an inch (1.3 cm) across each side. The box is about 1/2 an inch (1.3 cm) tall.
Using your knife, make a stop cut under the nose and remove wood from underneath (photo 2). Turn your piece upside down and repeat above the nose (completed in photo 2). After making your initial cuts, remove some wood above the nose—and below the nose—to flatten the front corner of the wood block.
When you are done, your wood block should look like photo 3. You will carve the sides of the nose later.
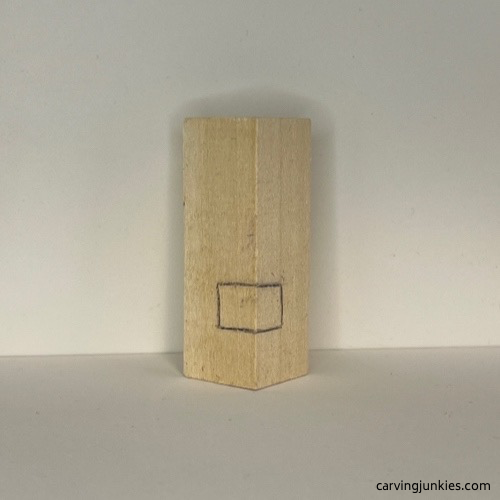 1. Nose box is drawn
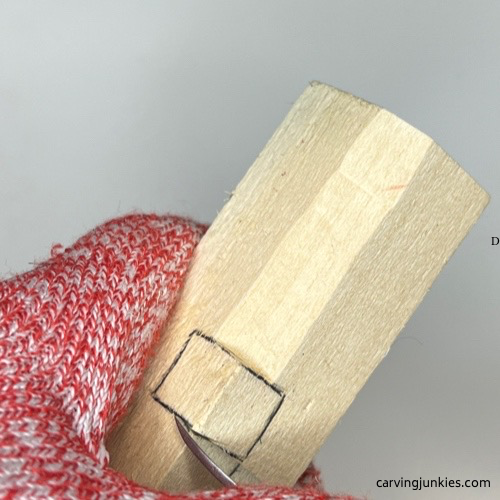 2. Making a stop cut
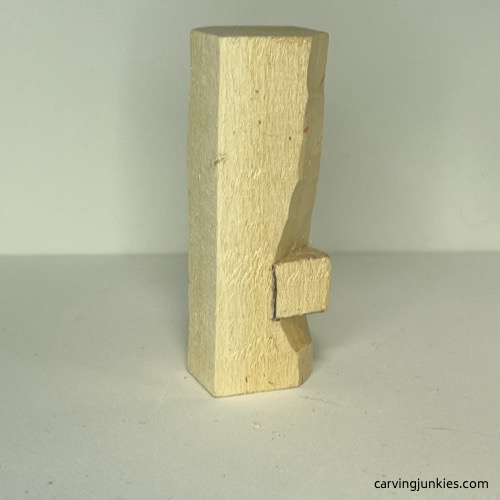 3. Progress on nose
Mark wood for removal on your Christmas tree wood carving caricature
Using a pen or pencil, draw a triangle on the top front and back corners (photos 4-6) to mark the wood that you will remove to shape the top of your Christmas tree wood carving.
Use your knife to carefully remove the marked wood (photo 7). Your final shape should be close to photo 8.
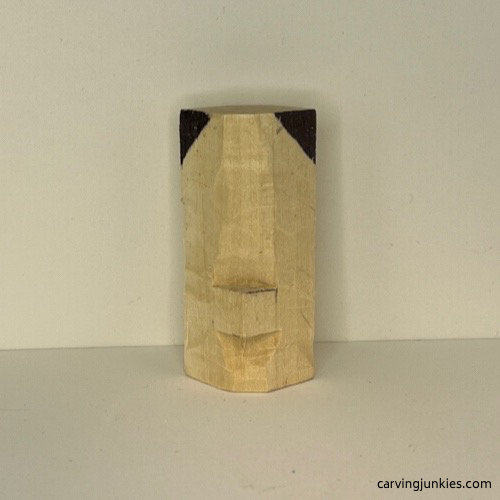 4. Front view of wood marked for removal
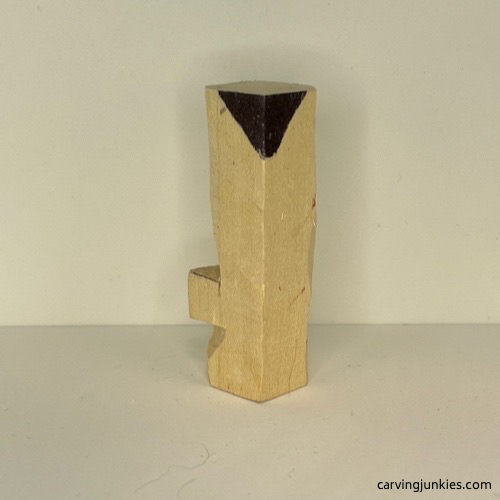 5. Left view of wood marked for removal
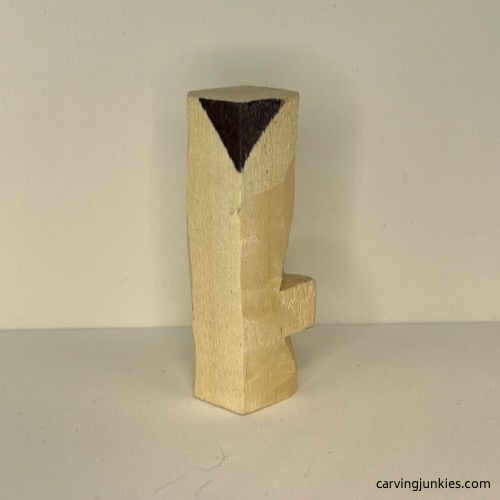 6. Right view of wood marked for removal
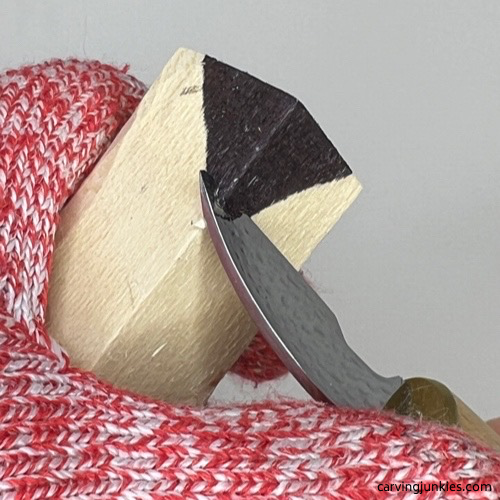 7. Starting to slice marked wood off
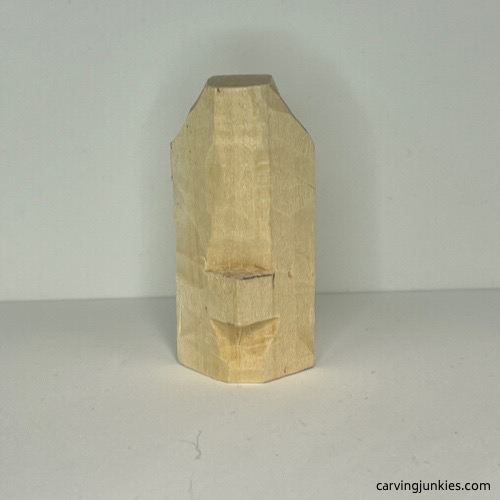 8. Starting to take shape
Add some details to your Christmas tree wood carving caricature
Draw the cross hatch design for the Christmas tree branches on the front (photo 9) and back (photo 10). The guidelines should be about 1/2 an inch (1.3 cm) wide. It’s okay if your guidelines are a little thinner in width. Use your ruler to help you keep your guidelines straight.
Keep an eraser handy in case you make a mistake. Ideally the guidelines should extend from the front around the back, but don’t worry if they don’t line up perfectly.
Make a series of stop cuts to separate the Christmas tree branches (photo 11).
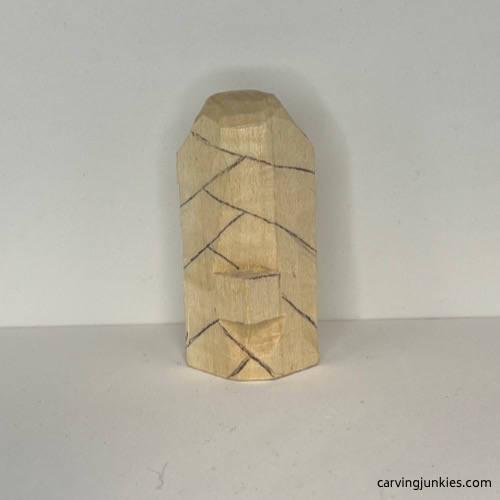 9. Front view of drawn details
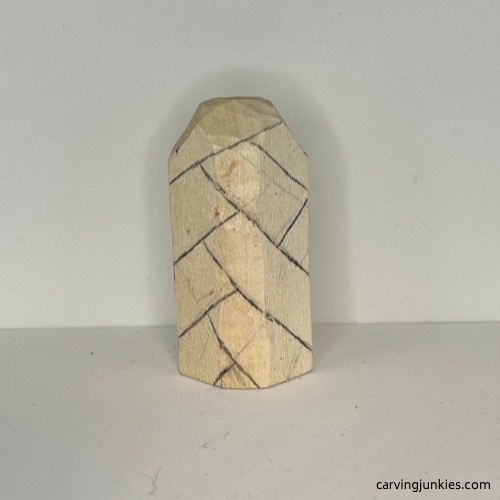 10. Back view of drawn details
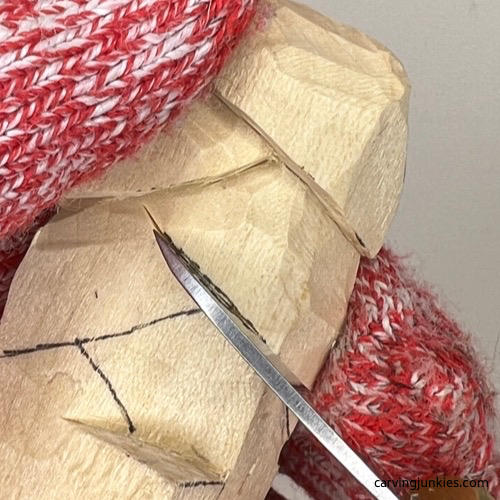 11. Separating the tree branches
Refine the nose of your Christmas tree wood carving caricature
Once the tree branches have been separated, mark the corners on the nose box where you will remove wood. Use a pyramid cut on each corner to cleanly remove the wood (photo 13). Tip: Make your first cut along the inner guideline (photo 13).
Continue to round the nose. When you are finished, draw on the eyes (photo 14). Now, follow the guideline of the eyes (photo 15) with your knife and make a second slicing cut to remove a clean sliver of wood.
Tip: If you have a V-tool or gouge, you can use it here. Just remember to carve down on each side of the eye to avoid running into grain issues. Tip: If your cuts aren’t as clean as you like, wood burning the outline of the eye will help.
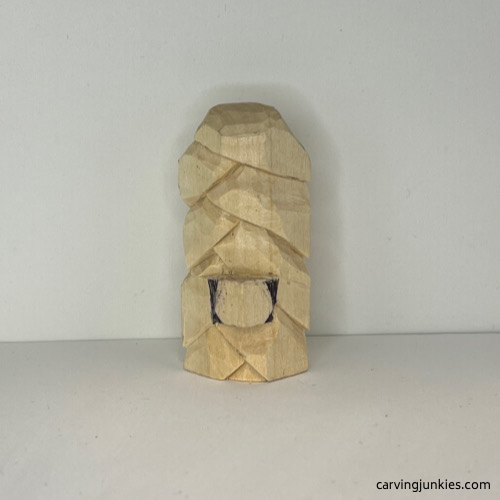 12. Marking wood for removal on nose
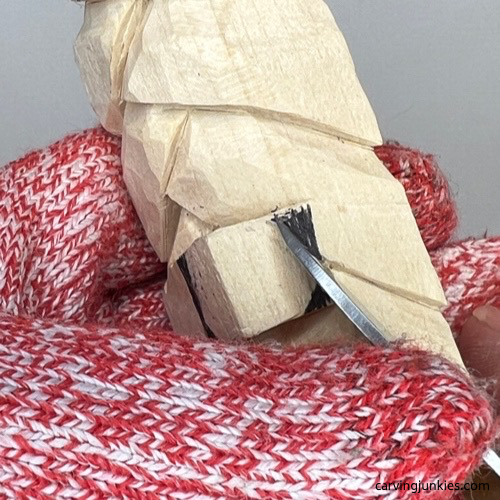 13. Starting a pyramid cut
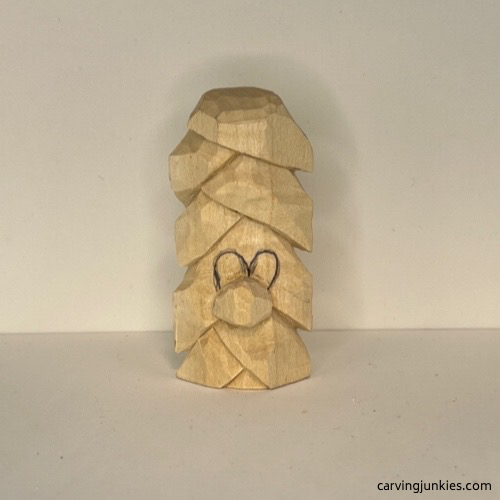 14. Eyes are drawn
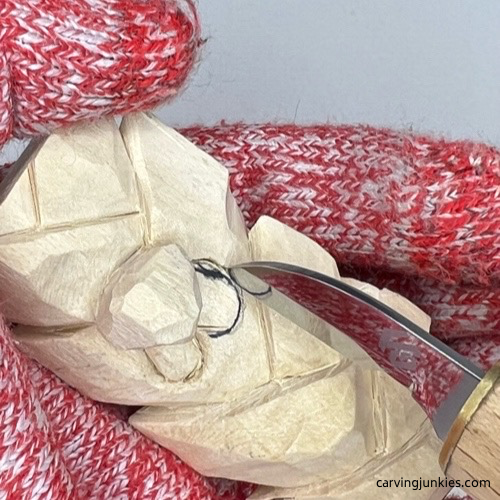 15. Carving the eyes
Add details to your Christmas tree wood carving caricature
Draw the mouth and smile lines on your Christmas tree wood carving caricature (photo 16). Tip: The smile lines extend from the corner of the nose on each side.
Follow the guideline with your knife—and make a second slicing cut close to your first cut—to carve the smile lines (photo 17) and mouth. You can also use a stop cut for the mouth and remove wood from underneath (photo 18).
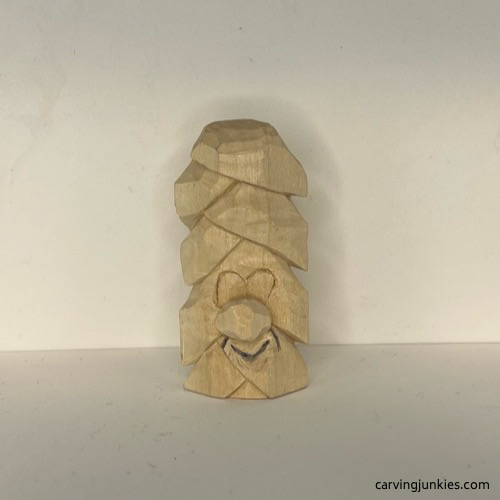 16. Mouth and smile lines are drawn
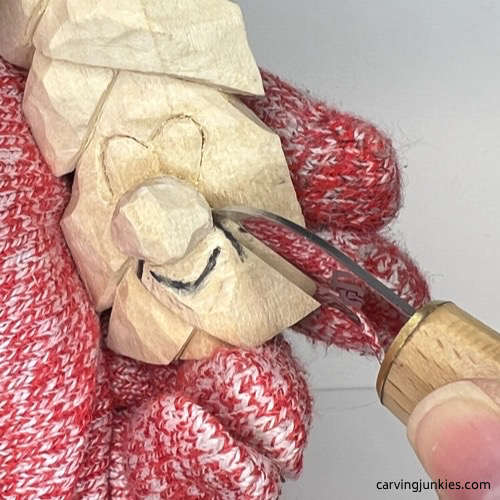 17. Carving the smile lines
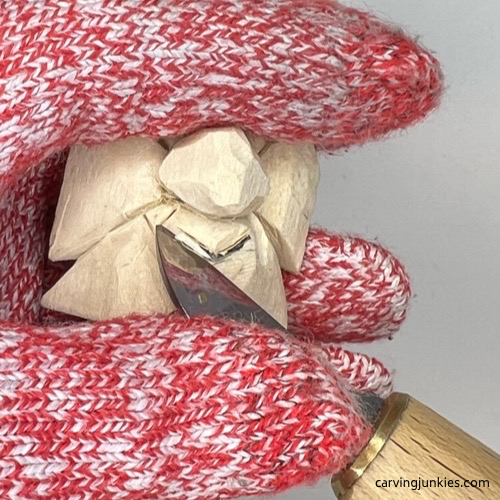 18. Carving the mouth
Refine your Christmas tree wood carving caricature
Clean up any wood fuzzies and refine the shape of your Christmas tree wood carving caricature (photos 19-22). Tip: Remember to remove some end grain wood from the top and bottom to be sure your paint will be absorbed evenly.
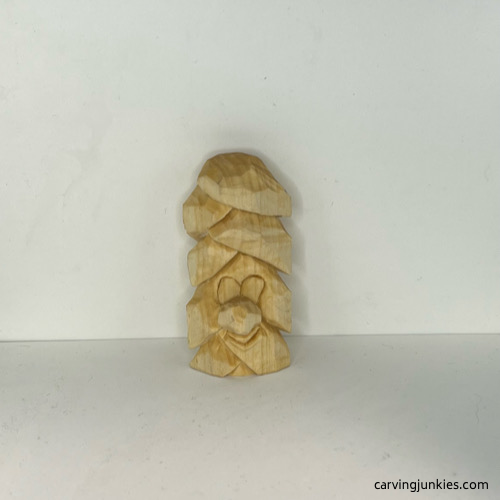 19. Front of unpainted ornament
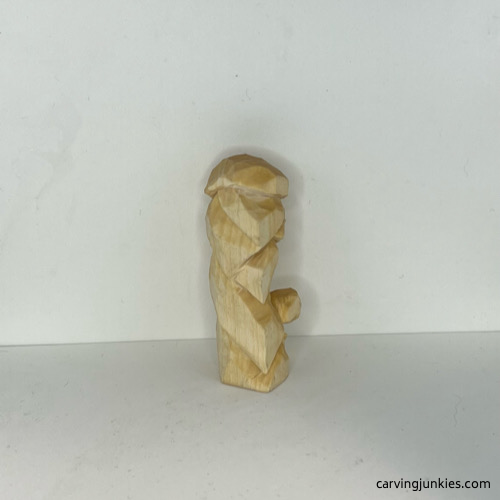 20. Right view prior to painting
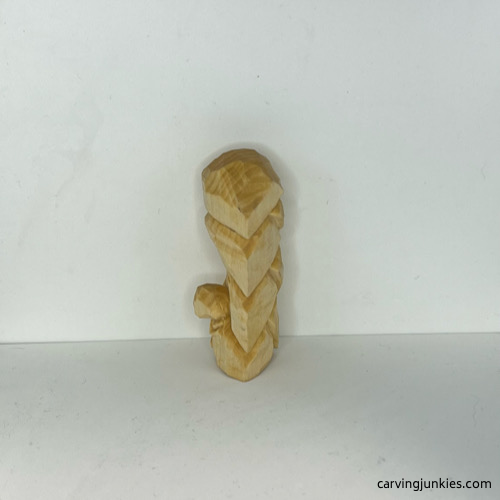 21. Left view before painting
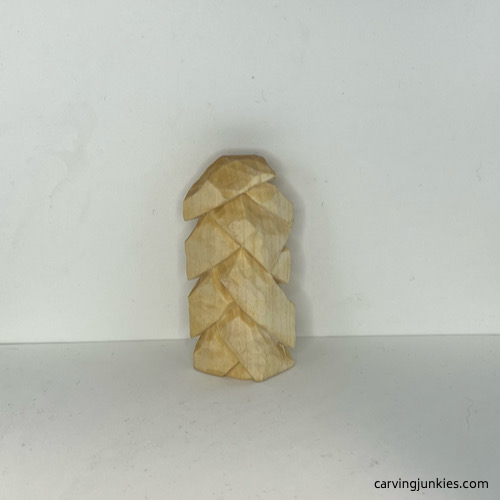 22. Back view before painting
Finish your Christmas tree wood carving caricature
For great painting tips, check out my page on painting a wood carving. Here are all of the acrylic paints I used if you want to get this same look for your Christmas tree wood carving caricature.
As mentioned, I wood burned the key lines on this Christmas tree wood carving caricature. Another option is to use 100% paint, or brown paint to create shadow. Unless noted, all paints are diluted with 15-20 drops of water to create a wash:
- Eye whites: 100% CraftSmart vanilla.
- Tree base layer: FolkArt bright green wash.
- Light green tree highlights: Ceramcoat leaf green wash.
- Dark tree highlights: Mix 2 drops of 100% bright green with 1 drop of Ceramcoat black and apply with a toothpick, streaking lines under the branches.
- Nose: Academy burnt sienna heavily diluted with water.
- Eyes (pupils): 100% Ceramcoat black (allow to completely dry).
- Eyes (irises): 100% Ceramcoat denim blue. After allowing to completely dry, add a speck of white to each iris.
- Seal with your finish of choice (such as wax, boiled linseed oil, polyurethane spray). I used a little clear nail polish on the eyes.
- If you want to turn your Christmas tree wood carving into an ornament, add a small screw eye into the top.
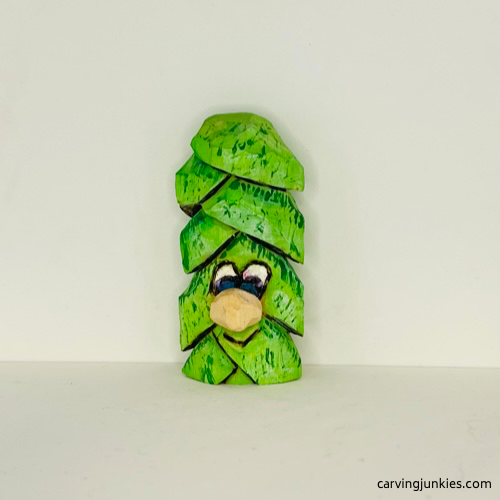 23. Front of painted ornament
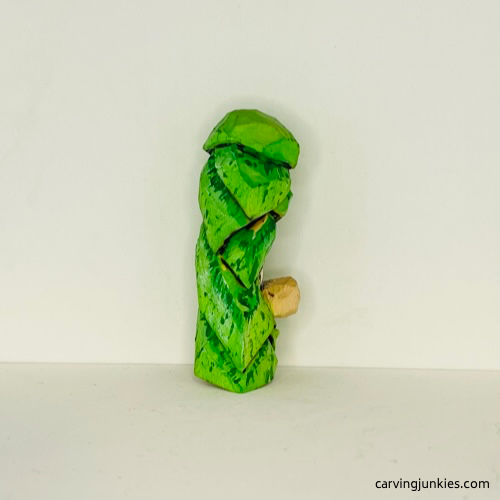 24. RIght view of painted ornament
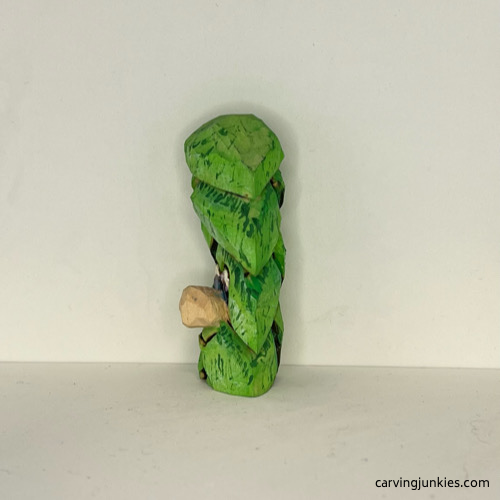 25. Left view of painted ornament
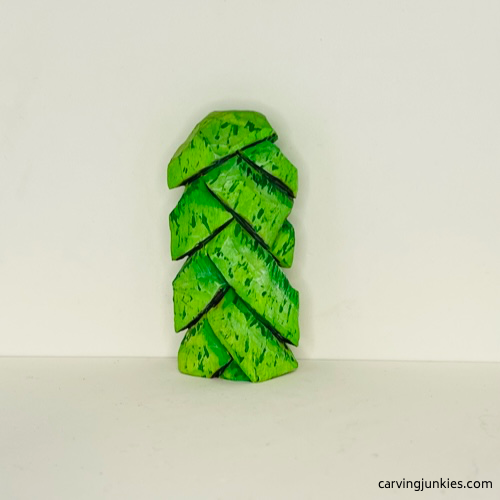 26. Back of painted ornament
Christmas tree wood carving caricature carving pattern
If you prefer to carve your Christmas tree wood carving caricature with a pattern, photocopy this to size to fit your wood block.
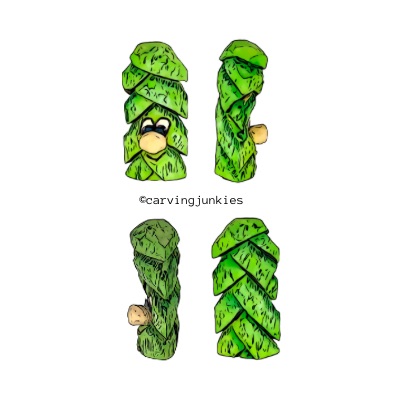
Christmas tree wood carving caricature tutorial summary
- This Christmas tree wood carving caricature is fun and fast to carve.
- The big eyes give it a cartoon-like look, but you can try other eye shapes as well.
- You don’t have to worry about making the perfect tree and can have fun making this pattern your own.
- This makes a cute ornament or can become a tabletop decoration if you carve a larger wood block.
Get 50 Wood Carving & Painting Tips when you join our FREE Covered in Chips club.
Share this page
carvingjunkies.com never sells your personal information.
This site uses cookies for its operation and to enhance your experience. As an Amazon Associate and Focuser Carving affiliate we earn from qualifying purchases.
Home | About Us | Privacy Policy | Terms of Use | Contact | Sitemap
