- Home
- Easy wood carving ideas
- Halloween ghost wood carving
Simple Halloween ghost wood carving
Super fast and fun to carve.
LEVEL: EASY
Looking for an easy Halloween ghost wood carving tutorial? I will guide you though this simple, step-by-step tutorial to help you create your handcrafted Halloween ghost.
The best aspect of this project is its sheer simplicity, making it completely approachable for beginners – or a super fast project for more experienced carvers. This adorable phantom will be a spooktacular addition to any Halloween decor.
This cute ghost wood carving would not be complete without some companionship! I've placed it next to last year's Halloween wood carved gnomes in the picture below, and they make a magical trio that represents the spirit of Halloween.
Let's get carving to make this Halloween truly boo-tiful.

What you will need
Here's everything needed for this spooky carving session:
- A wood block that's 1 x 1 x 3 inches (2.5 x 2.5 x 7.6 cm) is perfect for carving a cute, miniature apparition. Basswood is easy to work with, extremely carver-friendly, and holds fine detailing exceptionally well. If you fancy creating a larger ghost, just double or triple these measurements according to your liking.
- Grab your favorite carving knife. If you're on the hunt for one, some fantastic options are provided at the end of this page. I emphasized the ghostly folds with a #11 Stubai U-gouge. Don't have it? Don't worry! I provide an alternate option if you only have a knife.
- Safety is paramount! Always wear a carving glove. If you work over your lap, please use a flat piece of wood or a plastic cutting board to shield your precious leg arteries.
- You'll also need a pencil or pen to sketch out some details.
- As always, a painting guide is provided at the end of this page. This one is super simple!
Tutorial at-a-glance
Watch this super short video to see the steps to this tutorial before you start carving.
Shape your Halloween ghost wood carving
Narrow the top of your Halloween ghost wood carving (photo 1). It is a bit like sharpening a pencil (but don't narrow the top too much).
Turn your piece frequently to ensure that you maintain symmetry (completed in photo 2).
 1. Shaping the ghost
Sketch some details for your Halloween ghost wood carving
Once you have your desired shape, use your pencil or pen to sketch the eyes and mouth (photo 2).
Also, mark wood on the front (photo 2) and back (photo 3) where you will create the bottom curves for the folds on your Halloween ghost wood carving.
I carved 3 folds on the front and the back (visible in photos 7,10).
 2. Front details are drawn
 3. Wood is marked for removal
Start the folds on your Halloween ghost wood carving
Hold your piece upside down and carefully slice/scoop out the curves on the bottom of the wood block with your knife (photo 4).
Tip: If your knife doesn't have flex (or you're afraid of breaking the tip), carve halfway across one side, and meet your cut from the other side, to remove the wood.
 4. Carving the bottom of the folds
Carve the eyes and mouth of your Halloween ghost wood carving
Separate the eyes and mouth with your knife (photo 5). You could also use a micro V-tool here. I held my knife like a pencil (photo 5) and used my opposite thumb to move the knife with control. I made a second slicing cut to remove the wood.
You also could use a paring cut here, or make stop cuts, removing wood from inside the eyes and mouth.
It's really a matter of personal preference!
 5. Separating the eyes and mouth
Finish the folds on your Halloween ghost wood carving
I used a #11 U-gouge to carve the folds (photo 6). If you don't have one you can make wide V-cuts with your knife.
You can also use the U-gouge to carve a fold on one side of your Halloween ghost wood carving (visible in photo 8). Move your U-gouge horizontally across the side to avoid grain issues.
 6. Carving the folds
Time to paint!
Clean up the cuts on your Halloween ghost wood carving. Tip: You can use some sandpaper to smooth the eyes and mouth. But do not use your knife again after using sandpaper because it's not good for your knife.
To get this same look, use acrylic paints and a stain to finish your piece. You can use any paint brushes you prefer. For great painting tips, check out this page.
- First coat: CraftSmart ivory wash.
- Second coat: CraftSmart vanilla wash.
- Eyes and mouth: 100% Ceramcoat black.
- Folds: Use one drop of black paint heavily diluted with water to paint the insides of the folds.
- Let the piece dry completely and finish with Minwax Wood Stain (natural).
 7. Front of painted ghost wood carving
 8. Right view of painted ghost
 9. Left view of painted ghost
 10. Back view of painted ghost
Free Halloween ghost wood carving pattern
If you prefer to carve your Halloween ghost with a pattern, photocopy this to size to fit your wood block.

Get 50 Wood Carving & Painting Tips when you join our FREE Covered in Chips club.
You might like these
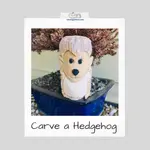
Hedgehog Wood Carving Tutorial Using Just a Knife and Basswood
Adorable hedgehog wood carving tutorial using a block of wood and just a knife.
How to Carve A Lion With Just A Knife
Learn how to carve a lion with our free step-by-step tutorial that includes tons of photos to guide you.
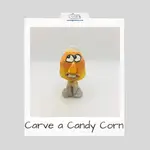
Candy Corn Halloween Wood Carving With a Knife Tutorial
This Halloween wood carving of a candy corn is super fun and easy to make as a decoration or gift.

Share this page
carvingjunkies.com never sells your personal information.
This site uses cookies for its operation and to enhance your experience. As an Amazon Associate and Focuser Carving affiliate we earn from qualifying purchases.
Home | About Us | Privacy Policy | Terms of Use | Contact | Sitemap