- Home
- Things to carve
- Knight wood carving
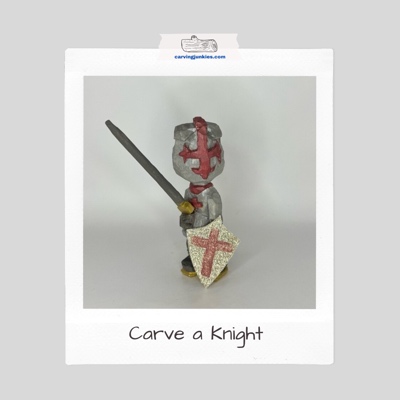
Fantastical knight wood carving
You will learn how to easily tilt his head.
This knight wood carving will take you back to medieval times… sort of. This knight has been spending way too much time drinking ale and eating roast lamb at the neighborhood pub (as evidenced by his big tummy).
For this carving, the knight’s head will be turned to the left, which will add some movement and interest.
We’re calling him Sir Laugh-A-Lot, because he doesn’t take battle too seriously. “On to the manor for more ale,” is his motto.
Preparing for your knight wood carving
For this knight wood carving you will need a pece of wood that is 1 x 1 x 4 inches tall (2.5 x 2.5 x 10 cm). You will also need a sturdy knife for removing wood. We recommend a detail knife for the finer cuts. Strop your knives every 30 minutes or so while carving and you’ll be good to go.
Keep a pencil or pen nearby for sketching on the design. Don’t worry about being perfect. The beauty of wood carving is you can always fix things as you go!
You will need a ruler to measure your initial guidelines. If you want to carve a hole in the hand to hold the sword, you will need a small pin-vise (hand drill).
For the sword, you will need 2 popsicle sticks (or a small piece of flat wood) and some wood glue. A little glitter cardstock is perfect to make a shield (or you can carve one from a small scrap of wood). We provide a painting guide at the end.
Last, but not least, wear a carving glove for safety.
Knight wood carving tutorial at-a-glance
Watch our short video to get an overview of the basic steps for this knight wood carving tutorial.
Seating up your knight wood carving
Your first guideline should be about 1 1/2-inches (3.8 cm) from the top to mark the bottom of the head (photo 1).
The second guideline will be about 3 inches (7.6 cm) from the top to mark the bottom of the body (photo 1).
Add a third guideline half an inch (1.2 cm) lower than the second guideline to mark the bottom of the legs (and the top of the shoes as seen in photo 1).
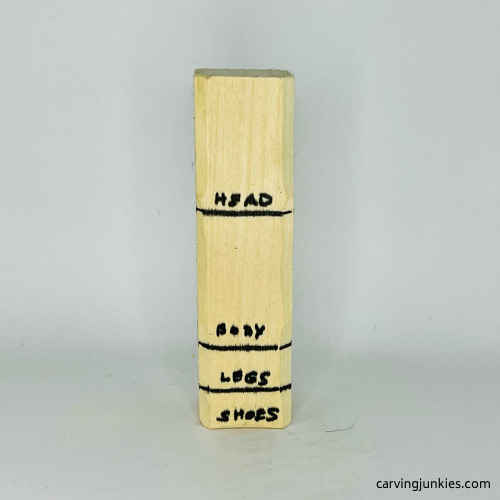 1. Guidelines are drawn
Starting your knight wood carving
Separate all the guidelines around. We start on each corner with a stop cut, removing wood from underneath (photos 2,3). Work your way around the block between the corners until all the guidelines are separated (photo 3).
You don’t have to make your cuts very deep. You are just making sure you reserve wood for the key sections of the knight wood carving.
Note: The head will be turned on this knight wood carving. You do not have to worry about until you carve the helmet (we will remind you).
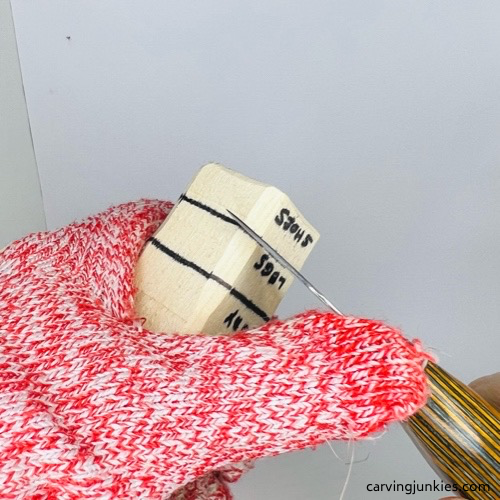 2. Making a stop cut
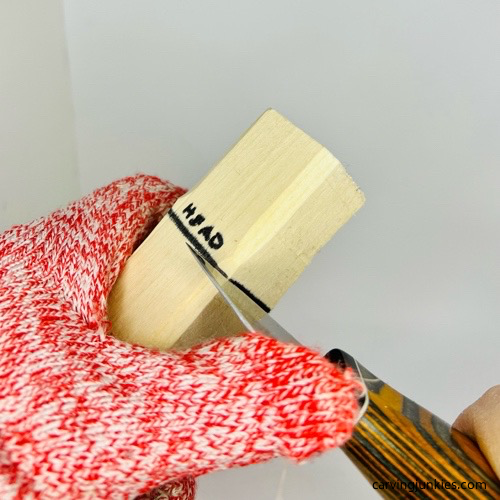 3. Starting to separate the head
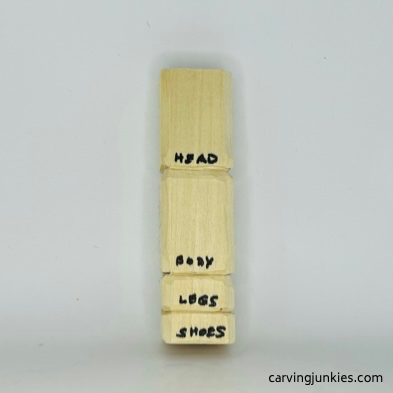 4. All areas are separated and reserved
Start the legs on the knight wood carving
The knees on this knight wood carving will be slightly bent. Color in a triangle on each side of the legs (photos 5,6) to mark the wood that you will remove.
We use a wide V-cut to remove the wood on each side (photo 7). You may have to make several passes to complete this cut (see progress photos 8,9).
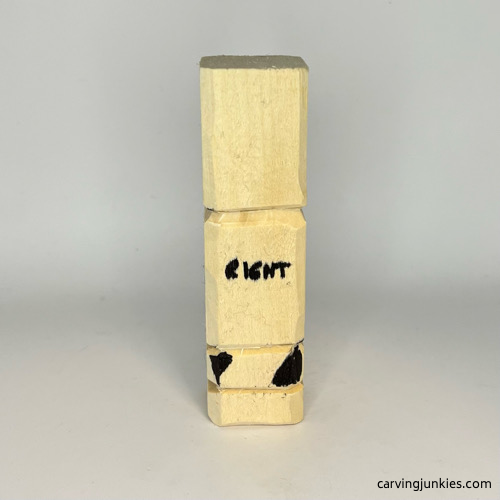 5. Right knee is marked for wood removal
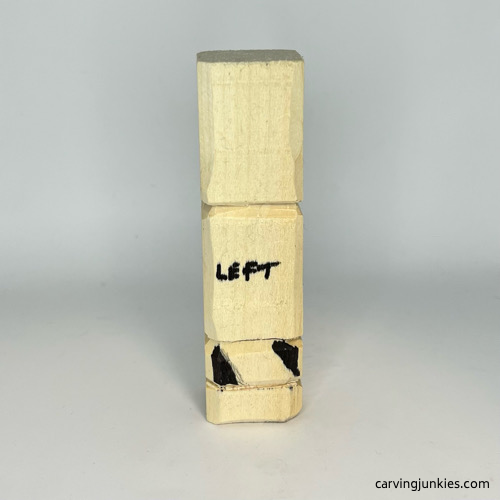 6. Left knee is marked for wood removal
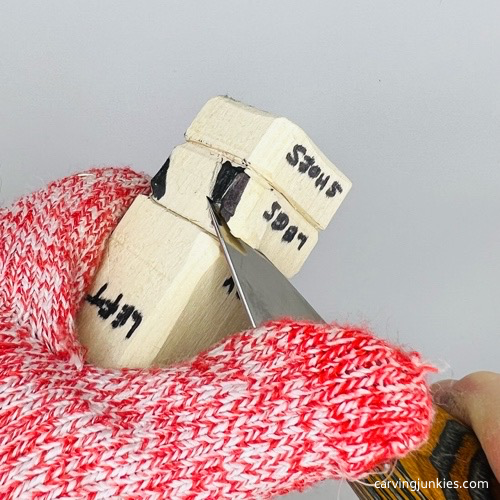 7. Making the initial cut
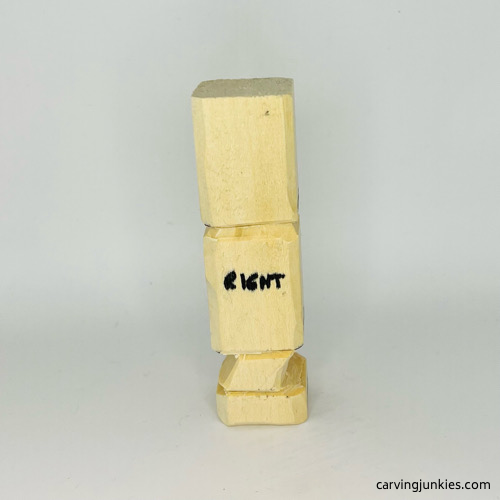 8. Right progress photo
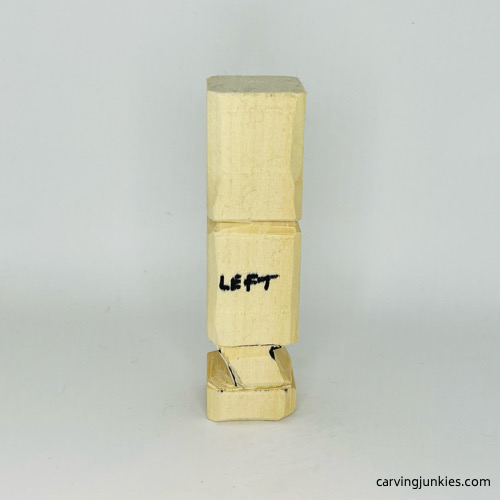 9. Left progress photo
Add some details to your knight wood carving
Draw on the right hand (photo 10), which will appear on the front, and the right arm (photo 12). Also, draw the left arm and hand (photo 11), which will hang down.
On the front (photo 10) and back (photo 13), draw a center line to mark where you will split the legs.
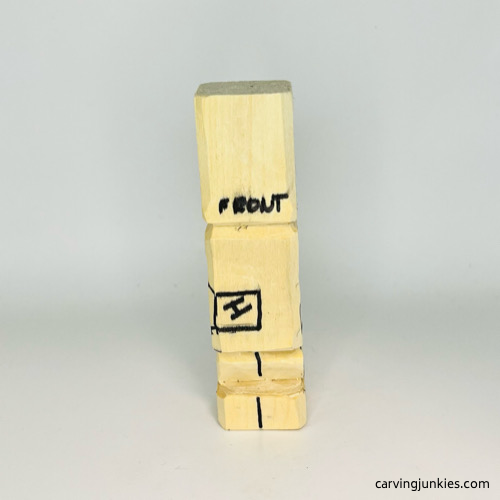 10. Right hand is drawn
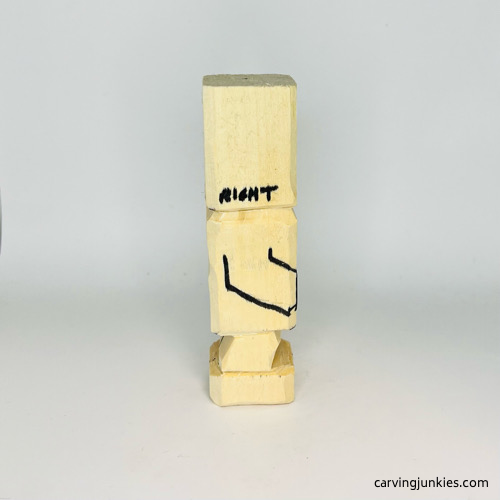 12. Side view of right arm
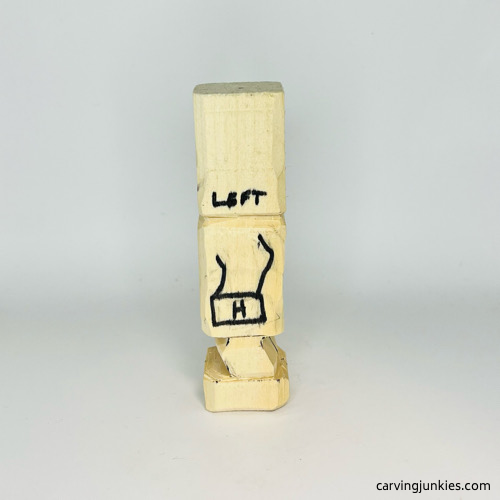 11. Left arm and hand are drawn
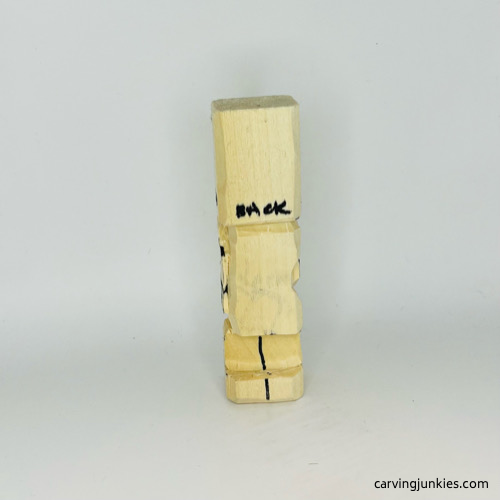 13. Back of knight wood carving
Separate the arms and hands of the knight wood carving
Use a series of stop cuts to separate the arms and hands of the knight wood carving (photos 14-18).
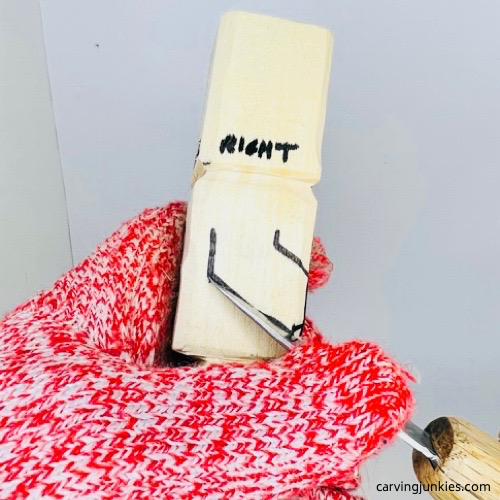 14. Separating the right arm
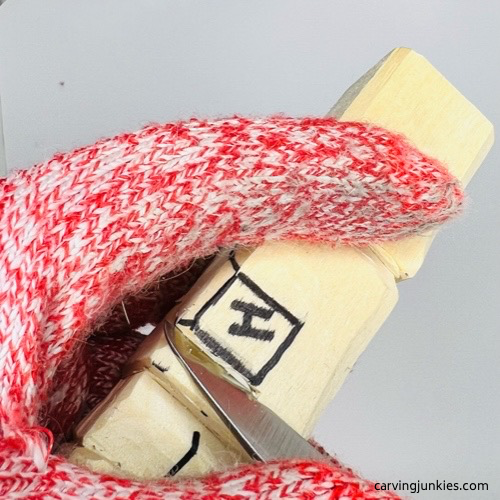 15. Making a stop cut
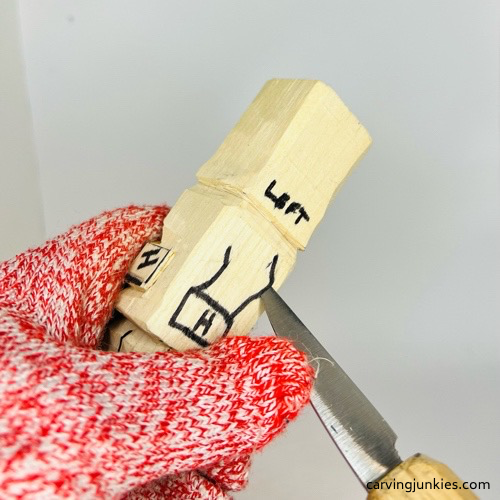 16. Starting the left arm
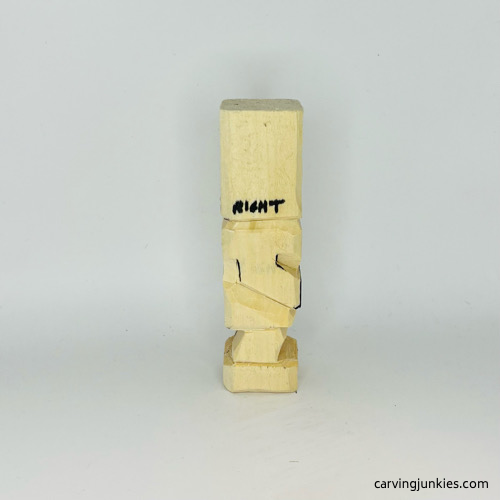 17. Right side progress
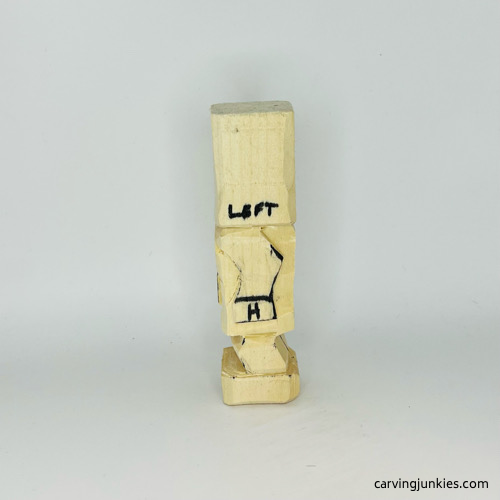 18. Left side progress
Round the helmet and narrow the neck of the knight wood carving
Round the top and bottom of the helmet of the knight wood carving (photo 19).
Keep the corners, especially in the middle of the helmet on the front (photo 20). The knight’s head will be turned left, and his helmet is a bit blocky, so there is no need to carve the head into a perfect oval shape.
Note: You will refine the helmet further later.
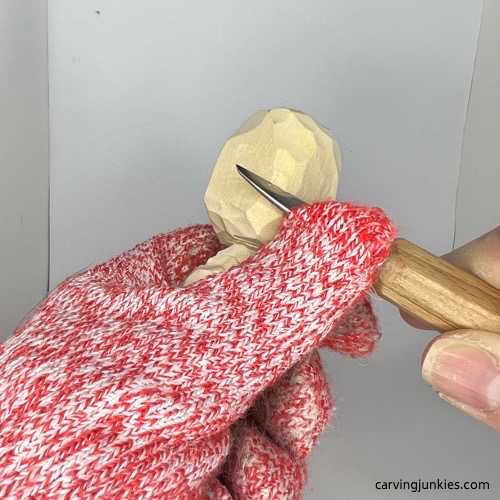 19. Shaping the helmet
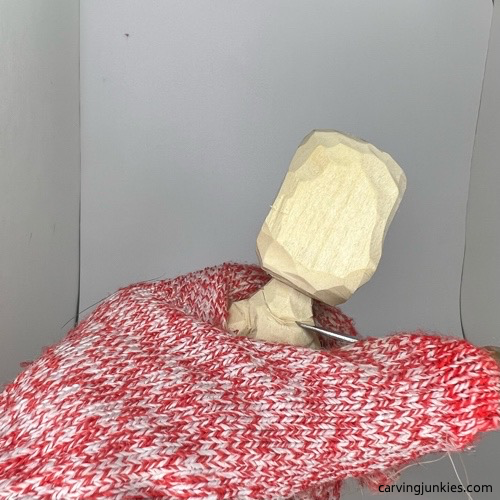 20. Shaping the neck and neckline
Carve the hands and the lower body
Round the hands on the front (photo 21) and the side of the knight wood carving. Make small V-cuts to create the fingers (photo 22). Tip: Draw them first for placement.
Also, start to angle the bottom of the knight’s cloak toward the legs (photo 23).
Check the back of your knight wood carving to be sure the shoulders are symmetrical and extend the neckline around from the front (photo 24).
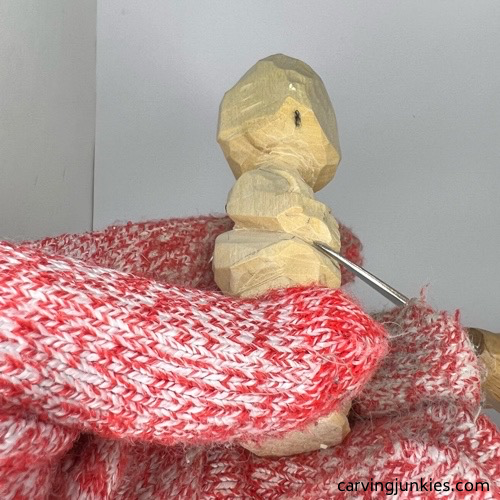 21. Rounding the hands
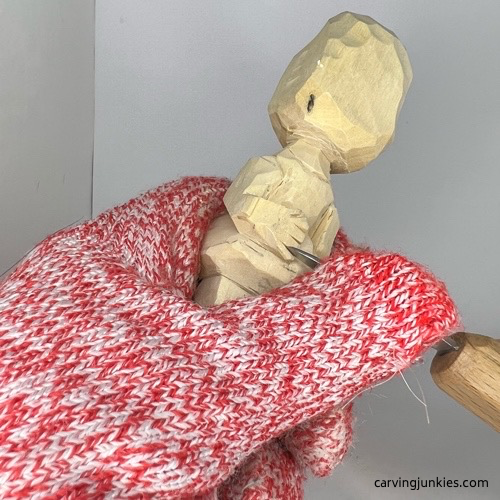 22. Carving the fingers
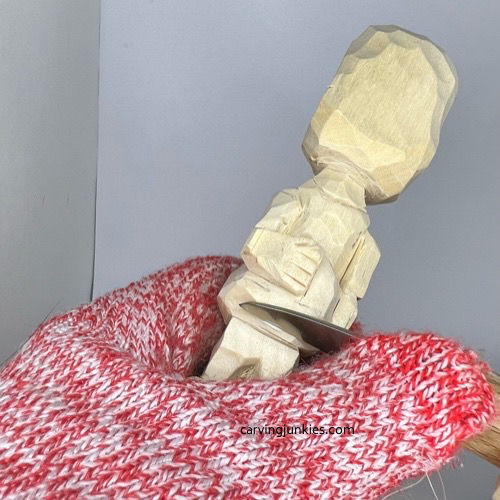 23. Shaping the knight’s cloak
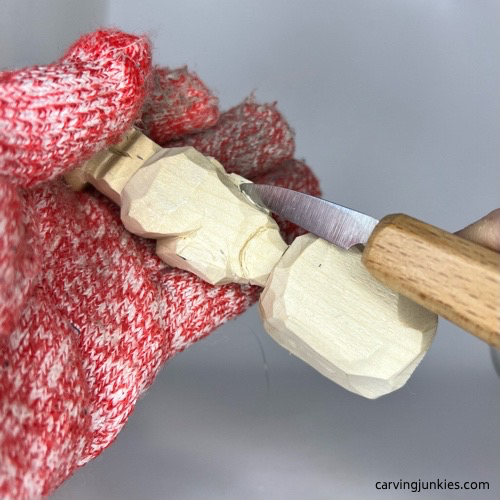 24. Refining shoulders and neckline
Draw more details on the knight wood carving
Draw the helmet design on the knight wood carving, including the cross (photo 25).
Also, add the cross on the front of the knight’s cloak (photo 24). Extend the top helmet guideline around to the back (photo 28).
Note: We decided not to carve the shoulder pads (the wood was too fragile), so ignore the drawing on the arms.
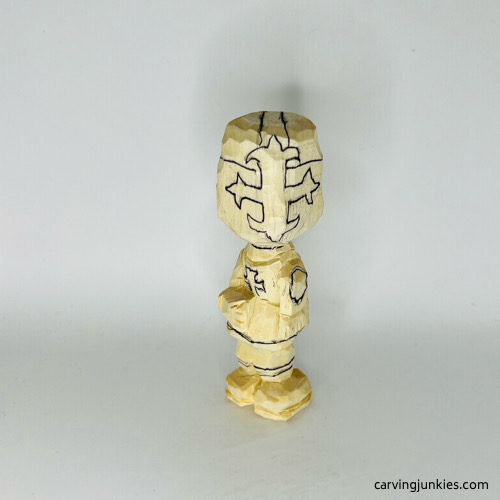 25. Front details are added
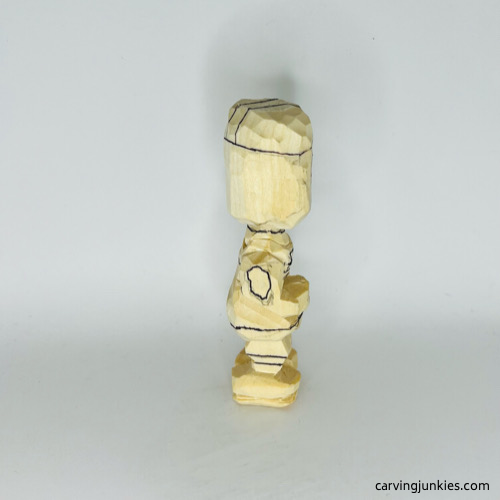 26. Details on the right side
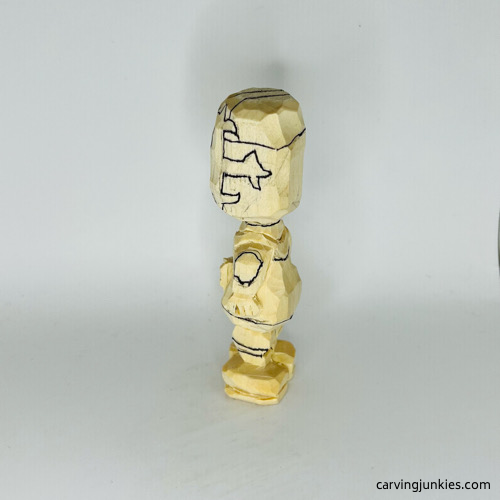 27. Left side details
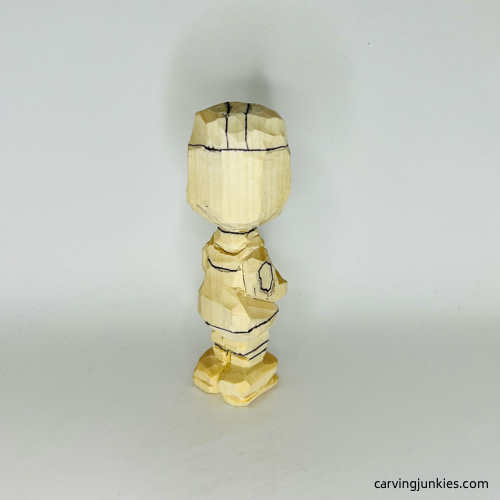 28. Back view of details
Separate the details on the knight wood carving
The middle section on the top of the helmet will be raised. Make a stop cut along the guideline and carefully remove wood from one side (photo 29). Repeat on the other side (photo 30).
Once all the details are carved, use a small hand drill to make the hole in the left hand (photo 31). Take your time and make the hole at an angle so the sword will sit right.
For the sword, we glued two small popsicle sticks together and let them sit overnight. We drew the outline of the sword and and handle (photo 32). You may want to use a vise to secure your sword. If not, be careful as you carve.
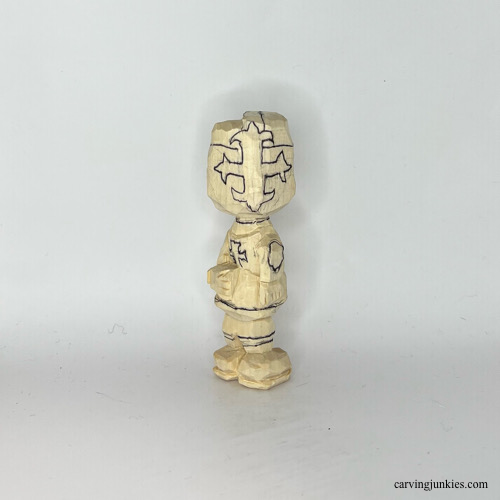 29. Half the helmet top is carved
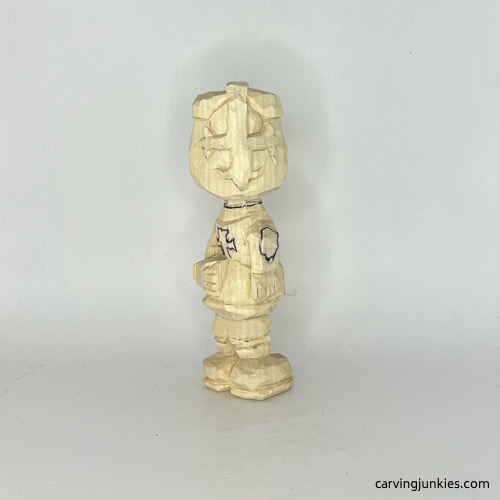 30. Carving details in progress
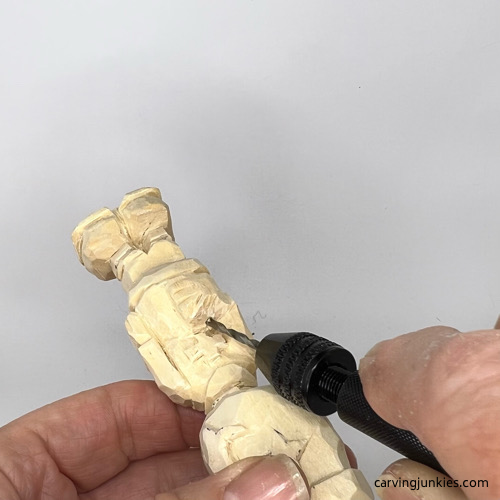 31. Drilling a hole in the hand
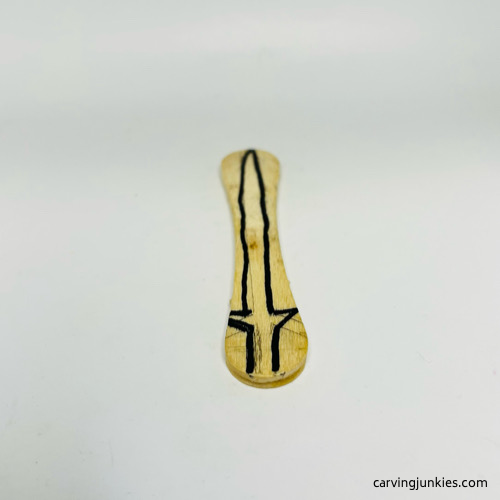 32. Sword drawn on popsicle stick
Clean up your cuts on your knight wood carving
Clean up any fuzzies and remove any marks. We wet the knight so you could see the detail more clearly. Note: We removed the helmet marks prior to panting (photo 34).
To make the shield, we used some leftover glitter cardstock and drew the design (see photo 37). We cut it out, turned it over, and traced it on the cardstock. Once we had both pieces, we glued them together.
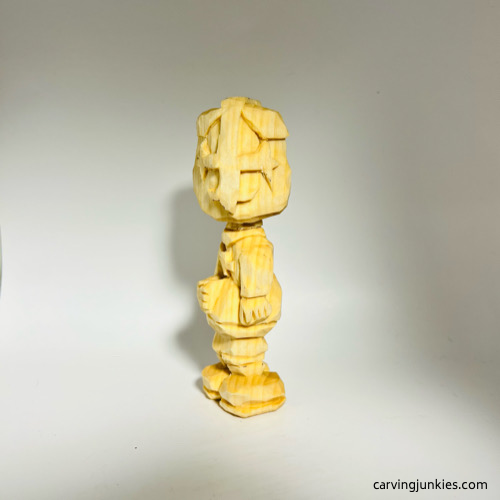 33. Front view of knight prior to painting
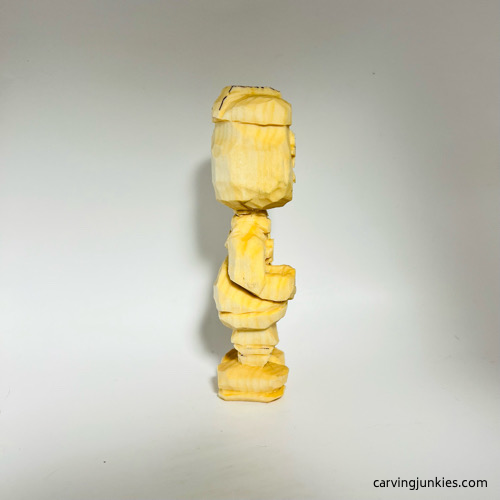 34. Right view of knight before painting
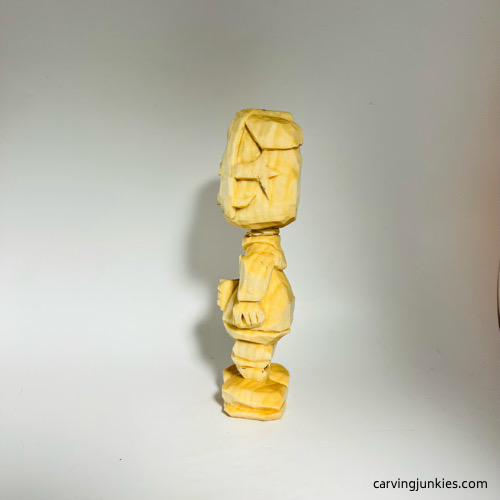 35. Left view of knIght before painting
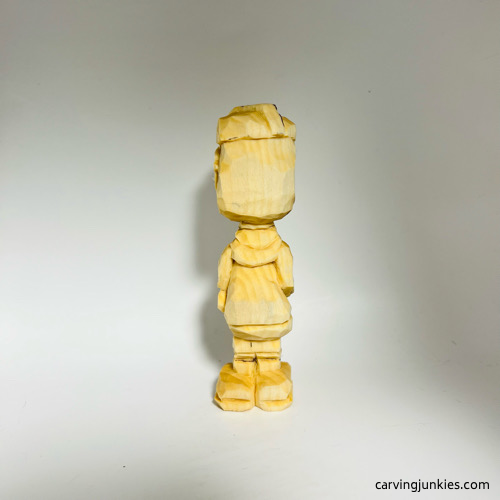 36. Back view of knight before painting
Get your paint out
We used 100% paint for the knight, except for the gloves and shoes. Here are the colors and acrylic paint brands used:
- Armor and helmet: FolkArt metallic silver.
- Crosses: Ceramcoat rose gold mixed with Artist’s Acrylic Naphtali crimson.
- Shoes and gloves: Ceramcoat black wash with water.
- Base: Ceramcoat metallic gold.
- Sword: Ceramcoat metallic gold for the handle and FolkArt Metallic silver.
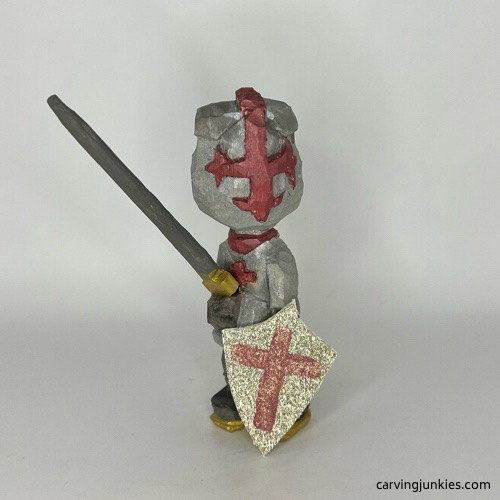 37. Front of completed knight
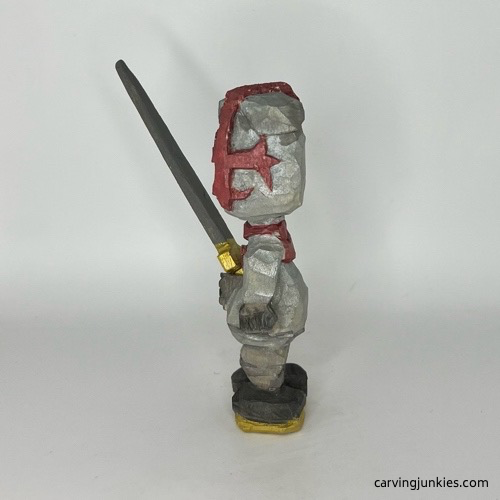 39. Left view of painted knight
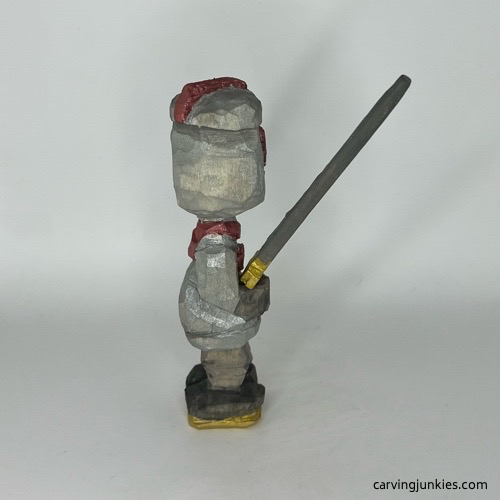 38. Right view of painted knight
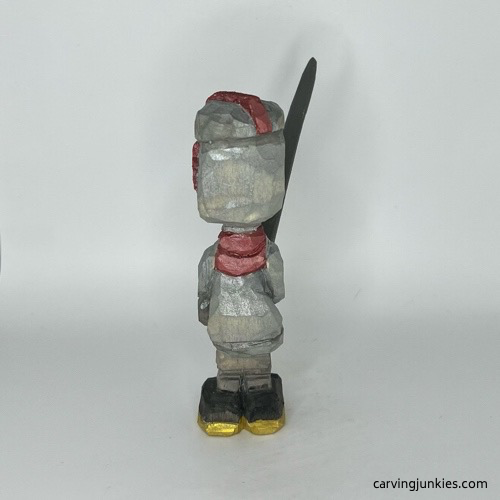 40. Back view of painted knight
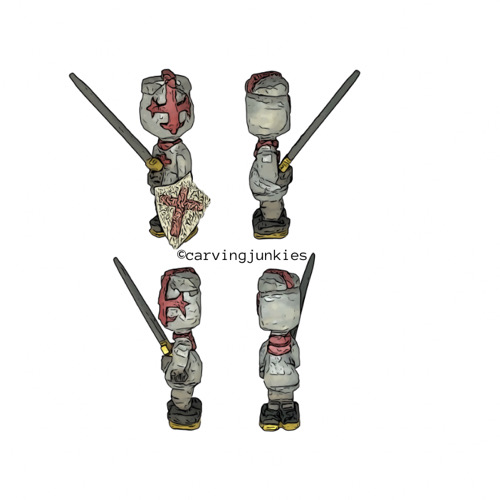
Free knight wood carving pattern
If you prefer to carve your knight with a pattern, photocopy this to size to fit your wood block.
Summary of our knight wood carving tutorial
- Mythical characters are fun to design and carve
- Check out images of medieval knights if you want to change up the clothes and decorations
- Be careful hand drilling the hole in the hand so you don’t crack it
- We carved our sword from popsicle sticks that were glued together
Get 50 Wood Carving & Painting Tips when you join our FREE Covered in Chips club.
Share this page
carvingjunkies.com never sells your personal information.
This site uses cookies for its operation and to enhance your experience. As an Amazon Associate and Focuser Carving affiliate we earn from qualifying purchases.
Home | About Us | Privacy Policy | Terms of Use | Contact | Sitemap
