- Home
- Things to carve
- Miniature wood carving
Manly miniature wood carving tutorial
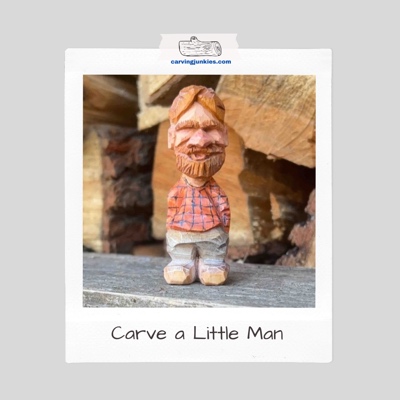
Carve yourself a little ginger-haired logger man.
LEVEL: SOME CHALLENGES
Making a miniature wood carving is tons of fun and great practice for carving larger caricatures.
This tutorial provides step-by-step instructions to make it easy to carve this little man. He’s happily taking a break from cutting up tree logs.
You won’t find other online tutorials that include this many photos, which can help you get the great results you want.
You also won’t have to worry about carving eyes with a piece this small.
Have a great time carving him!
What you will need for your miniature wood carving
I used a basswood block that is 1 x 1 x 3 inches (2.5 x 2.5 x 7.6 cm). To go larger, simply double (or triple) the pattern measurements.
You will need something to sketch your guidelines with, a ruler (if you don’t want to wing it), and safety gloves—as always.
I used a long blade knife for most of the piece and switched to a smaller detail knife for carving the facial details.
I also used a 4 mm micro U-gouge and a 4 mm micro V-tool, but provide suggested cuts if you do not have these tools.
If you’re a lap carver, please ALWAYS make sure you protect your vital leg arteries with something hard—like a square cutting board.
Miniature wood carving tutorial at-a-glance
This short video provides a quick overview of the key steps for this tutorial. You may want to watch it before you start carving.
Setting up your miniature wood carving
Draw a guideline on the front that is 1.5 inches (3.8 cm) from the top of the wood block to mark the bottom of the head (photo 1).
Draw anther guideline all around that is about 2.75 inches (7 cm) from the top to mark the top of the feet (photos 1-4).
Draw a guideline on the back of the block, that is 1 inch (2.5 cm) from the top to mark the bottom of the back of the head (photo 4). Note: The bottom of the back of the head is a little bit higher than the bottom of the front of the head (visible in photos 2,3). Tip: Mark the front and the back with an “F” and a “B” to avoid confusion (visible in photos 1,4).
Draw guidelines that meet with the front and back guidelines on the right and left sides (photos 2,3).
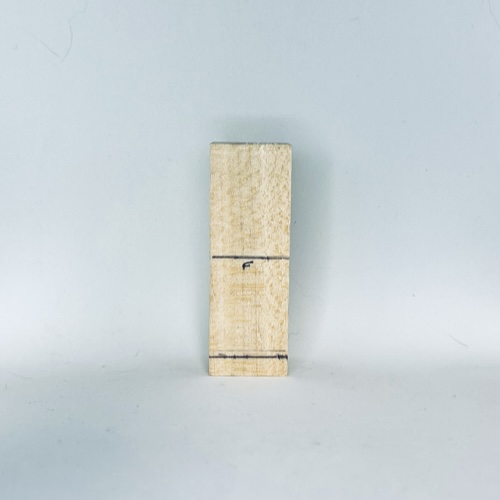 1. Front guidelines are drawn
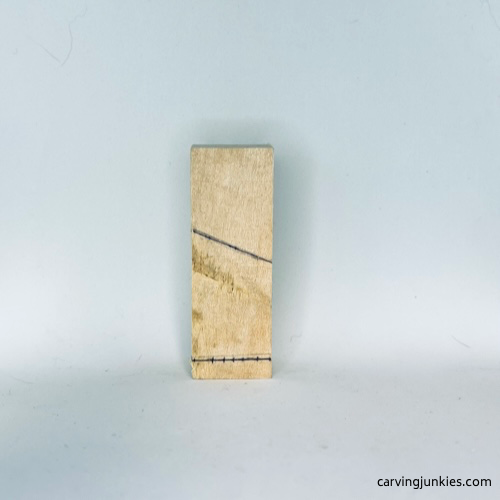 2. Right view of guidelines
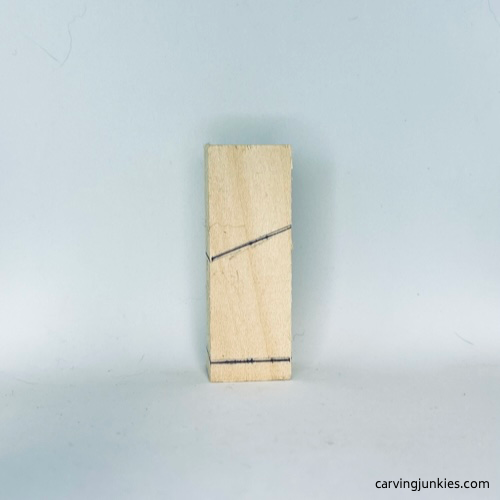 3. Left guidelines are drawn
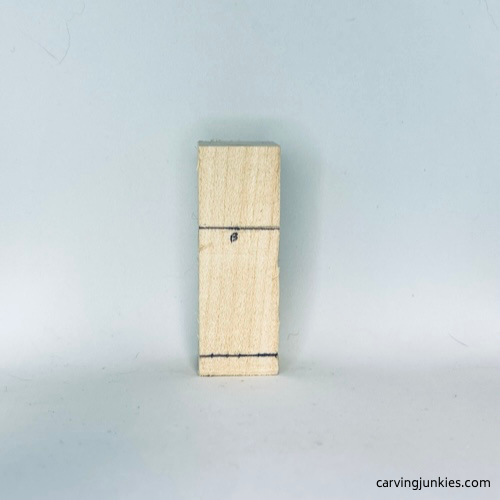 4. Back guidelines are drawn
Separate the head all around
Use stop cuts to separate the head all around (photo 5) with your knife (or use a V-tool).
Mark a triangle on each side that starts around 2.75 inches (7 cm) from the top of the block (photo 6). Starting at each corner, remove the wood you marked (photos 7,8). Be very careful here not to slip and carve off the feet! If you do, just add a little wood glue and wait 24 hours before you continue carving.
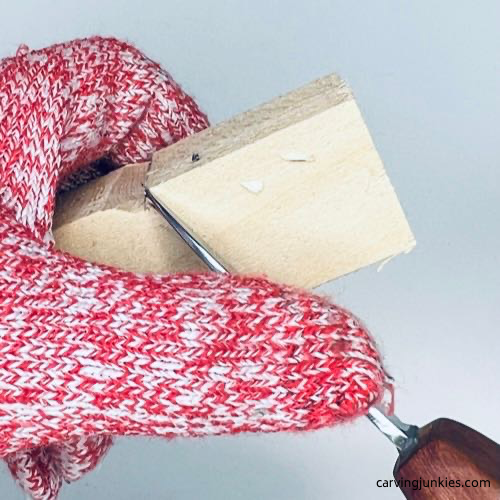 5. Making a stop cut
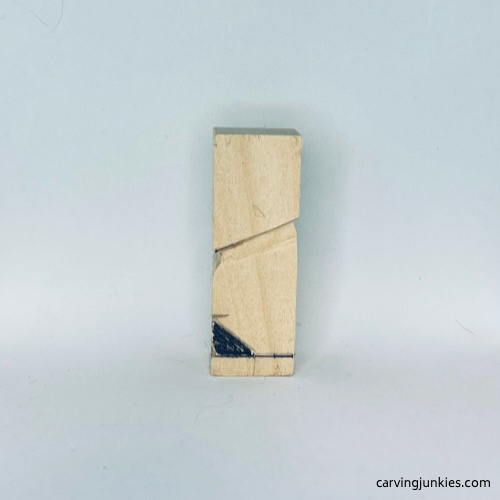 6. Wood is marked for removal
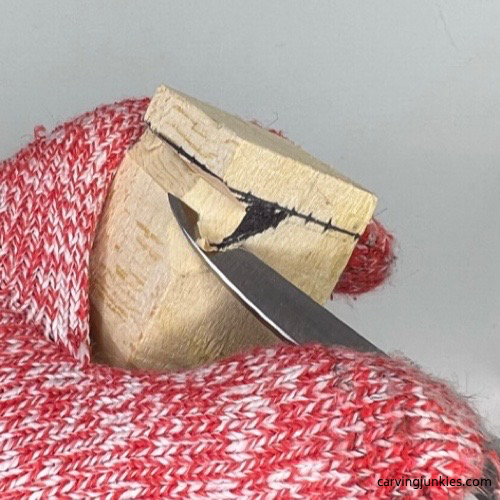 7. Cutting into legs
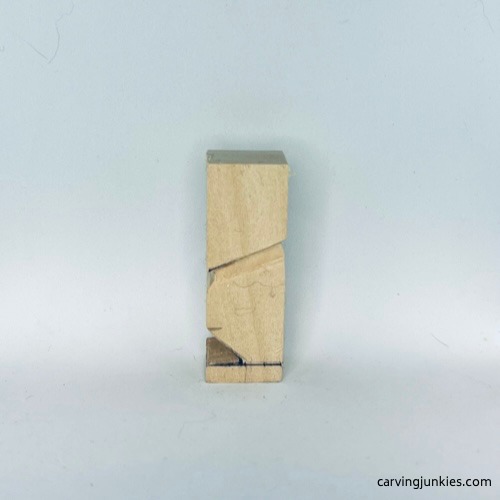 8. Legs are cut
Sketch the arms on your miniature wood carving
Sketch the arms on the sides of your miniature wood carving (photos 9,10). The pants can come down over the shoes in the back; add the pant line on both legs to reserve that wood (visible in photos 9,10).
You want to give the impression that this little guy is leaning a little forward. You will slightly curve the back by removing some wood (marked in photos 9,10).
The arms are about 1/4 inch (0.6 cm) wide. The inner crook of the arm is about 1/2 inch (1.3 cm) from the belly.
Don’t worry if your sketch isn’t perfect. You will be able to refine and shape the arms after you separate them.
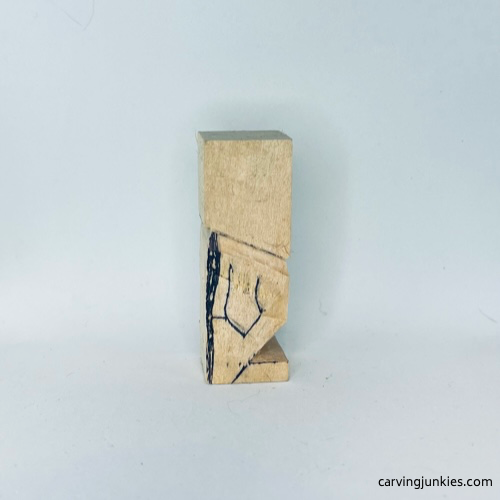 9. Right arm is sketched
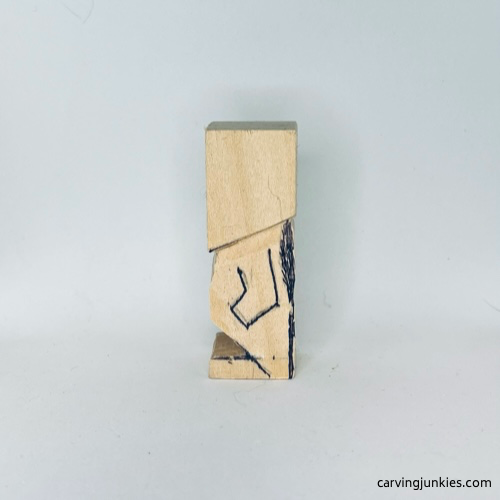 10. Left arm is sketched
Carve the arms on your miniature wood carving
Carve off the wood you marked across the back side of the miniature wood carving (completed in photo 12). You can use push or pull cuts here. Also, carve back the upper arms on the front (photo 11).
Start to separate the arm by making a cut across the bottom of the sleeve, holding your knife like a pencil (photo 12). Make a second slicing cut (photo 13) at an angle. Use the same method to carve the rest of the arm (completed in photo 14). You can also use stop cuts, or a V-tool. Once you have access, you can shave some wood off the belly, up to the neck (visible in photo 15) .
Repeat same process on the other arm.
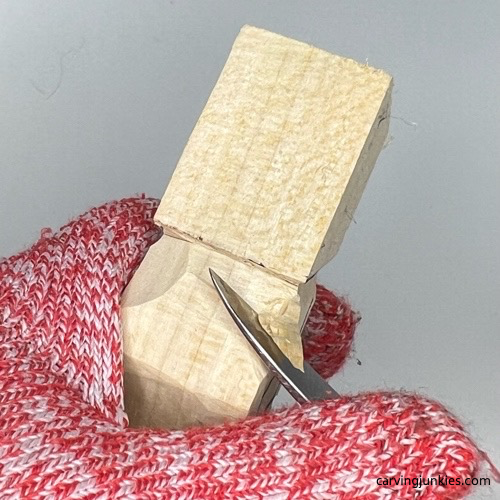 11. Carving back upper shoulder
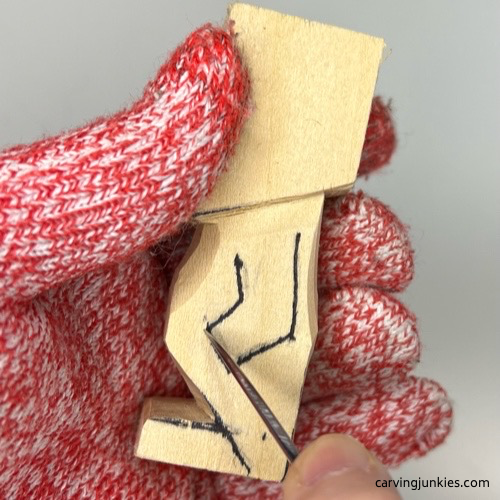 12. Using a pencil hold to cut
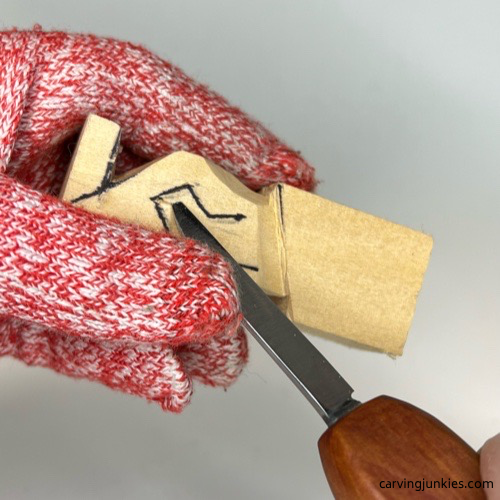 13. Making second slicing cut
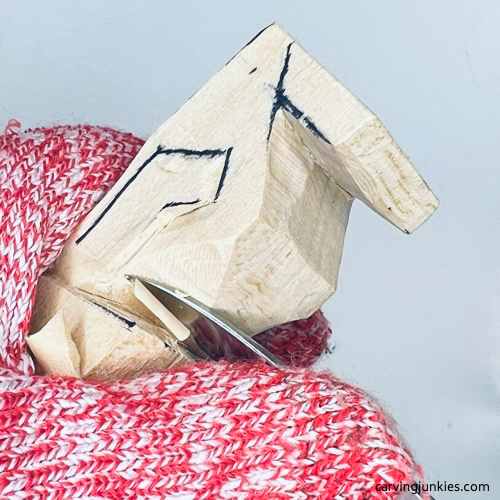 14. Cutting top of shoulder toward the neck
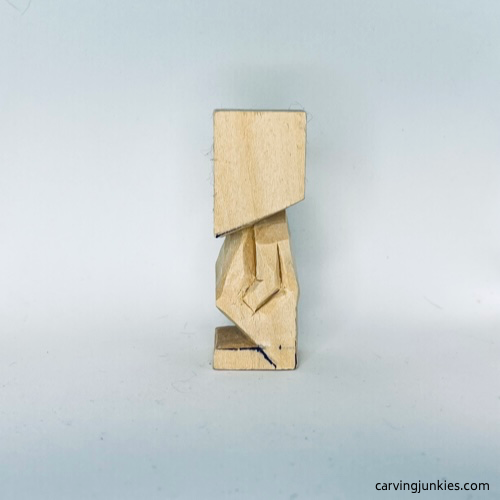 15. Arm is separated
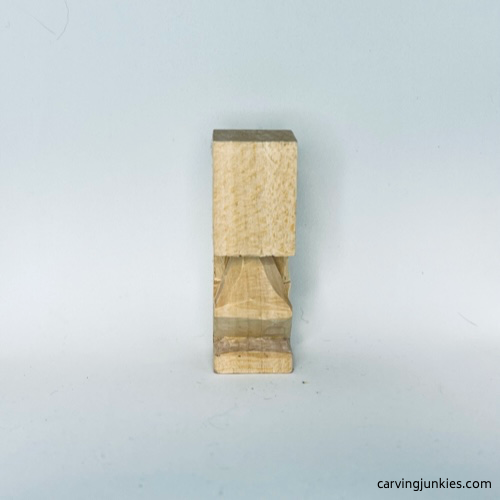 16. Progress photo (front)
Narrow your miniature wood carving
Narrow the sides (hips) on the lower body of your miniature wood carving (photo 17).
Use your knife to remove some wood and create a curved tush (completed in photo 18).
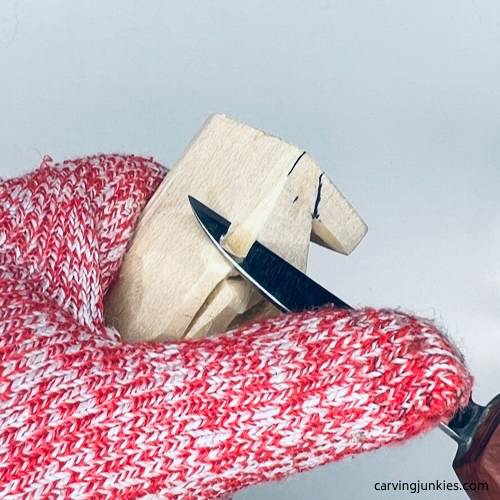 17. Shaping the hips
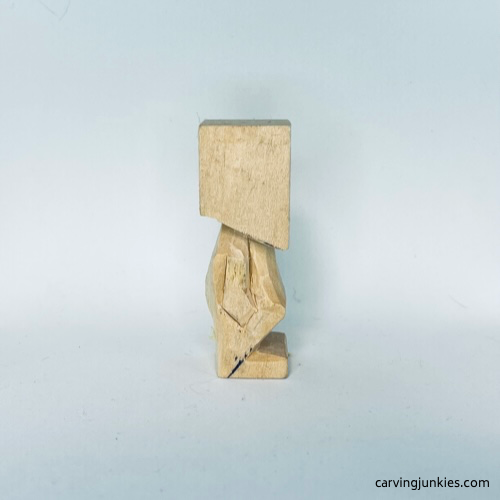 18. Progress photo of lower back
Set up the head of your miniature wood carving
Mark the top of the head where you will remove wood to create a corner on the front, which will make it easier to get depth for carving the nose (photo 19). Remove wood on each side of the new corner (photo 20). Optional: I shaped mine so that the head is turned slightly to the left.
Reserve an ear box on each side (photos 21,22). Each box is about 1/4-inch (0.6 cm) square.
On the front, draw a guideline that is 1 inch (2.5 cm) from the top to mark the bottom of the nose. It extends about 1/4 inch (0.6 cm) on each side of the new corner (photo 23).
Draw a second guideline that is a little more than 1/2 inch (1.3 cm) from the top, to mark the eye-line (photo 23).
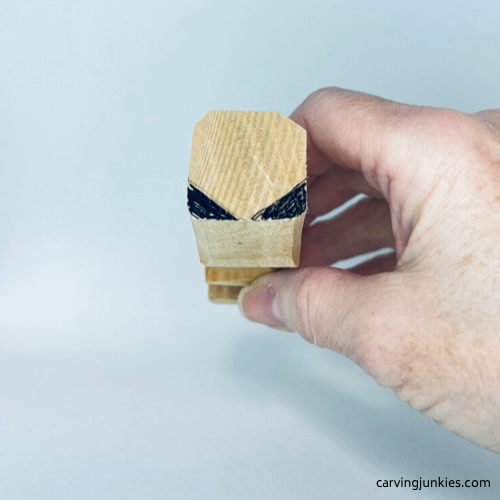 19. Wood is marked for removal
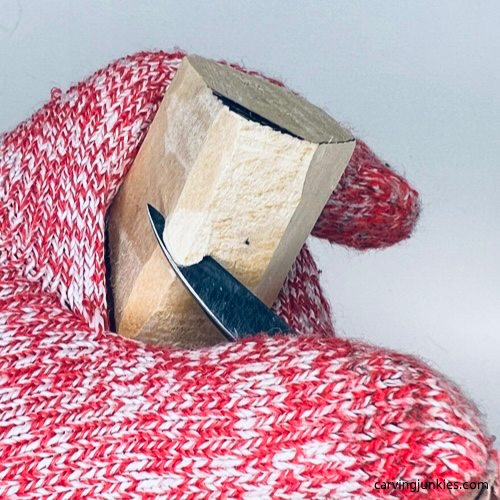 20. Removing wood to shape face
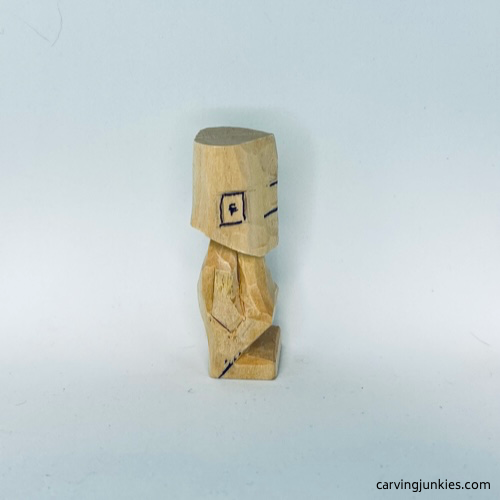 21. Right ear box is added
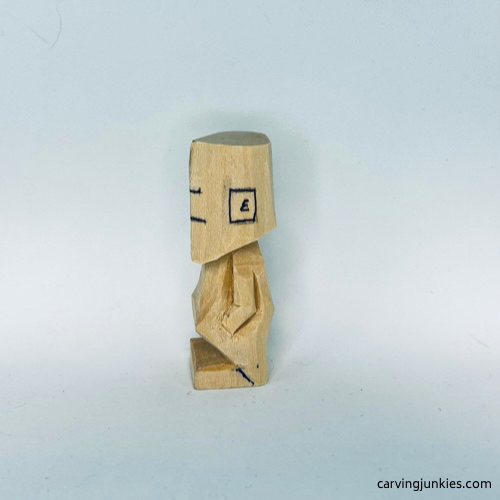 22. Left ear box is added
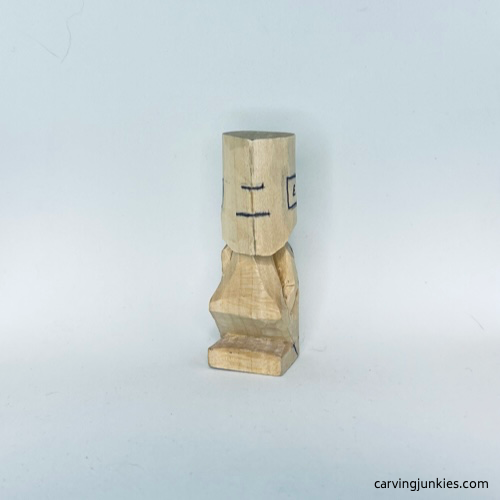 23. Nose and eye-line guidelines
Carve the nose on your miniature wood carving
Make a stop cut to establish the eyeline on your miniature wood carving. After cutting straight across, cut up to angle the corners downward (photo 24).
Make a stop cut under the nose and remove wood from underneath (photo 25).
Sketch the shape of the nose (photo 26). Switch to a smaller detail knife (strop it sharp first) to separate the nose. Move your knife along the guideline and make a second slicing cut. Once you have access, you can remove wood up to the eye line.
Add a triangle on each side of the nose (photo 27) to mark wood that you will remove using small pyramid cuts.
Sketch the nostrils (photo 28). I used a 4mm micro U-gouge to carve the nostrils (completed in photo 29). If you do not have this tool, carefully shape the curved nostrils with a knife that has some flex to it. Be careful not to break your knife here.
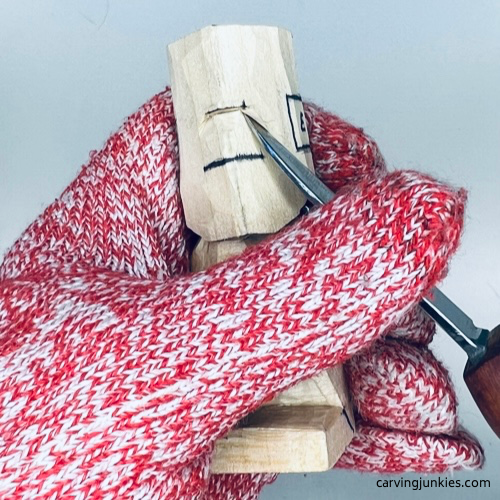 24. Carving the eyeline
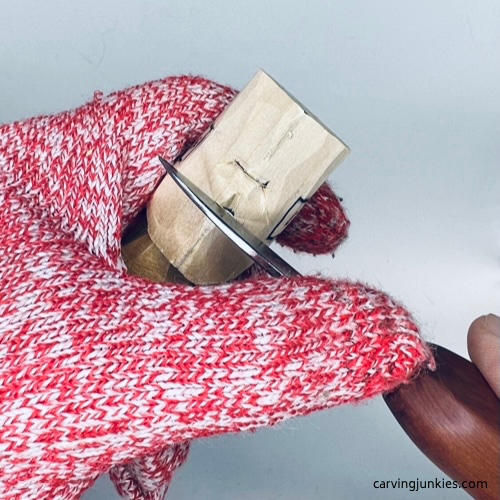 25. Making a stop cut under the nose
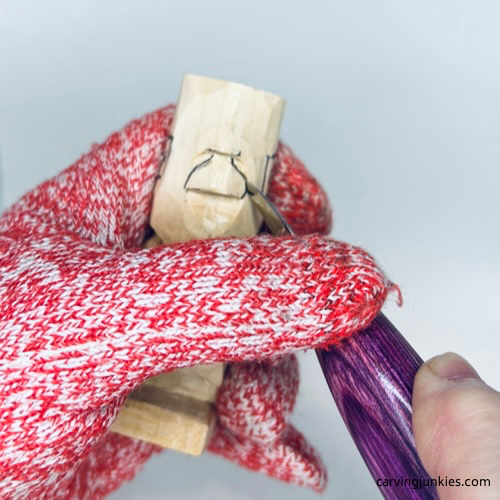 26. Shaping the nose
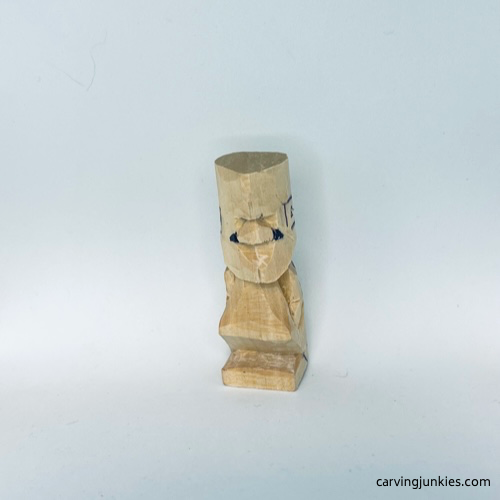 27. Wings on the nose
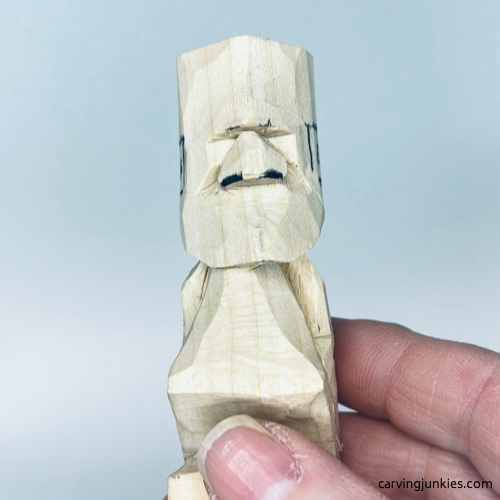 28. Nostrils are marked
Carve the head details on your miniature wood carving
Carve the forehead back and sketch the hairline and mouth (photo 29). Also, shape the top of the eyes so they curve slightly (completed in photo 29).
Start to narrow and shape the chin (photo 29). Use stop cuts to separate each ear box (or use a V-tool) and mark the wood for shaping (photo 30). After the ears are shaped, use a 4mm micro U-gouge to scoop wood out of the inner ear (photo 31). If you don’t have this gouge, simply make a wide V-cut in the front—toward the middle—of each ear.
Use stop cuts to separate the hairline all around (photo 31). Separate the mouth by moving your knife along the guideline and making a second slicing cut. Optional: Use your knife to make small pyramid cuts in each corner of the mouth and shape a tongue (visible in photos 33,34) with the 4mm micro U-gouge.
Sketch the mustache (photo 33) that you will separate from the beard with stop cuts.
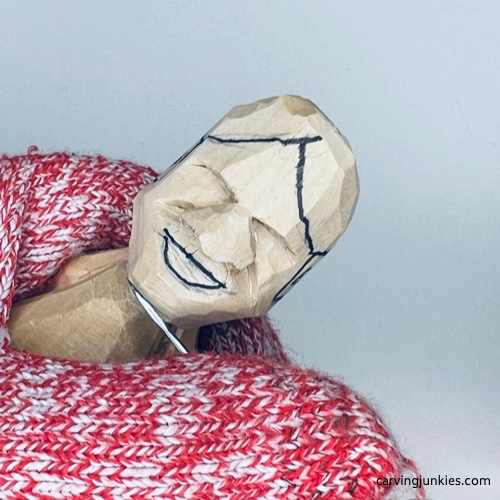 29. Narrowing the chin
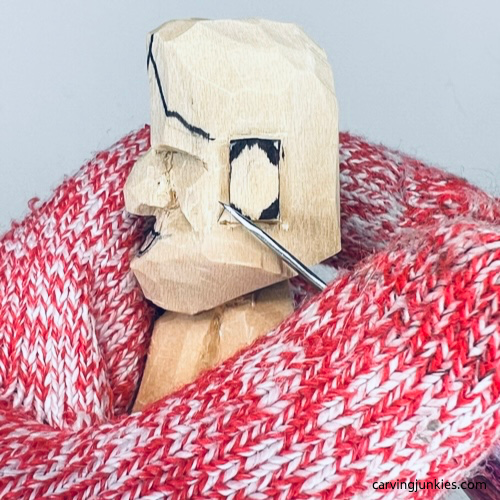 30. Shaping the outer ear
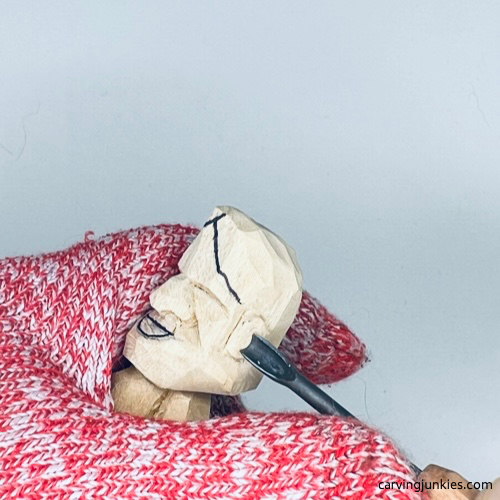 31. Shaping the inner ear
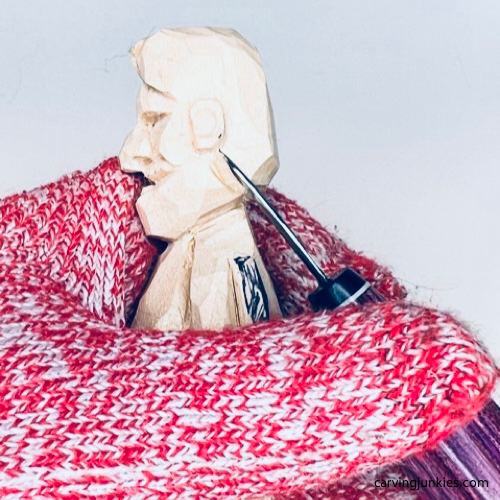 32. Separating the hairline
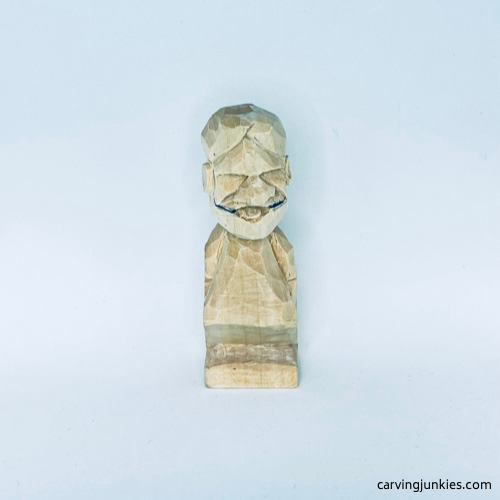 33. Mustache is added
Add more details to your miniature wood carving
Sketch the shirt and pants on your miniature wood carving (photos 34-37). Also, mark where you will split the legs.
Draw a little Y on the back (photo 37) to define the tush.
Use your knife to remove some wood on the front pants, leaving a slight mound on each hip to suggest the man’s hands are deep inside his pockets (completed in photos 34-36).
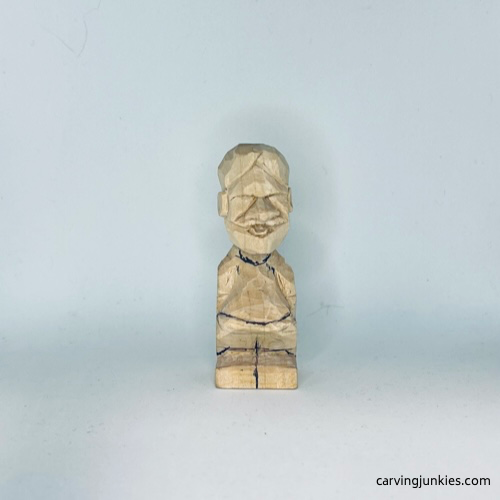 34. Front view of details
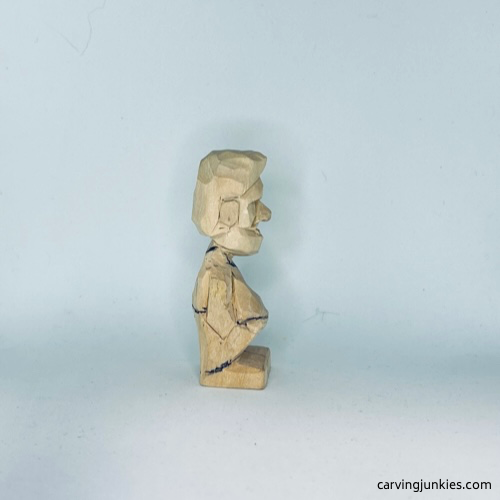 35. Right view of details
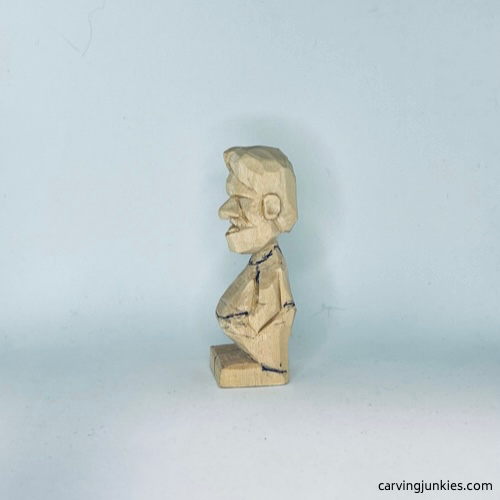 36. Left view of details
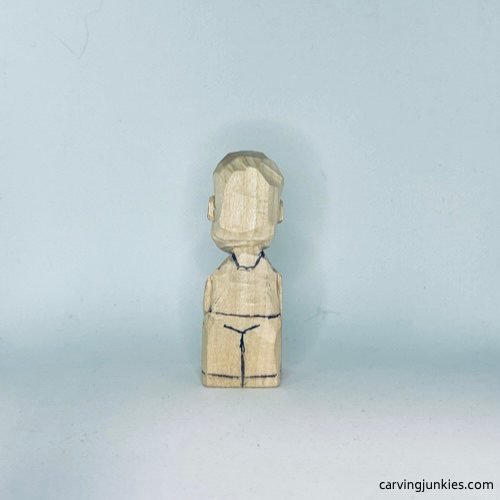 37. Back view of details
Finish your miniature wood carving
Use stop cuts to separate the shirt neckline on the front (completed in photo 38) and the back (photo 41). Also separate the pants (photos 38-41).
Use a micro V-tool (or make V-cuts with knife) to carve the hair on the beard and the mustache (completed in photos 38-40).
All completed in photos 38-41: Carefully split the legs—on the front and the back—with V-cuts. You may have to dig a bit to get the wood out. Tip: Angle your knife so your cuts meet in the middle to cleanly remove wood.Take your time here and be careful not to break your knife tip.
Once the legs are split, shape the shoes. Tip: Turn your piece upside down and sketch the shape before you cut. Use V-cuts to add a heel on each side. Tip: Mark the heels to be sure they are evenly placed.
Use some V-cuts to add wrinkles to the inside crook of each arm, the pants, and the hair (photos 38-41). Make small V-cuts or stop cuts to carve the Y on the tush (photo 41).
Finally, make a deep plunge cut—starting in the corner of each eye—to give the hint of eyes.
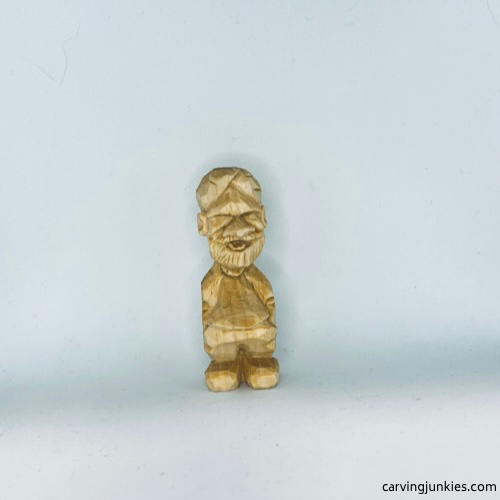 38. Front of miniature wood carving
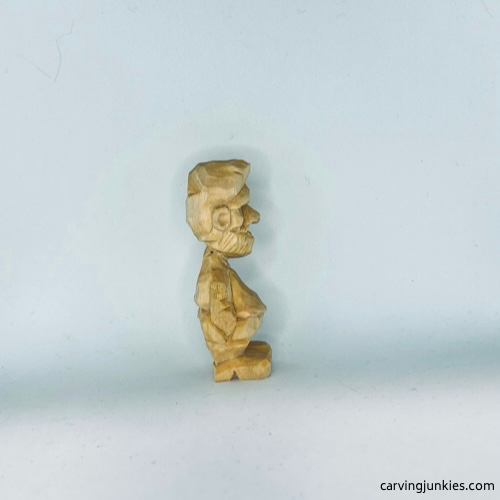 39. Right view
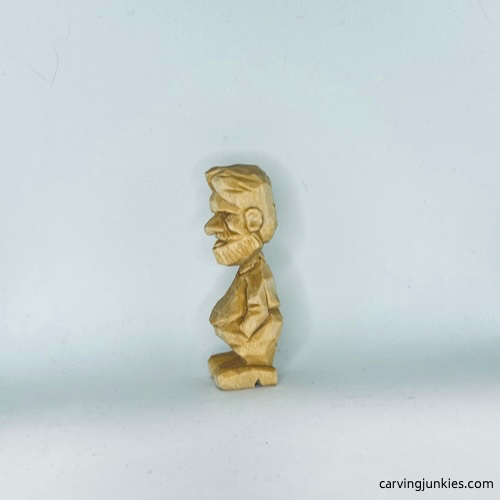 40. Left view
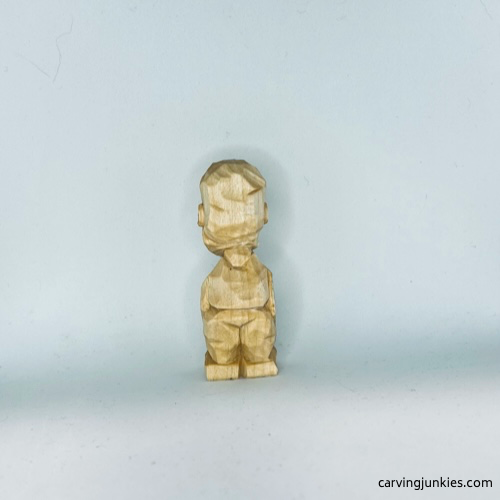 41. Back of miniature wood carving
Paint your miniature wood carving
Read our page about painting a wood carving, which describes different techniques and provides great tips. Unless noted, all acrylic paints used were diluted with water to create a milky wash.
Here are the paint colors if you want to achieve a similar look:
- Ears, face, and neck: Wash of 3 drops Ceramcoat tawny medium mixed with 1 drop Windsor & Newton terracotta.
- Shirt: Wash of Ceramcoat tangerine. Add 1 drop of Academy burnt umber for the wrinkles and edges. Allow to dry completely and use a fine-tip black magic marker to create the plaid pattern.
- Pants: Wash of Craftsmart navy. Add 1 drop of burnt umber for the wrinkles and edges.
- Hair, beard, and mustache: Wash of Craftsmart milk chocolate.
- Eyebrows: 100% Craftsmart milk chocolate applied with a toothpick.
- Lips, cheeks, tongue, and tops of ears: Wash of Windsor & Newton cadmium red light. Add in layers and top with very diluted wash of Apple Barrel flamenco red.
- Shoes: Apple Barrel golden brown wash.
- Dry brush piece with Ceramcoat ivory to highlight facets.
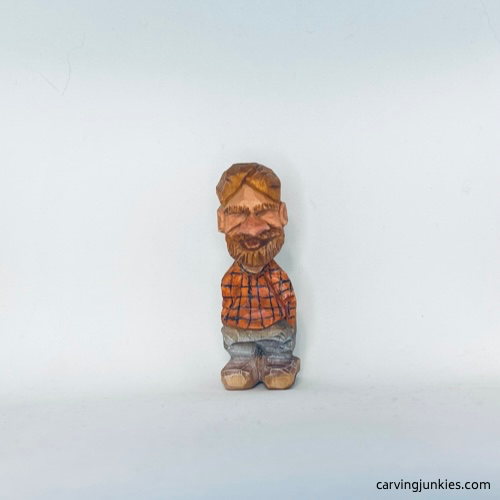 42. Front of painted miniature wood carving
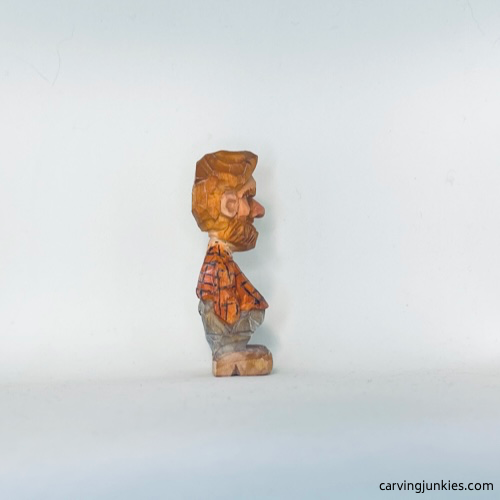 43. Right view of painted carving
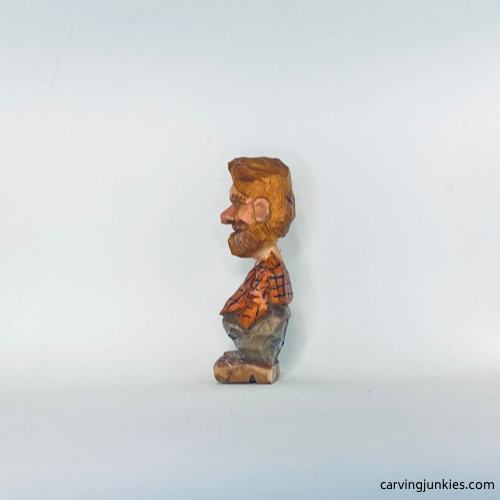 44. Left view of painted carving
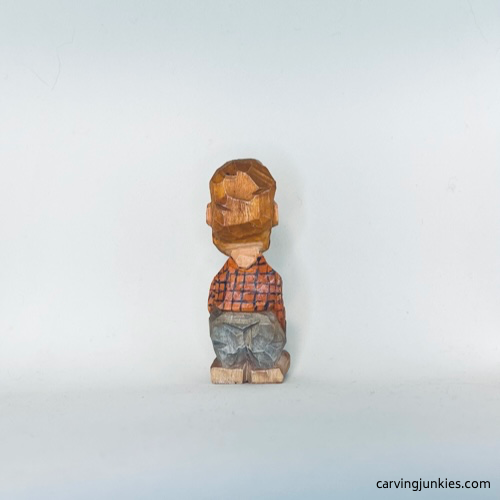 45. Back view of painted carving
Free miniature wood carving pattern
If you prefer to carve your miniature man from a pattern, photocopy this to size to fit your wood block.

Get 50 Wood Carving & Painting Tips when you join our FREE Covered in Chips club.
Share this page
carvingjunkies.com never sells your personal information.
This site uses cookies for its operation and to enhance your experience. As an Amazon Associate and Focuser Carving affiliate we earn from qualifying purchases.
Home | About Us | Privacy Policy | Terms of Use | Contact | Sitemap
