- Home
- Things to carve
- Old man carving
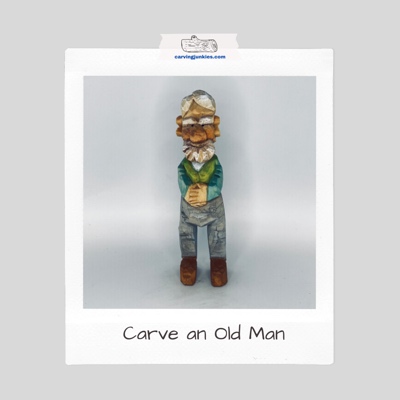
Jolly old man carving
Carve yourself an elderly geezer.
This old man carving provides the added challenge of carving crossed hands, a wide leg stance, and ears.
I started this carving tutorial while hanging out on the beach—so you will get to enjoy a few outdoor pictures.
I love carving at the shore (what we call the beach in New Jersey) because the humidity from the ocean makes the wood so soft and easy to carve. I easily carried my supplies in a Zip Lock bag (knife, homemade mini-strop, and wood block). I did forget my magic marker, but had a pencil in my beach bag. So my guidelines are a little lighter for this tutorial.
Carving little caricatures is a great way to experiment with different expressions and stances that you can easily adapt for larger pieces. Plus they carve up fast, which is great for those who like to jump from one project to another quickly!
 Island Beach state park (NJ)
Supplies needed for this old man carving tutorial
To make this little old man carving, you will need a wood block that is 1 x 1 x 4 inches (2.5 x 2.5 x 10.2 cm). You may have toincrease the size of the template with a photocopier to fit your wood block. Want to go bigger? Simply double or triple the measurements.
I prefer basswood for most of my caricature carvings. Since I used the flat plane carving style in some places on this piece, I used a knife with a straight edge and a long blade (1 7/8 inches). But feel free to use whatever knife you prefer!
A ruler, pen (or pencil), and an eraser will be helpful to sketch your guidelines and carving details.
Always carve with a protective glove and something hard to protect your lap from potential, leg artery-slicing knife slips. Accidents can (and do) happen! I carry a super small cutting board in my beach carving bag.
A painting guide is provided at the end to get the same look as my old man carving. You will also be provided with a template.
Have fun with this project!
Old man carving tutorial at-a-glance
See the major steps for this old man carving tutorial in the short video below.
Preparing your old man carving
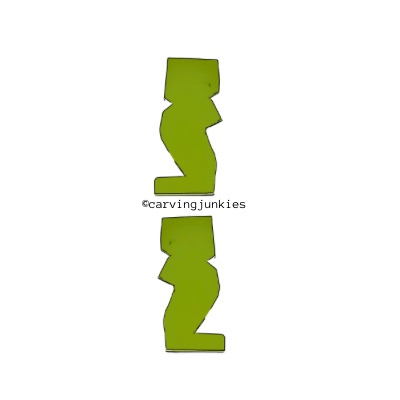
Use the template provided at the end of this page and trace it onto your wood block. Color in the areas of wood you will remove around the template (photos 1,2)
Extend guidelines around the front to mark the bottom of the head and the top of the shoes (photo 3).
Also, extend guidelines around the back to mark the back bottom of the head and the top of the elbows (photo 4).
These extra guidelines (photos 4,5) will help you know where to make your initial cuts.
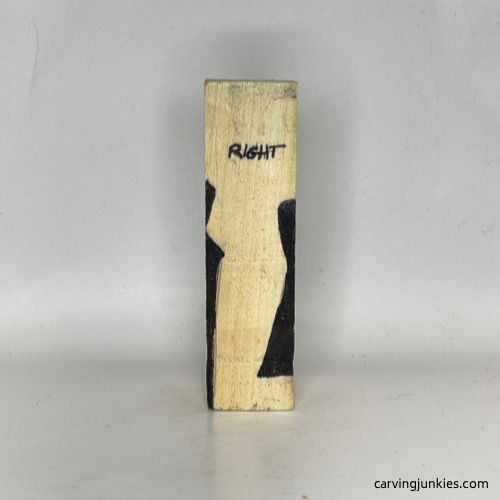 1. Right guidelines for old man carving
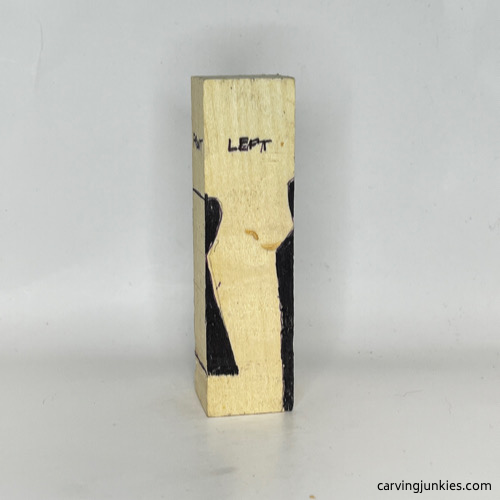 2. Left guidelines for old man carving
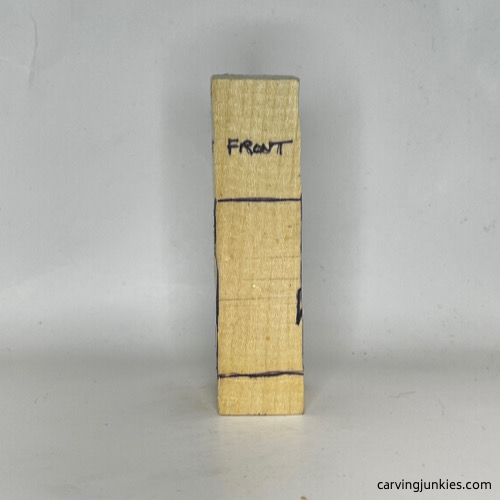 3. Front guidelines for old man carving
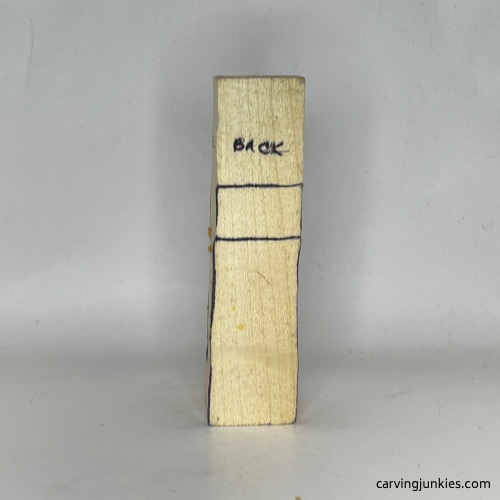 4. Back guidelines for old man carving
Separate the head of your old man carving
Use your knife to separate the head on the front and back. I like to start with stop cuts at each corner (photo 5), then I work my way with additional stop cuts in between the corners. Note that the bottom of the head on the front will be a little lower than the bottom of the head on the back.
Now, remove all the marked wood on the body of your old man carving (photo 6). When you get to the legs and feet, make a stop cut—and remove several layers of wood at one time—below it (photo 7).
Once all the excess wood is removed, sketch on the arms and legs (photos 8-11).
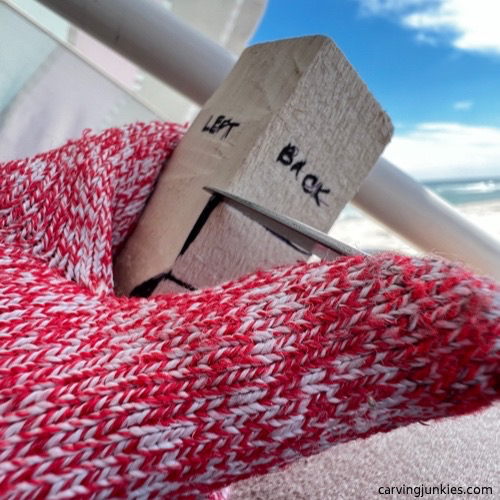 5. Making a stop cut
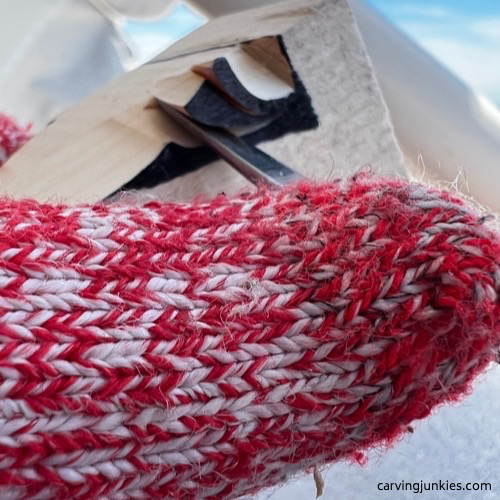 7. Removing cut layers
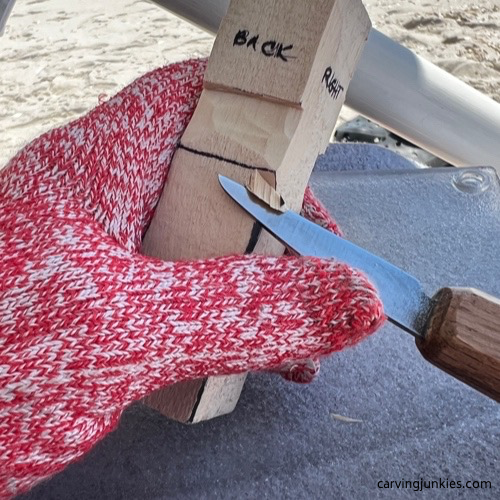 6. Removing wood on the back
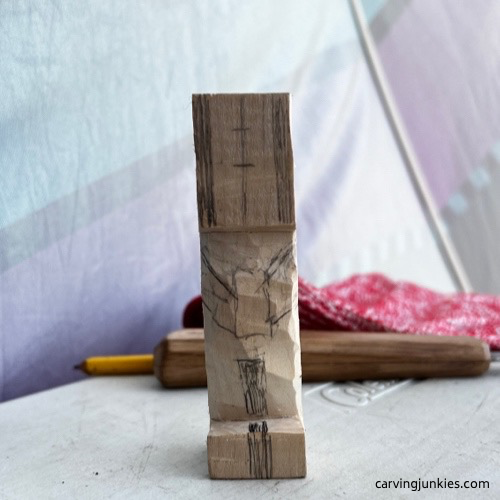 8. Front arms and hands are drawn
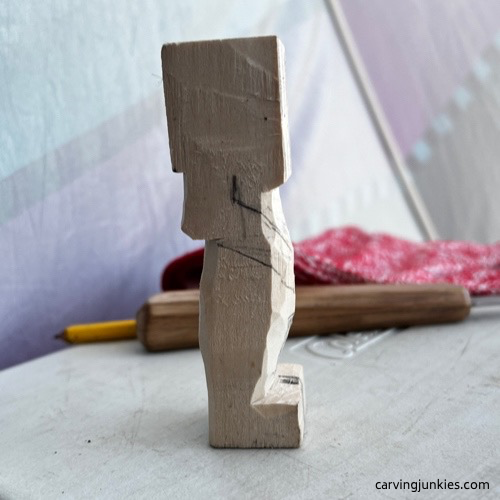 9. Right arm is drawn
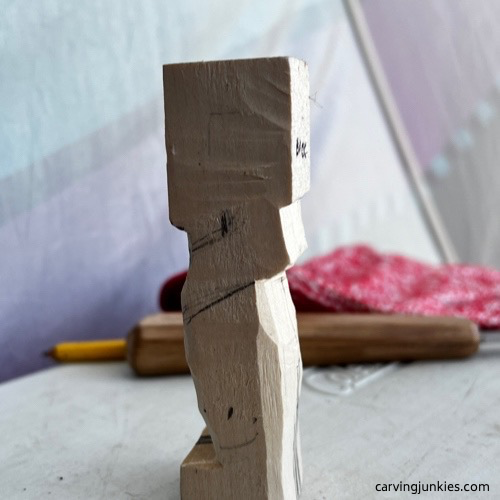 10. Left arm is drawn
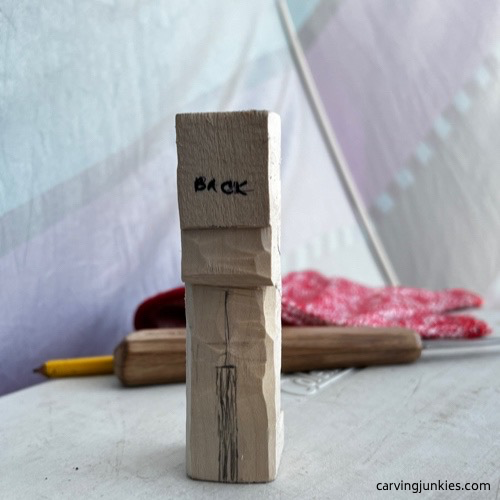 11. Wood is marked for removal
Separate the legs on your old man carving
Use a V-cut to separate the feet (photo 12), which will give you more access to separate the legs (photo 13).
The legs may be a little challenging to separate. Tip: It may help to make several wide V-cuts to remove wood in layers. As you carve, make sure you clean up your cuts between the legs (photo 14).
Then, use your knife to completely split the legs and roughly shape the shoes (photo 15).
Once you have wider access (photo 16) you can remove additional wood and clean up wood on the inside of the legs and crotch (photo 16).
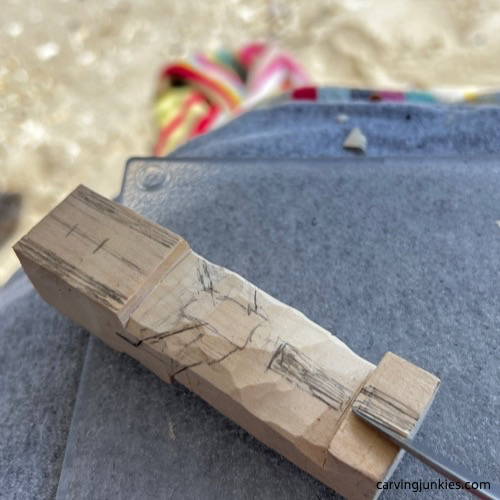 12. Making a wide V-cut
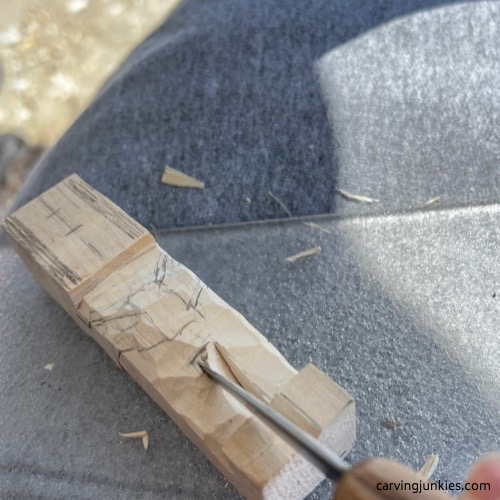 13. Removing excess wood
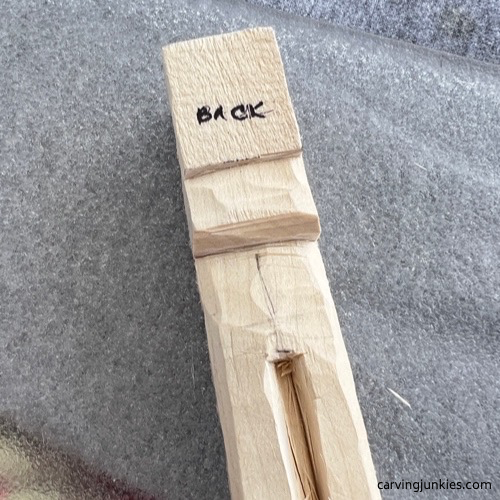 14. Legs are separated more
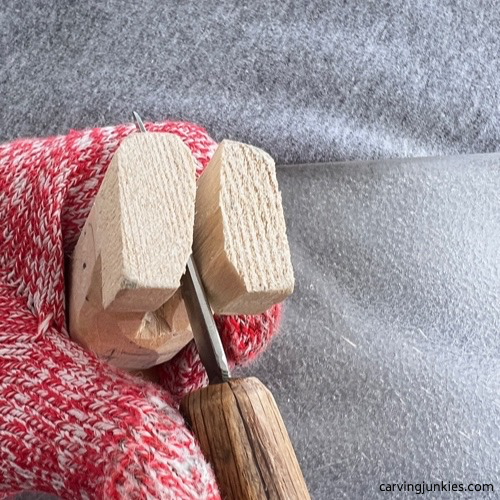 15. Separating legs completely
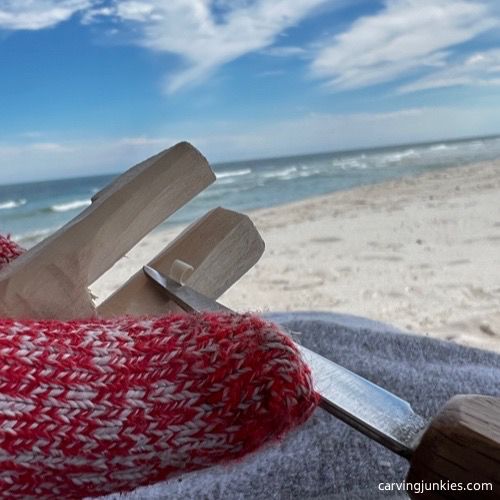 16. Narrowing the legs
Separate the arms on your old man carving
Make stop cuts to separate the arms on the front of your old man carving, removing wood from underneath (photo 17). Then, separate the head on each side (photo 18), narrow the neck on the front (photo 19), and remove some wood from each corner of the shoulder on the back (photo 20).
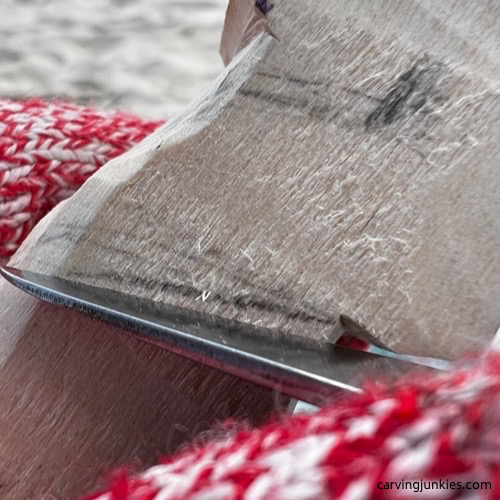 17. Stop cut to separate the arms
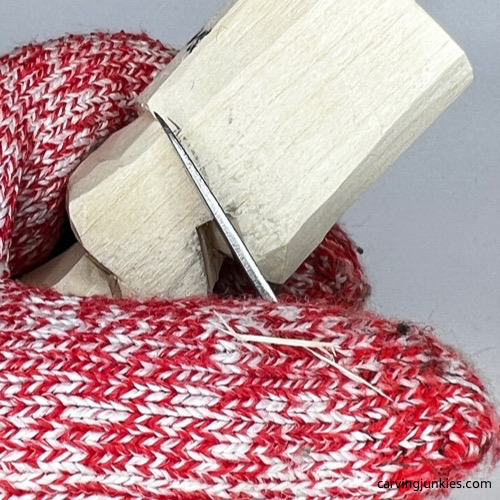 18. Separating the head on the side
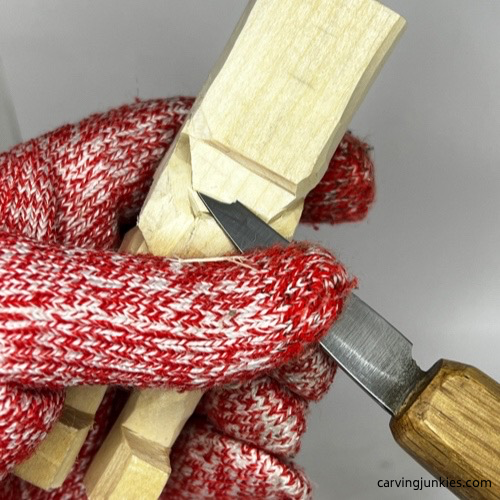 19. Narrowing the neck
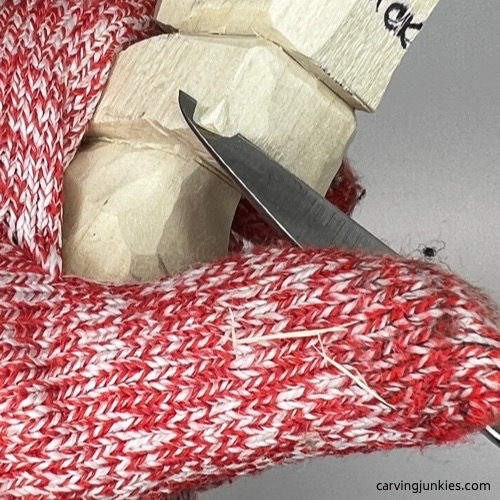 20. Narrowing the shoulders
Set up the nose on your old man carving
This tutorial uses my triangle-by-triangle carving system, which makes it easy to get the perfect nose. Of course, feel free to carve the nose differently, if you prefer.
Your nose box will be much bigger than the final carved nose, but it will give you a lot of room to play with.
First, a draw center line on the face (photo 21).
The top of the nose box is a little less than 1/2 inch (1.3 cm) from the top of the wood block. The widest part of the uncolored three-quarter triangle is a little less than 1/4 inch (0.6 cm) on each side of the center line.
The bottom line is a little more than 1/4 inch (0.6 cm) on each side of the center line. The length of the nose box (from top to bottom) is a little less than 1/2 inch (1.3 cm). These guidelines are all visible in photo 21.
Tip: Want a narrower nose? Make your colored triangles a little wider.
For the ears, first add a center line on each side of the head (photos 22,23). The ear boxes are 1/2 inch (1.3 cm) square and start 1/2 inch (1.3 cm) from the top of the wood block.
At this point you can also add some guidelines on the back to mark where you will cut the back shoulders, and add a little Y for the tush (photo 24).
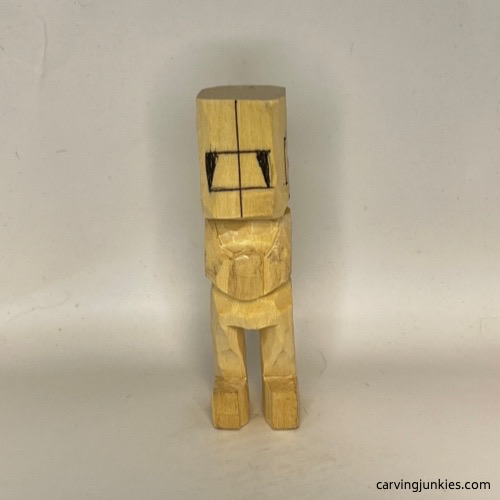 21. Nose box is drawn
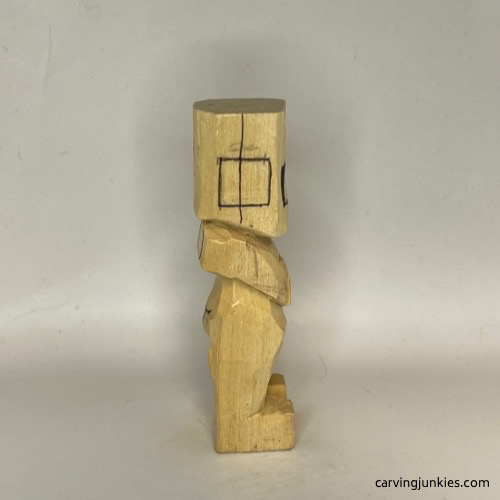 22. Right ear box is drawn
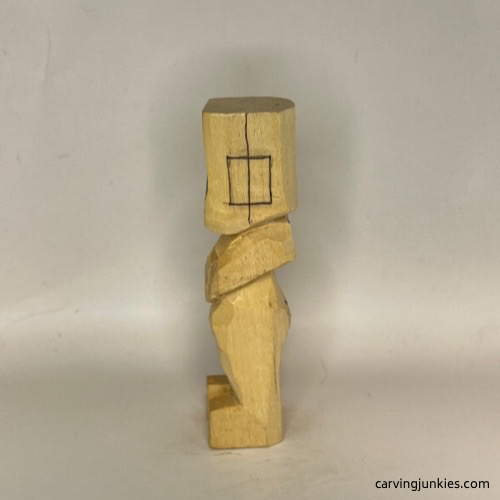 23. Left ear box is drawn
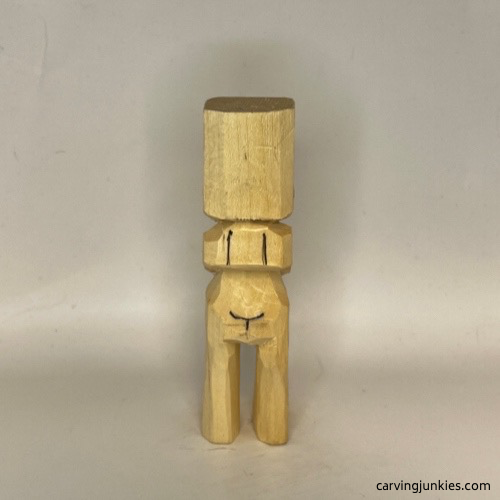 24. Back guidelines
Start the ears on your old man carving
Separate the ear boxes with long cuts along the guideline that extend over the full length of the block (photo 25). Then, remove wood around those cuts to narrow the head on the sides (photos 26,27).
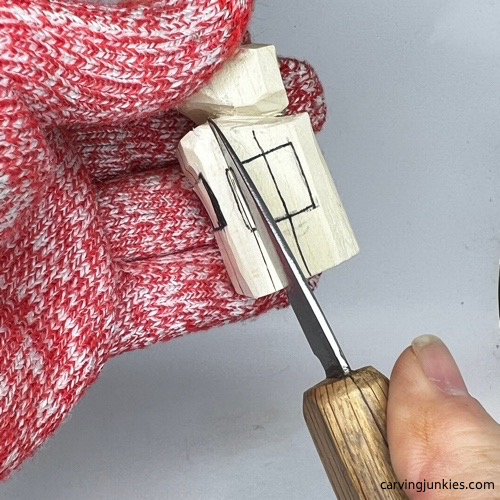 25. Making cut along the guideline
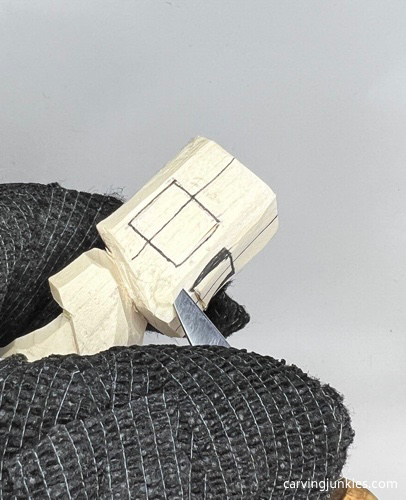 26. Removing wood
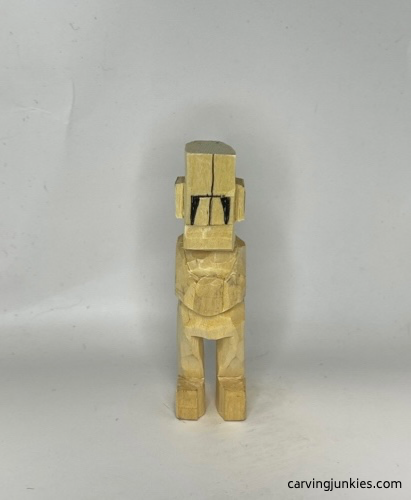 27. Ears are cut
Cut the nose on your old man carving
Make a stop cut under the nose and remove wood from underneath (photo 28). Tip: If you don’t have the hand strength to make one long cut, make two shorter ones.
Start your first pyramid cut along one of the colored nose triangles (photo 29). After both pyramid cuts are complete, you will have access with your knife to start to cut wood back at an angle to form the cheeks (photo 30).
Shave some wood off the forehead area (photo 31) to reduce the thickness of the head.
Start to shape the nose the bridge of the nose, and sketch some details, including the hair. Mark wood that you will remove to reduce the top of the head, the ends of the nose, and the bottom of the chin (photo 32).
After you shave off the bottom of the nose, draw triangles for the last set of pryramid cuts, which will make an M-shaped smile line on your old man carving (photo 33).
Make stop cuts along the hair line to shape the forehead and the hair on the front (completed in photo 33). Extend the hair line around the back of the old man carving and separate it all around. Note: I ended up not adding sideburns to prevent the wood from crumbling.
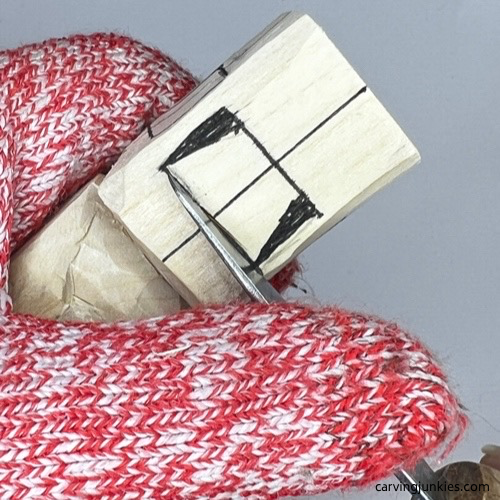 28. Making a stop cut
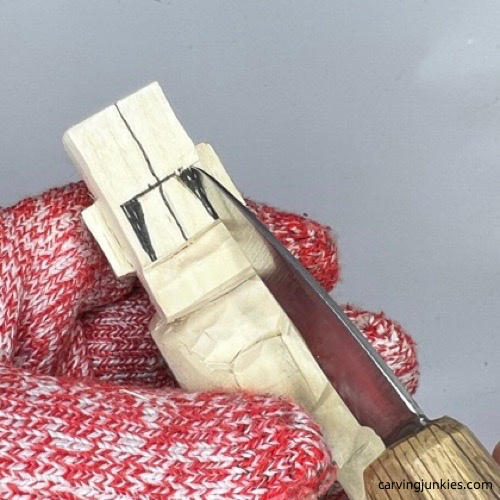 29. First pyramid cut
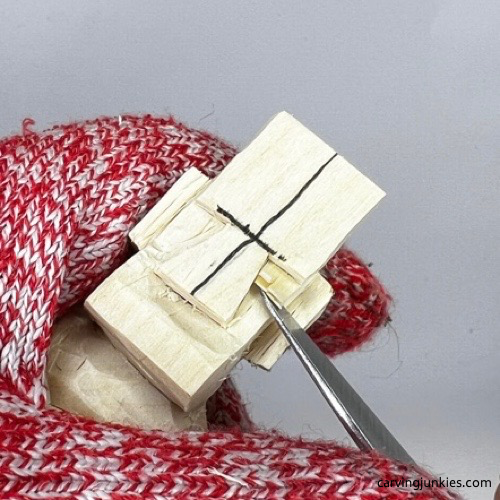 30. Creating the cheek
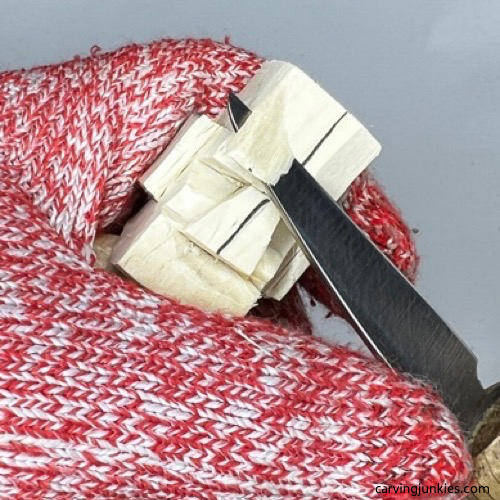 31. Cutting back the forehead
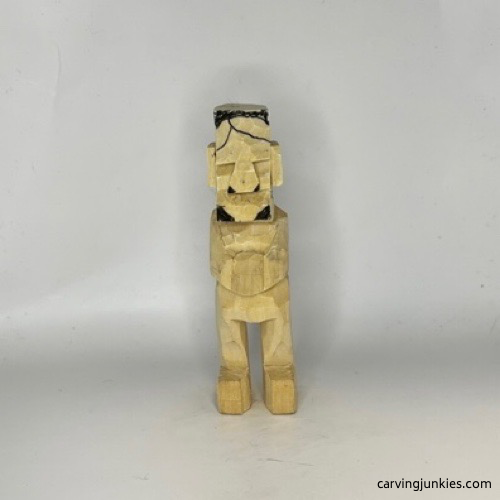 32. Details are drawn
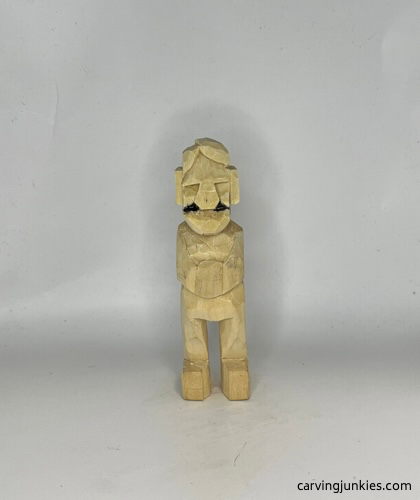 33. Next set of triangles to remove
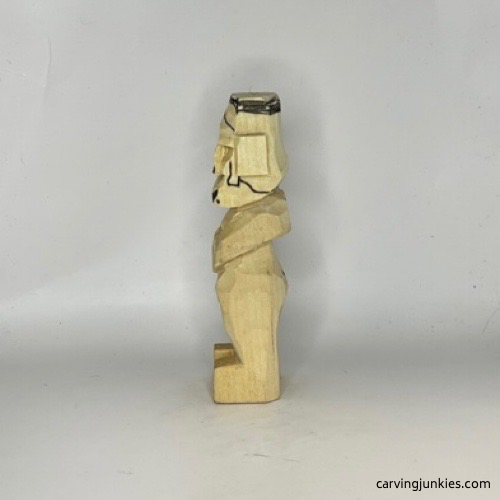 34. Guidelines on the side
Carve more details on your old man wood carving
Sketch sections that you will carve for the beard (photo 35), and add a guideline where you will separate the eyebrow (tip: keep the eyebrow as one long brow when you are first separating it to keep it from crumbling).
Use different sized V-cuts to carve the beard (photo 37). Make a slicing cut to create the smiling mouth (completed in photo 37).
Mark where that you will remove wood to shape the ears (photo 36). Use a V-cut to very carefully create the shape of the inside of each ear (photo 37). Go slow here to avoid cracking the ears!
Sketch on some additional details, including the wood you will remove with a V-cut to split the eyebrows, and the shirt, vest, and crossed hands. Also, mark some wood to help reduce the height of the shoes (photo 38).
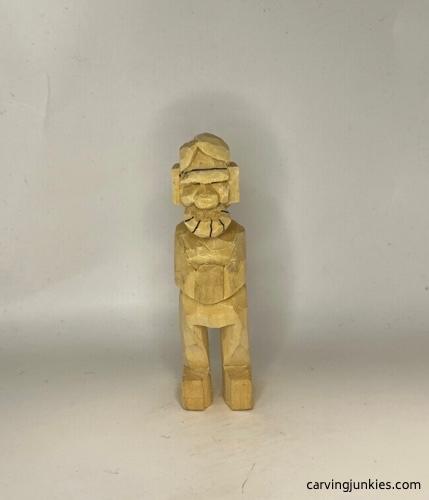 35. Beard sections are drawn
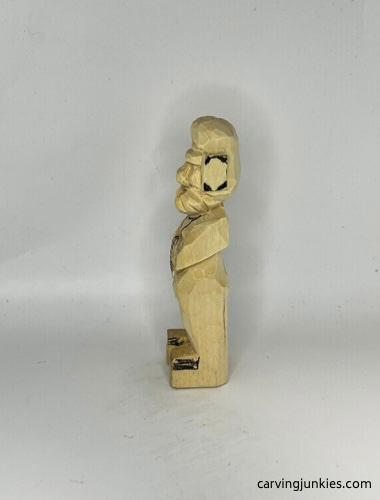 36. Wood is marked for removal
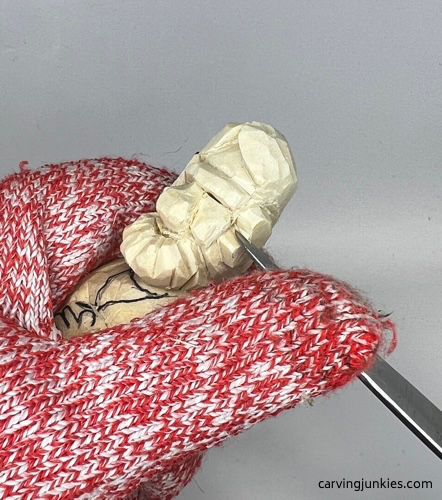 37. Making a V-cut
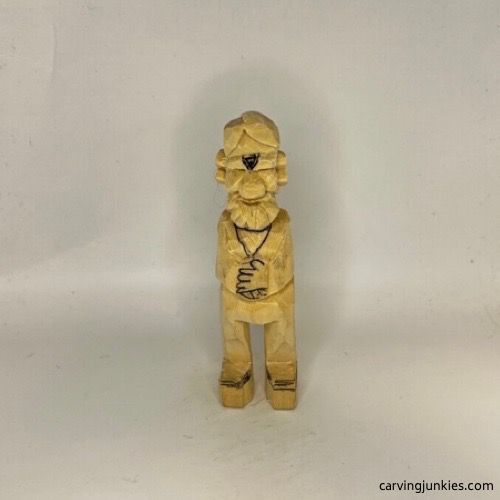 38. More details are drawn
Make your final cuts on your old man carving
Remove any excess wood on the upper back, and use a stop cut to create the back shoulders (photo 39).
Cut down the shoes by cutting back toward the leg (photo 40). Tip: Shave wood off in thin layers. If you use a stop cut, it’s easy to slice off the entire foot! Work carefully to prevent cracking the feet. Tip: Turn the piece upside down to narrow the shoes evenly. Add small V-cuts to carve the heels (completed in photos 42,43).
Separate the vest and shirt (completed in photo 41). Deepen the cuts on the inner arms (tip: check for symmetry as you carve).
Separate the fingers by carefully using small V-cuts (completed in photo 41). Tip: Angle the ends of the fingers downward first before you separate them.
Add some wrinkles on the pants and arms (completed in photos 41-44).
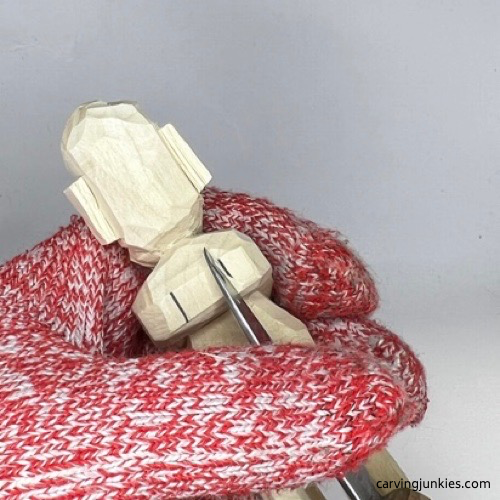 39. Shaping the back shoulders
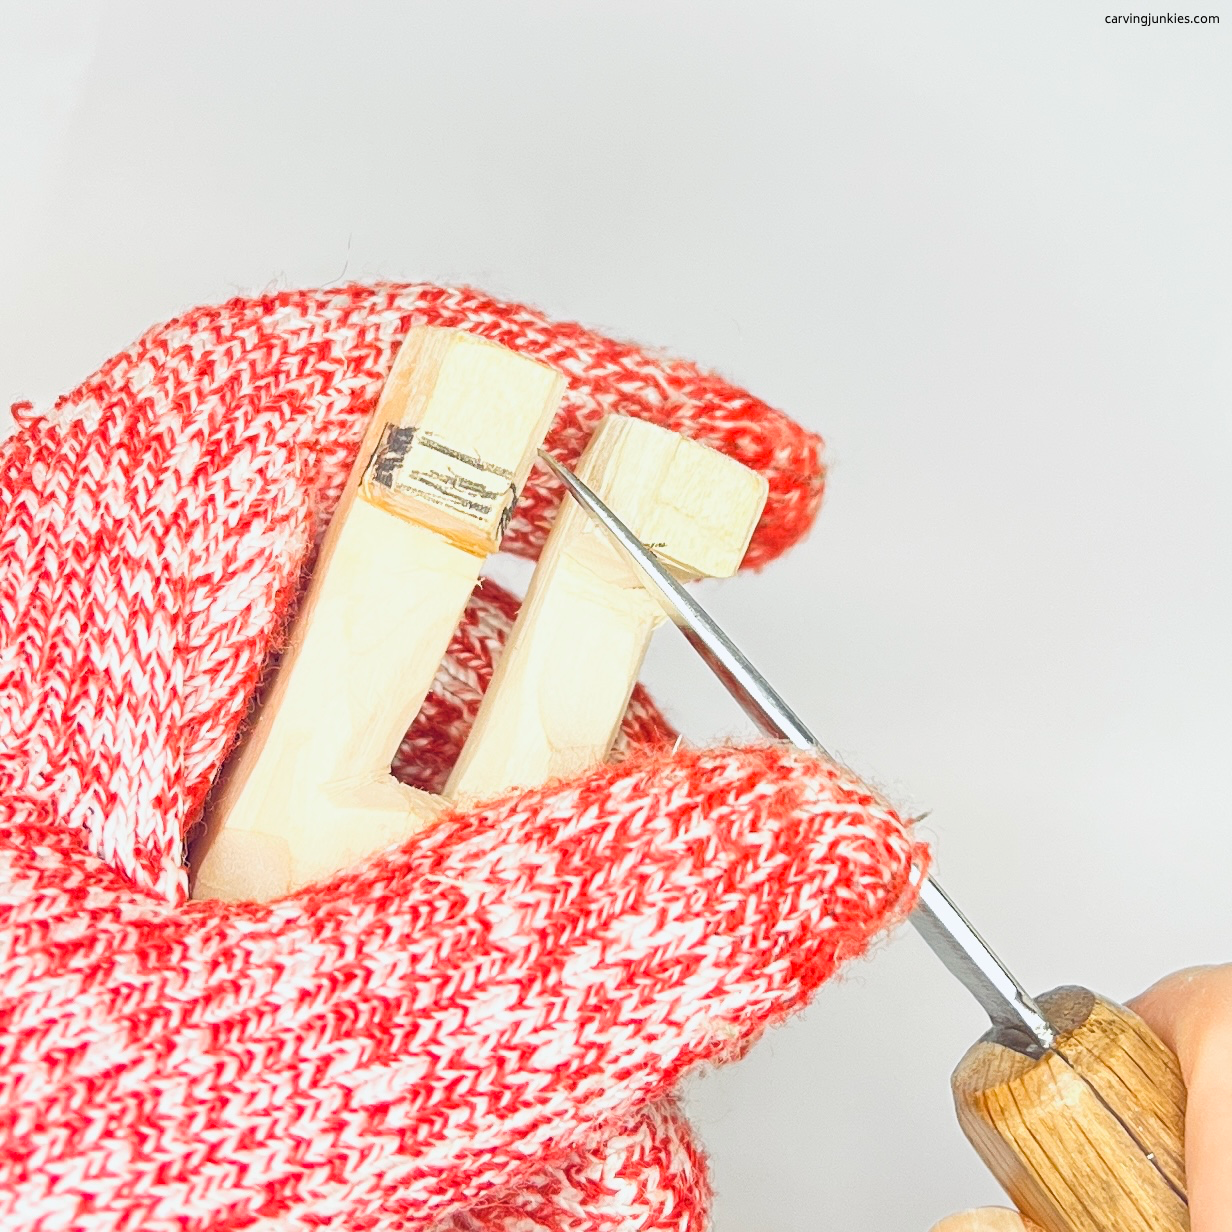 40. Reducing the height of the shoes
Prepare your old man carving for painting
Clean up any fuzzies or cuts to enhance your painting. You can also sand uneven areas with a metal file or fine sandpaper.
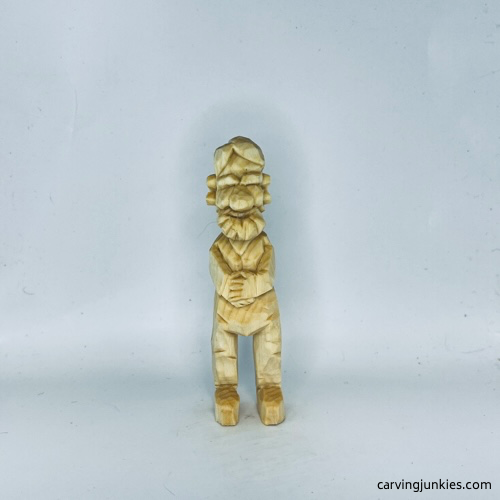 41. Front of unpainted old man carving
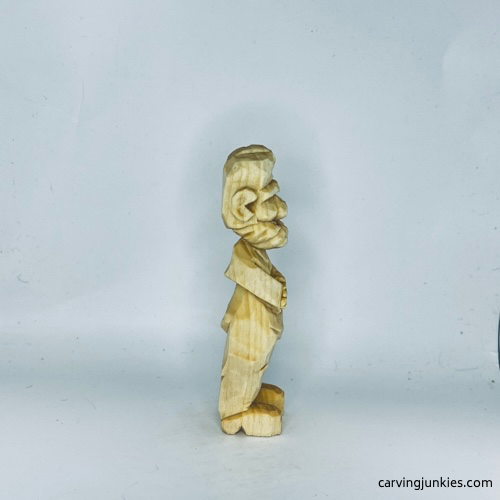 42. Right of unpainted old man carving
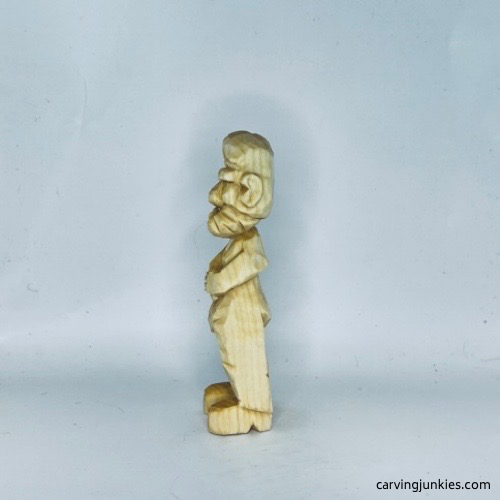 43. Left of unpainted old man carving
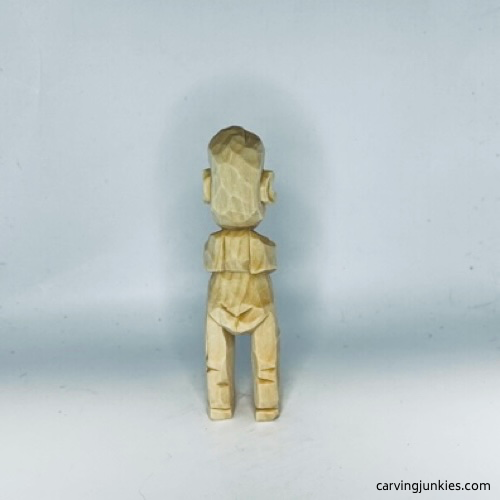 44. Back of unpainted old man carving
Paint your old man carving
Use whatever acrylic paints that you want as well as any preferred brushes.
Generally, I mix 25 drops of water to 1-2 drops of paint to create a wash. To create highlights, I place a drop or two of paint on a paper towel and dab my brush. Then, I wipe off all the paint with the paper towel (called dry brushing).
To learn more about painting your wood carvings, click here.
Here are the paints I used if you want this same look:
- Base layer: Academy burnt sienna wash.
- Hair, eyebrows, and beard: Ceramcoat ivory wash.
- Skin: Ceramcoat tawney light wash.
- Pants: Folk Art medium gray wash.
- Vest: FolkArt apple orchard wash.
- Shirt: FolkArt calypso sky wash.
- Neck shirt: 100% Artist Loft titanium white.
- Shoes: CraftSmart golden brown (first coat) and then dry brush with Academy burnt sienna.
- Pants: Dry brush with Folk Art medium gray.
- Hair highlights: Dry brush with titanium white.
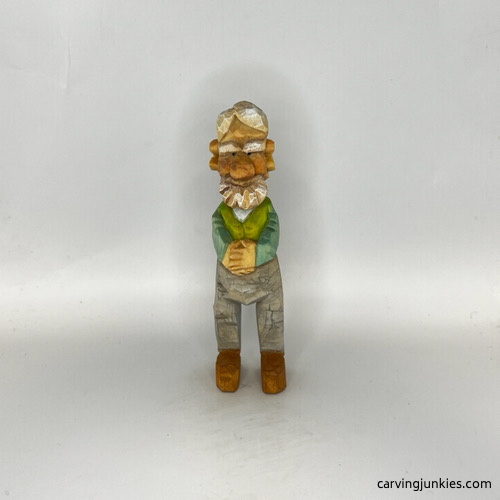 45. Front view of painted old man carving
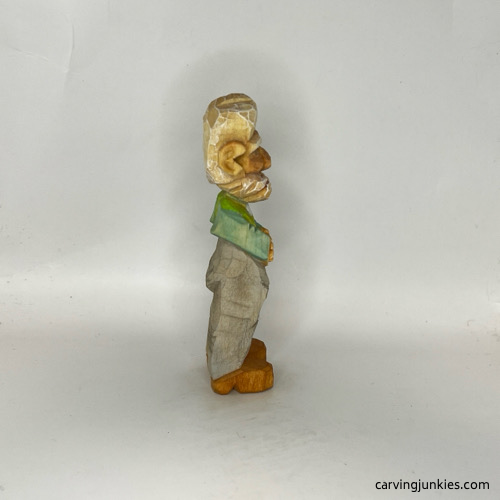 46. Right view of painted old man carving
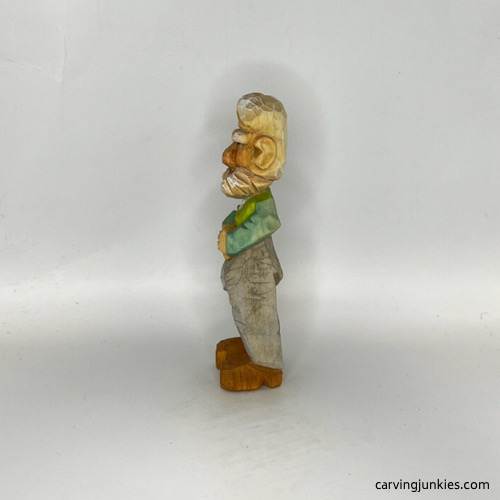 47. Left view of painted old man carving
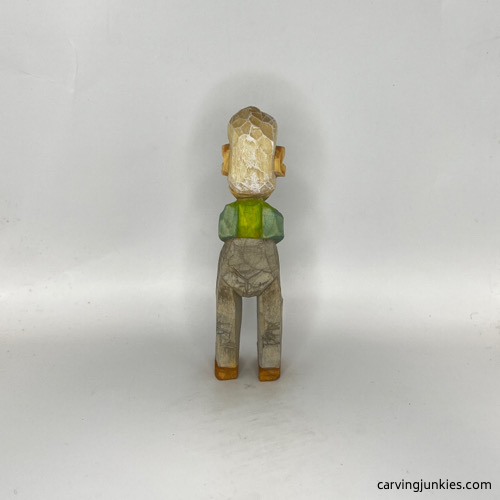 48. Back view of painted old man carving
Free old man carving template
Photocopy this template to size to fit your wood block.
Summary of this old man carving tutorial
- This old man carving template can be used over and over again to create different variations of this happy man.
- You can add a mustache or skip the facial hair altogether.
- This tutorial is also ideal for practicing how to carve ears.
Get 50 Wood Carving & Painting Tips when you join our FREE Covered in Chips club.
Share this page
carvingjunkies.com never sells your personal information.
This site uses cookies for its operation and to enhance your experience. As an Amazon Associate and Focuser Carving affiliate we earn from qualifying purchases.
Home | About Us | Privacy Policy | Terms of Use | Contact | Sitemap
