- Home
- Carving wood animals
- Dog wood carving
Dashing dog wood carving tutorial
The perfect pup to carve for a big smile.
LEVEL: SOME CHALLENGES
It’s time for a cool dog wood carving tutorial! Let’s woof it up together and carve this cute schnauzer caricature.
This little whittle is fun to carve and shouldn’t take you more than a day or two to finish. While the painting is simple (guide provided at the end), the textured cuts for the fur add visual interest.
This step-by-step tutorial provides all the instructions that you will need to carve a beautiful dog that never needs walking!

Supplies needed for your dog wood carving
For this dog wood carving, you will need a wood block that is 1.25 x 1.25 x 3 inches (3.2 x 3.2 x 7.6 cm). I use basswood for ease of carving.
Want a bigger dog wood carving? Simply increase the dimensions (print this tutorial and mark each measurement so you will not forget the changes).
A pencil or a sharpie is helpful for sketching. A small ruler is another great addition to your everyday carving kit.
Since this is a little whittle, you can probably use just detail knife. A gouge or micro-gouge is helpful (and faster) for carving the fur, but you can also make V-cuts with your (sharp) knife.
Safety first! Please always use a carving glove and protect your lap with something hard and flat as well.
Dog wood carving tutorial at-a-glance
See the key steps to make your dog wood carving in this short video.
Draw guidelines for your dog wood carving
You will carve off the corner for this dog wood carving.
Draw a guideline all around the block that is about 3/4 of an inch (1.9 cm) from the top. Add a second guideline all around that is 1.75 inch (4.4 cm) from the top.
Add a nose box between the two guidelines that runs 1 inch (2.5 cm) wide. This means you nose box will run 1/2 inch (1.3 cm) on each side.
Add a third guideline that is 2 inches (5.1 cm) from the top all around. All guidelines are visible in photo 1.
On the back, add a box to reserve wood for the tail (photo 2) between the 2nd and third guideline. It should be 1/2 inch (1.3 cm) wide. This means it will be 1/4 inch (0.6 cm) on each side of the corner.
 1. Nose box is reserved
 2. Guidelines on the back
Make the first cuts on your dog wood carving
Use stop cuts (photo 3) to separate the top guideline all around. Tip: Start at each corner and work your way between the corners).
Flatten the corner above the nose (photo 4) to make an area for the eyes. Then, sketch the eyes and mark areas on the top where you will remove wood to carve the ears (photo 5). Tip: Hold off on carving the ears to avoid breaking them.
Now, separate the nose all around. You can use stop cuts, or slicing cuts, or a combination of both (photo 6).
 3. Making a stop cut
 4. Carving the eyes back
 5. More guidelines are drawn
 6. Separating the nose
Add details to your dog wood carving
Sketch on the head, mustache, tongue, and the paws on the front (photo 7) and the back (photo 8).
 7. Front details are drawn
 8. Back paws are drawn
Start the eyes and ears on your dog wood carving
Make a V-cut on the top of the eye sockets (photo 9) and separate the eyes all around. Tip: It may be easier to hold the knife like a pencil (photo 10) on the side—and then a slicing cut—to remove wood.
Now that you have access to the eye sockets, you can remove wood in layers around the eyes (photos 11,12).
Once both sides are cut, mark more wood to remove to shape the ears (photo 13).
 9. Making a V-cut
 10. Making a pencil cut
 11. Removing wood in layers
 12. Progress view of right side
 13. Wood is marked for removal
Refine the ears on your dog wood carving
Use your knife to remove the wood that you previously marked (photos 14,15) on one ear using V-cuts (or slicing cuts). Repeat on the other ear.
Round the back of the head (photo 16).
 14. Shaping the ear
 15. Progress of right ear
 16. Rounding the back of the head
Continue to shape your dog wood carving
Start to shape the next section of the head from the front around (photo 17). Round the nose (completed in photo 20), and separate the mustache (photo 20) and tongue on the front. Tip: mark wood to remove on the corners to round the nose (photo 18).
Draw guidelines to mark where you will separate the legs on the front (photo 21) and the back (photo 22) of the carving. Note: I ended up moving the tail box down a little bit.
 17. Rounding the mid-section of the head
 18. Wood marked to round the nose
 19. Removing wood around the mustache
 20. Front legs are marked for carving
 21. New back guidelines
Start the lower body of the dog carving
Separate the tail, paws, and the legs on the front and back. You can use a combination of cuts—such as stop cuts (photo 22) to separate the tail and front paws—and push or pull cuts to remove wood between the paws (photos 23, 24).
Use a V-cut to remove wood to shape the ears (completed in photo 25). On the back side, make a curve cut (turn your wrist as you cut) to shape the back of the ears (photo 26).
 22. Separating the tail
 23. Removing wood between the paws
 24. Shaping the paws
 25. Ears are cut
 26. Shaping the back of the ears
Carve the hair on your dog wood carving
Use a V-tool to carve the fur on your dog wood carving (photo 27). Make your lines curve around the face (visible in photo 31). If you don’t have a V-tool you can use a sharp knife and make V-cuts. It will take you longer, but you can achieve the same effect. Go slow and be careful.
When you are done, draw on the paws (photo 28) that you will cut with a V-tool (photo 29)—or very carefully with a knife.
 27. Carving the fur
 28. Add the paw lines
 29. Carving the paws
Clean up your dog wood carving
Use your knife to clean up your cuts. You can also use a metal file or some sandpaper to remove any fuzzies before painting your dog wood carving. This will help enhance your painting.
 30. Front of unpainted dog wood carving
 31. Right side of dog wood carving
 32. Left side of dog wood carving
 33. Back of unpainted dog wood carving
Finish your dog wood carving
 34. Front view of painted dog wood carving
 35. Right view of painted dog wood carving
 36. Left view of painted dog wood carving
 37. Back view of painted dog wood carving
Feel free to use paints and paint brushes of your choice. To get this look, I make a paint wash with 1 to 2 drops of paint mixed with 25 drops of water. Here are the acrylic paints, brands, and colors you can use to get the same look:
- Full body: Academy burnt sienna wash (1 drop paint/25 drops of water).
- Fur (first coat): Ceramcoat ivory wash.
- Fur (first highlights): Dry brush sections with Apple Barrel dolphin gray (allow some wood to show through).
- Fur (second highlights): Dry brush with FolkArt medium gray.
- Nose, ears, and paws: 100% Craftsmart deep gray.
- Tongue: 100% Apple Barrel cameo pink.
- Eye whites: 100% Ceramcoat white.
- Eye color: 100% Americana calypso sky.
- Pupils: Black magic marker.
- Specs: 100% Ceramcoat white applied with metal dot brushes.
- Fur highlights: Dry brush with white.
- Finishing: Dip completely into boiled linseed oil (or use a brush to apply) and let dry. If using paper towels, properly dispose of them as they are flammable.
Free dog wood carving pattern
If you prefer to carve your dog wood carving with a pattern, photocopy it to size to fit your wood block.

Dog wood carving tutorial summary
- Animal caricatures are fun to carve and this little schnauzer is no exception!
- You can create this pup with just a knife, but it will be easier to create fur texture with a gouge.
- The painting is simple and uses just a few colors with dry brushed highlights.
- A dot brush with a round metal end is helpful to accent the eyes evenly.
Get 50 Wood Carving & Painting Tips when you join our FREE Covered in Chips club.
You might like these
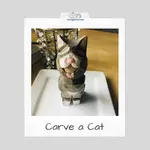
Carving a Cat Using Just a Knife Tutorial
Carving a cat is easy with our step by step tutorial with tons of photos from every angle
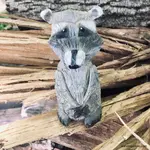
Raccoon Wood Carving With a Knife Tutorial From A Block of Wood
Raccoon wood carving tutorial carved from a block of wood with just a knife and no bandsaw.
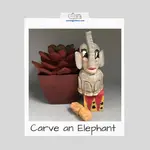
How to Carve an Elephant With Just a Knife
How to carve an elephant with only a knife is easy with this tutorial.
Share this page
You might like these
Fun Things to Carve With A Knife From a Block of Wood
Fun things to carve from wood with free tutorials and pictures from all angles so you can get great results.
Chip Carving Tutorial For Beginners
This chip carving tutorial for maritime coasters is perfect to make a gift or add to your home.
Easy Low Relief Carving Tutorial With Wood Found in Nature
Our low relief carving tutorial is fun and easy for everyone.
carvingjunkies.com never sells your personal information.
This site uses cookies for its operation and to enhance your experience. As an Amazon Associate and Focuser Carving affiliate we earn from qualifying purchases.
Home | About Us | Privacy Policy | Terms of Use | Contact | Sitemap