- Home
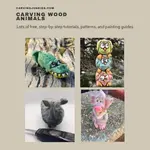
- Carving wood animals
- Carving a moose
Fun carving a moose tutorial
Carve an adorable caricature that’s a grinner.
LEVEL: SOME CHALLENGES
Carving a moose caricature is fun and effortless with this easy-to-follow tutorial. It includes everything you need, including step-by-step instructions, lots of progress photos, painting guide, pattern (if you prefer using a band saw), and tips to help you.
David and I once saw a male and female moose (from across a pond) in New Hampshire several years ago. It was during the mating season. Boy, was the male moose loud!
We also saw a moose on the road (thankfully on the side). These animals are huge and can be dangerous—especially if you hit one with your car.
Fortunately, you will be carving a moose that is completely safe and cute as a button. Let’s get carving!

Supplies you will need for carving a moose
This carving a moose tutorial is for a basswood block that is 1.5 x 1.5 x 4 inches (3.8 x 3.8 x 10.1 cm). If you want to go bigger, simply double or triple the pattern dimensions.
Use whatever knife or knives you want (perhaps a roughout and a detail knife). A knife with a straight blade works well on small wood blocks and seems to prevent the wood from crumbling.
A pencil will be needed to sketch the design. An eraser is also helpful if you make any mistakes.
A wood burner was used to create the eyes, nostrils, mouth, and other details. This is optional (brown paint can be substituted), but it adds extra personality to the final moose carving.
A free painting guide is provided at the end of this carving a moose tutorial, as well as a free pattern (for bandsaw use).
As always, carving gloves are recommended for safety. Also, protect your lap with a cutting board or another hard surface that can withstand an accidental knife stab.
Another good habit is to take your time—and make sure your cuts are always intentional—to avoid slips with your knife when carving a moose.
Carving a moose tutorial at-a-glance
This short video will give you a quick overview of the key steps in this carving a moose tutorial.
Preparing your wood block for carving a moose
You are going to carve off the corner for this carving a moose tutorial. This will give you more room to work with across the block, which is helpful.
Round off the corners on the front and back (photo 1).
 1. Front and back corners are rounded off
Draw your guidelines for carving a moose
- Draw a box that is 1/2-inch wide (1.3 cm) and 1/4-inch (0.6 cm) down from the top on the front and back to mark the wood that you will remove between the antlers (photos 2,3).
- Draw a line that is 3/4-inch (1.9 cm) from the top to mark the bottom of the antlers (photos 2,3).
- Add a second line 1.75 inches (4.4 cm) from the top of the block to mark the bottom of the head (photos 2,3).
- Draw a third line 2 inches (5.1 cm) from the top to mark the bottom of the neck (photos 2,3).
- Add a fourth line 3 inches (7.6 cm) from the top to mark the bottom of the body (photos 2,3).
- Finally, draw a fifth line 3.5 inches. (8.9 cm) from the top to mark the bottom of the legs (photos 2,3).
 2. Front guidelines
 3. Back guidelines
Make your first cuts
Make a deep stop cut along the marked box on the top (photo 4). Tip: Carving on end grain can be challenging. It may help to carefully rock your knife back and forth to make your cut as deep as you can. Then, make cuts at an angle against your stop cut to remove wood (photo 5).
You will have to make several passes and dig into the wood a bit. Be careful not to snap your knife. If you have a fishtail gouge, this is a great place to use it.
Once you have removed the middle section, remove wood to flatten the antlers a bit (photo 6). You will save carving the antlers for later to avoid breaking them while you are carving your moose.
Now, draw the facial details on the front of the moose carving (photo 7), including the top part of the antlers.
 4. Rocking a stop cut
 5. Removing wood against the stop cut
 6. Flattening the antlers
 7. Face details are drawn
Start the head
You will carve the head from the neck up, which will help you maintain the right proportions for carving a moose.
Make a stop cut along the second guideline (photo 8) and remove wood from above it (completed in photos 9,10). You can use a pull cut (or turn the piece around and use a push cut).
 8. Cutting the neck
 9. Neck is cut
 10. Back view of cut neck
Continue carving the moose head
Make a stop cut along the first guideline on each side (photo 11), which will give you access to separate the antlers and ears (photos 12,13). Note: Do not separate the ears or eyes just yet (photo 12).
 11. Making second stop cut
 12. Front view after completed cut
 13. Back view of completed cut
Separate the ears
You will need to set the ears back a bit so they fall under the middle of each antler. Draw a box on each side to reserve the wood (photos 14,15). These boxes should be about a 1/4-inch (0.6 cm) square.
Make a stop cut under the ear box and along each side of the box (photo 16). Remove wood from around the ear box (photo 17). Continue on the front side (photo 18).
Then, remove some wood from under the antlers on the back side of the head (photo 19).
 14. Right ear box
 15. Left ear box
 16. Cutting below the ear
 17. Removing wood around the ear
 18. Separating the front of the ear
 19. Shaping the back of the head
Start the nose
Using your knife, follow the guideline to separate the nose (photo 20). Tip: Start at the top and cut “downhill” on each side to avoid splitting the wood.
Remove wood from above to meet your previous cuts along the nose guideline. Then, cut straight back into the nose (photo 21) to achieve some depth.
Separate the head all around using stop cuts, removing wood from underneath (photo 22).
Draw the face on the front of the moose (photo 23).
 20. Starting the nose
 21. Cutting straight back
 22. Separating the head all around
 23. Details are drawn
Start the body
Use your knife to carefully hog off (remove) wood around the neck. You can make a stop cut into each side and remove wood from above. You may have to make several passes to remove all the wood (photo 24).
Mark wood to remove on the front and the back to shape the legs and body (photos 24,25).
Start to remove wood to shape the body on the front and the back. On the top, you can use slicing cuts. On the bottom, you can make a deep V-cut to remove wood (photo 26). You may have to make additional V-cuts to remove all the wood.
Separate the bottom guideline all around, which marks the bottom of the feet. Use stop cuts and remove wood from underneath. Then, narrow the legs all around. Draw where you will split the legs on the front and the back (photos 27,28). Also, draw the little tail on the back (photo 28).
 24. Wood to remove from the front is marked
 25. Wood to remove from the back is marked
 26. Making a V-cut
 27. Front legs are shaped and marked
 28. Back legs are shaped and tail is marked
Carve the details
Use V-cuts to separate the legs and the hooves on the front and the back. Cut the wood at an angle to set back the hind legs a bit (photo 29).
Use your knife to flatten the tops of the antlers (photo 30). Then, use V-cuts to carve the grooves in the tops of the antlers (photo 31). Be careful not to break the wood here.
This carving a moose tutorial calls for using a wood burner to burn the nostrils, eyes, mouth, and add highlights on the antlers (photo 32,33,36).
 29. Cutting back the hind legs
 30. Flattening the top of the antlers
 31. Making V-cuts to notch the antlers
 32. Using the woodburner
 33. Wood burning highlights on the front
 35. Left view of wood burning highlights
 34. Right view of wood burning highlights
 36. Back view of wood burning higlights
Time to paint your moose carving
Use whatever acrylic paints and paint brushes you prefer. All paint is diluted with water, except where noted as 100%.
Start by adding a wet paint brush to a drop of paint. Continue until the paint has a milky consistency to it. Tip: For large areas like the body, use a few extra drops of paint so that you will not run out.
- Eye whites: 100% Artist’s Loft titanium white.
- Antlers: 100% DecoArt Americana natural buff.
- Body (first layer): DecoArt Americana fawn wash.
- Body (second layer): Apple Barrel classic caramel wash.
- Body (third layer): Dry brush with titanium white.
- Body (highlights): 100% Academy burnt sienna.
- Allow to dry (cure) for at least 24 hours. Brush with boiled linseed oil to finish (be sure to properly dispose of cloth or towels with oil on them because they can self-combust).
Get more wood carving painting tips here.
 37. Front of painted moose carving
 38. Right view of painted moose carving
 39. Left view of painted moose carving
 40. Back view of painted moose carving
Free pattern for carving a moose
If you prefer to carve your moose with a pattern, photocopy this to size to fit your wood block.

Carving a moose tutorial summary
- This little moose carving goes pretty quickly and the paining is super easy.
- This carving a moose tutorial is a great way to try a little wood burning, which takes some practice.
- The wood burning is optional, but it really adds character.
- You can easily increase the size of your moose by doubling or tripling the pattern dimensions.
Get 50 Wood Carving & Painting Tips when you join our FREE Covered in Chips club.
You might like these
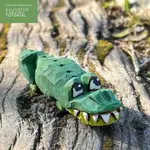
Awesome Alligator Wood Carving Tutorial
Fun alligator wood carving tutorial that is super easy for beginner wood carvers with step by step instructions.
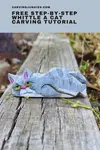
Whittle A Cat With Just A Knife Tutorial
Whittle a cat that is filled with charm and easy to make with our step by step tutorial.
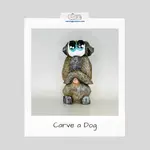
Darling Dog Wood Carving Tutorial
Make a fun dog wood carving with our step by step tutorial and simple instructions.


Share this page
carvingjunkies.com never sells your personal information.
This site uses cookies for its operation and to enhance your experience. As an Amazon Associate and Focuser Carving affiliate we earn from qualifying purchases.
Home | About Us | Privacy Policy | Terms of Use | Contact | Sitemap